1. Introduction
This manual provides detailed instructions for the assembly, operation, and maintenance of your Modern Shade 10' x 12' Hardtop Gazebo. This outdoor pavilion is designed to enhance your patio, backyard, or deck with a durable and functional living space. It features a galvanized steel double roof, an aluminum frame with a wood-look finish, integrated LED lighting, and convenient USB/USB-C charging ports and standard outlets.
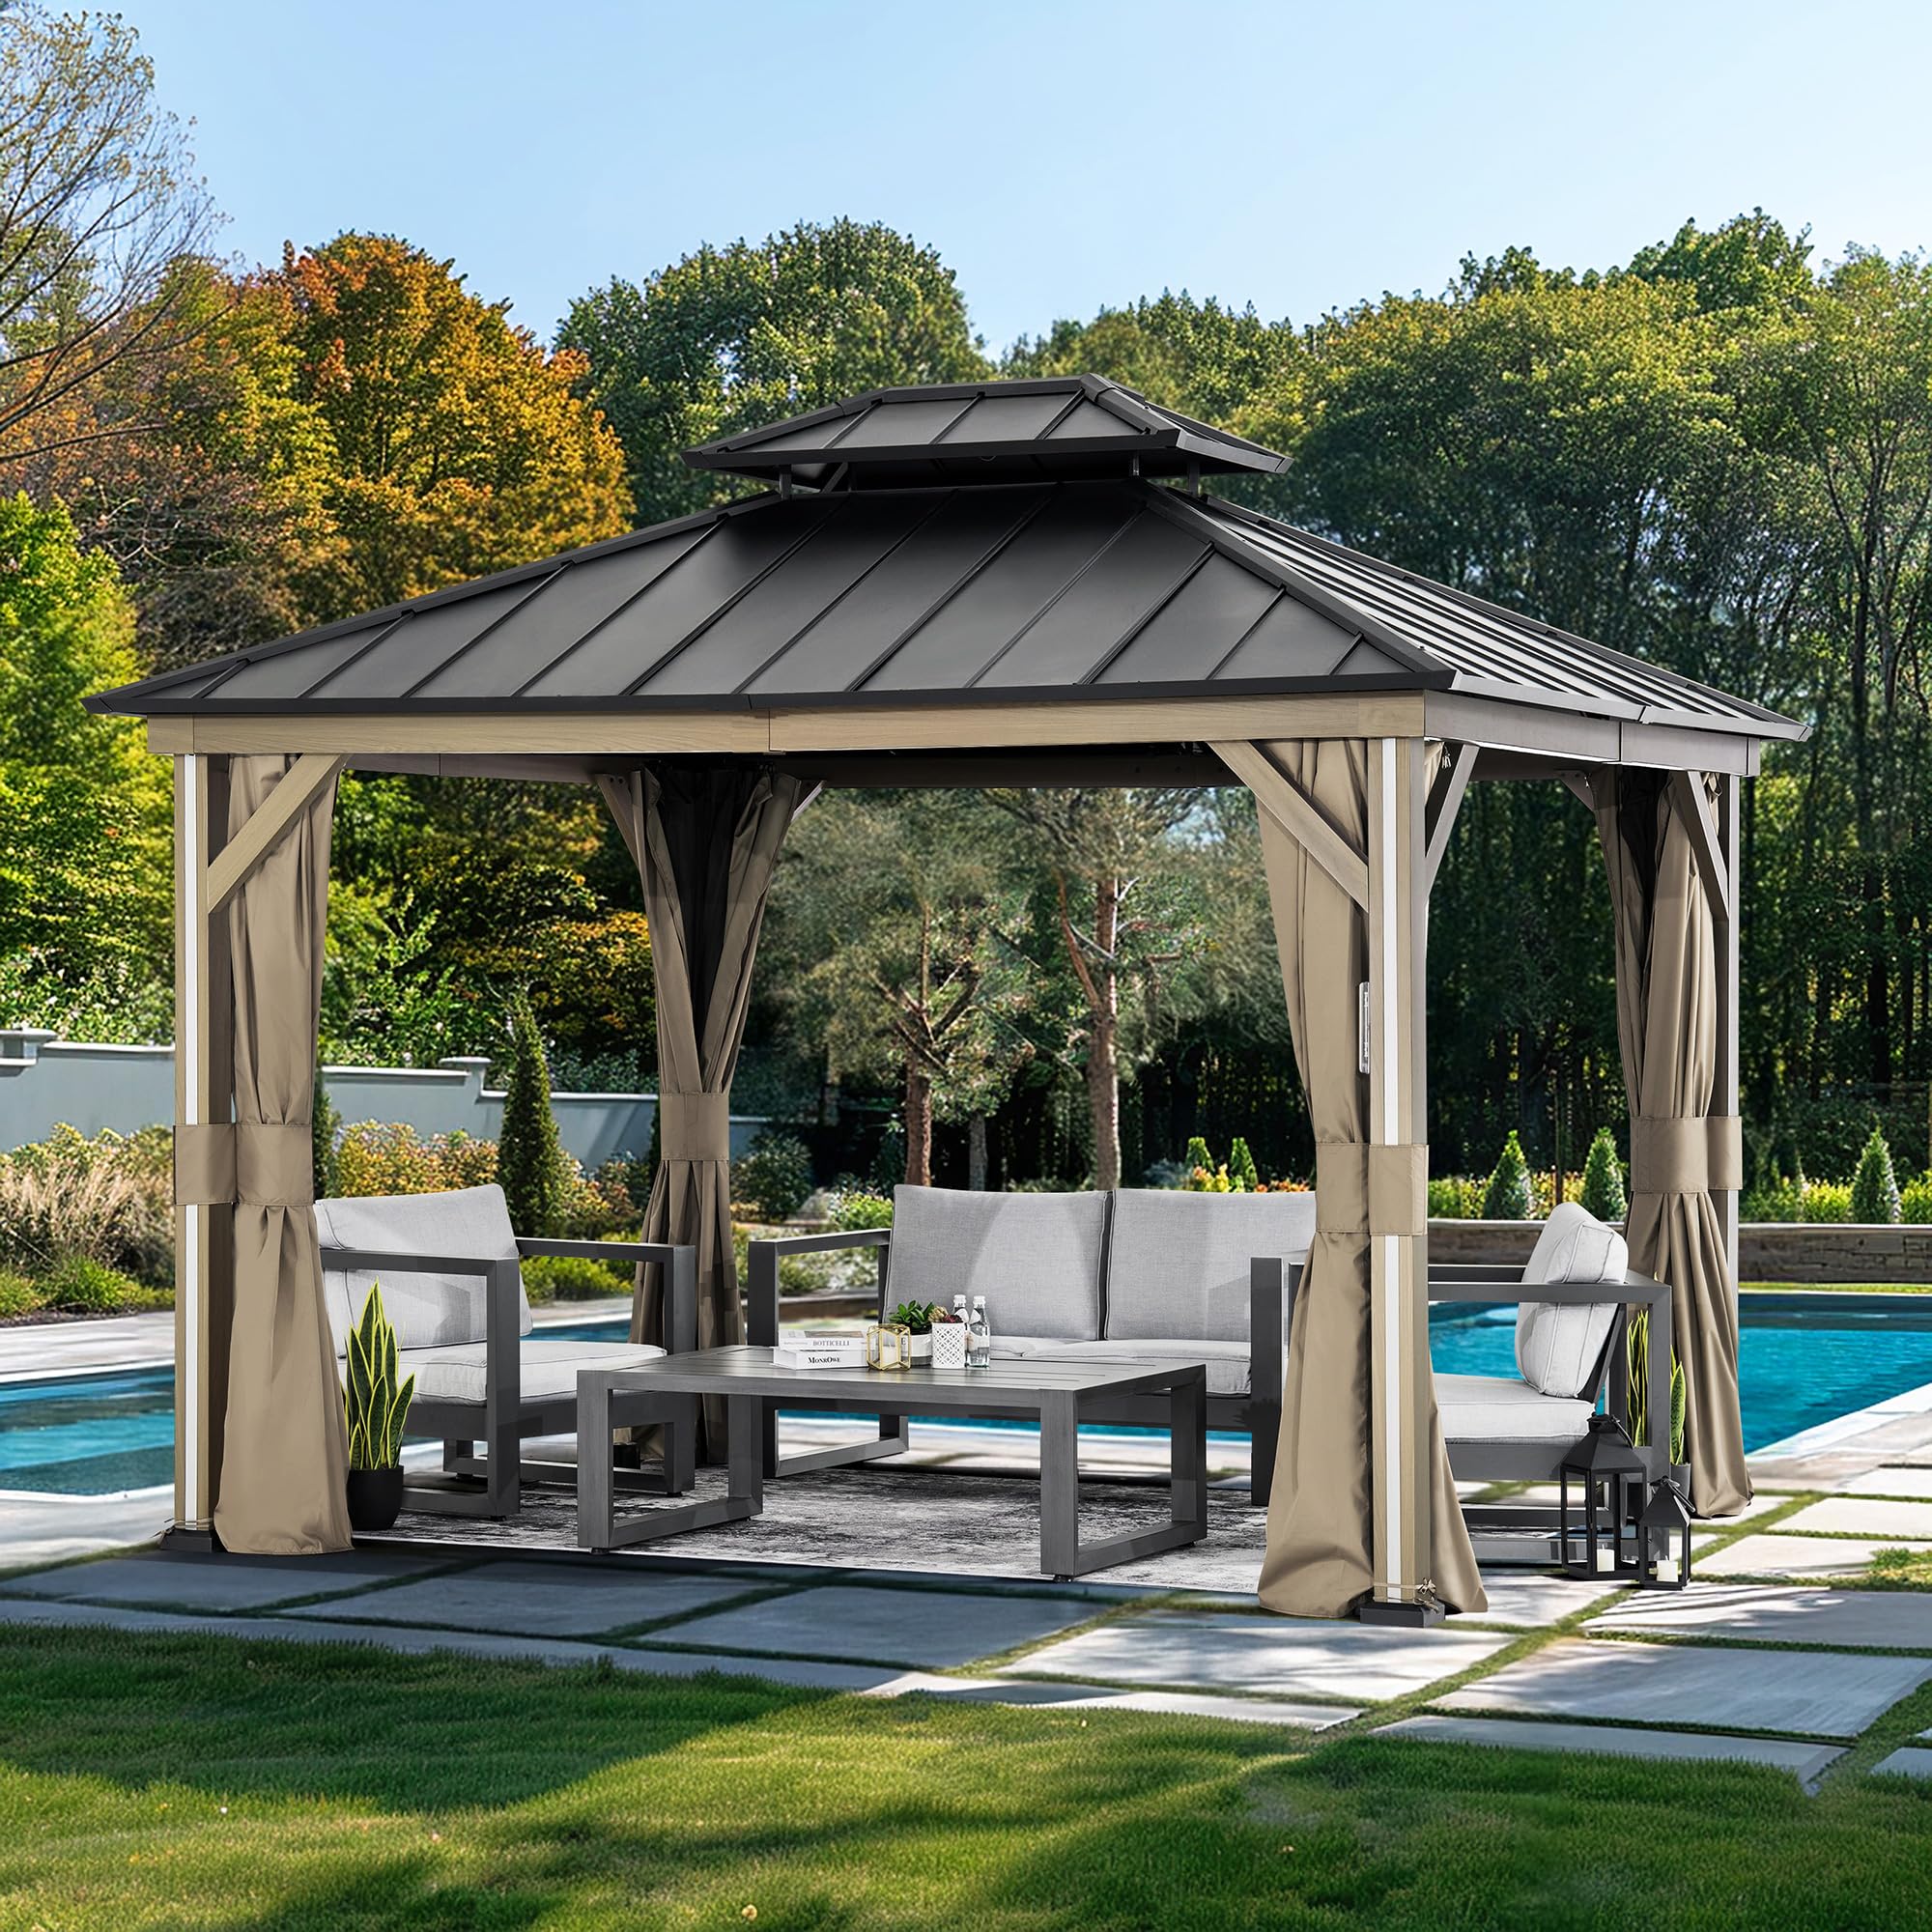
Figure 1: Modern Shade 10' x 12' Hardtop Gazebo, Wood Looking.
2. Safety Information
Read all instructions carefully before assembly and use. Failure to follow these instructions may result in injury or damage to the product.
- Assembly: Always assemble with at least 2-4 adults. Ensure all parts are correctly aligned and securely fastened.
- Anchoring: Secure the gazebo to a stable foundation using the provided expansion screws. For deck installations, anchor into the wood structure, not just the deck surface.
- Weather Conditions: While designed for various weather, exercise caution during extreme wind, heavy snow, or severe storms. Clear heavy snow accumulation from the roof to prevent damage.
- Electrical Safety: Ensure all electrical connections (USB, USB-C, outlets, LED lights) are properly covered when not in use to prevent weather damage. Do not use electrical features during rain or wet conditions.
- Placement: Ensure proper drainage around the gazebo to prevent water accumulation.
3. Package Contents
Your Modern Shade Gazebo is shipped in multiple boxes (typically 8). Verify all boxes are received before beginning assembly. Each box is labeled (e.g., "Box 1 of 8").
3.1. Components
All structural components are made of aluminum with a wood-look finish and galvanized steel roof panels. Each piece is lettered and numbered for easy identification during assembly.
3.2. Hardware
All necessary hardware, including screws, washers, and an Allen wrench, is included. Hardware is typically organized on a labeled card for easy access. Extra screws are provided.
3.3. Accessories
- Detachable Curtains (Polyester fabric and PU, CPAI-84 certified, flame resistant)
- Detachable Mosquito Netting
- Integrated LED Strip Lights (4 units)
- USB and USB-C connectors, plus 2 standard outlets (integrated into one post)
- Ceiling Hooks (for hanging lights or fans)
4. Setup & Assembly
Assembly requires 2-4 people due to the size and weight of components. Read the entire instruction manual before starting. Organize all parts by their labels (lettered and numbered) for efficient assembly.
4.1. Tools Required
- Included Allen Wrench
- Recommended: Ratchet with appropriate bit, or a drill with an Allen wrench attachment for faster and more secure fastening.
4.2. Assembly Steps
- Unpack and Organize: Carefully open all boxes. Identify and lay out all components and hardware according to their labels. Refer to the hardware identification sheet to ensure all small parts are accounted for.
- Frame Assembly: Begin assembling the main aluminum frame structure. Follow the detailed pictorial and written instructions provided in your manual. Ensure all screws are tightly secured.
- Roof Panel Installation: Install the galvanized steel roof panels onto the assembled frame. The double-layered design allows for air circulation.
- Electrical Connections: Connect the integrated LED strip lights. The wires run along the top frame and connect to a single plug. One post contains the USB, USB-C, and standard outlets.
- Anchoring: Secure the gazebo to your chosen surface. For concrete or decking, use the provided expansion screws to anchor the posts. If installing on a deck, ensure posts are secured into the underlying wood structure for maximum stability.
- Curtain and Netting Installation: Attach the detachable curtains and mosquito netting to the dual tracks. The curtains and netting can be adjusted independently.

Figure 2: Using a drill attachment for efficient assembly.

Figure 3: Integrated USB and standard power outlets for device charging.

Figure 4: Secure anchoring of the gazebo post to the ground.

Figure 5: Detachable curtains and mosquito netting provide privacy and insect protection.
5. Operation
5.1. LED Lighting
The 4 integrated LED strip lights are powered via a single USB-C connection located within the outlet post. To turn the lights on or off, simply plug or unplug the USB-C cord from the designated port in the outlet panel.

Figure 6: Gazebo illuminated by integrated LED strip lights.
5.2. Power Outlets
One of the gazebo posts is equipped with USB, USB-C, and two standard electrical outlets. These allow you to power or charge devices while enjoying your outdoor space. Ensure the protective cover is closed when not in use to prevent weather exposure.
5.3. Curtains and Netting
The curtains and netting operate on dual tracks, allowing independent adjustment. They can be zipped closed for full privacy and insect protection, or tied back to allow for open air circulation. The curtains are made of flame-resistant material.
5.4. Ceiling Hooks
The roof structure includes sturdy "U" hooks for hanging additional items such as decorative lights, fans, or plants.

Figure 7: Ceiling hook for hanging accessories.
6. Maintenance
Regular maintenance will ensure the longevity and appearance of your gazebo.
- Cleaning: Clean the galvanized steel roof and aluminum frame with mild soap and water. Avoid abrasive cleaners.
- Fabric Care: The polyester curtains and netting can be spot cleaned with mild detergent. For deeper cleaning, they may be removed and hand washed. Ensure they are completely dry before reattaching or storing to prevent mildew.
- Fasteners: Periodically check all screws and bolts to ensure they remain tight and secure.
- Winter Care: While the roof is designed to withstand up to 20 lbs of snow per square foot, it is recommended to clear excessive snow accumulation to prevent structural stress.
- Electrical Components: Keep the outlet panel cover closed when not in use to protect against moisture and debris.
7. Troubleshooting
| Problem | Possible Cause | Solution |
|---|---|---|
| Gazebo feels unstable. | Improper anchoring; loose fasteners. | Ensure all posts are securely anchored to a solid foundation. Tighten all screws and bolts. |
| LED lights not working. | USB-C cord unplugged; power outage. | Check if the USB-C cord is securely plugged into the outlet post. Verify power supply to the outlets. |
| Water leakage from roof. | Improperly installed roof panels; damaged seals. | Inspect roof panels for correct overlap and secure fastening. Check for any visible damage to seals and replace if necessary. |
| Curtains/Netting not sliding smoothly. | Debris in tracks; damaged runners. | Clean tracks of any debris. Inspect runners for damage and replace if needed. |
8. Specifications
| Feature | Detail |
|---|---|
| Brand | Modern Shade Outdoor Living Spaces |
| Model Number | metalgazebo |
| Material | Aluminum frame, Galvanized Steel roof |
| Style | Modern, Wood Looking |
| Product Dimensions (L x W x H) | 122"L x 147"W x 116"H (approx. 10' x 12') |
| Item Weight | 356.4 Pounds |
| Water Resistance Level | Waterproof |
| Ultraviolet Light Protection | Yes |
| Snow Capacity | 20 lbs per square foot |
| Occupancy | 10-12 people |
| Assembly Required | Yes (2-4 people recommended) |
9. Warranty & Support
Modern Shade Outdoor Living Spaces is committed to providing quality products and excellent after-sales service. For any questions regarding assembly, missing parts, or product performance, please contact our customer support team.
Refer to your purchase documentation for specific warranty details. If you have any questions, please feel free to contact us.