m MU VS8001
MULIN Food Vacuum Sealer Machine User Manual
Model: VS8001
Introduction
Thank you for choosing the MULIN Food Vacuum Sealer Machine. This appliance is designed to preserve the freshness of your food by removing air from specially designed bags and containers, significantly extending their shelf life. Please read this manual thoroughly before operation to ensure proper use and maintenance.

Image: The MULIN Food Vacuum Sealer Machine in use, demonstrating its ability to seal various food items, including meat and fresh produce, to extend freshness.
Safety Precautions
- Always ensure the power cord is securely plugged into a grounded outlet.
- Do not immerse the appliance, power cord, or plug in water or other liquids.
- Keep out of reach of children. This appliance is not intended for use by persons with reduced physical, sensory, or mental capabilities unless supervised.
- Unplug from outlet when not in use and before cleaning.
- Do not operate any appliance with a damaged cord or plug, or after the appliance malfunctions or has been damaged in any manner.
- Use only accessories recommended by the manufacturer.
- Avoid placing the appliance near hot surfaces or open flames.
Product Components
The MULIN Food Vacuum Sealer Machine package includes the following items:

Image: A visual representation of the product contents, including the vacuum sealer unit, vacuum bags, a vacuum bag with valve, suction hose, power cord, and the instruction manual.
- Vacuum Sealer Unit (1)
- Vacuum Bags for Sealing (10 pcs)
- Vacuum Bag with Valve (5 pcs)
- Suction Hose (1)
- Power Cord (1)
- Instruction Manual (1)
Setup
Initial Preparation
- Unpack all components from the box.
- Place the vacuum sealer on a flat, stable, and dry surface.
- Wipe the exterior of the appliance with a damp cloth to remove any dust from packaging. Ensure it is completely dry before plugging in.
- Plug the power cord into the appliance and then into a standard electrical outlet.
Using the Built-in Cutter
The integrated cutter allows you to create custom-sized bags from a roll. This feature is convenient for minimizing waste and ensuring a perfect fit for your food items.

Image: The built-in cutter feature of the vacuum sealer, demonstrating how to easily cut a custom-sized bag from a roll of vacuum sealing film.
- Place the roll of vacuum sealing film into the designated compartment.
- Pull out the desired length of film.
- Slide the cutter across the film to create a clean cut.
- Seal one end of the newly cut bag using the "Seal" function (refer to Operating Instructions).
Operating Instructions
Understanding the Modes
The MULIN vacuum sealer offers multiple modes for optimal food preservation:

Image: The control panel of the vacuum sealer, highlighting the "Dry", "Moist", "Canister", "Seal", and "Stop" buttons, indicating the various operational modes.
- Dry Mode: Ideal for dry food items such as bread, snacks, nuts, and cereals.
- Moist Mode: Suitable for moist or juicy foods like meats, fish, and fruits. This mode adjusts the sealing time to ensure a strong seal even with moisture present.
- Seal Mode: Used for sealing bags without vacuuming. This is useful for creating custom bags from a roll or for sealing delicate items that do not require vacuum.
- Canister Mode (External Vacuum): For use with vacuum-sealable canisters, jars, or wine bottles.
- Stop Button: Allows you to stop the vacuuming or sealing process at any time.
Vacuum Sealing Bags (Dry/Moist)
This process typically takes about 10-20 seconds for completion.

Image: The vacuum sealer actively removing air from a bag containing vegetables, illustrating its strong 60Kpa suction capability for efficient food preservation.
- Place the food item into a vacuum sealer bag, leaving at least 2-3 inches of space from the top edge.
- Ensure the open end of the bag is clean and free of food particles or moisture, as this can affect the seal.
- Open the lid of the vacuum sealer. Place the open end of the bag into the vacuum channel, ensuring it lies flat and smooth across the sealing strip.
- Close the lid firmly until you hear a click, indicating it is locked.
- Press the appropriate mode button: "Dry" for dry foods or "Moist" for moist foods. The machine will automatically vacuum and seal.
- Once the process is complete, the indicator light will turn off. Press the release buttons (if present) or lift the lid to open.
- Remove the sealed bag. Check the seal to ensure it is complete and airtight.
External Vacuum (Canister Mode)
This function allows you to vacuum seal food in compatible canisters, jars, and wine bottles using the included suction hose.
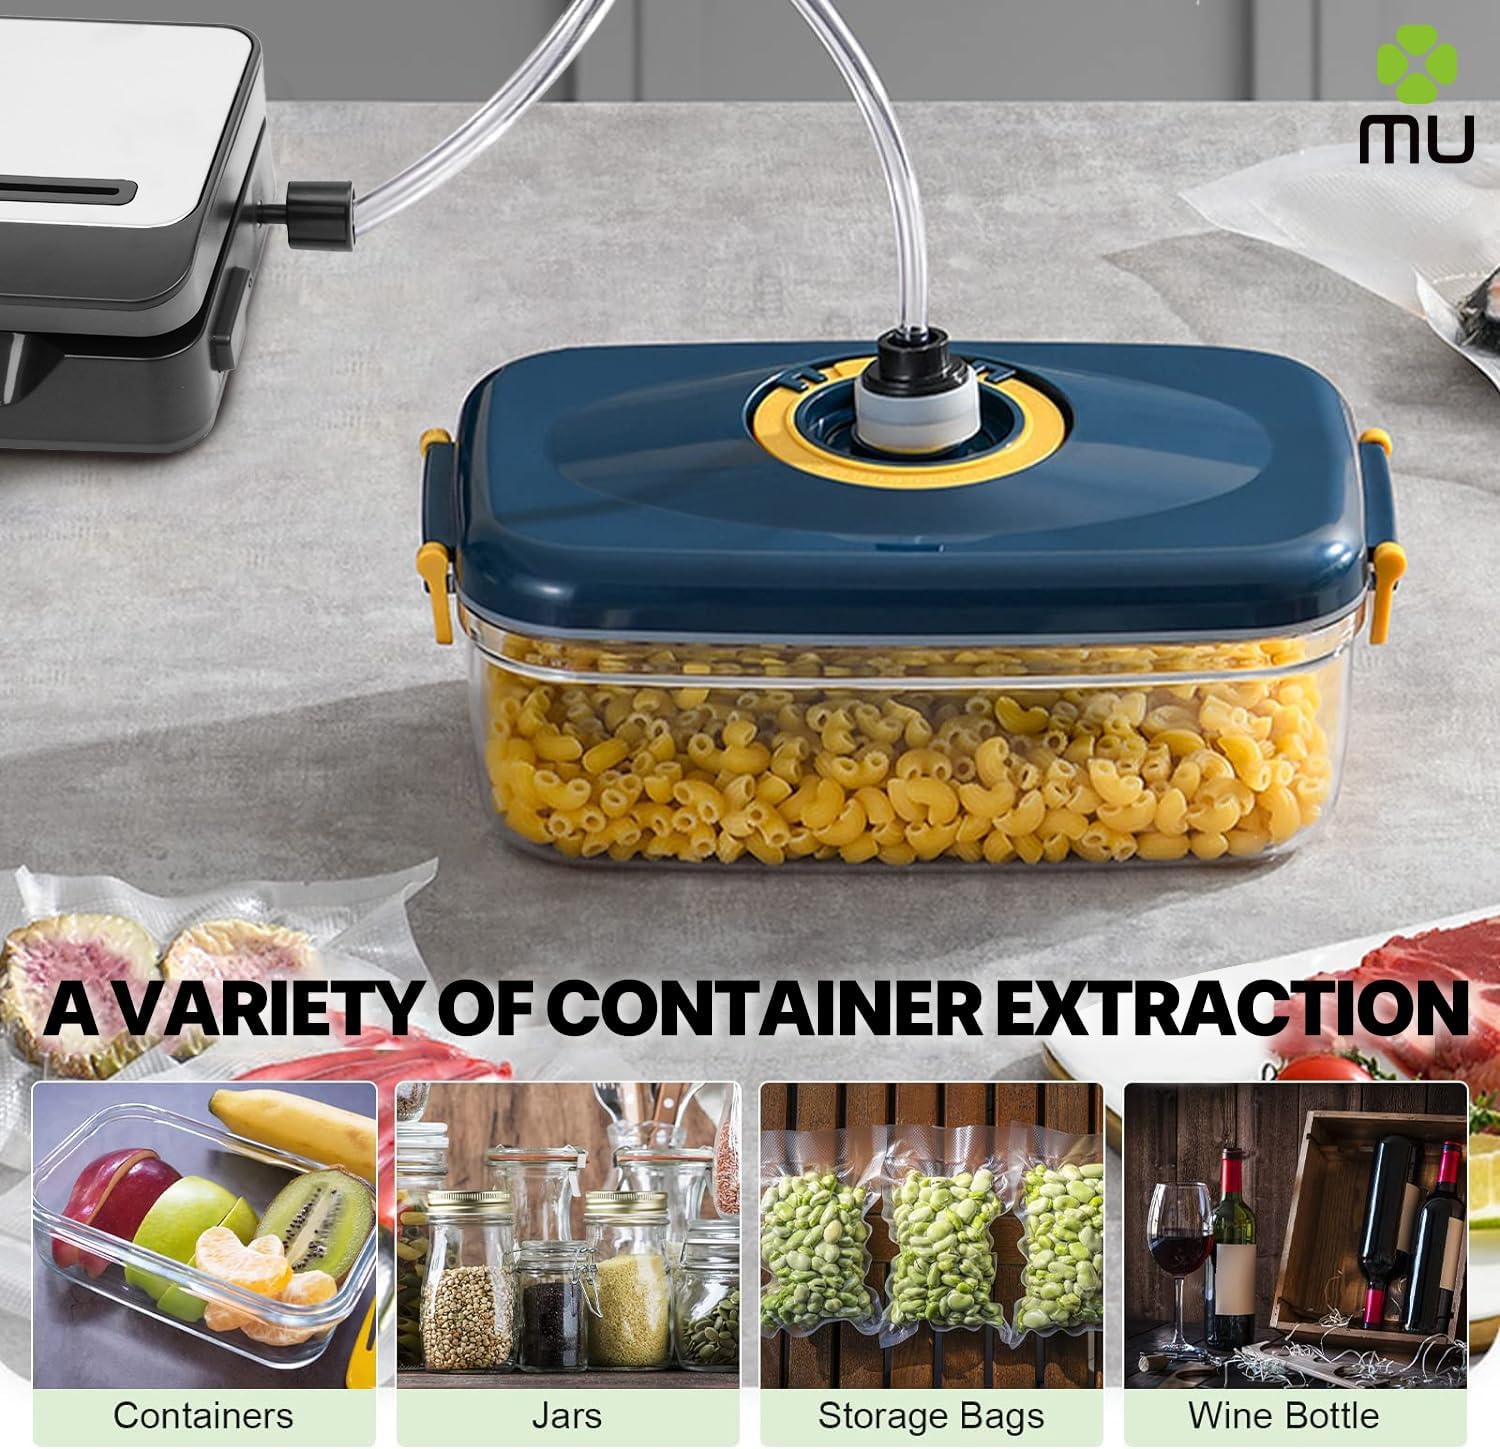
Image: The vacuum sealer demonstrating its external vacuum capability by connecting to a food container with a hose. Examples of other compatible items like jars, storage bags, and wine bottles are also shown.
- Connect one end of the suction hose to the vacuum port on the appliance.
- Connect the other end of the hose to the port on your vacuum-sealable canister, jar, or wine stopper.
- Ensure the lid of the container is properly secured.
- Press the "Canister" button. The machine will begin to remove air.
- The machine will stop automatically when the desired vacuum level is reached. Disconnect the hose.
Maintenance and Cleaning
Regular cleaning ensures the longevity and optimal performance of your vacuum sealer.
- Always unplug the appliance from the power outlet before cleaning.
- To clean the sealing strip and vacuum channel, gently wipe them with a damp cloth. Ensure no food particles or moisture remain.
- The top cover can be removed for easier cleaning of the vacuum channel. Refer to the diagram in the physical manual for specific removal instructions if needed.
- Wipe the exterior of the appliance with a soft, damp cloth. Do not use abrasive cleaners or solvents.
- Ensure all parts are completely dry before storing or next use.
- Store the appliance in a cool, dry place, away from direct sunlight and extreme temperatures.
Troubleshooting
If you encounter issues with your vacuum sealer, refer to the following common problems and solutions:
| Problem | Possible Cause | Solution |
|---|---|---|
| Machine does not turn on. | Not plugged in; power outlet issue; damaged cord. | Check power connection; try a different outlet; inspect cord for damage. |
| Bag does not vacuum properly. | Bag not positioned correctly; bag opening is wet or has food particles; bag is damaged; lid not fully locked. | Reposition bag; clean and dry bag opening; use a new bag; ensure lid clicks shut. |
| Seal is incomplete or weak. | Sealing strip is dirty or damaged; bag material not compatible; too much moisture in bag. | Clean sealing strip; use only recommended vacuum sealer bags; use "Moist" mode for wet foods or pre-freeze very wet items. |
| Machine is noisy during operation. | Normal operation sound; internal component issue. | A certain level of noise is normal for vacuum pumps. If noise is excessive or unusual, contact customer support. |
| External vacuum not working. | Hose not connected properly; canister/jar not sealed; canister/jar is not vacuum-compatible. | Ensure hose is firmly attached to both machine and container; check container lid seal; use only vacuum-compatible accessories. |
Specifications
| Feature | Detail |
|---|---|
| Brand | m MU |
| Model | VS8001 |
| Color | Grey |
| Dimensions (Package) | 41 x 20 x 11 cm |
| Weight (Item) | 1.09 Kilograms |
| Wattage | 150W |
| Voltage | 230V |
| Material | Metal, Plastic |
| Automatic Shutoff | Yes |
| Vacuum Pressure | -60 Kpa |
Warranty and Support
For information regarding warranty coverage, terms, and conditions, please refer to the warranty card included with your product or visit the official MULIN website. For technical support, troubleshooting assistance beyond this manual, or to inquire about replacement parts, please contact MULIN customer service through the contact information provided on the product packaging or the official website.
Please retain your purchase receipt as proof of purchase for warranty claims.
Ask a question about this manual
Ask about setup, troubleshooting, compatibility, parts, safety, or missing instructions. Manuals+ will review the question and use this page’s manual context to help answer it.