1. Introduction
The CinusLinus 360° Self-Leveling Green Line Laser Level is a versatile and precise tool designed for various leveling and alignment tasks in home renovation, construction, and DIY projects. This manual provides detailed instructions for safe operation, setup, and maintenance to ensure optimal performance and longevity of your device.

This image displays the complete CinusLinus laser level kit, including the green laser level unit, a compact tripod, four AA batteries, and a magnetic wall mounting bracket.
2. Safety Information
WARNING: This product emits a Class II laser beam. Avoid direct eye exposure to the laser. Do not stare into the beam. Do not aim the laser at people or animals. Use caution when operating near reflective surfaces.
- Always operate the laser level in a well-lit area to reduce the risk of accidental eye exposure.
- Do not attempt to modify or disassemble the laser level. This can lead to hazardous laser radiation exposure.
- Keep the device out of reach of children.
- Ensure the work area is clear of obstacles to prevent tripping hazards.
3. What's Included
Your CinusLinus Laser Level package includes the following components:
- 1 x 2D Green Laser Level Line Tool
- 1 x Laser Level Tripod (25.6 inches)
- 1 x Wall Mounting Bracket
- 1 x Target Board
- 4 x AA Batteries
- 1 x Soft Case Toolkit
- 1 x Instruction Manual
4. Product Overview

This diagram labels the key components of the laser level, including the function buttons, laser output window, on/off switch, 1/4"-20 threaded mount for accessories, and the battery compartment latch.
Familiarize yourself with the main parts of the laser level:
- Function Buttons: Located on top, used for brightness adjustment and mode switching.
- Laser Output Window: Where the green laser beams are projected.
- On/Off Button: A slide switch on the side for powering the device.
- 1/4"-20 Threaded Mount: Located at the bottom for attaching to the tripod or wall bracket.
- Battery Compartment Latch: Secures the battery compartment.
5. Setup
5.1 Battery Installation
- Locate the battery compartment latch on the bottom of the laser level.
- Open the compartment and insert the 4 AA batteries, ensuring correct polarity (+/-) as indicated inside the compartment.
- Close the battery compartment securely.

This image shows the correct way to install batteries into the laser level and illustrates two common mounting methods: directly on a wall using the bracket, and on the included tripod.
5.2 Tripod Assembly and Use
- Extend the tripod legs to the desired height. Ensure the legs are fully extended for maximum stability.
- Attach the laser level to the tripod's 1/4" quick-release plate by screwing it onto the threaded mount at the bottom of the laser level.
- Use the tripod's handle and pan head to adjust the angle and position of the laser level. The tripod offers 360-degree swivel and 180-degree tilt capabilities.

The included aluminum tripod can be adjusted from 11 inches (28 cm) to 25.6 inches (65 cm) in height. It features a 360-degree swivel function and a 180-degree tilt for versatile positioning.
5.3 Wall Mounting
The included magnetic wall mounting bracket allows for flexible placement on metallic surfaces or can be secured with screws (not included) to non-metallic surfaces. Attach the laser level to the bracket via the 1/4"-20 threaded mount.
6. Operating Instructions
6.1 Power On/Off
To turn the device ON, slide the On/Off button on the side to the "unlocked" position. To turn the device OFF, slide the On/Off button to the "locked" position.
6.2 Self-Leveling Mode
- When the On/Off button is in the "unlocked" position, the laser level automatically enters Self-Leveling Mode.
- The device will self-level within ±4° of horizontal.
- If the surface is tilted more than 4 degrees, the green laser will flash rapidly to indicate that it is out of level. Adjust the position of the device until the laser stops flashing and provides a stable line.
6.3 Manual Mode
- To activate Manual Mode, slide the On/Off button to the "locked" position.
- Then, press and hold the "Function Button" (Lock icon) on top of the device for 3 seconds.
- In Manual Mode, the self-leveling function is disabled, allowing you to project laser lines at any desired angle. The laser will not flash when tilted.
6.4 Pulse Mode
- With the switch on the "unlocked" side (Self-Leveling Mode), the device is in Pulse Mode.
- This mode is designed for use with a laser detector (not included) to extend the working distance up to 150 ft (45 meters).
6.5 Brightness Adjustment
- To adjust the brightness of the green laser lines, short press the "Function Button" on top of the device.
- The brightness can be cycled through various levels (e.g., 100%, 75%, 50%, 25%) to adapt to different indoor lighting environments and conserve battery life.
- Note: Brightness Adjustment cannot be used simultaneously with Pulse Mode.

The image illustrates the three primary operating modes: Manual Mode (long press), Self-Leveling Mode (power on), and Pulse Mode (short press), showing how the laser lines appear in each setting.

The laser level offers four adjustable brightness settings (100%, 75%, 50%, 25%) to optimize visibility and conserve battery life in various indoor lighting conditions.
7. Applications
The CinusLinus Laser Level is suitable for a wide range of applications, including but not limited to:
- Hanging pictures and shelves
- Installing flooring and tiles
- Mounting cabinets and fixtures
- Painting and wallpapering
- DIY projects and home renovations
- Construction, HVAC, electrical work, and steel stud framing
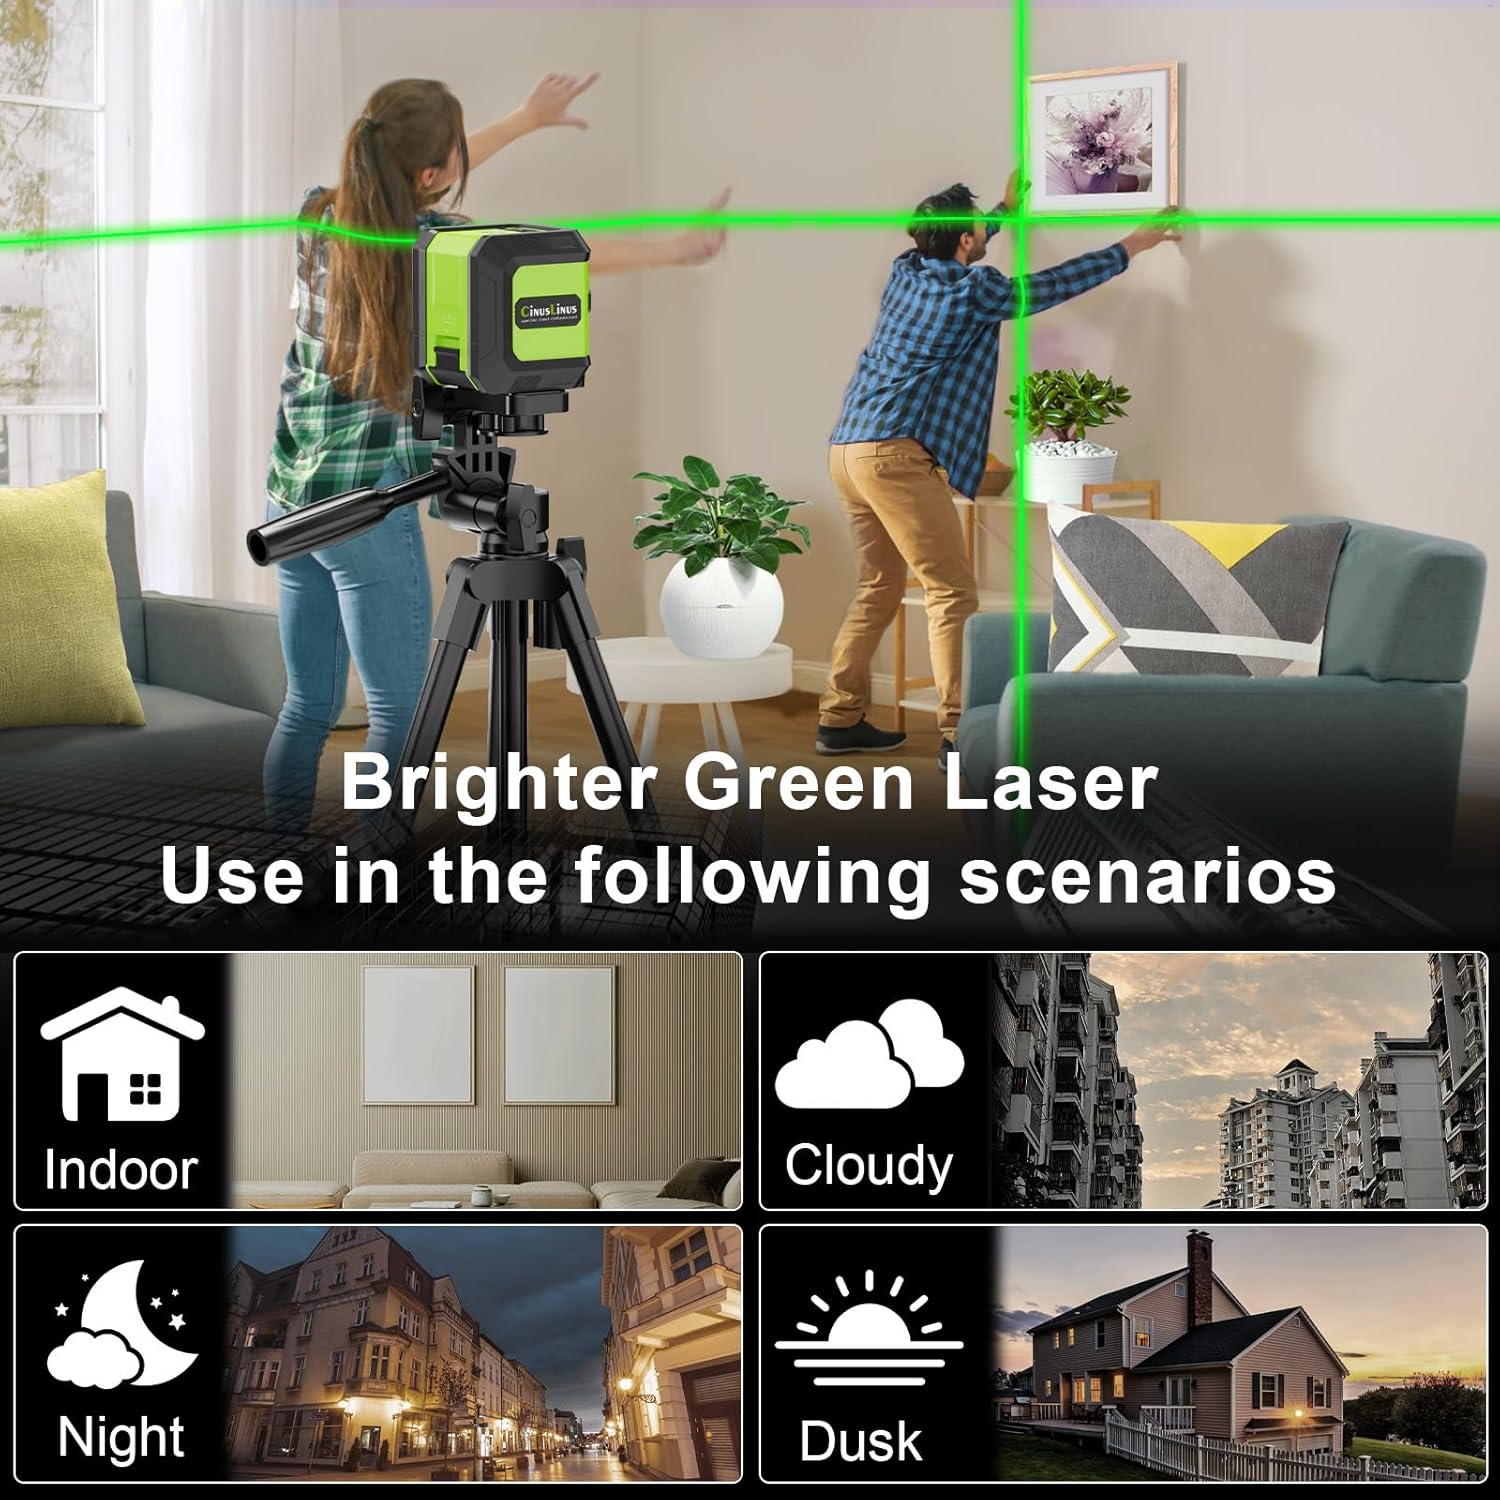
This image demonstrates the versatility of the bright green laser for use in different lighting conditions and environments, such as indoors, at night, in cloudy weather, and at dusk.
8. Maintenance
- Cleaning: Wipe the device with a soft, damp cloth. Do not use abrasive cleaners or solvents.
- Storage: Store the laser level in its soft case toolkit in a dry, cool place when not in use. Remove batteries if storing for extended periods to prevent leakage.
- Protection: The device has an IP54 rating, providing protection against dust and splashing water. However, avoid submerging it in water.
9. Troubleshooting
- Laser lines are flashing: In Self-Leveling Mode, this indicates the device is tilted more than ±4°. Adjust the position of the laser level until it is within its self-leveling range and the lines become stable.
- Laser lines are dim or not visible:
- Check the battery level and replace batteries if necessary.
- Adjust the brightness setting using the function button.
- Strong sunlight can significantly weaken the visibility of the laser. It is best to use the device indoors or in shaded areas for optimal visibility.
- Tripod instability: Ensure all tripod legs are fully extended and locked into place. The tripod is designed for stability on flat surfaces.
10. Specifications
| Feature | Specification |
|---|---|
| Brand | CinusLinus |
| Model Number | 360-12 |
| Material | Aluminum |
| Color | Green |
| Product Dimensions | 9.8"L x 3.52"W |
| Style | Green 2 Line Laser Level with Tripod |
| Operation Mode | Cross Green Laser, Self Leveling, Pulse Mode, Manual Mode, Green Laser Brightness Adjustment |
| Item Weight | 1.9 pounds |
| Power Source | Battery Powered (4 x AA Battery) |
| Batteries Included? | Yes |
| Batteries Required? | Yes |
| Battery Cell Type | Zinc Carbon |
| Laser Class | Class II, <1mW power output |
| Working Distance | 65 ft (150 ft with detector in Pulse Mode) |
| Accuracy | 1/9" at 32 ft |
| Self-Leveling Range | ±4° |
| Protection Rating | IP54 |
11. Warranty and Support
CinusLinus products are manufactured to high-quality standards. This product comes with a standard manufacturer's warranty against defects in materials and workmanship. For warranty claims, technical support, or any questions regarding your laser level, please refer to the contact information provided on the product packaging or visit the official CinusLinus website.