Introduction
Thank you for choosing the CHENZILIN L9 Mini Camera. This portable digital video recorder is designed for versatile use, offering high-definition 1080P video recording, night vision capabilities, and a compact, wearable design. It is suitable for various applications including sports, law enforcement, and as a car driving recorder. This manual provides detailed instructions for setup, operation, and maintenance to ensure optimal performance of your device.
Key Features
- Portable and Wearable Design: Features a back clip for easy attachment to backpacks or pockets, ensuring discreet and convenient recording.
- High-Definition 1080P Video: Captures clear and crisp video footage at 1920x1080 resolution.
- Motion Detection: Automatically starts recording when motion is detected, conserving battery and storage.
- Night Vision: Equipped with 5 white light lamps for clear recording in low-light conditions up to 5 meters.
- 180-Degree Rotatable Lens: The lens can be manually rotated 180 degrees, providing flexible recording angles.
- 140-Degree Wide Angle: Captures a broad field of view, ensuring comprehensive coverage.
- Looping Recording: Overwrites the oldest files when the memory card is full, ensuring continuous recording.
- Photo Taking Capability: Allows for still image capture during video recording.
- Invisible and Quiet Recording: Designed for discreet operation.
- 1.3-inch Screen: Provides a clear display for viewing recordings and navigating settings.
- Wi-Fi Connectivity: (For "With wifi" model) Enables remote control and file transfer via a mobile application.
Product Overview and Components
Familiarize yourself with the various parts of your L9 Mini Camera:

Figure 1: Front view of the L9 Mini Camera, showcasing its compact design, 1.3-inch screen, and rotatable lens. The screen displays a live feed of a cyclist.

Figure 2: Illustrates key features of the L9 Mini Camera, including one-click recording, the detachable back clip, video recording capability, motion detection, and night vision functionality.

Figure 3: A detailed view of the L9 Mini Camera's screen and the control buttons located on its side. The screen shows a live recording, and the buttons are clearly visible for operation.

Figure 4: Rear view of the L9 Mini Camera, highlighting the integrated back clip mechanism. This clip allows for secure attachment to clothing or gear.
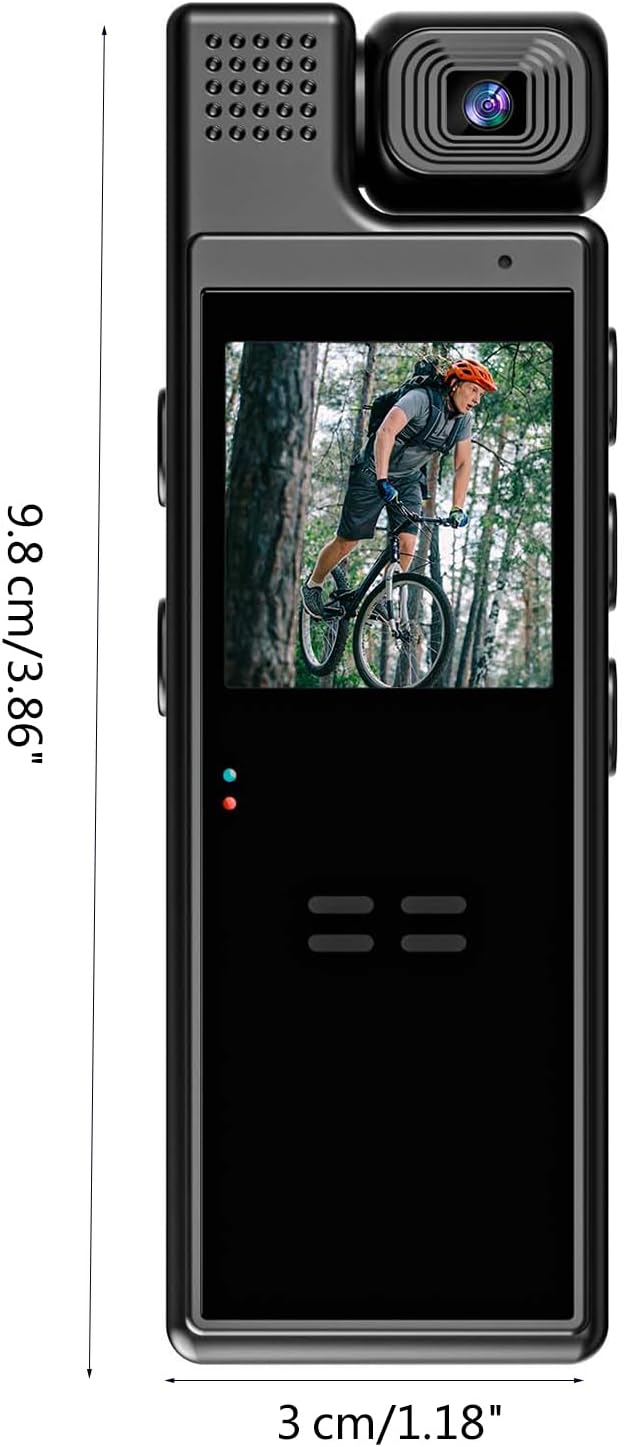
Figure 5: Depicts the compact dimensions of the L9 Mini Camera, measuring approximately 9.8 cm (3.86 inches) in length and 3 cm (1.18 inches) in width, emphasizing its portability.
Button and Port Identification:
- Power Button: Used to turn the device on/off.
- Record Button: Initiates and stops video recording.
- Mode Button: Switches between video, photo, and playback modes.
- Navigation Buttons (Up/Down/OK): For menu navigation and selection.
- USB Port: For charging and data transfer.
- MicroSD Card Slot: For external memory storage.
- Lens: The rotatable camera lens.
- Screen: 1.3-inch display for live view and playback.
- Indicator Lights: Provide status information (e.g., charging, recording).
Setup Guide
1. Charging the Device
Before first use, fully charge the L9 Mini Camera. Connect the camera to a USB power adapter (not included) or a computer's USB port using the provided USB cable. The indicator light will show charging status and turn off or change color when fully charged.
Note: The battery capacity is 1200mAh, providing approximately 8 hours of battery life.
2. Inserting a MicroSD Card
The L9 Mini Camera requires a MicroSD card (not included) for storing recordings. Locate the MicroSD card slot on the device. Gently insert the MicroSD card with the gold contacts facing down until it clicks into place. To remove, push the card in again until it springs out.
- Ensure the card is formatted to FAT32 for optimal performance.
- Use a high-speed MicroSD card (Class 10 or higher) for smooth video recording.
3. Powering On/Off
To power on the camera, press and hold the Power button for a few seconds until the screen lights up. To power off, press and hold the Power button again until the screen turns off.
Operating Instructions
Video Recording
- Enter Video Mode: After powering on, the camera typically defaults to video recording mode. If not, use the Mode button to switch to video mode.
- Start Recording: Press the Record button once to begin video recording. A red indicator light will typically flash, and a recording icon will appear on the screen.
- Stop Recording: Press the Record button again to stop recording. The indicator light will stop flashing.
- Loop Recording: The camera supports loop recording. When the memory card is full, the oldest files will be automatically overwritten to make space for new recordings.
Photo Taking
- Enter Photo Mode: Use the Mode button to switch to photo mode.
- Take a Photo: Press the Record button (or a dedicated photo button if available) once to capture a still image.
Motion Detection
To activate motion detection recording:
- Access Settings: Navigate through the camera's menu using the navigation buttons to find the motion detection setting.
- Enable Motion Detection: Select "On" or "Enable" for motion detection. Once enabled, the camera will automatically start recording when movement is detected within its field of view and stop when motion ceases.
Night Vision
The L9 Mini Camera features night vision for recording in low-light conditions.
- Automatic Activation: Night vision may activate automatically in low light.
- Manual Activation: Refer to the on-screen menu for an option to manually turn night vision on or off if available. The 5 white light lamps will illuminate to assist recording in darkness.
Lens Rotation
The camera lens can be manually rotated 180 degrees to adjust the recording angle as needed. Gently rotate the lens housing to achieve the desired perspective.
Connecting to Wi-Fi (For "With wifi" model)
For models with Wi-Fi, you can connect the camera to your smartphone for remote control and file management.
- Download App: Search for the recommended companion app (e.g., "L9 Camera" or similar) on your smartphone's app store.
- Enable Camera Wi-Fi: Turn on Wi-Fi on the L9 Mini Camera via its settings menu.
- Connect Phone to Camera Wi-Fi: On your smartphone, go to Wi-Fi settings and connect to the camera's Wi-Fi network (SSID usually starts with "L9" or similar). The default password might be "12345678" or "88888888".
- Open App: Launch the app and follow the on-screen instructions to connect to your camera. You can then view live footage, control recording, and download files.
Maintenance and Care
- Cleaning: Use a soft, dry cloth to clean the camera body. For the lens, use a specialized lens cleaning cloth and solution. Avoid abrasive cleaners or solvents.
- Storage: Store the camera in a cool, dry place away from direct sunlight and extreme temperatures.
- Battery Care: To prolong battery life, avoid fully discharging the battery frequently. If storing for a long period, charge the battery to about 50% every few months.
- Firmware Updates: Check the manufacturer's website periodically for any available firmware updates to improve performance and add features.
- Avoid Impacts: The device is designed to be durable, but avoid dropping or subjecting it to strong impacts.
- Water Resistance: This device is not waterproof. Avoid exposure to water or high humidity.
Troubleshooting
| Problem | Possible Cause | Solution |
|---|---|---|
| Camera does not turn on. | Low battery; device frozen. | Charge the camera fully. If unresponsive, try a soft reset (press and hold power button for longer, or look for a reset pinhole if available). |
| Cannot record video/take photos. | No MicroSD card; card full; card error; incorrect mode. | Insert a MicroSD card. Format or replace the card. Ensure sufficient storage. Switch to the correct recording mode. |
| Poor video quality. | Dirty lens; low light; incorrect settings. | Clean the lens. Ensure adequate lighting or activate night vision. Check resolution settings. |
| Wi-Fi connection issues. | Incorrect password; app issues; camera Wi-Fi off. | Verify Wi-Fi password. Restart camera and phone. Reinstall the app. Ensure camera Wi-Fi is enabled. |
| Short battery life. | Frequent use of power-intensive features (Wi-Fi, night vision); aging battery. | Reduce use of power-intensive features. Ensure full charge. Battery degradation is normal over time. |
Technical Specifications
| Feature | Detail |
|---|---|
| Model | L9 |
| Screen | 1.3-inch (240x240 resolution) |
| Resolution | 1920x1080 (1080P) |
| Lens Rotation | 180 degrees |
| Lens Wide Angle | 140 degrees |
| Battery Capacity | 1200mAh |
| Video Format | AVI |
| Battery Life | Approximately 8 hours |
| Night Vision Lamps | 5pcs White light lamps |
| Night Vision Distance | Up to 5 meters |
| Material | Acrylonitrile Butadiene Styrene (ABS) |
| Connectivity | Wi-Fi (for "With wifi" model) |
| Dimensions | Approx. 9.8 x 3 cm (3.86 x 1.18 inches) |
Warranty and Support
For warranty information and technical support, please refer to the retailer or the official CHENZILIN website where you purchased the product. Keep your proof of purchase for any warranty claims.
If you encounter issues not covered in this manual, please contact customer service for assistance.