1. Introduction and Overview
The QIACHIP 433 MHz Remote Control Switch is a versatile wireless relay system designed for convenient control of various electrical devices such as lights, ventilation systems, and appliances. It offers robust stability with high receiving sensitivity and interference resistance, allowing for control up to 50 meters in open areas.
This product features a flexible 1-channel design capable of storing up to 15 portable transmitters and supports three distinct operating modes: Momentary, Toggle, and Latched. Its easy installation and broad compatibility with AC 85V~250V voltage make it suitable for a wide range of applications in homes, farms, factories, offices, and laboratories.
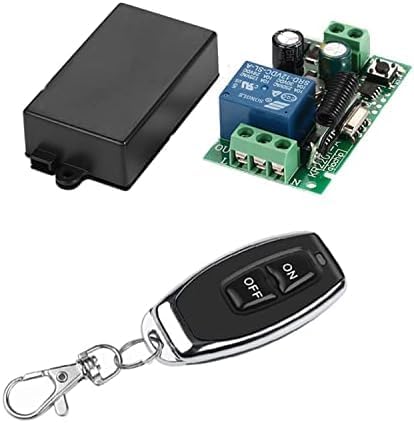
Figure 1: QIACHIP 433 MHz Remote Control Switch components.
2. Setup and Installation
2.1 Wiring Diagram
The receiver module is designed for AC 85V~250V input. Ensure power is disconnected before wiring. Connect the Live (L) and Neutral (N) wires to the corresponding input terminals on the receiver board. The output for your device (e.g., light) should be connected to the 'OUT' terminal. Refer to the diagram below for proper connection.

Figure 2: Receiver Module Wiring and RF Remote Range.
2.2 Pairing Remote Control (Learning Modes)
The receiver supports three operating modes: Momentary, Toggle, and Latched. You must clear any existing pairing codes before programming a new mode. The "Learn" button is located on the receiver board.
2.2.1 Clearing Existing Codes
- Ensure the module is powered on.
- Press the "Learn" button on the receiver board 8 times in quick succession.
- The indicator light on the receiver will flash, indicating that all previously paired codes have been cleared.
Note: It is essential to clear the code each time you switch between different operating modes.
2.2.2 Momentary Mode (Hold to ON, Release to OFF)
- Clear existing codes (as described above).
- Press the "Learn" button on the receiver board 1 time. The indicator light will turn on.
- Immediately press the desired button on your remote control (e.g., the 'ON' button). The indicator light on the receiver will flash, confirming successful pairing.
- In this mode, the connected device will remain ON only while the remote button is pressed and held. It will turn OFF when the button is released.
2.2.3 Toggle Mode (Press to ON, Press again to OFF)
- Clear existing codes (as described above).
- Press the "Learn" button on the receiver board 2 times in quick succession. The indicator light will turn on.
- Immediately press the desired button on your remote control (e.g., the 'ON' button). The indicator light on the receiver will flash, confirming successful pairing.
- In this mode, one press of the remote button will turn the device ON, and another press of the same button will turn it OFF.
2.2.4 Latched Mode (One button ON, another button OFF)
This mode requires a multi-button remote control (e.g., a remote with separate ON and OFF buttons).
- Clear existing codes (as described above).
- Press the "Learn" button on the receiver board 3 times in quick succession. The indicator light will turn on.
- Immediately press the 'ON' button on your multi-button remote control.
- Then, immediately press the 'OFF' button on the same remote control. The indicator light on the receiver will flash, confirming successful pairing.
- In this mode, pressing the designated 'ON' button will turn the device ON, and pressing the designated 'OFF' button will turn it OFF.
2.3 Visual Guide: Pairing and Operation
For a visual demonstration of the pairing process and different operating modes, please watch the official product video below:
Video 1: Demonstration of pairing and operating modes for the QIACHIP remote control switch.
3. Operating Instructions
Once paired, operate the remote control according to the mode you have set:
- Momentary Mode: Press and hold the remote button to turn the device ON. Release the button to turn the device OFF.
- Toggle Mode: Press the remote button once to turn the device ON. Press the same button again to turn the device OFF.
- Latched Mode: Press the designated 'ON' button on your multi-button remote to turn the device ON. Press the designated 'OFF' button to turn the device OFF.
The strong 433 MHz RF signal allows control through walls, floors, and doors, with an effective range of up to 50 meters in open areas. This makes it ideal for controlling devices in various locations within your home or workspace.

Figure 3: Convenient usage of the remote control switch in different rooms.
4. Maintenance
4.1 Remote Control Battery Replacement
The remote control uses a CR2032 battery (included). If the remote's indicator light does not illuminate or its range decreases significantly, it may be time to replace the battery. To replace:
- Carefully open the remote control casing.
- Remove the old CR2032 battery.
- Insert a new CR2032 battery, ensuring correct polarity (+/-).
- Close the remote control casing securely.

Figure 4: Remote control details and battery type.
4.2 Cleaning
Wipe the remote control and receiver module with a soft, dry cloth. Do not use liquid cleaners or abrasive materials, as these can damage the electronic components.
5. Troubleshooting
- Device not responding to remote:
- Ensure the receiver module is powered on.
- Check the remote control battery (refer to Section 4.1).
- Verify that the remote and receiver are correctly paired in the desired mode (refer to Section 2.2). Try re-pairing.
- Ensure there are no significant obstructions or excessive distance between the remote and receiver.
- Intermittent operation:
- This could be due to interference. Try repositioning the receiver or remote.
- Weak battery in the remote.
- Safety Concerns (as noted in user reviews):
- The internal circuit board may be loose within its enclosure, and wiring access points might not align perfectly with terminals.
- When wiring, ensure wires are routed carefully to avoid strain on connections, especially with thicker gauges (e.g., 18AWG for 120VAC).
- Consider securing the board within the enclosure if it is loose. If you are not comfortable with electrical work or modifying the enclosure, consult a qualified electrician to ensure safe installation and operation, especially when dealing with AC voltage to prevent risks of electric shock or fire.
6. Specifications
| Feature | Specification |
|---|---|
| Brand | QIACHIP |
| Model Number | KR2201-KT05/ONOFF |
| Operation Mode | Automatic |
| Coil Voltage | 120 Volts |
| Current Rating | 10 Amps |
| Maximum Switching Current | 10 Amps |
| Maximum Switching Voltage | 120 Volts |
| Connector Type | Through Hole |
| Contact Material | Copper |
| Contact Type | Normally Open |
| Mounting Type | Surface Mount |
| Number of Terminals | 2 |
| Item Weight | 2.89 ounces |
| Package Dimensions | 4.8 x 3.35 x 1.06 inches |
| Batteries Required | 1 CR2032 (included) |
7. Warranty Information
QIACHIP products are manufactured to high-quality standards. For specific warranty details, please refer to the product packaging or contact QIACHIP customer support directly. Keep your purchase receipt as proof of purchase.
8. Customer Support
For technical assistance, troubleshooting, or any inquiries regarding your QIACHIP Remote Control Switch, please visit the official QIACHIP store on Amazon or contact their customer service team. Contact information can typically be found on the product packaging or the seller's page.
This manual is intended for informational purposes only. Specifications and features are subject to change without notice.