BAOFENG UV-21R
Baofeng UV-21R Dual Band Ham Radio Instruction Manual
Model: UV-21R | Brand: BAOFENG
1. Introduction
Thank you for choosing the Baofeng UV-21R Dual Band Ham Radio. This professional two-way radio is designed for reliable long-range communication, offering a robust set of features for both amateur radio enthusiasts and general users. With its durable construction, IP54 water resistance, and advanced functionalities like wireless frequency copy and VOX, the UV-21R provides a superior communication experience. This manual will guide you through the setup, operation, and maintenance of your new radio to ensure optimal performance and longevity.
Key features include:
- Long communication range (3-5 miles)
- Type-C USB and base charging options
- Wireless frequency copy function
- High-gain dual-band antenna (15.35 inches)
- VOX (Voice Operated Transmit) for hands-free operation
- 999 programmable channels with CTCSS/DCS codes
- Large, clear display screen
- Built-in FM radio and NOAA weather stations
- Emergency alarm and LED flashlight
2. Product Overview and Components
Before operating your radio, familiarize yourself with its components and the items included in the package.
2.1. What's in the Box
- 4 x Radio Body (UV-21R)
- 4 x Battery
- 4 x 21CM Antenna & 4 x 39CM Antenna
- 4 x Belt Clip
- 4 x Type-C Charging Cable
- 4 x US Plug (for base charger)
- 4 x Lanyard
- 4 x Manual
- 4 x Screwdriver
2.2. Radio Parts Identification

Figure 2.2.1: Baofeng UV-21R Radio Parts Diagram. This image illustrates the various external components of the UV-21R radio, including the antenna connector, flashlight, power/volume knob, Push-to-Talk (PTT) button, MENU button, FM/Monitor button, speaker, headset jack, NXIT key, and navigation keys.
3. Setup
3.1. Battery Installation
- Ensure the radio is powered off.
- Align the battery pack with the grooves on the back of the radio.
- Slide the battery pack upwards until it clicks securely into place.
- To remove, press the battery release latch (if present) and slide the battery downwards.
3.2. Antenna Attachment
- Screw the antenna clockwise into the antenna connector on the top of the radio until it is finger-tight. Do not overtighten.
- The kit includes both 21CM and 39CM antennas. Choose the appropriate antenna based on your communication needs; the 39CM high-gain antenna can improve communication distance.
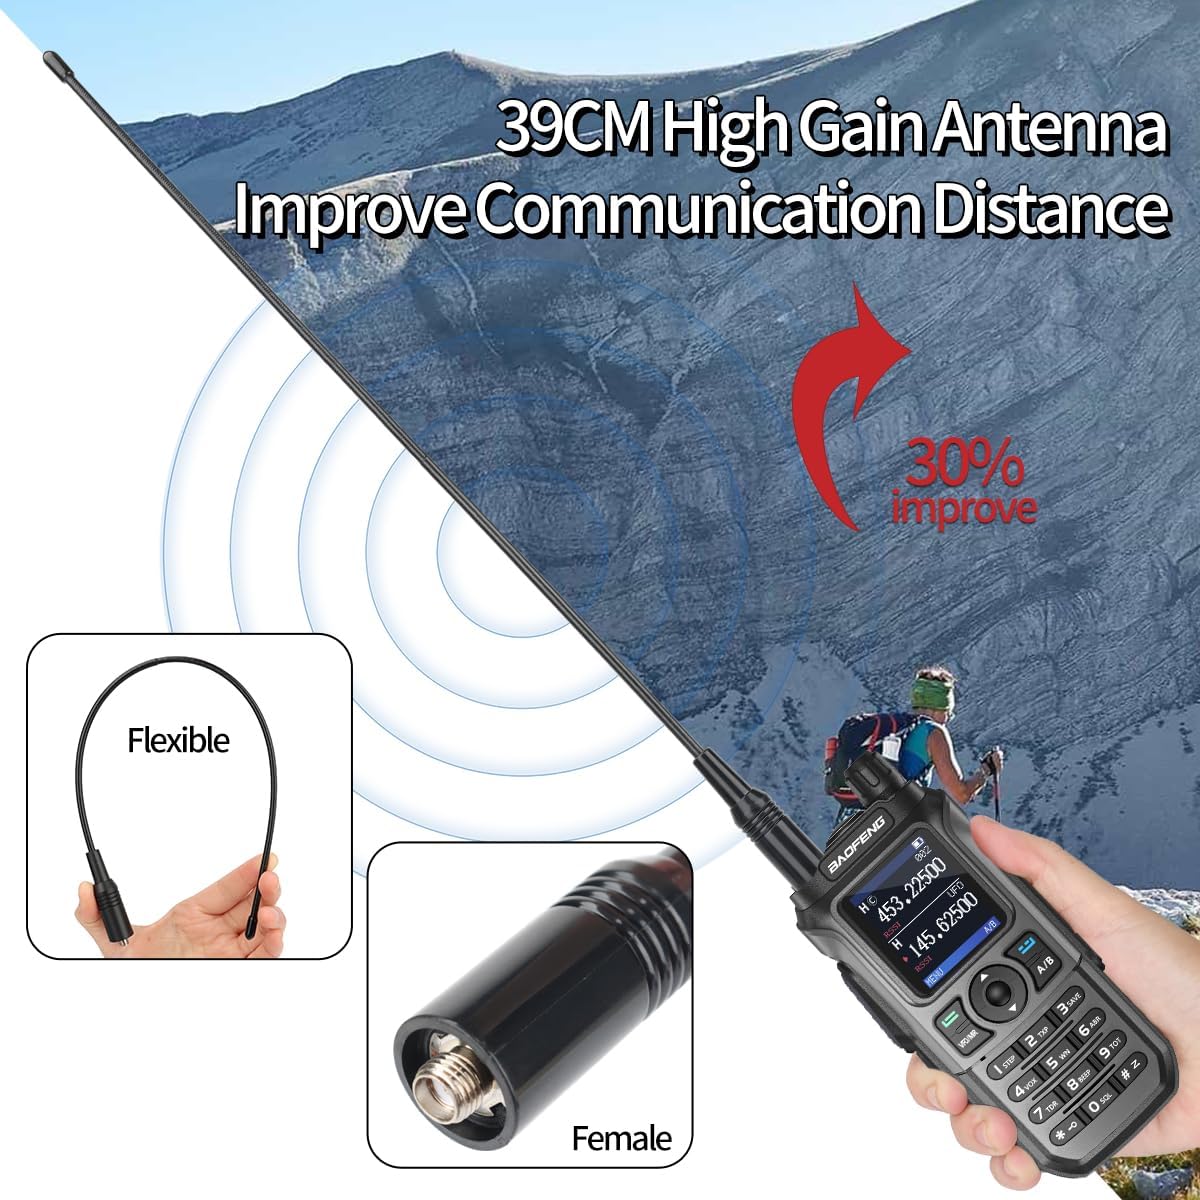
Figure 3.2.1: High Gain Antenna. This image displays the flexible nature of the high-gain antenna and a close-up view of the female connector on the radio, indicating where the antenna attaches.
3.3. Charging the Battery
The Baofeng UV-21R offers two convenient charging methods: Type-C direct charging and base charging.

Figure 3.3.1: Charging Methods. This image illustrates the two available charging methods: Type-C direct charging, where a USB-C cable connects directly to the radio's battery, and base charging, where the radio sits in a charging cradle connected to a power outlet.
- Type-C Charging:
- Locate the Type-C charging port on the back of the battery pack.
- Connect the provided Type-C USB cable to the port and the other end to a USB power source (e.g., wall adapter, power bank, car charger, laptop).
- The charging indicator on the radio or battery will show charging status.
- Note: The USB port supports charging only and does not support programming.
- Base Charging:
- Connect the US plug adapter to the charging base.
- Place the radio into the charging base, ensuring proper contact with the charging terminals.
- The indicator light on the base will typically turn red during charging and green when fully charged.
4. Operating Instructions
4.1. Power On/Off and Volume Control
- To power on the radio, rotate the Power/Volume knob clockwise until you hear a click.
- To power off, rotate the knob counter-clockwise until it clicks.
- Adjust the volume by rotating the same knob clockwise to increase and counter-clockwise to decrease.
4.2. Channel Selection and Frequency Input
- The UV-21R supports 999 channels. Use the Up/Down navigation keys to scroll through programmed channels.
- To enter a specific frequency in VFO (Variable Frequency Oscillator) mode, press the VFO/MR button to switch to VFO mode, then use the numeric keypad to input the desired frequency.
- Press the MENU button to access various settings and options.
4.3. Transmitting and Receiving (PTT)
- To transmit, press and hold the PTT (Push-to-Talk) button on the side of the radio. Speak clearly into the microphone.
- Release the PTT button to receive.
- Ensure you are on the correct frequency or channel before transmitting.
4.4. VOX Function (Voice Operated Transmit)
The VOX function allows for hands-free transmission. When activated, the radio will automatically transmit when it detects your voice.
- To activate VOX, navigate through the MENU settings to find the VOX option.
- Adjust the VOX sensitivity level as needed. A higher sensitivity means the radio will transmit with softer voice input.
- When VOX is active, you do not need to press the PTT button to transmit.
4.5. Wireless Frequency Copy
This feature allows you to quickly copy the frequency from another walkie-talkie without needing computer programming.

Figure 4.5.1: Wireless Frequency Copy Tutorial. This image provides a visual guide for the "2 Seconds Copy Frequency" feature, showing the steps to power on, press key "2", and then hold the other walkie-talkie near to copy its frequency.
- Step 1: Power on your UV-21R walkie-talkie and press key "2". The display will show "SEEK".
- Step 2: Press and hold the PTT button on the other walkie-talkie (the one you want to copy the frequency from). Place it close to your UV-21R. The UV-21R will search for and display the frequency. Press "MENU" to confirm.
- Step 3: Switch to channel mode. The display will now show the other person's frequency, and you can begin communicating.
4.6. FM Radio Function
The radio includes an FM radio function for entertainment.
- Press the FM/Monitor key to activate the FM radio.
- Use the navigation keys to scan for stations or manually input a frequency.
- Press the FM/Monitor key again to exit FM radio mode.
4.7. NOAA Weather Stations
Stay informed about weather conditions with access to NOAA weather stations.

Figure 4.7.1: NOAA Weather Stations. This image displays the radio's screen showing a weather alert message, indicating its capability to receive NOAA weather broadcasts.
- Access the NOAA function through the radio's menu.
- The radio can receive broadcasts from 10 NOAA weather stations, providing real-time weather alerts and information.
4.8. Emergency Alarm and LED Flashlight
- The radio features an emergency alarm function for critical situations. Refer to the radio's menu for activation details.
- A built-in LED flashlight can be activated for illumination in low-light conditions.
5. Maintenance
5.1. Cleaning
- Wipe the radio's surface with a soft, damp cloth. Do not use harsh chemicals or abrasive cleaners.
- Ensure the radio is dry before use or storage.
5.2. Battery Care
- Fully charge the battery before first use.
- Avoid overcharging or completely draining the battery to prolong its lifespan.
- If storing the radio for an extended period, remove the battery.
5.3. Storage
- Store the radio in a cool, dry place away from direct sunlight and extreme temperatures.
- Keep the radio away from dust and moisture.
6. Troubleshooting
| Problem | Possible Cause | Solution |
|---|---|---|
| Radio does not power on. | Battery is low or not installed correctly. | Charge the battery. Ensure the battery is securely attached. |
| Cannot transmit or receive. | Incorrect frequency/channel; antenna not attached; out of range. | Verify frequency/channel. Ensure antenna is securely attached. Move closer to the other radio. |
| Poor audio quality. | Low battery; interference; antenna issue. | Charge battery. Move away from sources of interference. Check antenna connection. |
| Wireless frequency copy fails. | Radios too far apart; transmitting radio not active. | Ensure radios are close together. Verify the other radio is transmitting during the copy process. |
7. Specifications
| Feature | Detail |
|---|---|
| Model Number | UV-21R |
| Brand | BAOFENG |
| Color | Gray |
| Number of Channels | 999 |
| Special Feature | Long Range, Emergency Alarm |
| Frequency Range | VHF UHF |
| Talking Range Maximum | 5 Mile |
| Tuner Technology | UHF VHF |
| Water Resistance Level | Not Water Resistant (Note: IP54 rating indicates splash resistance, not full submersion) |
| International Protection Rating | IP54 |
| FCC ID | 2AJGM-UV21 |
| Compatible Programming Software | Chirp (UV-17Pro) |
8. Warranty and Support
8.1. Warranty Information
According to the product specifications, there is no explicit warranty provided for this product. Please refer to your point of purchase for any return or exchange policies.
8.2. Customer Support
For further assistance, technical support, or inquiries regarding your Baofeng UV-21R radio, please contact the seller or manufacturer through the platform where the product was purchased.