
1. Introduction
Thank you for choosing the Reemix Electric 8 Trays Food Dehydrator Machine. This appliance is designed to efficiently remove moisture from various foods, preserving their natural flavors, nutrients, and enzymes. With its compact design and adjustable temperature control, you can easily create healthy and delicious snacks for your family and pets.
Please read this manual thoroughly before operating the dehydrator to ensure safe and optimal use.
2. Important Safety Information
- Always unplug the dehydrator from the power outlet when not in use, before cleaning, or if a malfunction occurs.
- Do not immerse the motor base, cord, or plug in water or any other liquid.
- Keep the appliance out of reach of children and pets.
- Ensure the dehydrator is placed on a stable, heat-resistant surface with adequate ventilation.
- Do not operate the appliance with a damaged cord or plug. Contact customer support for assistance.
- Avoid blocking the air vents during operation to prevent overheating.
- Use only original Reemix accessories and parts.
3. Product Overview and Components
The Reemix Food Dehydrator consists of a base unit, multiple drying trays, and a top cover.

Figure 3.1: The Reemix Electric 8 Trays Food Dehydrator Machine, showcasing its compact design and the clear drying trays filled with various produce.
Key Components:
- Base Unit: Contains the heating element, fan, and control panel.
- Drying Trays (8 layers): Transparent, BPA-free, and dishwasher safe. Designed for efficient airflow.
- Top Cover: Sits on top of the stacked trays, ensuring proper heat retention and circulation.
- Control Panel: Features a Power Button and a Temperature Knob for easy operation.
- Fine Mesh Mats: Two silicone mats are included for dehydrating smaller items or making fruit leather.

Figure 3.2: Detailed view of the easy-to-operate control panel, featuring the power button and precise temperature knob.

Figure 3.3: The 8 BPA-free plastic mesh trays, designed for durability and environmental protection, allowing for visual monitoring of the dehydration process.
4. Setup
- Unpack: Carefully remove all components from the packaging.
- Clean: Before first use, wash all drying trays and the top cover with warm, soapy water. Rinse thoroughly and dry completely. Wipe the base unit with a damp cloth.
- Placement: Place the base unit on a clean, dry, stable, and heat-resistant surface. Ensure there is sufficient space around the unit for proper air circulation.
- Stack Trays: Place the desired number of drying trays onto the base unit. The trays can be reversed to provide more space between layers for thicker items.
- Connect Power: Plug the power cord into a standard electrical outlet.

Figure 4.1: The dehydrator with trays loaded, demonstrating its readiness for use after proper setup.
5. Operating Instructions
Preparation:
- Wash and prepare your food items (e.g., slice fruits, vegetables, or meat).
- Arrange food in a single layer on the drying trays, ensuring not to overlap for optimal airflow.
- For items with high moisture content, consider placing them on lower trays for faster drying.

Figure 5.1: Proper preparation of food, such as slicing oranges, is crucial for effective dehydration.
Operation:
- Power On: Press the Power Button on the control panel to turn on the dehydrator. A blue indicator light will illuminate.
- Set Temperature: Rotate the Temperature Knob to select your desired drying temperature. The adjustable range is from 95°F to 158°F (or up to 167°F as indicated on the dial).
- Monitor Progress: The transparent trays allow you to monitor the drying process without opening the unit.
- Check Doneness: Drying times vary based on food type, thickness, and moisture content. Refer to general dehydration guides for specific food items.
- Power Off: Once dehydration is complete, turn the Temperature Knob to the lowest setting or press the Power Button to turn off the unit. Unplug the dehydrator from the power outlet.

Figure 5.2: Adjusting the temperature knob to the desired setting for optimal dehydration.

Figure 5.3: Guide for homemade dehydrated treats, showing recommended temperature ranges for different food types.

Figure 5.4: The 360° All-round Hot Air Circulation Heating System ensures even heat distribution for consistent drying results.
6. Maintenance and Cleaning
Regular cleaning ensures the longevity and hygiene of your dehydrator.
- Always unplug the unit and allow it to cool completely before cleaning.
- The drying trays and top cover are dishwasher safe. Alternatively, wash them with warm, soapy water and rinse thoroughly.
- Wipe the base unit with a damp cloth. Do not immerse the base unit in water.
- Ensure all parts are completely dry before reassembling or storing the dehydrator.

Figure 6.1: Trays are easily removable for cleaning and can be reversed for increased space.
7. Troubleshooting
| Problem | Possible Cause | Solution |
|---|---|---|
| Dehydrator does not turn on. | Not plugged in; Power button not pressed; Power outage. | Ensure unit is securely plugged in; Press the Power button; Check household power supply. |
| Food not drying evenly. | Overloaded trays; Unevenly sliced food; Insufficient airflow. | Do not overload trays; Slice food uniformly; Ensure proper spacing between food items. Rotate trays if necessary. |
| Dehydrator is too noisy. | Normal fan operation; Unit not on a flat surface. | Some fan noise is normal. Ensure the unit is on a flat, stable surface. |
8. Specifications
- Brand: Reemix
- Model Number: GGJ 803-8
- Power: 400W
- Number of Trays: 8
- Temperature Control: Adjustable from 95°F to 158°F (dial indicates up to 167°F)
- Tray Material: BPA-Free PP (Food Safe)
- Dishwasher Safe Trays: Yes
- Color: Black, Silver
- Item Weight: 6.14 pounds
- Package Dimensions: 12 x 12 x 11 inches
- Country of Origin: China
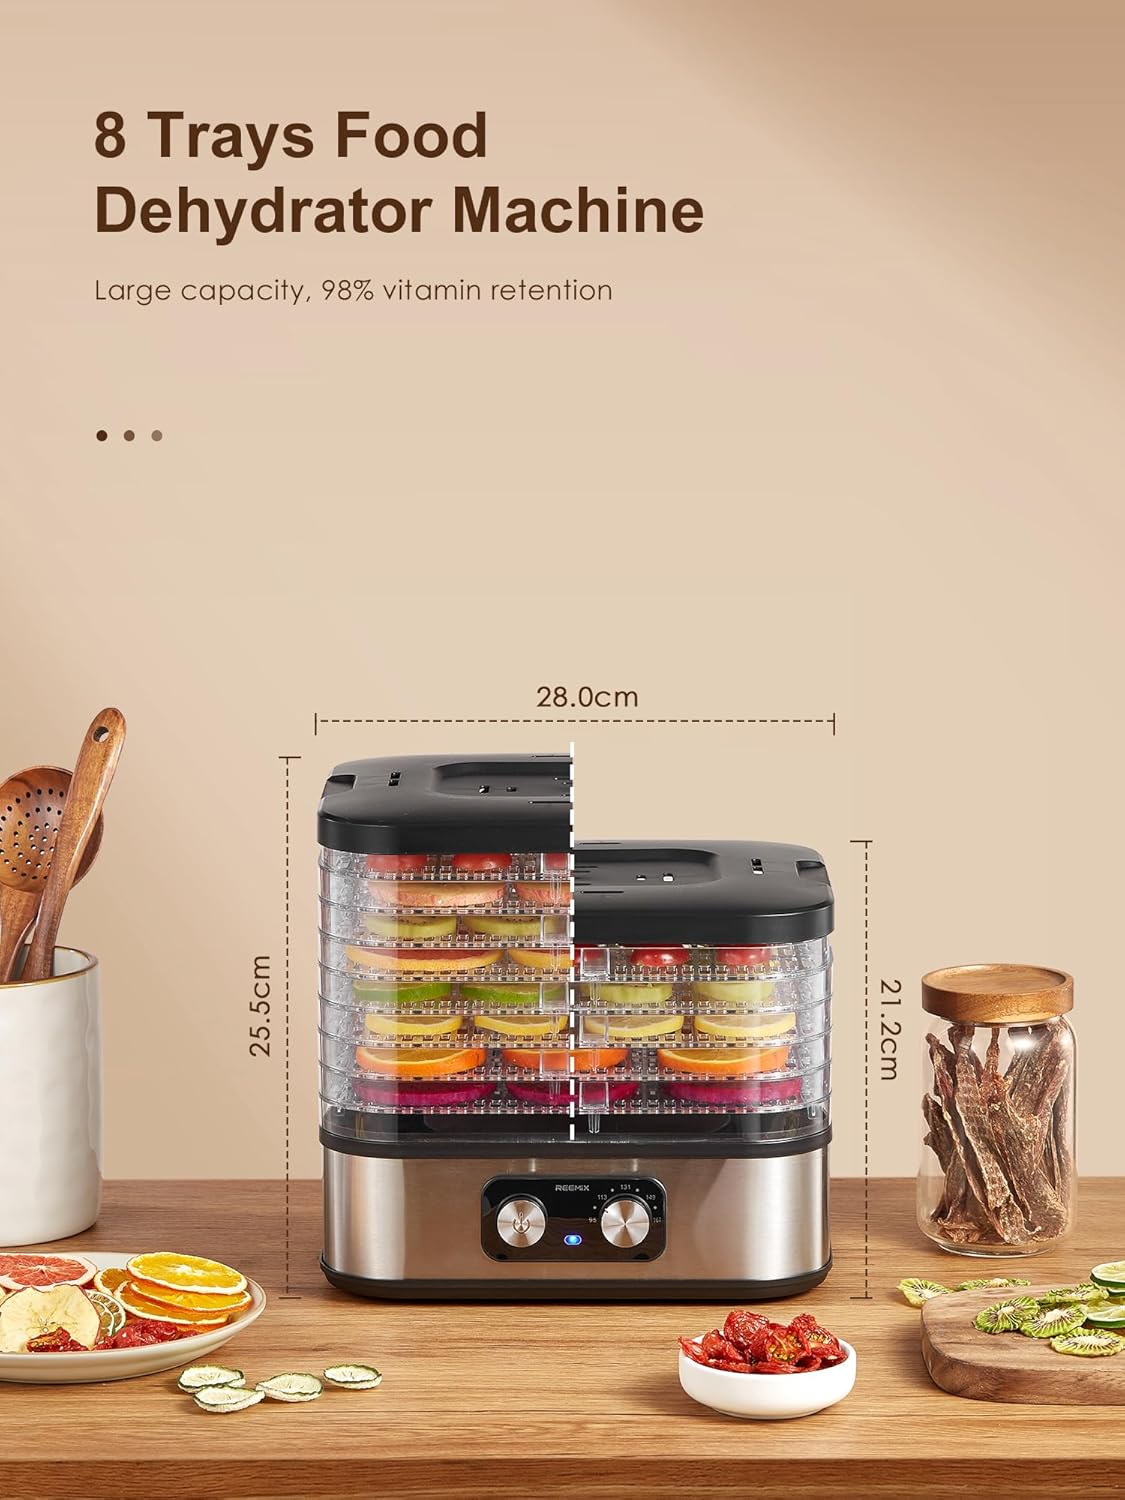
Figure 8.1: Dimensions of the Reemix 8 Trays Food Dehydrator Machine, illustrating its compact footprint.
9. Warranty and Support
The Reemix Electric 8 Trays Food Dehydrator Machine comes with a manufacturer's warranty. Please refer to the included warranty card for specific terms and conditions regarding your purchase.
For technical support, troubleshooting assistance, or warranty claims, please contact Reemix customer service through the retailer's platform or the contact information provided on the product packaging or warranty card.
Keep your purchase receipt as proof of purchase for warranty purposes.