RICTLY 012-1361
RICTLY Star Projector Night Light User Manual
Model: 012-1361
Introduction
This manual provides instructions for the safe and effective operation of your RICTLY Star Projector Night Light. Please read this manual thoroughly before use and retain it for future reference.
The RICTLY Star Projector Night Light is designed to project star and moon patterns, transforming any room into a relaxing, sky-like environment. It features multiple light colors and a rotation function, making it suitable for various settings such as bedrooms, parties, and special occasions.
Product Overview

This image shows the overall design of the RICTLY Star Projector Night Light in pink, featuring the dome with star and moon cutouts and the control buttons (A, B, C) at the base.
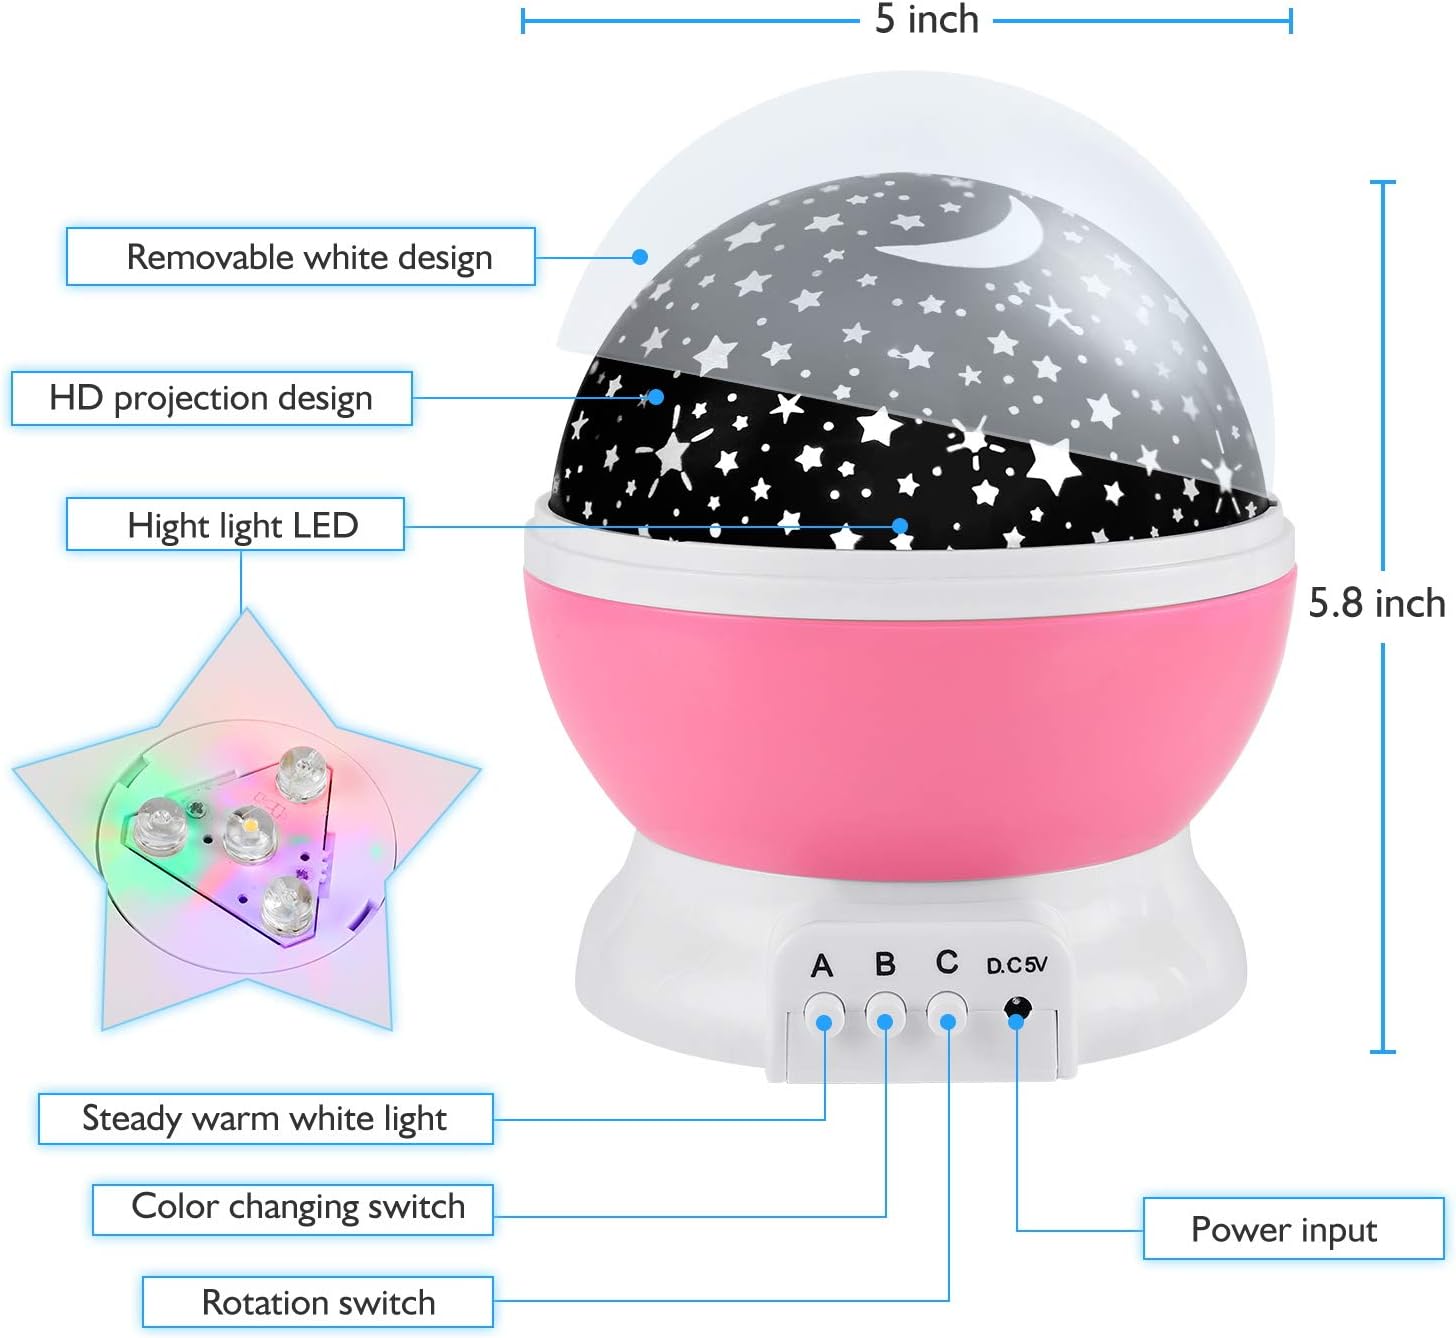
This diagram illustrates the key components of the night light, including the removable white design, HD projection design, high light LED, steady warm white light button, color changing switch, rotation switch, and power input. Dimensions are also indicated: 5 inches width and 5.8 inches height.
Package Contents:
- 1 x Night Light Star Projector
- 1 x USB Cable
- 1 x User Manual
Setup
Power Supply:
The RICTLY Star Projector Night Light can be powered in two ways:
- USB Connection: Connect the provided USB cable to the DC 5V port on the projector and to a USB power source (e.g., computer, USB wall adapter, portable power bank).
- AAA Batteries: Insert 4 x AAA batteries (not included) into the battery compartment located at the bottom of the unit. Ensure correct polarity (+/-) when inserting batteries.
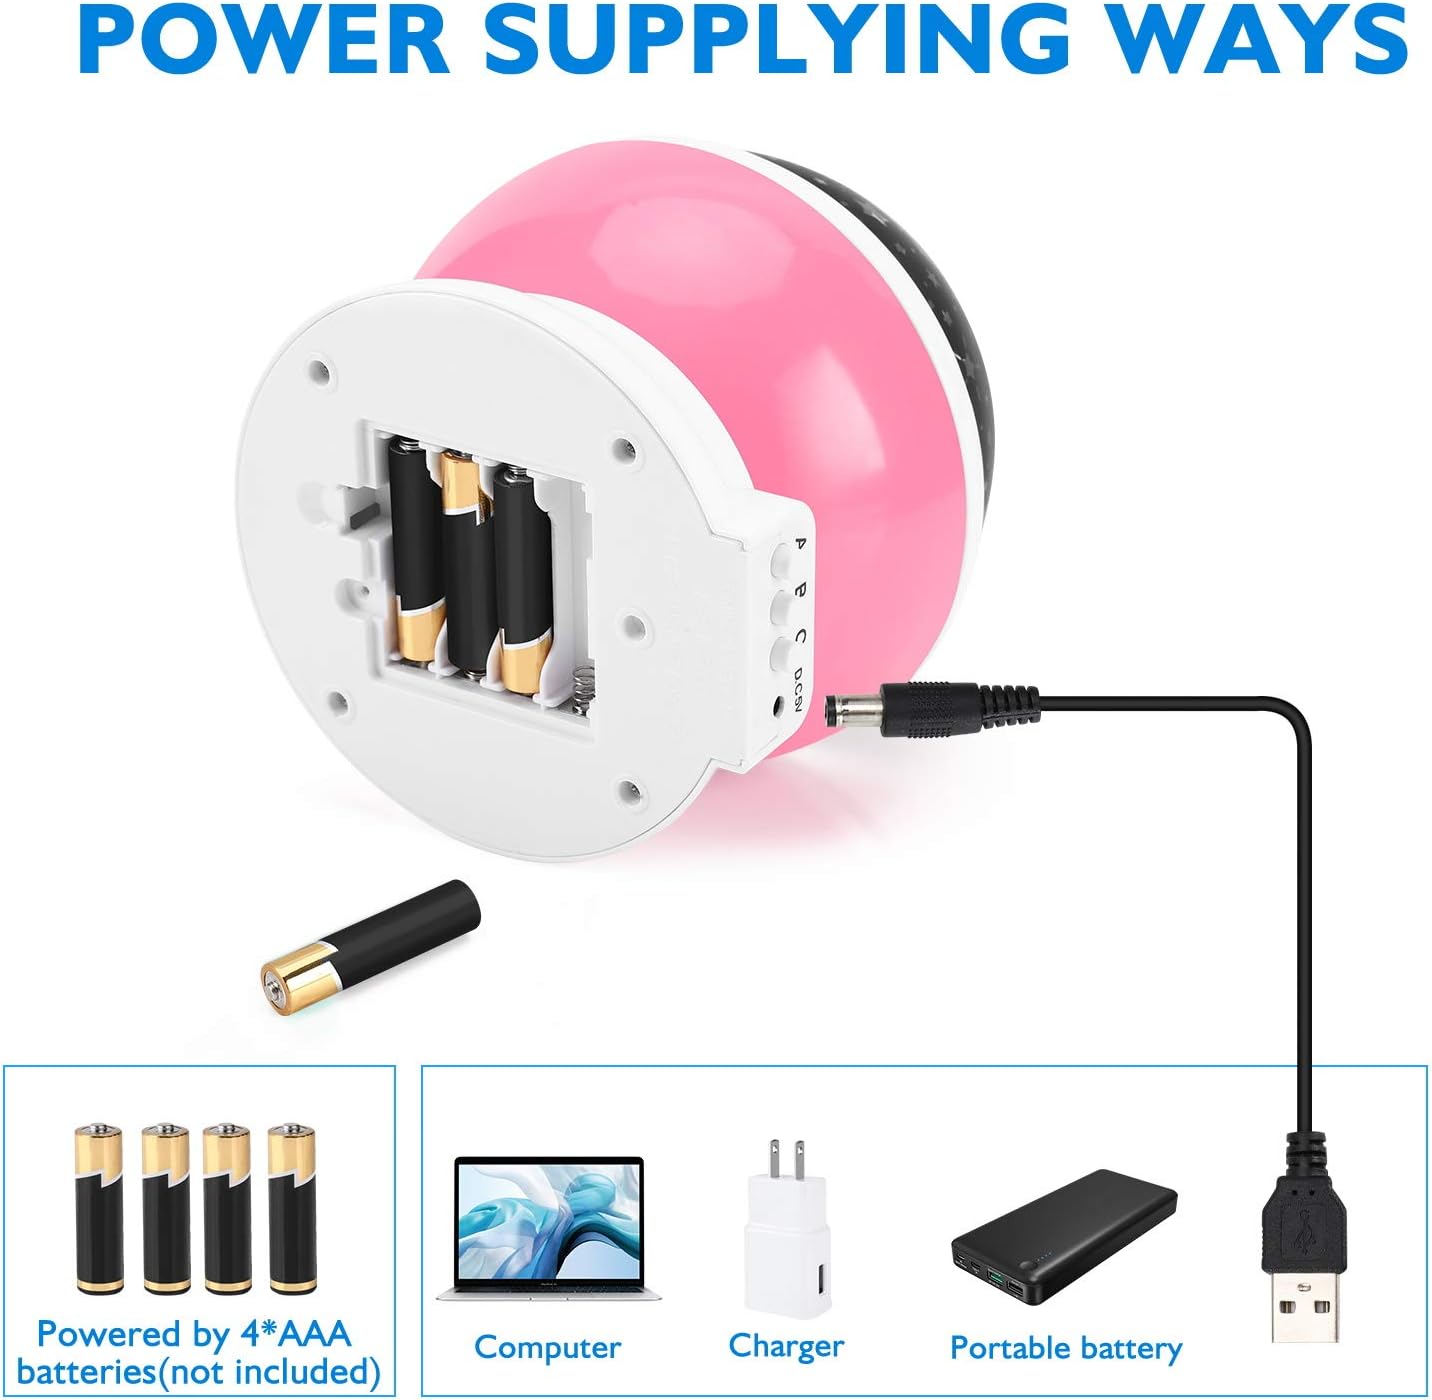
This image illustrates the two methods for powering the device: via 4 AAA batteries (not included) or by connecting the USB cable to a computer, charger, or portable battery.
Projection Mode vs. Night Light Mode:
The projector offers two primary modes:
- Projection Mode: To project stars and moons onto walls or the ceiling, ensure the outer translucent cover (removable white design) is removed.
- Night Light Mode: To use the device as a soft night light, keep the outer translucent cover in place. This diffuses the light, creating a gentle glow.

This image demonstrates the projection mode, where the outer cover is removed, allowing stars and moons to be projected onto the walls and ceiling of a room.

This image illustrates the night light mode, where the inner film is kept on, providing a diffused light effect in various colors.
Operating Instructions
The RICTLY Star Projector Night Light features three control buttons (A, B, C) located at the front base of the unit.
- Button A:
- Press once to turn on the warm white light.
- Press a second time to turn off the warm white light.
- Button B:
- Press repeatedly to cycle through different lighting effects and colors (e.g., single colors, color combinations).
- Continue pressing until all lights are off to turn off the lighting effects.
- Button C:
- Press once to activate the 360-degree rotation function.
- Press again to turn off the rotation.

This image displays a grid of nine different color projection modes, showcasing the variety of single and mixed color options available from the 4 LED bulbs (warm yellow, blue, red, green).

This image illustrates the 360-degree rotation feature of the projector, showing the dynamic movement of the projected stars and moons.
Maintenance
- Cleaning: Wipe the surface of the projector with a soft, dry cloth. Do not use abrasive cleaners or solvents.
- Storage: When not in use for extended periods, store the projector in a cool, dry place. If using batteries, remove them before storage to prevent leakage.
- Handling: Handle the projector with care. Avoid dropping or subjecting it to strong impacts, as this may damage internal components or the plastic casing.
Troubleshooting
| Problem | Possible Cause | Solution |
|---|---|---|
| Unit does not turn on. |
|
|
| Lights are dim or flickering. |
|
|
| Rotation function not working. |
|
|
| Projection is blurry or unclear. |
|
|
Specifications
| Feature | Detail |
|---|---|
| Product Name | Rotatable Star Night Light |
| Model Number | 012-1361 |
| Modes | Night Light or Star Projector |
| Light Colors | 4 LED Bulbs (Warm Yellow, Blue, Red, Green), 9 adjustable projection effects |
| Rotation | 360-degree rotation |
| Product Dimensions | 4.7"D x 4.7"W x 5.3"H (12 x 12 x 13.5 cm) |
| Item Weight | 0.6 lbs (approx. 9.6 ounces / 272g) |
| Material | ABS Plastic |
| Power Supply | 4 x AAA Batteries (not included) or USB DC 5V |
| Light Source Type | LED |
| Wattage | 5 watts |
| Voltage | 6 Volts |
Safety Information
- This product is not a toy. Adult supervision is recommended for young children.
- Do not disassemble or modify the product.
- Keep away from water and high humidity.
- Do not look directly into the LED light source.
- Use only specified power sources (4 x AAA batteries or DC 5V USB).
- Dispose of batteries properly according to local regulations.
Related Documents - 012-1361
 |
Moredig Star Night Light Projector User Manual and Safety Guide Comprehensive user manual for the Moredig Star Night Light Projector (Model 012-1652), covering setup, operation modes, power options, cleaning, safety precautions, and disposal information. |
 |
Snail Aurora Projection Lamp User Manual (Model 012-2402B) User manual for the Snail Aurora Projection Lamp (Model 012-2402B) by ShanTou City XingBao Technology Co., Ltd. Includes setup, operation, specifications, features, and safety information for this Bluetooth-enabled star and nebula projector. |
 |
Malmbergs Evon Pro WiFi/Bluetooth/4G EV Charging Station Installation and User Manual Comprehensive guide for the Malmbergs Evon Pro WiFi/Bluetooth/4G EV charging station, covering safety, installation, technical specifications, operation, and troubleshooting. This manual provides detailed instructions for commercial use. |
 |
Veroboard 2" Mini LED IC Rated Recessed Downlight - Specifications and Performance Detailed specifications, safety information, and light measurement report for the Veroboard 2" Mini LED IC Rated Recessed Downlight. Includes CRI, CCT, lumen output, beam angle, and recommended power supplies. |
 |
MALMBERGS Evon PRO WiFi/Bluetooth/4G EV Charging Station User Manual Detailed user manual for the MALMBERGS Evon PRO WiFi/Bluetooth/4G electric vehicle charging station, covering installation, technical specifications, safety guidelines, network configuration, and troubleshooting. |
 |
Veratron Marine EMPS Pressure Sensor Installation Guide Comprehensive installation instructions for Veratron Marine EMPS pressure sensors, covering safety guidelines, electrical connections, and detailed part number references for marine and automotive applications. |
Ask a question about this manual
Ask about setup, troubleshooting, compatibility, parts, safety, or missing instructions. Manuals+ will review the question and use this page’s manual context to help answer it.