1. Introduction
Thank you for purchasing the PARKVISION AHD 1080P Car Camera. This manual provides detailed instructions for the installation, operation, and maintenance of your new camera. Please read this manual thoroughly before use to ensure proper functionality and to maximize the product's lifespan. Keep this manual for future reference.
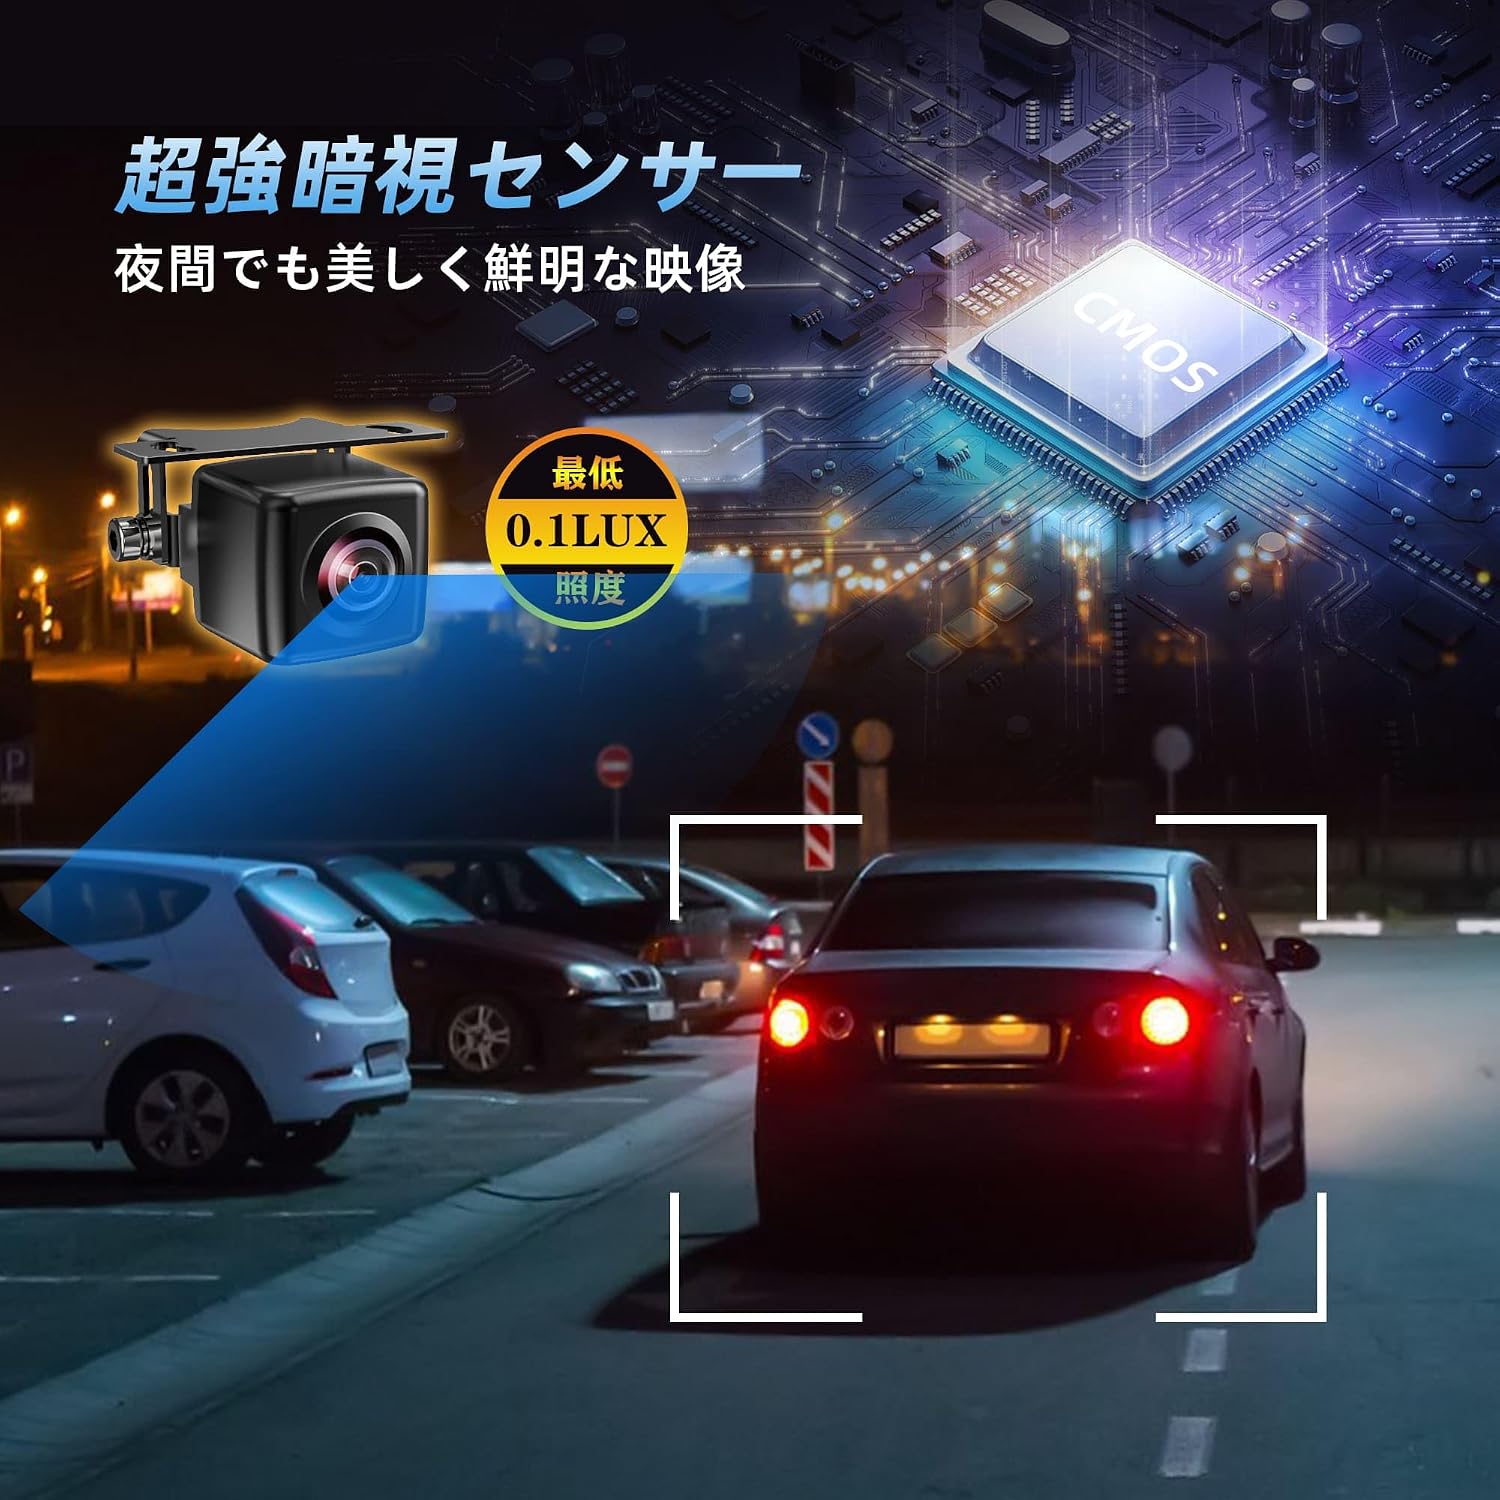
2. Product Features
- High-Resolution 1080P Video & Super Night Vision: Equipped with a new high-sensitivity CMOS sensor and a 6-layer glass lens, this camera delivers clear and sharp 1080P images even in complete darkness with a minimum illumination of 0.01 lux. This design ensures high visibility at night and maintains lens clarity and durability over time.
- Versatile Functionality: This upgraded car camera supports both AHD and CVBS signal inputs, eliminating compatibility concerns. It features a button for easy switching between AHD and CVBS video signals. It also supports normal/mirror image switching, allowing use as both a front and rear camera. Additionally, you can enable or disable parking guide lines, a convenient feature for backing up.
- Clear Image Quality & Automatic Image Correction: The CMOS sensor provides clear images and high image quality. Automatic exposure compensation technology enhances incident light in low-light environments, maintaining good light transmission and sensitivity for excellent color reproduction and optimal night vision. Integrated 3D noise reduction technology further minimizes screen noise for a clean display.
- IP68 Waterproof & Ultra-Compact Design: This proprietary rear camera is smaller than many commercially available backup cameras, ensuring compliance with road vehicle safety standards and suitability for vehicle inspections. Its high IP68 waterproof and dustproof performance means no worries about lens fogging or water intrusion in adverse weather conditions (rain, snow, fog, or road icing).
- Adjustable Camera Angle: The camera includes a 135° adjustable bracket, simplifying installation by allowing angle adjustments even when mounting positions are limited.
3. Package Contents
Verify that all items are present in the package:
- Camera Unit (0.6m cable) x 1
- Power Cord (2.1m) x 1
- RCA Video Cable (8m) x 1
- Mounting Screws x 2
- Instruction Manual x 1
- Wrench x 1

4. Setup
4.1 Mounting the Camera
The camera's ultra-compact design and adjustable bracket allow for flexible mounting. It can be installed as a rear, front, or side camera. Ensure the mounting location provides a clear view and does not obstruct vehicle safety features.
- Rear Camera: Typically mounted above the license plate or on the trunk lid.
- Front Camera: Can be mounted on the front grille or bumper.
- Side Camera: Can be mounted under the side mirrors.

4.2 Wiring Diagram
Connect the camera according to the following steps:
- Connect the camera unit to the power cord.
- Connect the RCA video cable to the camera's video output.
- Connect the other end of the RCA video cable to your monitor or navigation system's video input.
- Connect the red wire of the power cord to the reverse lamp (for rear camera functionality) or ACC power (for continuous power, e.g., front/side camera).
- Connect the black wire of the power cord to a vehicle ground point.
5. Operating Instructions
5.1 AHD/CVBS Signal Switching
The camera supports both AHD and CVBS video formats. To switch between formats, locate the small button or wire loop near the camera connector. Consult the included instruction manual for the specific method (e.g., pressing a button or cutting a wire loop) to change the video signal output.

5.2 Image Orientation (Normal/Mirror)
The camera can display images in either normal view (for front/side cameras) or mirror view (for rear cameras). This setting is typically controlled by cutting a specific wire loop on the camera cable. Refer to the detailed instructions in your package for the correct wire to cut.
5.3 Parking Guide Lines
The camera can display dynamic or static parking guide lines on the screen to assist with parking. This feature is usually toggled on or off by cutting another specific wire loop. Consult your manual for the exact wire and procedure.
5.4 Night Vision Performance
The camera features super night vision capabilities, providing clear images even in very low light conditions. No special operation is required; the camera automatically adjusts to ambient light.
6. Maintenance
- Cleaning: Regularly clean the camera lens with a soft, damp cloth to ensure optimal image clarity. Avoid abrasive cleaners or solvents.
- Waterproof & Dustproof: The camera is IP68 rated, meaning it is highly resistant to water and dust. However, avoid directing high-pressure water jets directly at the camera for extended periods, such as during car washes.
- Cable Inspection: Periodically check all cables and connections for any signs of wear, damage, or corrosion. Ensure connections remain secure.
- Environmental Conditions: While designed for various weather conditions, extreme temperatures or prolonged direct sunlight exposure may affect performance over time.

7. Troubleshooting
If you encounter issues with your camera, please refer to the following common problems and solutions:
| Problem | Possible Cause | Solution |
|---|---|---|
| No image on monitor | Loose cable connection, incorrect power supply, incorrect video signal format (AHD/CVBS) | Check all cable connections. Ensure power is supplied correctly (12V-24V). Verify the camera's video output format matches your monitor's input. |
| Image is blurry or unclear | Dirty lens, protective film still on lens, incorrect focus (if adjustable), low light conditions | Clean the lens. Remove any protective film. Ensure sufficient lighting. |
| Image is inverted or reversed | Incorrect image orientation setting (normal/mirror) | Adjust the image orientation by cutting the appropriate wire loop as per the manual. |
| No parking guide lines | Guide line feature is disabled | Enable the guide line feature by cutting the appropriate wire loop as per the manual. |
If the problem persists after trying these solutions, please contact PARKVISION customer support.
8. Specifications
| Feature | Specification |
|---|---|
| Brand | PARKVISION |
| Model Number | MP126S |
| Product Dimensions (L x W x H) | 8 x 5 x 17 cm |
| Voltage | 12-24 Volts |
| Optical Sensor Technology | CMOS |
| Optical Sensor Size | 1/3 inch |
| Lens Type | Wide Angle |
| Actual Angle of View | 140 degrees |
| Video Pixels | 1080p |
| Minimum Illumination | 0.01 Lux |
| Waterproof/Dustproof Rating | IP68 |
| Connector Type | RCA |
| UPC | 726597469159 |
9. Warranty and Support
9.1 Warranty Information
This PARKVISION product comes with a 1-year warranty from the date of purchase. This warranty covers manufacturing defects and malfunctions under normal use. It does not cover damage caused by improper installation, misuse, accidents, or unauthorized modifications.
9.2 Customer Support
Should you encounter any issues with your product or require assistance, please do not hesitate to contact PARKVISION customer support. You can typically reach us through your purchase platform:
- Go to 'Account Service'
- Select 'Order History'
- Find your order from 'Seller: PARKVISION'
- Click on 'Ask a Question'
Our support team aims to provide a solution within 24 hours.