1. Introduction
The DIYmalls ESP32-2424S012C-I is a compact development board integrating an ESP32-C3 microcontroller with a 1.28-inch round IPS capacitive touchscreen. This module features a 240x240 resolution TFT LCD, making it suitable for various embedded projects requiring a small, interactive display. It is designed for programming using environments such as the Arduino IDE or ESP32 flash tools.

Figure 1: Front view of the DIYmalls ESP32-2424S012C-I, showcasing its 1.28-inch round IPS capacitive touchscreen.
2. Package Contents
Upon receiving your DIYmalls ESP32-2424S012C-I, please verify that all the following items are included:
- 1 x 1.28-inch Round Display ESP32-C3 Module (ESP32-2424S012C-I)
- 1 x 1.25mm 2-pin cable
- 1 x 1.0mm 4-pin to female Dupont wire
- 1 x 1.0mm 4-pin to male Dupont wire
Note: A USB cable is not included in the package.
3. Product Features and Specifications
Key Features:
- Integrated ESP32-C3-MINI-1U development board
- 1.28-inch IPS round display with 240x240 resolution
- Capacitive touchscreen for interactive applications
- Supports programming via Arduino IDE or ESP32 flash tools
- Built-in Wi-Fi and Bluetooth connectivity
Technical Specifications:
| Specification | Value |
|---|---|
| Model | ESP32-2424S012C-I |
| Display Size | 1.28 inches |
| Display Type | IPS Round TFT LCD |
| Resolution | 240x240 pixels |
| Touch Type | Capacitive |
| Microcontroller | ESP32-C3-MINI-1U |
| Operating Voltage | 5V |
| RAM Memory | 400 KB |
| Flash Memory | 4 MB |
| Processor Speed | 160 MHz |
| Connectivity | USB, 802.11b Wi-Fi, Bluetooth |

Figure 2: The 1.28-inch round display showing a digital watch face with activity tracking. Dimensions of the module are approximately 37.00mm width and 38.50mm height.
4. Setup and Connection
Follow these steps to set up and connect your ESP32-2424S012C-I module:
- Power Supply: It is recommended to power the module via a 5V power adapter rather than directly from a PC USB port for stable operation.
- USB Connection: Connect the module to your computer using a Type-C to USB-A 2.0 cable. The module does not support Type-C to Type-C cables for programming or power.
- Component Identification: Familiarize yourself with the key components on the board as shown in Figure 3. This includes the Type-C port, reset button, boot button, ESP32-C3-MINI-1U module, and various connectors.
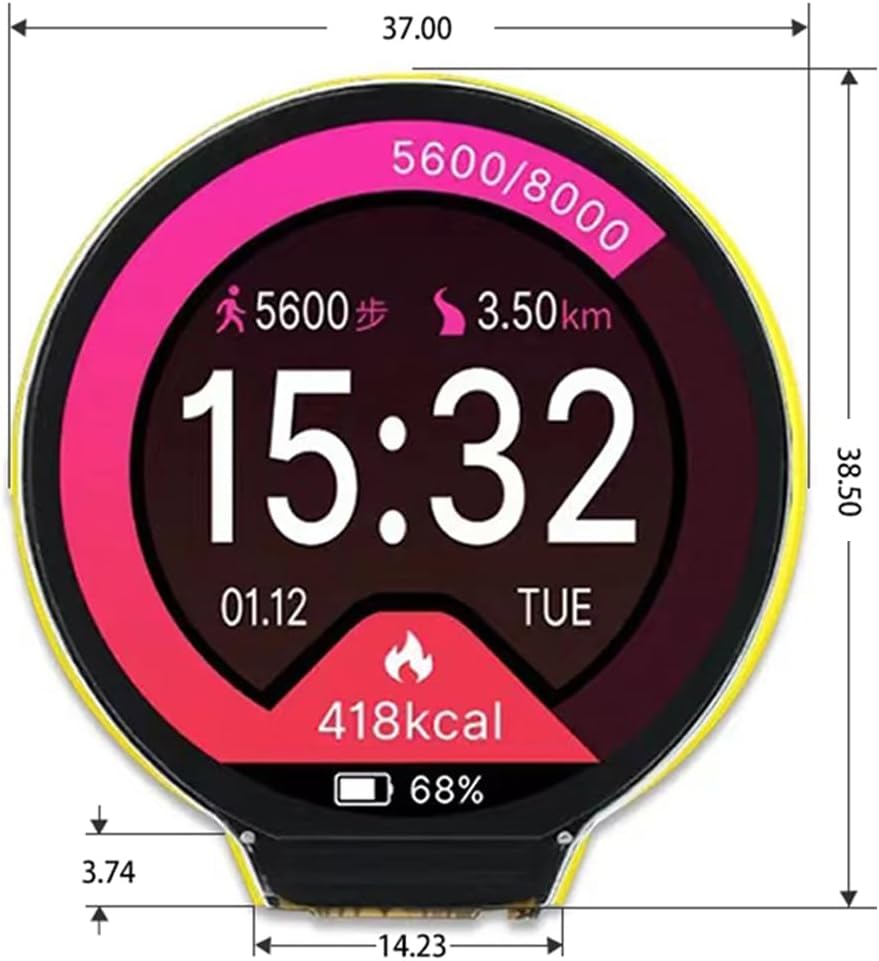
Figure 3: Detailed view of the ESP32-2424S012C-I development board, highlighting the ESP32-C3-MINI-1U module, Type-C USB port, reset and boot buttons, 1.0mm 4-pin connector, and 1.25mm 2-pin battery connector.
Connection Demonstration:
Video 1: Overview video of the DIYmalls 1.28-inch round display ESP32-C3 capacitive touchscreen, highlighting its physical appearance and basic functionality.
5. Programming and Operation
The ESP32-2424S012C-I module can be programmed using the Arduino IDE or ESP32 flash tools. Ensure you have the correct board definitions and libraries installed for the ESP32-C3.
- Software Setup: Install the Arduino IDE or your preferred ESP32 development environment. Configure it for the ESP32-C3 board.
- Code Upload: Upload your code to the module via the Type-C USB port. Refer to Figure 4 for a visual guide on using the Arduino IDE or ESP32 Download Tool.
- Display Interaction: Once programmed, the capacitive touchscreen allows for interactive applications. Examples include displaying time, weather information, or custom user interfaces.
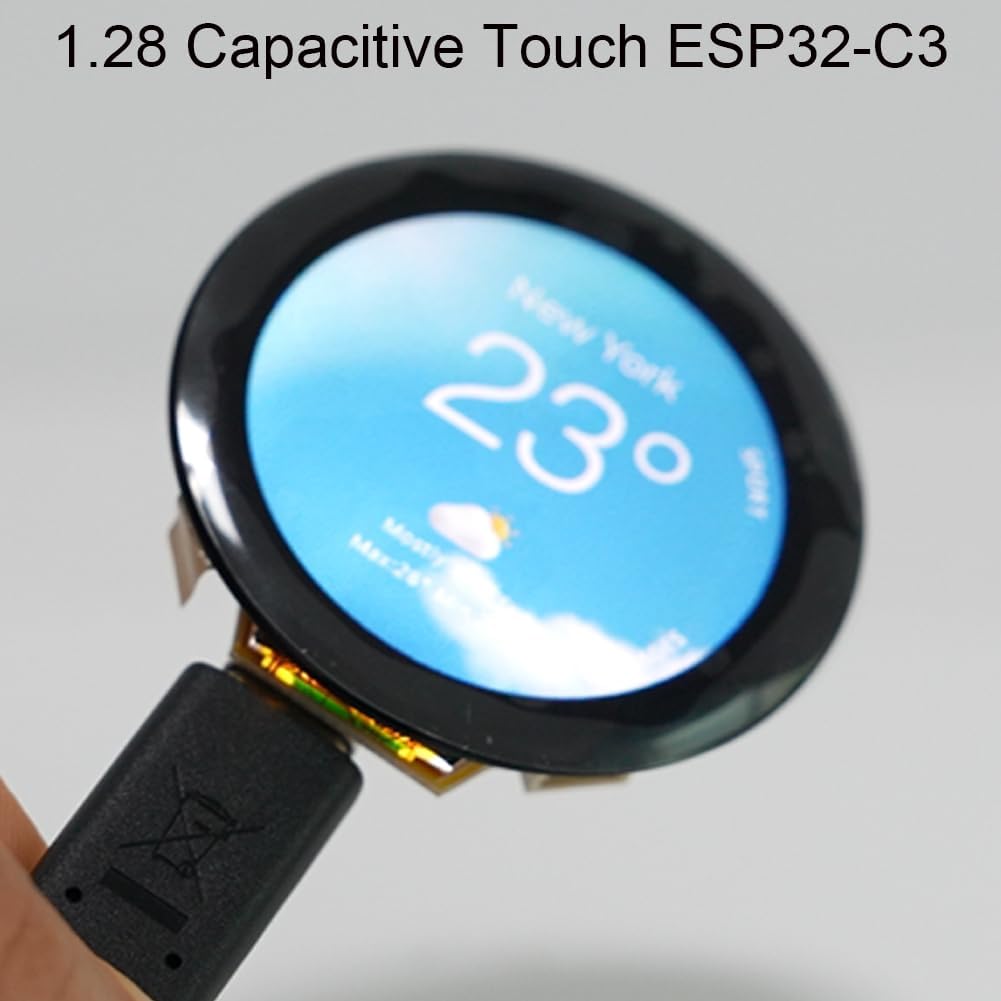
Figure 4: Illustration of the process for uploading code to the ESP32-2424S012C-I using either the Arduino IDE or the ESP32 Flash Download Tool.
Display Functionality Demonstrations:
Video 2: Demonstrates interactive capabilities, showcasing various watch faces and touch responsiveness.
Video 3: Short clip highlighting the visual clarity and compact design of the display.
Video 4: Brief demonstration focusing on the display quality and form factor.

Figure 5: The 1.28-inch capacitive touchscreen displaying a weather application interface.
6. Maintenance
To ensure the longevity and optimal performance of your ESP32-2424S012C-I module, follow these maintenance guidelines:
- Cleaning: Use a soft, dry, anti-static cloth to gently clean the display surface. Avoid abrasive materials or harsh chemicals.
- Storage: Store the module in a cool, dry environment, away from direct sunlight, extreme temperatures, and high humidity.
- Handling: Handle the board by its edges to avoid touching sensitive components or the display surface.
- Power Management: Always ensure the correct 5V power supply is used. Incorrect voltage can damage the module.
7. Troubleshooting
If you encounter issues with your ESP32-2424S012C-I module, consider the following troubleshooting steps:
- Module Not Powering On:
- Ensure the power source is providing a stable 5V.
- Verify that the USB cable is a Type-C to USB-A 2.0. Type-C to Type-C cables are not supported for power or data transfer.
- Check the polarity of any connected battery or external power wires. Some users have reported issues with supplied cables having reversed polarity, which can damage the board if not corrected.
- Programming Errors:
- Confirm that the correct ESP32-C3 board is selected in your IDE.
- Ensure all necessary libraries are installed and updated.
- Critical Note on GPIOs: Be aware that GPIO6 and GPIO7 on the ESP32-C3 are typically reserved for flash access. If your custom code attempts to use these pins for display SPI or other functions, it may lead to crashes or instability. Review your pin assignments carefully.
- Display Not Responding:
- Check all connections to the display.
- Verify that the display initialization code in your program is correct for the GC9A01 driver (common for this display type).
- Intermittent Operation:
- Powering the module directly from a PC USB port might lead to insufficient power, especially during peak operations. Use a dedicated 5V power adapter if experiencing instability.
8. Warranty and Support
The DIYmalls ESP32-2424S012C-I module comes with a 30-day warranty from the date of purchase.
For technical support, inquiries, or to report any issues, please contact DIYmalls directly. You can typically find a 'Sold by DIYmalls' link under the 'Buy Now' section on the product page. Clicking this link will lead you to a page where you can select 'Ask a question' to reach our support team.