1. Setup and Installation
1.1 Unpacking
Carefully remove all packaging materials from the washing machine. Ensure no parts are left inside the drum or attached to the exterior. Keep packaging materials away from children.
1.2 Positioning and Leveling
Place the washing machine on a firm, level surface. Adjust the feet to ensure the appliance is perfectly level and stable. Proper leveling reduces vibration and noise during operation.
1.3 Water Connection
Connect the water inlet hose to a cold water tap. Ensure the connection is secure to prevent leaks. The appliance includes an AquaStop hose for enhanced safety.

Image: AquaStop Hose Connection. This image shows the AquaStop hose connected to the rear of the washing machine, designed to automatically cut off water supply in case of a leak, preventing water damage.
Connect the drain hose to a suitable drain pipe or sink, ensuring it is securely fixed to prevent displacement during draining.
1.4 Electrical Connection
Plug the washing machine into a grounded electrical outlet. Ensure the voltage matches the appliance's requirements (230 Volt). Do not use extension cords or adapters.
1.5 Initial Use
Before the first wash with laundry, run an empty cycle at 60°C with a small amount of detergent to clean the drum and remove any manufacturing residues.
2. Operating Instructions
2.1 Control Panel Overview
The washing machine features a touch control panel and an LED display for easy program selection and monitoring.

Image: Control Panel. This image provides a detailed view of the washing machine's control panel, showing the program selection dial, touch buttons, and the LED display for cycle information.
2.2 Loading Laundry
Open the door and load laundry into the drum. Do not overload the machine; the maximum capacity is 10 kg. Close the door firmly.
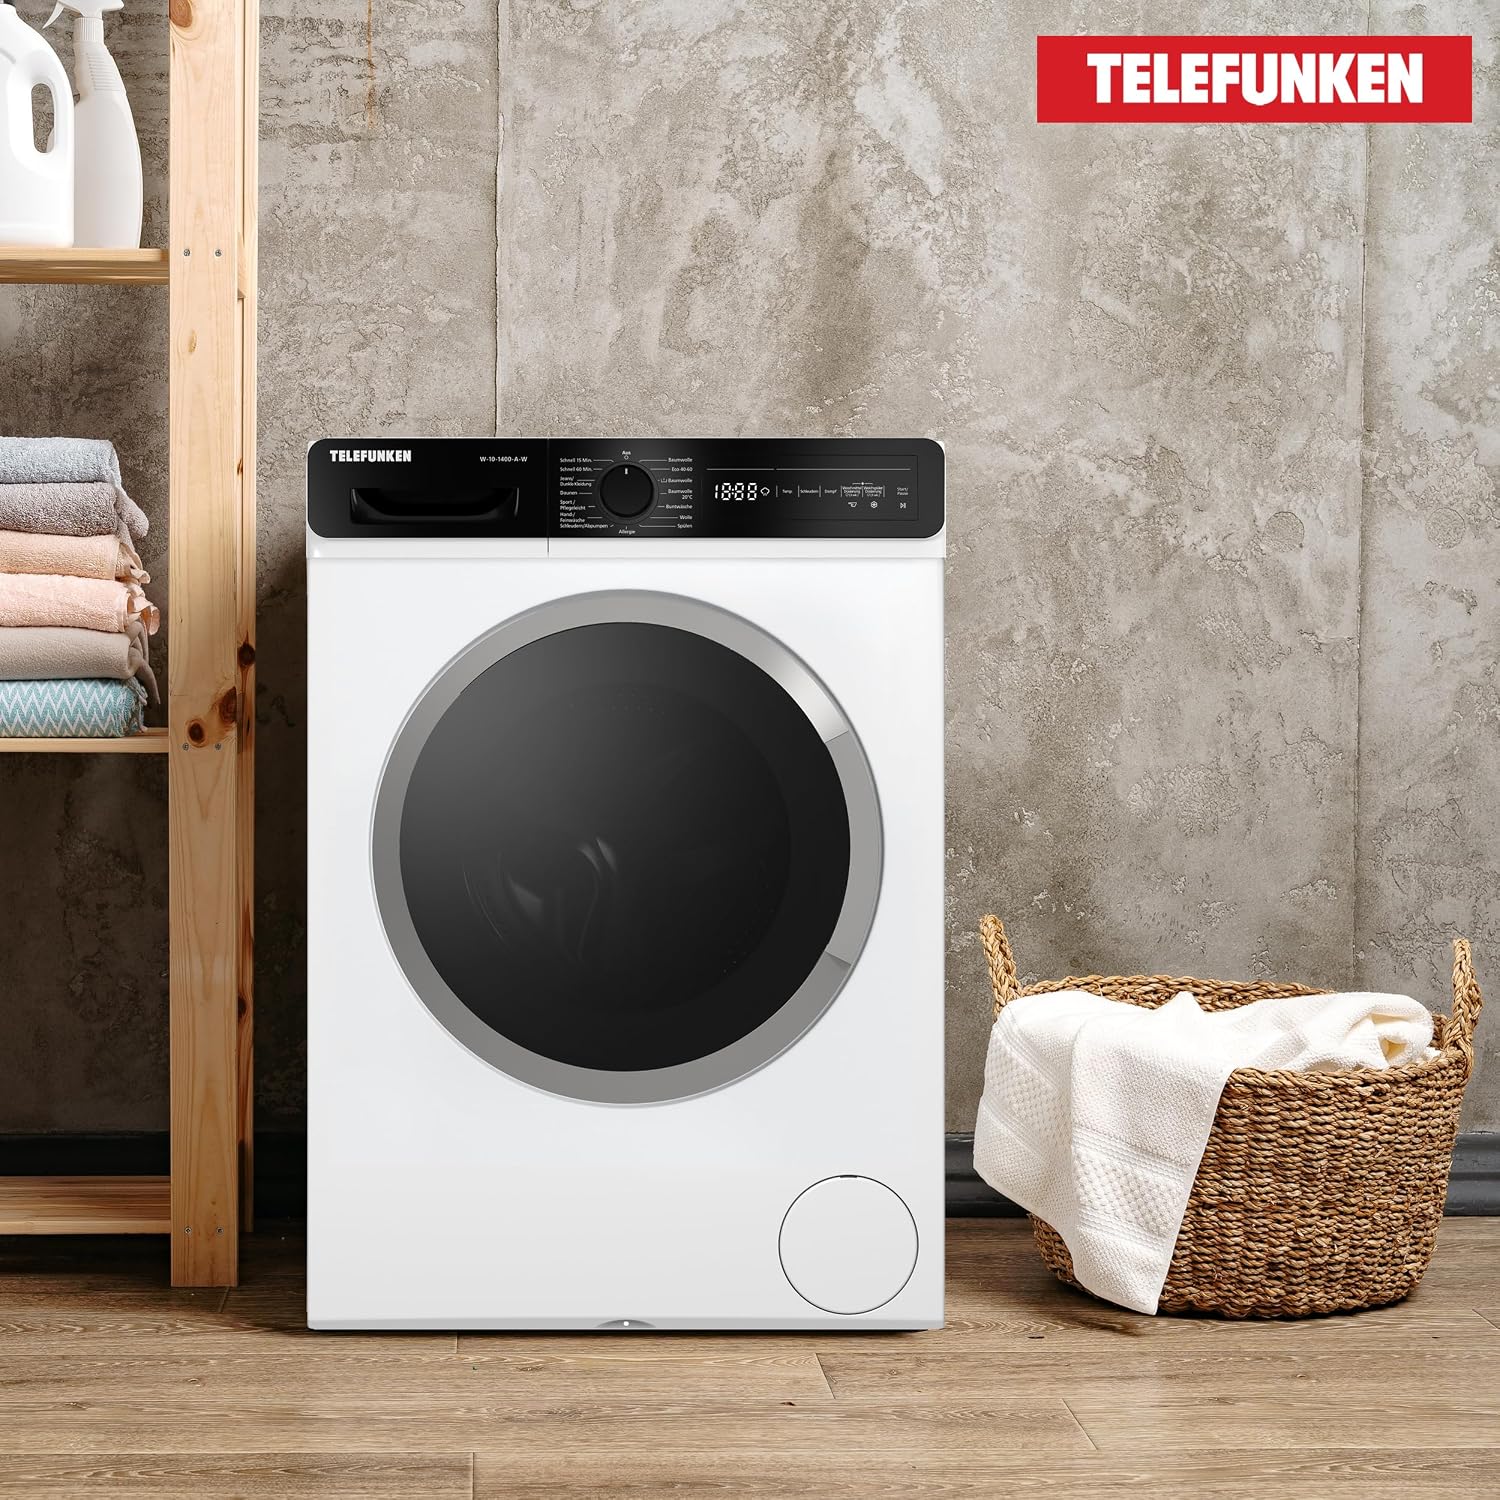
Image: Front View of Washing Machine. This image displays the Telefunken W-10-1400-A-W washing machine, highlighting its front-loading design and overall appearance.
2.3 Detergent and Softener Dispenser
The washing machine features an automatic dosing function. Add liquid detergent and fabric softener to the designated compartments. The machine will automatically dispense the correct amount based on the load.

Image: Automatic Dosing System. This image shows a close-up of the detergent drawer with two compartments for automatic dosing, ensuring precise detergent usage for optimal cleaning.
2.4 Program Selection
Turn the program dial or use the touch controls to select one of the 15 available programs:
- Eco 40 – 60 °C
- Pre-wash Cotton
- Cotton 90 °C
- Cotton 20 °C
- Cotton 60 °C
- Easy Care (Synthetic)
- Wool
- Wash (General)
- Allergy
- Spin
- Hand / Delicate Wash
- Blouse / Shirt
- Quick 60 minutes
- Quick 15 minutes
- Quick 12 minutes
2.5 Special Functions
Utilize additional features for enhanced washing results:
- Steam Function: Provides deep cleaning, removes stubborn stains and odors, has an antibacterial effect, and reduces wrinkles.

Image: Steam Function Illustration. This graphic illustrates how steam penetrates fabric fibers, highlighting the antibacterial and wrinkle-reducing benefits of the steam function.
- Delay Start: Set a specific time for the wash cycle to begin.
- Child Safety Lock: Prevents accidental changes to settings during operation.
- Anti-Vibration Body: Designed to minimize noise and vibration.
- Delicate Drum: The stainless steel drum is designed to treat fabrics gently, reducing friction and protecting delicate items.

Image: Stainless Steel Delicate Drum. A close-up view of the washing machine's stainless steel drum, showcasing its smooth design optimized for gentle fabric care.
- Inverter Motor: Ensures quiet and efficient operation, adjusting performance to the load and extending appliance life.

Image: Inverter Motor Diagram. This diagram shows the internal components of the inverter motor, illustrating its advanced design for quiet and energy-efficient performance.
2.6 Starting a Cycle
After selecting the program and any desired options, press the Start/Pause button to begin the wash cycle. The LED display will show the remaining time.
3. Maintenance
3.1 Cleaning the Drum
Regularly run a maintenance wash (e.g., a hot cycle with no laundry and a descaling agent) to keep the drum clean and free of residue.
3.2 Cleaning the Detergent Dispenser
Remove the detergent dispenser drawer and rinse it under warm water to remove any detergent or softener buildup. Clean the housing of the dispenser with a brush.
3.3 Cleaning the Filter
Locate the drain pump filter, usually at the bottom front of the machine. Open the cover, place a shallow container underneath to catch water, and carefully unscrew the filter. Clean any lint or debris from the filter and its housing before reassembling.
3.4 Exterior Cleaning
Wipe the exterior of the washing machine with a soft, damp cloth. Do not use abrasive cleaners or solvents.
4. Troubleshooting
Before contacting service, review the following common issues and solutions:
- Machine does not start: Check if the power cord is plugged in, the door is closed properly, and the start button has been pressed.
- No water intake: Ensure the water tap is open and the water inlet hose is not kinked or blocked.
- Water not draining: Check the drain hose for kinks or blockages. Clean the drain pump filter.
- Excessive vibration/noise: Ensure the machine is level and all transport bolts have been removed. Check for unbalanced loads.
- Detergent residue: Ensure the detergent dispenser is clean and not blocked. Use the correct amount of detergent.
- Error codes: If an error code appears on the LED display, consult the full user manual (included components) for specific instructions or contact customer support.
5. Specifications
| Feature | Value |
|---|---|
| Model Name | W-10-1400-A-W |
| Brand | Telefunken |
| Capacity | 10 kg |
| Maximum Spin Speed | 1400 RPM |
| Number of Programs | 15 |
| Product Dimensions (D x W x H) | 58.2D x 59.7W x 84.5H cm |
| Product Weight | 73.5 kg |
| Voltage | 230 Volt |
| Noise Level (Spin) | 75 dB |
| Drum Material | Stainless Steel |
| Installation Type | Freestanding |
| Control Type | Touch |
| Display Type | LED |
| Key Features | Delicate drum, Hygiene Steam, Auto Dose, AquaStop, Inverter Motor |
| Included Components | User manual, Water inlet hose, Washing machine |
5.1 Dimensions Overview

Image: Product Dimensions. This diagram illustrates the height (84.5 cm) and width (59.7 cm) of the washing machine, providing essential measurements for installation planning.
5.2 Energy Label and Product Data Sheet
For detailed energy efficiency information and the official product data sheet, please refer to the following link:
View Energy Label and Product Data Sheet (EPREL Database)

Image: EU Energy Label. This image displays the EU Energy Label for the Telefunken W-10-1400-A-W, indicating its energy efficiency class (A), energy consumption (51 kWh/100 cycles), water consumption (52 L/cycle), capacity (10 kg), and noise level (75 dB).

Image: Product Data Sheet. This image shows the detailed product data sheet, providing comprehensive technical specifications and compliance information for the washing machine.
6. Warranty & Support
6.1 Warranty Information
This appliance comes with a standard manufacturer's warranty. Please refer to the warranty card included with your product for specific terms, conditions, and duration. Retain your proof of purchase for warranty claims.
6.2 Customer Support
For technical assistance, spare parts, or service requests, please contact Telefunken customer support. Contact details can typically be found in the included user manual or on the official Telefunken website.