1. Introduction
This manual provides essential information for the safe and correct assembly, operation, and maintenance of your vidaXL Aviary. Please read all instructions carefully before beginning assembly or use. Keep this manual for future reference.
The vidaXL Aviary is designed to provide a secure and spacious environment for birds and other small animals such as rabbits, ducks, chickens, or geese. Its robust galvanized steel construction ensures durability for outdoor use.
2. Safety Information
- Adult Assembly Required: This product requires assembly by at least two adults.
- Protective Gear: Wear heavy-duty work gloves and eye protection during assembly, especially when handling mesh panels, as edges can be sharp.
- Heavy Components: Some parts are heavy. Lift with care to prevent injury.
- Small Parts: Keep all small parts, such as screws, out of reach of children and pets.
- Stable Surface: Assemble the aviary on a flat, stable, and level surface.
- Secure Installation: For outdoor use, it is highly recommended to anchor the aviary to the ground to prevent movement or tipping due to wind or other external forces. Anchoring hardware is not included and must be sourced separately.
- Ventilation: Ensure adequate ventilation for the animals housed within the aviary.
3. Package Contents
Before beginning assembly, verify that all components listed below are present and undamaged. If any parts are missing or damaged, do not proceed with assembly and contact customer support.
- Galvanized Steel Frame Sections (various lengths and shapes)
- Mesh Panels (rolls or pre-cut sheets)
- Door Frame and Hinges
- Lockable Ratchet System
- Assembly Hardware (screws, nuts, washers - approximately 1000+ pieces)
- Instruction Manual
Note: Some mesh panels may require cutting to size during assembly. Sufficient mesh is provided to account for potential cutting errors.
4. Setup and Assembly
Assembly of this aviary is a multi-step process that requires patience and attention to detail. It is highly recommended to have a drill with a 2mm bit available, as many screw holes may not be pre-drilled.
- Prepare the Area: Choose a flat, level, and stable outdoor location for the aviary. Clear any debris or obstacles from the area.
- Unpack and Sort Components: Carefully unpack all boxes and sort the steel frame sections, mesh panels, and hardware. Refer to the included parts diagram to identify each component.
- Assemble Base Frame: Begin by assembling the rectangular base frame sections. Connect the horizontal and vertical steel bars using the provided screws. Ensure all connections are secure but do not fully tighten screws until the entire section is aligned.
- Construct Wall Frames: Assemble the individual wall frame sections. These typically consist of 2x2 meter elements. Connect them according to the diagrams.
- Attach Mesh Panels to Wall Frames: This step requires precision. Lay a wall frame flat. Carefully unroll and position the mesh over the frame. Using the provided screws, secure the mesh to the frame. You may need to drill pilot holes (2mm) for each screw if they are not pre-drilled. Ensure the mesh is taut and evenly distributed.

Image: Front view of the assembled aviary, highlighting the mesh panels.
- Assemble Aviary Walls: Once all wall sections with mesh are prepared, connect them vertically to form the aviary's perimeter. Ensure the sections are properly aligned and secured.
- Install Door: Assemble the door frame and attach the hinges to the designated opening in one of the wall sections. Install the lockable ratchet system on the door and frame to ensure secure closure.

Image: Aviary with the door open, demonstrating access.

Image: Detail of the secure lockable ratchet system.
- Assemble Roof Frame and Mesh: Construct the roof frame sections similar to the walls. Attach the mesh panels to the roof frame. For larger aviaries, the roof mesh may need to be secured with wire ties or additional profiles if not designed for full screw attachment.
- Attach Roof: Carefully lift and secure the assembled roof section onto the top of the aviary walls. Ensure all connections are tight and the roof is stable.
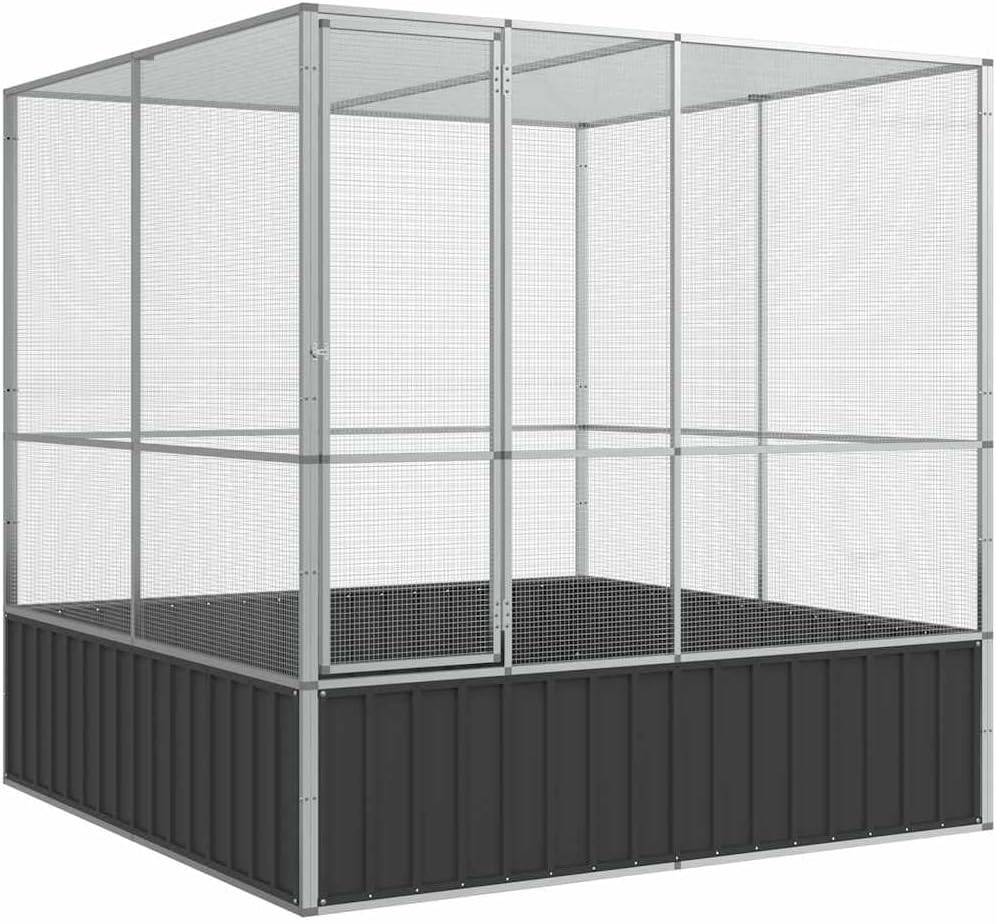
Image: The fully assembled vidaXL Aviary.
- Final Tightening and Inspection: Once all sections are assembled, go back and fully tighten all screws. Inspect the entire structure for stability, ensuring all mesh panels are securely attached and there are no gaps or sharp edges that could harm animals.
- Ground Anchoring (Recommended): To enhance stability and prevent movement, especially in windy conditions, anchor the aviary to the ground using appropriate ground anchors or by securing the base to a concrete foundation. This is crucial as the aviary does not include built-in ground anchoring points.
5. Operating the Aviary
Once assembled, the aviary is ready for use. Ensure the environment inside is suitable for the animals you intend to house. Provide appropriate perches, feeders, waterers, and shelter as needed for birds, or bedding and enrichment for other small animals.
Regularly check the door and locking mechanism to ensure it functions correctly and remains secure, preventing escapes.

Image: Aviary in an outdoor setting, ready for use.
6. Maintenance
- Regular Cleaning: Clean the aviary regularly to maintain hygiene for the animals. This includes removing waste, cleaning feeders and waterers, and wiping down surfaces.
- Mesh Inspection: Periodically inspect the mesh for any signs of damage, rust, or loose connections. Repair or replace damaged sections promptly to ensure the safety and security of the animals.
- Frame Inspection: Check the steel frame for any signs of corrosion or structural weakness. The galvanized steel is designed for durability, but extreme weather conditions may cause wear over time.
- Door and Lock: Lubricate hinges and the locking mechanism as needed to ensure smooth operation.
- Ground Anchoring: If anchored, regularly check the ground anchors for stability, especially after strong winds or heavy rain.
7. Troubleshooting
| Problem | Possible Cause | Solution |
|---|---|---|
| Missing parts upon delivery | Shipping error or incomplete packaging. | Do not proceed with assembly. Contact vidaXL customer support immediately with your order details. |
| Difficulty assembling frame sections | Misalignment of parts; screws not fully tightened. | Ensure parts are correctly oriented according to the diagrams. Loosen screws slightly on connected parts to allow for adjustment, then re-tighten once aligned. |
| Mesh not fitting or difficult to attach | Incorrect cutting; insufficient tension; lack of pilot holes. | Double-check measurements before cutting mesh. Ensure mesh is pulled taut. Drill 2mm pilot holes for each screw if not pre-drilled. Wear protective gloves. |
| Aviary feels unstable or wobbly | Not all screws fully tightened; uneven ground; lack of ground anchoring. | Ensure all screws are fully tightened. Relocate to a more level surface or use shims to level the base. Install ground anchors for added stability. |
8. Specifications
- Model: 172584
- Material: Galvanized steel, steel
- Color: Silver and Anthracite
- Overall Dimensions (W x D x H): 211 x 207 x 212 cm (83.1 x 81.5 x 83.5 inches)
- Gate Dimensions (W x H): 48.5 x 152.4 cm (19.1 x 60 inches)
- Grid Dimensions (L x W): 1 x 1 cm (0.39 x 0.39 inches)
- Assembly Required: Yes

Image: Dimensional diagram of the aviary.
9. Warranty and Support
For warranty information, product support, or to order replacement parts, please contact vidaXL customer service through the retailer where you purchased the product or visit the official vidaXL website. Please have your model number (172584) and purchase details ready when contacting support.


