1. Introduction
This manual provides comprehensive instructions for the setup, operation, and maintenance of your Generic Multisport Electronic Scoreboard with 24-Second Shot Clock. This digital scoreboard system is designed for indoor use across various sports, including basketball, baseball, football, and tennis, offering synchronized scoring and timing functionalities.
Please read this manual thoroughly before using the product to ensure correct operation and to maximize its lifespan.
2. Product Overview
2.1 Key Features
- Multisport Functionality: Suitable for basketball, baseball, football, tennis, volleyball, badminton, and ping pong.
- Synchronized 24-Second Shot Clocks: Two wireless shot clocks automatically synchronize with the main scoreboard's game timer.
- Remote Control Operation: Control the scoreboard and shot clocks separately or together with a remote control, offering a valid control distance of up to 50 meters with 360° coverage.
- Audible Signal: Features a loud sound signal when the countdown reaches 00 seconds.
- Flexible Installation: Includes tabletop brackets and wall-mount holes for versatile placement.
- Durable Construction: Features an aluminum alloy frame and high-quality LED display.
2.2 Components
The complete system includes the main scoreboard, two 24-second shot clocks, tripods for mounting, a remote control, power adapter, and user manual.
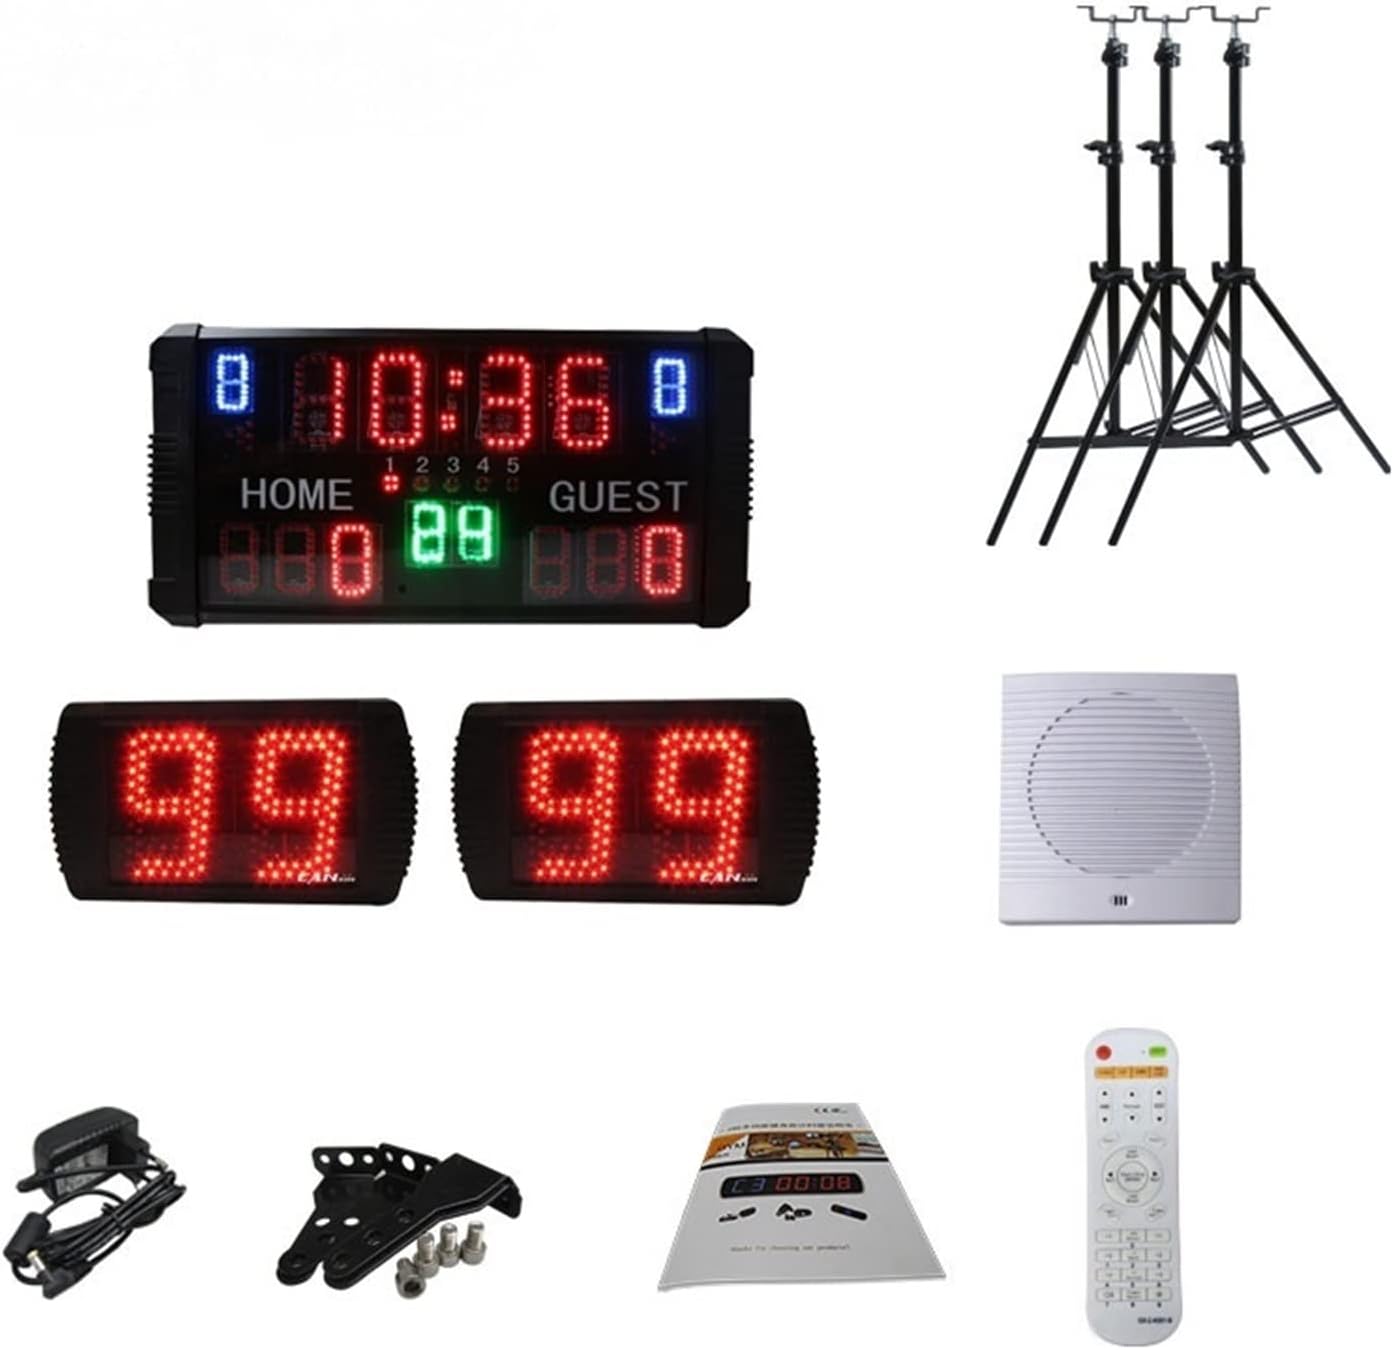
Figure 2.2.1: All included components. This image displays the main scoreboard, two 24-second shot clocks, three tripods, a power adapter, a remote control, and the instruction manual.

Figure 2.2.2: Assembled system. The main scoreboard is centrally positioned on a tripod, flanked by two 24-second shot clocks, each on its own tripod, demonstrating a typical setup.
3. Setup Instructions
- Unpack Components: Carefully remove all items from the packaging and verify that all components listed in Section 2.2 are present.
- Assemble Tripods: Extend and secure the legs of the three tripods. Ensure they are stable on a flat surface.
- Mount Scoreboard and Shot Clocks:
- Attach the main scoreboard to one tripod using the provided mounting hardware.
- Attach each 24-second shot clock to the remaining two tripods.
- Alternatively, for wall mounting, use the wall-mount holes on the back of the scoreboard and shot clocks. Ensure appropriate wall anchors and screws are used for secure installation.
- Positioning: Place the main scoreboard centrally and the two shot clocks on either side of the playing area, ensuring clear visibility for all participants and spectators.
- Power Connection: Connect the power adapter to the main scoreboard and plug it into a standard AC 110V-260V outlet. The shot clocks are wireless and will synchronize automatically.

Figure 3.1: Scoreboard and Shot Clock Dimensions. The main scoreboard measures 50cm x 25.5cm x 5.5cm. Each shot clock measures 24cm x 16cm x 4cm. These dimensions are crucial for planning installation space.
4. Operating Instructions
4.1 Remote Control Operation
The scoreboard system is controlled via the included remote. Ensure the remote has working batteries. The remote allows for independent control of the scoreboard and shot clocks, or synchronized operation.
4.2 Synchronized Shot Clock Functionality
- When a game starts and the main scoreboard's 24-second timer begins, the two wireless shot clocks will automatically start timing simultaneously.
- Upon reaching 00 seconds, a loud sound signal will activate, indicating the end of the shot clock period.
4.3 Display Indicators (Basketball Mode Example)

Figure 4.3.1: Scoreboard Display in Basketball Mode. This image illustrates the various display segments: blue numbers for fouls, green numbers for the 24-second shot clock, red numbers at the top for game time, red numbers at the bottom for Home and Guest scores, a red dot for the period, and arrows indicating the serving side.
- Fouls: Indicated by blue numbers.
- Game Time: Displayed by red numbers at the top.
- Period: Indicated by a red dot.
- 24s Shot Clock: Displayed by green numbers.
- Home/Guest Score: Shown by red numbers at the bottom.
- Serving Side: Indicated by arrows.
5. Maintenance
To ensure the longevity and optimal performance of your electronic scoreboard system, follow these maintenance guidelines:
- Cleaning: Gently wipe the display and frame with a soft, dry cloth. For stubborn dirt, use a slightly damp cloth and mild, non-abrasive cleaner. Avoid excessive moisture.
- Storage: When not in use, store the scoreboard and shot clocks in a cool, dry place within the specified storage temperature range (-50°C ~ 80°C).
- Power: Disconnect the power adapter when the unit is not in use for extended periods.
- Remote Control: Replace batteries in the remote control as needed to ensure reliable operation.
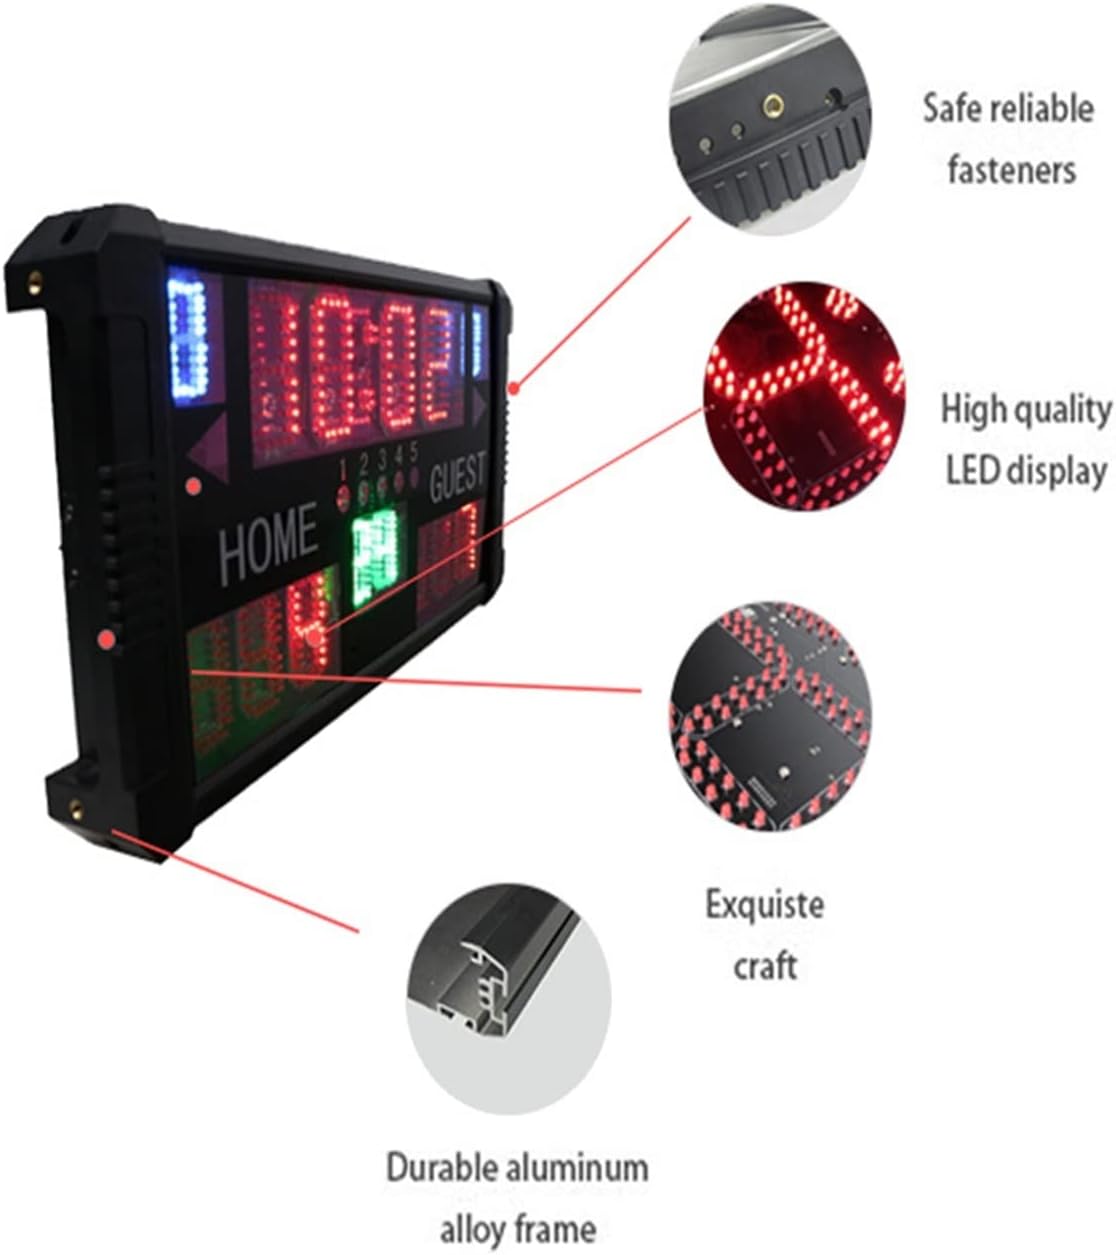
Figure 5.1: Scoreboard Construction Details. This image highlights the safe and reliable fasteners, high-quality LED display, exquisite craftsmanship, and durable aluminum alloy frame, all contributing to the product's robust design.
6. Troubleshooting
If you encounter issues with your scoreboard system, please refer to the following common troubleshooting steps:
- No Power/Display:
- Ensure the power adapter is securely connected to the scoreboard and a working power outlet.
- Check the power cable for any damage.
- Remote Control Not Responding:
- Verify that the remote control batteries are correctly inserted and have sufficient charge. Replace if necessary.
- Ensure there are no obstructions between the remote and the scoreboard/shot clocks.
- Confirm you are within the effective control range (up to 50m).
- Shot Clocks Not Synchronizing:
- Ensure both shot clocks are powered on and within range of the main scoreboard.
- Restart the main scoreboard and shot clocks to re-establish the wireless connection.
- Sound Signal Not Working:
- Check if the sound function is enabled via the remote control (if applicable).
- Ensure no physical obstructions are blocking the speaker.
7. Specifications

Figure 7.1: Technical Specifications. This table provides detailed information on the model number, usage environment, digit height, visual range, frame material, working environment, storage temperature, power supply, and function of the scoreboard.
| Feature | Detail |
|---|---|
| Model Number | GS14D-(3+2.3)RGB |
| Usage Environment | Indoor |
| Digit Height | 3 + 2.3 + 1.8 inches |
| Visual Range | 22.5 meters |
| Frame Material | Aluminum alloy frame |
| Working Environment | -10°C ~ 50°C, Relative Humidity: 0~95% RH |
| Storage Temperature | -50°C ~ 80°C |
| Power Supply | AC 110V-260V / 12V DC |
| Function | With beep sound when countdown to preset time or 00:00 |
| Scoreboard Size | 50cm x 25cm x 5.5cm |
| Shot Clock Size | 24cm x 16cm x 4cm |
| Control Method | Remote control |
| Control Distance | Up to 50m, 360° |
| Sound Signal | Yes |
8. Warranty and Support
Information regarding product warranty and customer support is not provided in the available product data. Please refer to your purchase documentation or contact the seller directly for details on warranty coverage and support services.