1. Introduction
Thank you for choosing the Aheaplus Bar Cabinet. This versatile furniture piece is designed to enhance your living space with ample storage, integrated power solutions, and dynamic LED lighting. It can function as a wine bar, liquor cabinet, coffee bar station, kitchen pantry, microwave stand, or general storage cabinet. Please read this manual thoroughly before assembly and use to ensure proper setup and safe operation.
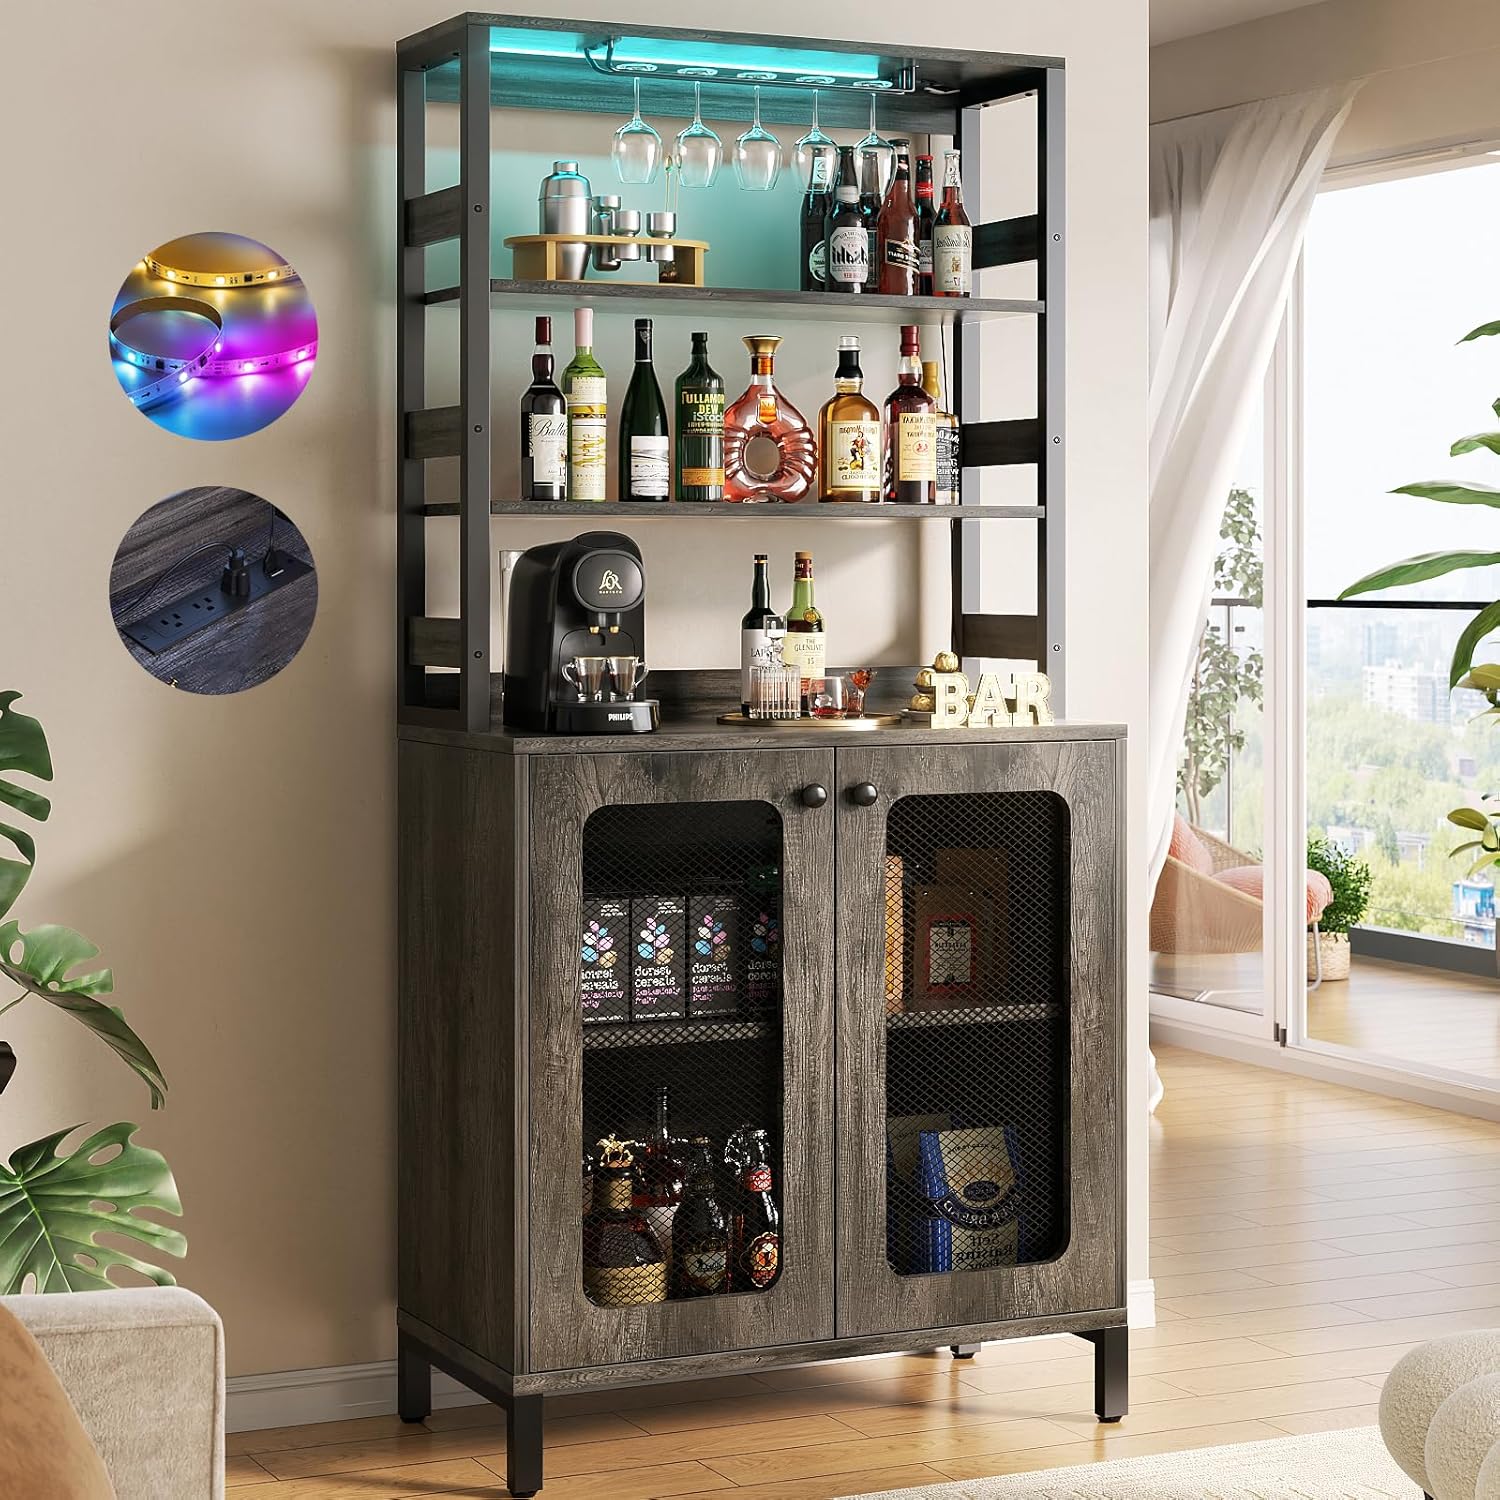
Image 1: Aheaplus Bar Cabinet with various items, showcasing its functionality.
2. Safety Information
Please observe the following safety precautions to prevent injury or damage to the product:
- Ensure all components are securely fastened before placing items on the cabinet.
- Do not exceed the maximum weight capacity of 100 lbs for the top shelf. Distribute weight evenly across all shelves.
- Always use the provided anti-toppling fittings to secure the cabinet to a wall, especially in households with children or pets.
- Keep electrical components (power outlets, LED lights) away from water or excessive moisture.
- Do not attempt to modify the electrical wiring or components. Contact a qualified electrician if issues arise.
- Assemble the cabinet on a soft, clean surface to prevent scratches.
3. Package Contents
Verify that all parts are present before beginning assembly. If any parts are missing or damaged, please contact Aheaplus customer support.
- MDF Boards (various sizes for shelves, panels, doors)
- Metal Frame Components
- Integrated Power Strip (3 AC Outlets, 2 USB Ports, 6.56ft Power Cord)
- LED Light Strip with Controller
- Wine Glass Holders
- Adjustable Leg Pads
- Anti-Toppling Hardware
- Assembly Hardware (screws, bolts, cam locks, etc.)
- Assembly Tools (Hex Key/Allen Wrench, Screwdriver - typically not included, but recommended)
4. Setup and Assembly Instructions
Follow these steps carefully for proper assembly. It is recommended to have two people for assembly.
- Unpack and Identify Parts: Lay out all components on a clean, soft surface. Compare them with the parts list in your package to ensure everything is accounted for.
- Assemble the Base Cabinet: Begin by connecting the side panels to the bottom and top panels of the lower cabinet using the provided hardware. Ensure all connections are tight and stable.
- Install Adjustable Shelves: Insert the shelf pins into the desired holes inside the lower cabinet. Place the adjustable shelves onto these pins.
- Attach Cabinet Doors: Secure the mesh doors to the front of the lower cabinet using the hinges and screws. Adjust hinges as needed for proper alignment.
- Assemble the Upper Hutch Frame: Connect the metal frame components for the upper hutch. Ensure the frame is square and stable.
- Integrate Upper Shelves and Glass Holders: Install the glass holders beneath the top shelf of the hutch. Place the remaining shelves into the hutch frame.
- Mount the Power Strip: Secure the power strip into its designated slot on the top surface of the lower cabinet. Ensure the power cord is routed safely.
- Install LED Lights: Adhere the LED light strip to the underside of the top shelf of the upper hutch. Connect the light strip to its controller and power source.
- Connect Upper and Lower Sections: Carefully lift the assembled upper hutch and align it with the lower cabinet. Secure the two sections together using the designated connectors.
- Attach Adjustable Leg Pads: Screw the adjustable leg pads into the bottom of the cabinet legs. Adjust them to level the cabinet on uneven floors.
- Secure with Anti-Toppling Kit: Attach the anti-toppling hardware to the back of the cabinet and to a wall stud, following the instructions provided with the kit. This step is crucial for safety.

Image 2: Visual representation of product dimensions and top shelf weight capacity (100 lbs).
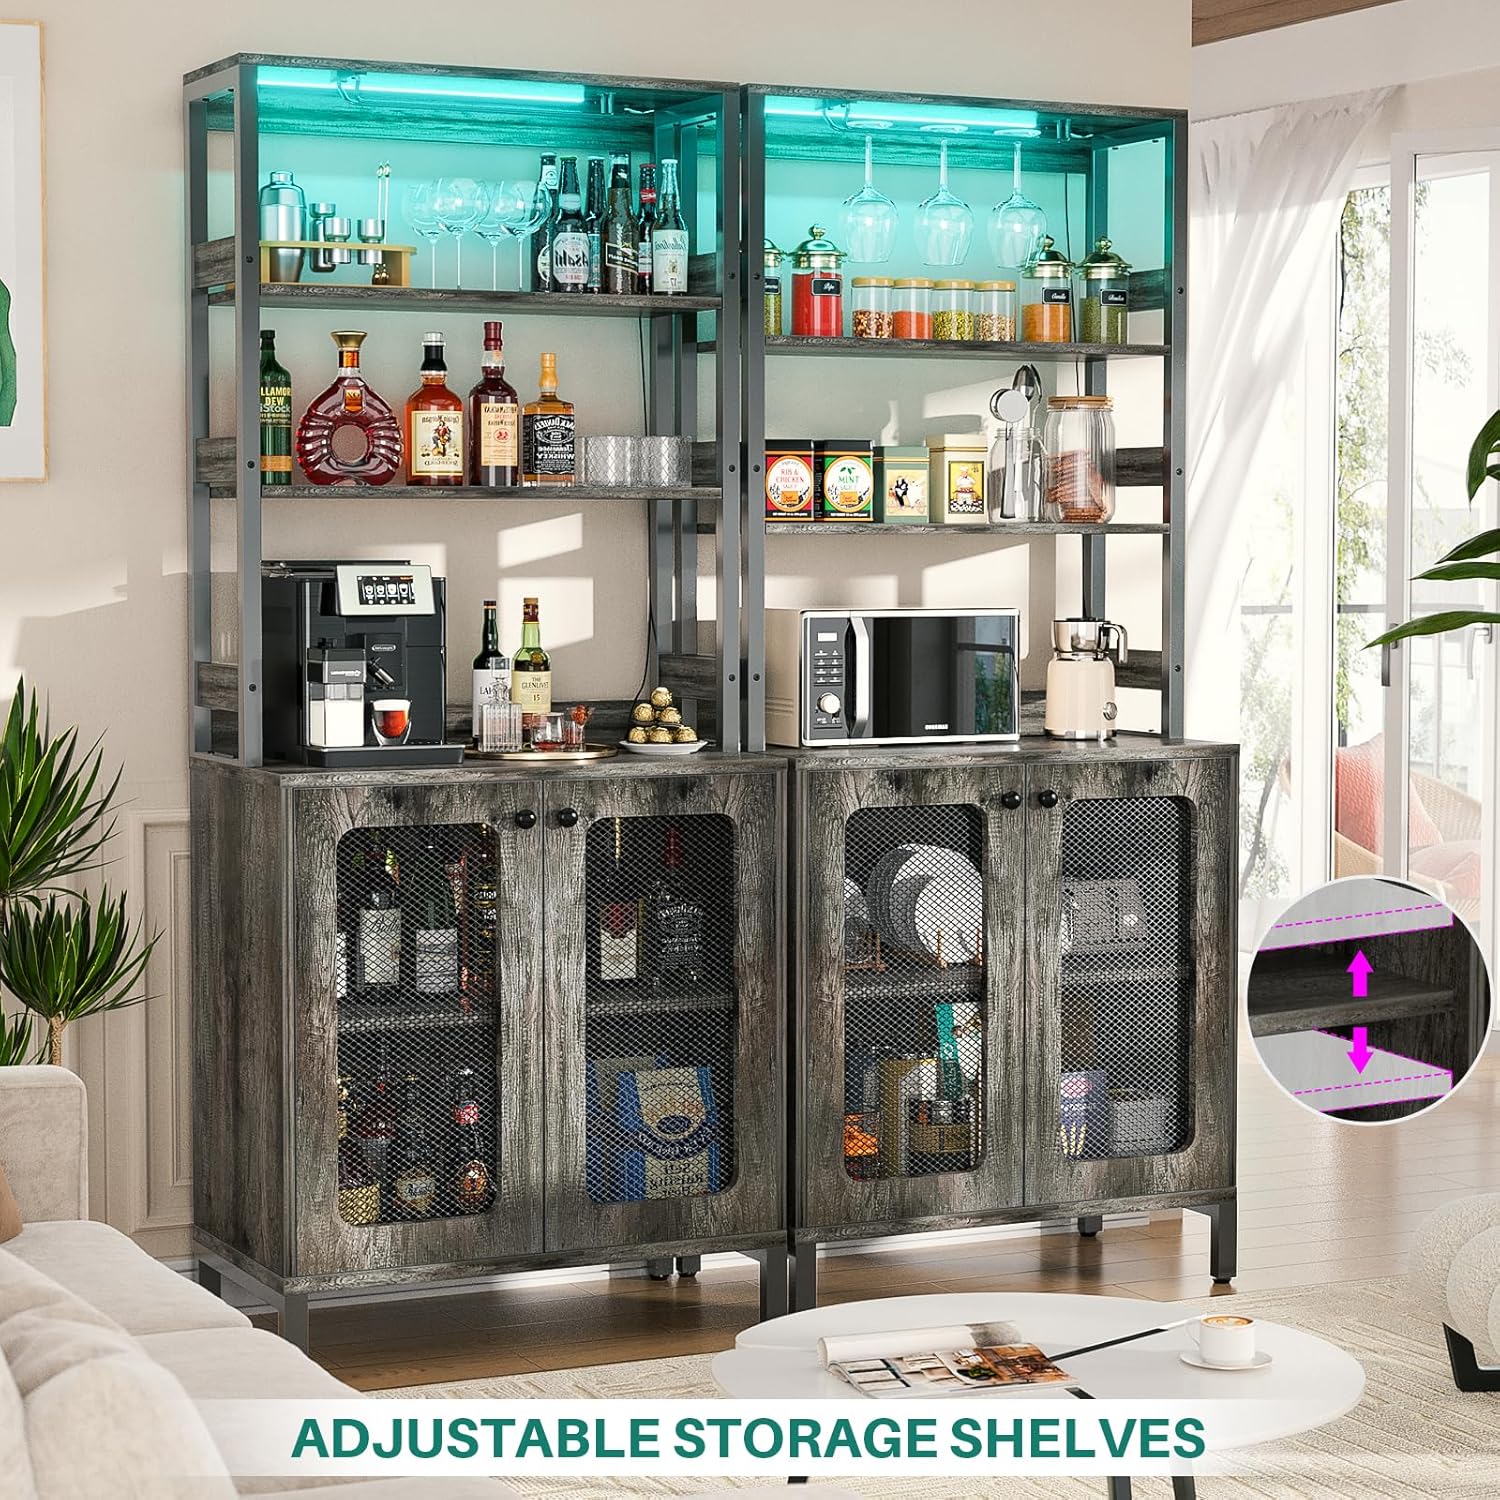
Image 3: Illustration of adjustable storage shelves for flexible organization.
5. Operating Instructions
5.1. Using the Integrated Power Outlets
The cabinet features a built-in power strip for convenient access to electricity.
- AC Outlets: Plug in your appliances (e.g., coffee maker, microwave, juicer) into the 3 standard AC outlets.
- USB Ports: Use the 2 USB ports to charge your mobile devices or other USB-powered accessories.
- Power Cord: The power cord is 6.56 feet (2 meters) long, providing flexibility for placement.

Image 4: Close-up of the built-in power strip with 3 AC outlets and 2 USB ports.
5.2. Controlling the Smart LED RGB Lights
The integrated RGB LED lights offer customizable illumination for your cabinet. Control is typically via a remote control (if included) or a dedicated mobile application.
- Color Selection: Choose from over 60,000 colors to match your mood or decor.
- Flashing Modes: Select from multiple dynamic flashing modes for a lively atmosphere.
- Music Sync Function: Activate the music sync feature to make the lights change color and rhythm with sound and music.
- Timing Function: Set a timer for the lights to turn on or off automatically.
- APP Control: Download the specified mobile application (refer to packaging or included instructions for app name) to control the lights from your smartphone.

Image 5: Overview of LED light features including color options, music sync, and app control.
6. Maintenance and Care
- Cleaning: Wipe surfaces with a soft, damp cloth. Avoid harsh chemicals or abrasive cleaners that may damage the finish.
- Dusting: Regularly dust the cabinet with a dry, soft cloth to prevent buildup.
- Spills: Clean up spills immediately to prevent staining or damage to the wood finish.
- Electrical Components: Ensure the power strip and LED lights are clean and free from dust. Do not immerse in water.
- Stability Check: Periodically check all screws and connections to ensure they remain tight. Re-tighten if necessary.
7. Troubleshooting
| Problem | Possible Cause | Solution |
|---|---|---|
| LED lights not turning on. | Loose connection, power outage, faulty light strip/controller. | Check all connections. Ensure power outlet is working. Test with remote/app. Contact support if issue persists. |
| Power outlets not working. | Power strip not plugged in, circuit breaker tripped, faulty power strip. | Ensure the cabinet's power cord is fully plugged into a working wall outlet. Check your home's circuit breaker. |
| Cabinet feels wobbly. | Uneven floor, loose assembly hardware, anti-toppling kit not installed. | Adjust leg pads to level the cabinet. Re-tighten all assembly screws. Install or verify the anti-toppling kit. |
| Doors are misaligned or do not close properly. | Hinges not adjusted correctly, loose hinge screws. | Adjust the screws on the hinges to align the doors. Ensure hinge screws are tight. |
8. Specifications
| Feature | Detail |
|---|---|
| Brand | Aheaplus |
| Model | Bar Cabinet with Power Outlets and LED Lights |
| Color | Black Oak |
| Product Dimensions (D x W x H) | 15.7" x 26.9" x 66.9" |
| Material | MDF Board, Metal Frame |
| Power Outlets | 3 AC Outlets, 2 USB Ports |
| Power Cord Length | 6.56 ft |
| LED Lights | RGB, 60000+ colors, multiple modes, music sync, timing function, APP control |
| Number of Shelves | 6 (including top surface and internal adjustable shelves) |
| Special Features | Built-in USB Outlet, LED Light, Adjustable Feet, Wine Glass Holders, Anti-toppling fittings |
| Assembly Required | Yes |
9. Warranty and Support
For warranty information, technical support, or to order replacement parts, please refer to the contact information provided at the point of purchase or visit the official Aheaplus website. Keep your purchase receipt for warranty claims.