Introduction
This manual provides detailed instructions for the installation, operation, and maintenance of your LeTkingok ADL-EQ9 9-Band Car Audio Equalizer. Please read this manual thoroughly before using the product to ensure proper function and to prevent damage.
The ADL-EQ9 is designed to enhance your car audio experience by providing precise control over nine frequency bands, allowing for fine-tuning of your sound system's output.
Product Features
- 9-Band Graphic Equalizer for precise audio tuning.
- Adjustable Subwoofer Frequency (30Hz-120Hz).
- Maximum Output Voltage: 8V RMS.
- Leveling Range: ±12dB.
- Dual input options (AUX and CD).
- Compact design for easy integration into car audio systems.
Package Contents
Verify that all items are present in the package:
- 1 x LeTkingok ADL-EQ9 9-Band Car Equalizer
Note: Additional wiring for audio input/output and power connection may be required and is typically sold separately.
Safety Information
- Always disconnect the vehicle's battery before beginning any electrical installation.
- Ensure all wiring is properly insulated and secured to prevent short circuits and damage.
- Do not install the equalizer in a location that obstructs the driver's view or interferes with vehicle operation.
- Consult a professional car audio installer if you are unsure about any part of the installation process.
- This device operates on a DC 12V power supply. Connecting to an incorrect voltage may cause damage.
Setup and Installation
Proper installation is crucial for optimal performance. Follow these steps carefully.
1. Mounting the Equalizer
Choose a secure and accessible location for the equalizer, away from heat sources and moisture. Ensure adequate ventilation.

Figure 1: Front view of the ADL-EQ9 equalizer with approximate dimensions (18cm x 11cm x 2.5cm).
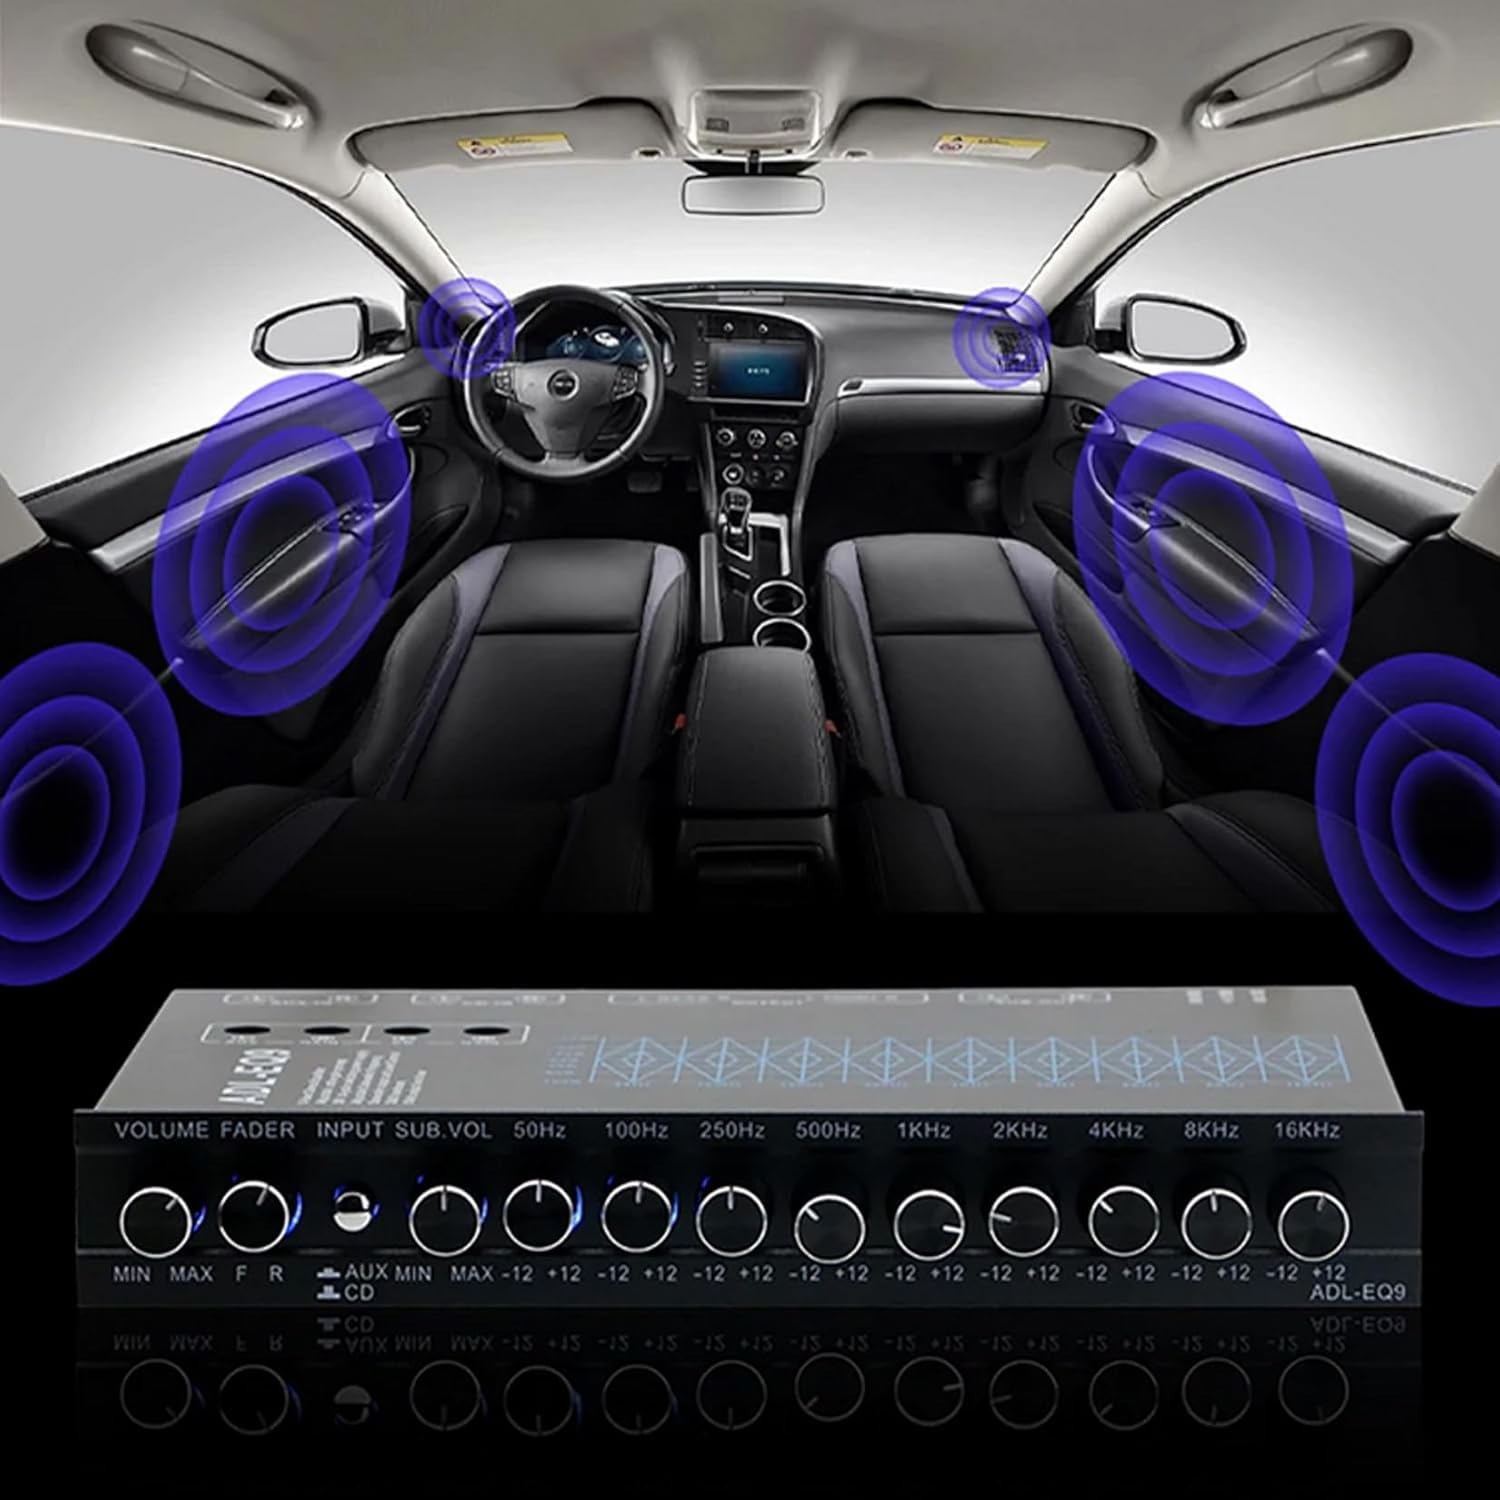
Figure 2: Example of the ADL-EQ9 equalizer integrated into a car audio system, showing its compact size relative to the dashboard.
2. Wiring Connections
Refer to the diagram below for proper wiring connections. Ensure all connections are secure and correctly polarized.

Figure 3: Top and rear panel overview of the ADL-EQ9, illustrating the control layout and input/output ports.
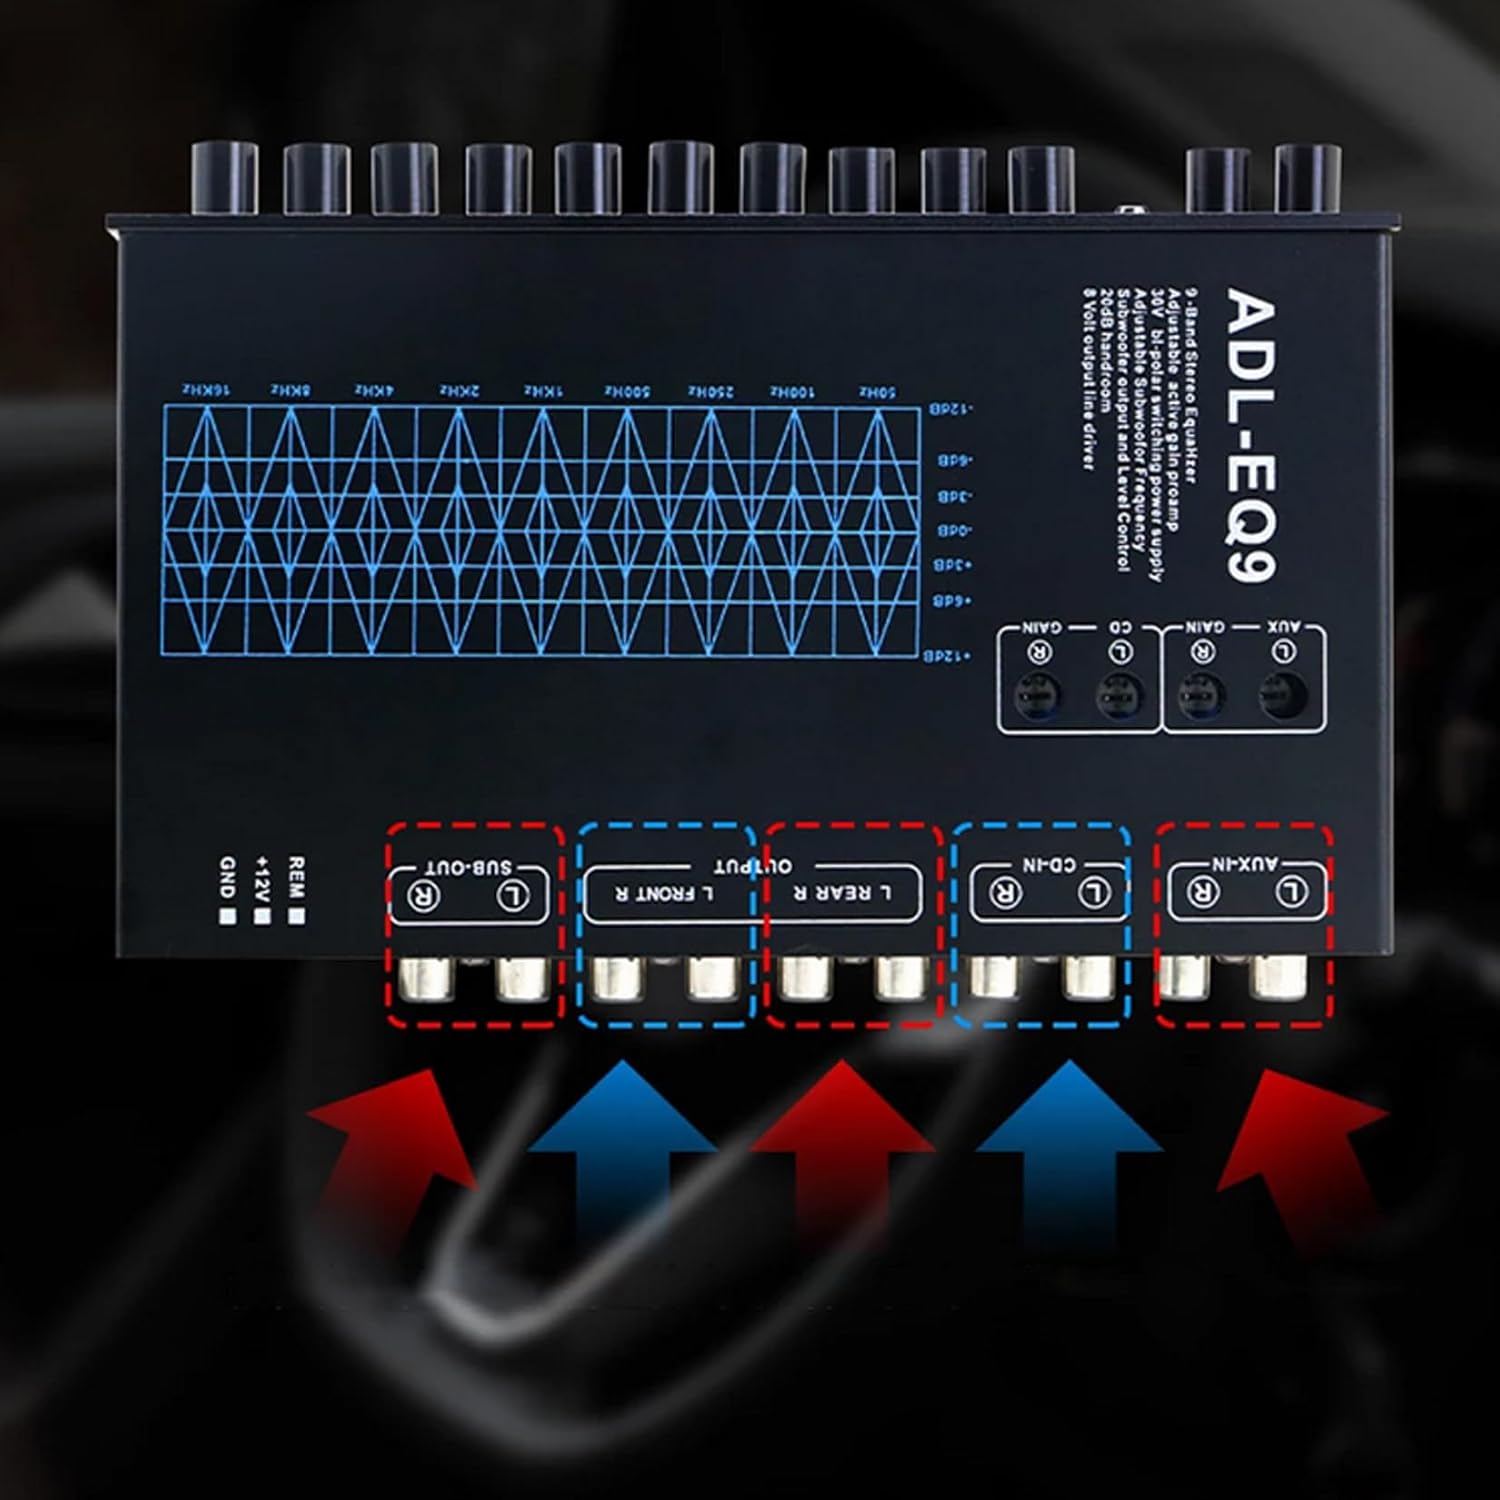
Figure 4: Detailed view of the rear connections, showing RCA inputs (AUX-IN, CD-IN) and outputs (SUB-OUT, L FRONT R, L REAR R) along with power terminals (GND, +12V, REM).
- Power Connection:
- Connect the +12V terminal to a switched 12V power source (e.g., ignition wire).
- Connect the GND terminal to a good chassis ground point.
- Connect the REM (Remote) terminal to the remote output of your head unit or amplifier. This turns the equalizer on/off with your audio system.
- Audio Input:
- Connect your head unit's RCA outputs to either the AUX-IN or CD-IN RCA inputs on the equalizer. Use the input selector switch on the front panel to choose the active input.
- Audio Output:
- Connect the L FRONT R and L REAR R RCA outputs to your amplifier's front and rear inputs, respectively.
- Connect the SUB-OUT RCA output to your subwoofer amplifier's input.
Operating Instructions
Once installed, you can begin adjusting your audio settings.

Figure 5: Front panel controls of the ADL-EQ9 equalizer.
Front Panel Controls:
- VOLUME: Master volume control for the entire system. Adjust to desired listening level.
- FADER: Balances the sound output between front and rear speakers.
- INPUT: Selects between AUX and CD input sources.
- SUB.VOL: Controls the output level of the subwoofer channel.
- Frequency Bands (50Hz, 100Hz, 250Hz, 500Hz, 1KHz, 2KHz, 4KHz, 8KHz, 16KHz): Each knob adjusts the gain (boost or cut) for its respective frequency band by up to 12dB.
- Turn clockwise to boost the frequency.
- Turn counter-clockwise to cut the frequency.
- Set to the center position for a flat (no boost/cut) response.
Adjusting the Sound:
- Start with all equalizer bands set to the center (flat) position.
- Play a familiar piece of music.
- Adjust the VOLUME to a comfortable listening level.
- Use the FADER to balance front and rear speakers.
- Adjust the SUB.VOL to integrate the subwoofer output smoothly with the main speakers.
- Begin adjusting individual frequency bands.
- Lower frequencies (50Hz, 100Hz, 250Hz) affect bass and mid-bass.
- Mid-range frequencies (500Hz, 1KHz, 2KHz) affect vocals and instruments.
- Higher frequencies (4KHz, 8KHz, 16KHz) affect treble and clarity.
- Make small adjustments and listen for the effect. Avoid excessive boosting, which can lead to distortion.
Maintenance
The LeTkingok ADL-EQ9 equalizer requires minimal maintenance.
- Keep the unit clean and free from dust. Use a soft, dry cloth for cleaning.
- Do not use harsh chemicals or abrasive cleaners.
- Ensure all connections remain secure. Periodically check wiring for any signs of wear or damage.
- Avoid exposing the unit to extreme temperatures or direct sunlight for prolonged periods.
Troubleshooting
| Problem | Possible Cause | Solution |
|---|---|---|
| No power to the equalizer. |
|
|
| No sound output. |
|
|
| Distorted sound. |
|
|
| Humming or buzzing noise. |
|
|
Specifications
| Feature | Detail |
|---|---|
| Product Name | 9 Band Car Equalizer |
| Model | ADL-EQ9 |
| Power Supply | DC 12V |
| Maximum Output Voltage | 8V RMS |
| Leveling Range | ±12dB |
| Subwoofer Frequency | 30Hz - 120Hz |
| Product Dimensions (L x W x H) | 180mm x 110mm x 25mm (approx. 7.1 x 4.3 x 1.0 inches) |
| Weight | 1.2 KG (approx. 2.6 lbs) |
Warranty and Support
For warranty information and technical support, please refer to the documentation provided with your purchase or contact LeTkingok customer service through your retailer.
Keep your proof of purchase for warranty claims.