1. Introduction
This manual provides detailed instructions for the installation, operation, and maintenance of your EVERSECU Expandable 4-Channel Wired Mini DVR and Security Cameras System. Please read this manual thoroughly before use to ensure proper setup and functionality.
1.1 What's in the Box
- 1 Mini DVR
- 2 Mini Cameras
- 2 Cables
- 2 Power adapters
1.2 Key Features
- Compact Design: Ultra-mini DVR (120mm*95mm*28mm) for easy placement.
- Expandable System: Supports up to 4 channels; includes 2 mini dome cameras.
- High-Efficiency Video Compression: H.265+ technology for extended recording and storage optimization (approx. 80% space saving over H.264).
- Intelligent Motion Detection: Distinguishes between humans, vehicles, and objects to minimize false alarms.
- Instant Alerts: Receive email and APP notifications upon detection of significant events.
- 24/7 Recording & Playback: Continuous surveillance with automatic oldest footage replacement and smart search functionality.
- Remote Viewing: Access live and recorded video via "XMEYE" APP (Android/iOS) or CMS software (Windows/MAC).
- Flexible Storage Options: Supports SD card (up to 128GB Class 10) or external HDD (eSATA/USB, max 6TB) for recording.

Image 1.1: The EVERSECU Mini DVR and two included dome cameras, showcasing their compact size.
2. Setup
2.1 System Components Overview
Before beginning installation, identify all components. The system includes the Mini DVR, two dome cameras, power adapters, and necessary cables.
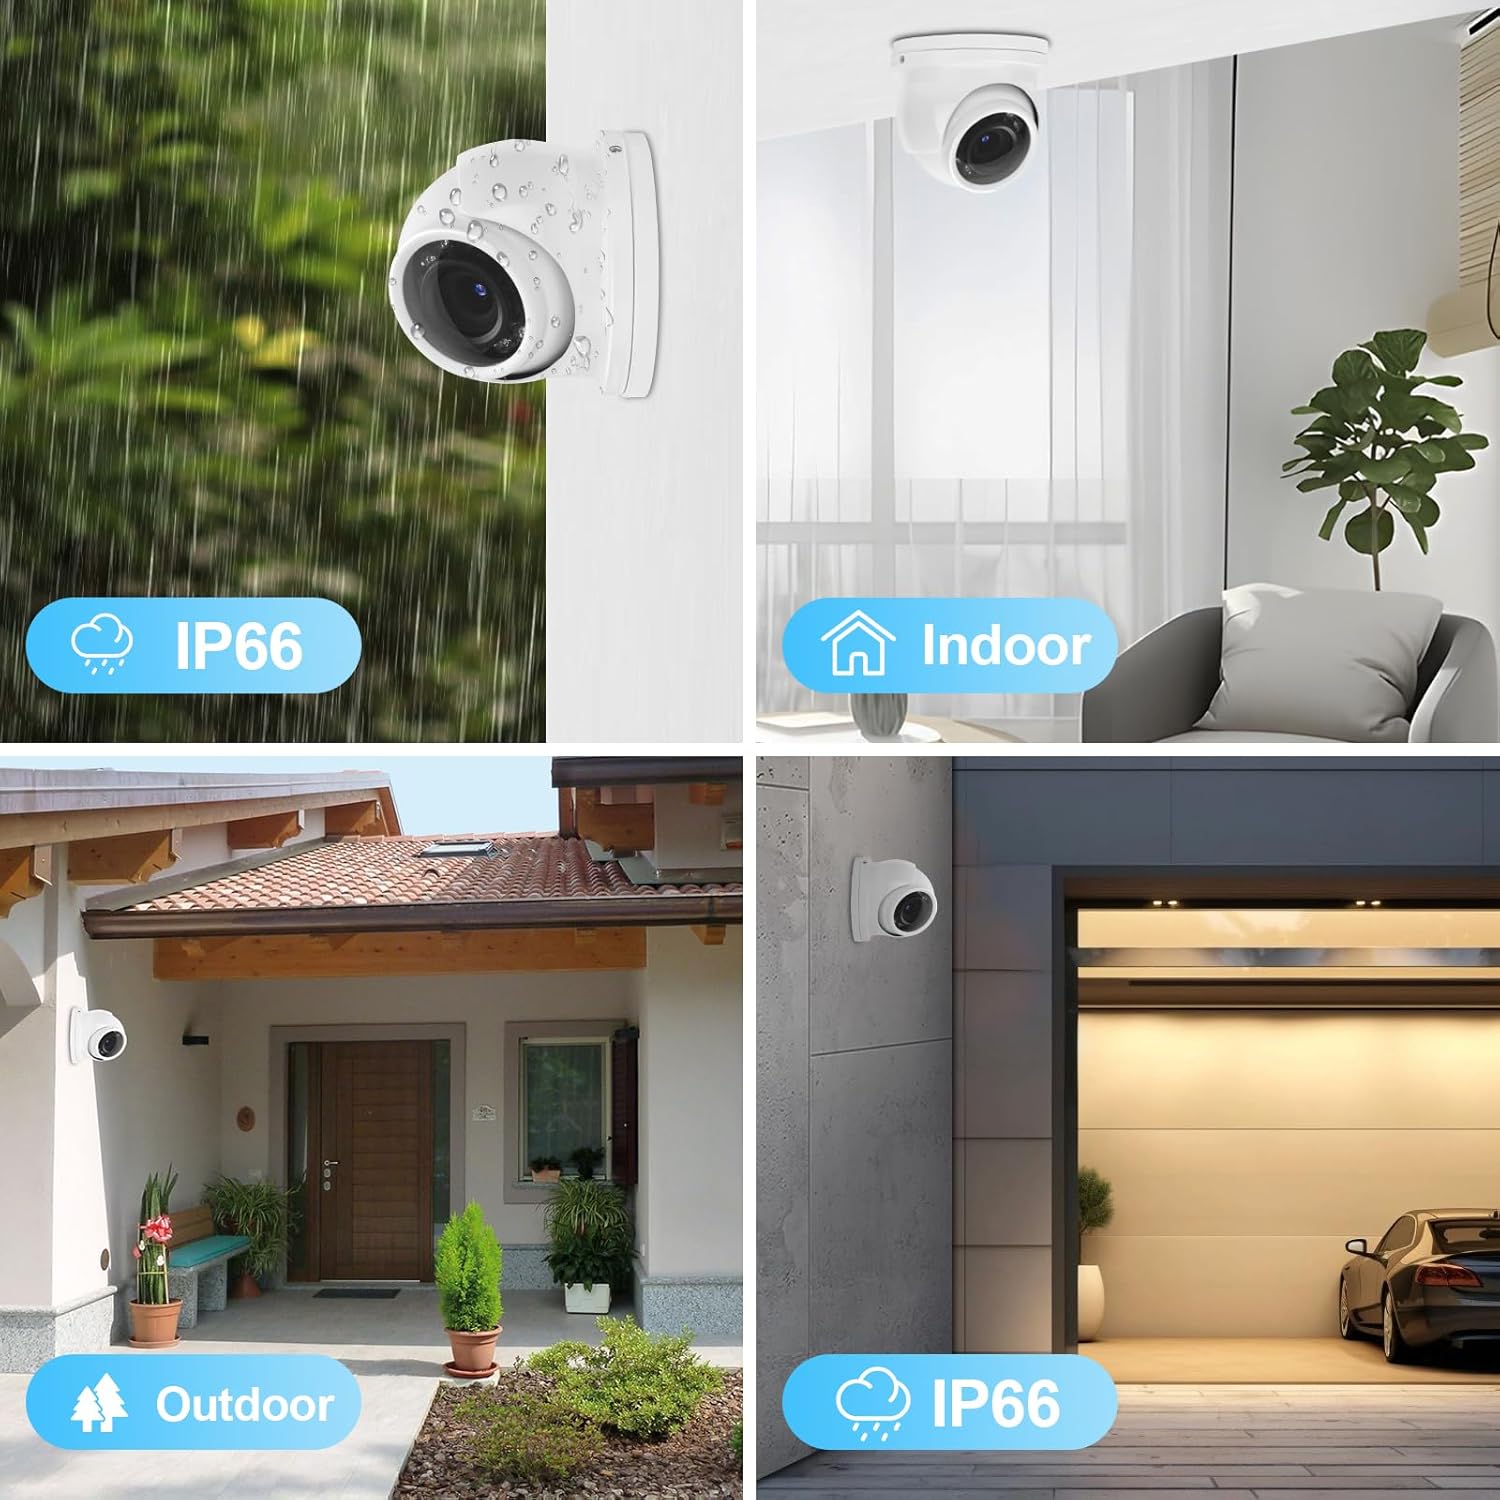
Image 2.1: Examples of camera placement for indoor and outdoor use, highlighting IP66 weather resistance.
2.2 Connecting the DVR and Cameras
- Connect Cameras to DVR: Use the provided BNC cables to connect each camera to the corresponding video input ports on the Mini DVR. The system supports up to 4 cameras.
- Power the Cameras: Connect the camera power adapters to the cameras and then plug them into a power outlet.
- Connect DVR to Monitor: Use an HDMI or VGA cable (not included) to connect the DVR to a monitor for local viewing and configuration.
- Connect DVR to Network: Connect the DVR to your router using an Ethernet cable for remote viewing capabilities.
- Power the DVR: Connect the DVR power adapter and plug it into a power outlet. The DVR will power on automatically.
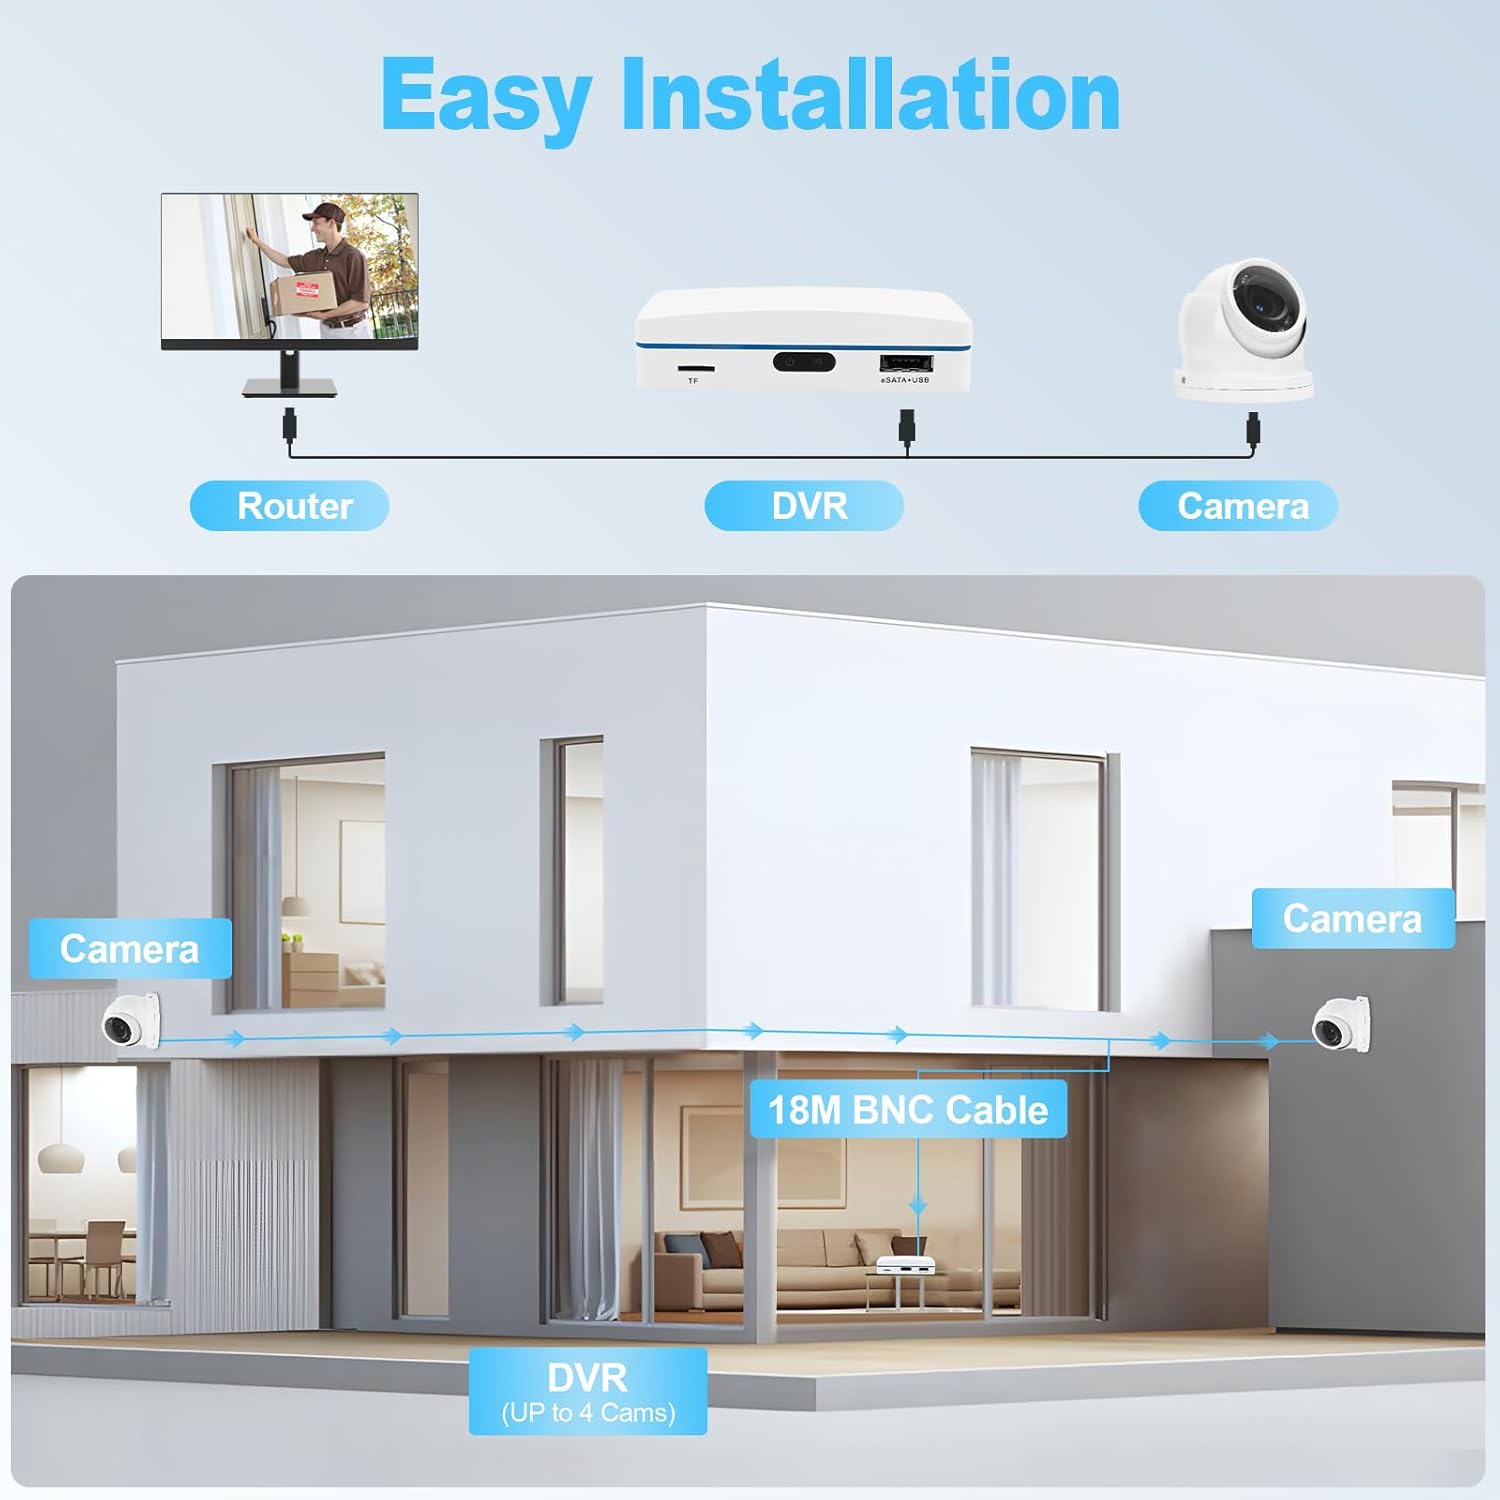
Image 2.2: A visual guide to connecting the DVR to a router and cameras, illustrating a typical home setup.
2.3 Storage Device Installation (Optional)
The DVR does not include a hard drive. You can install an SD card or an external HDD for recording.
- SD Card: Insert a Class 10 SD card (max 128GB) into the TF card slot on the DVR.
- External HDD: Connect an external HDD (max 6TB) via the eSATA+USB port. The DVR will format the drive upon first use.
2.4 Remote Access Setup
- Download APP: Download the free "XMEYE" APP from Google Play (Android) or Apple APP Store (iOS).
- Register Account: Create a new user account within the XMEYE APP.
- Add Device: Add your DVR device by scanning the QR code or manually entering the device ID found in the DVR's network settings.
- PC/Laptop View: For Windows systems, use the CMS Software. For MAC systems, use the MAC CMS Software. Contact EVERSECU for software download links.
3. Operating Instructions
3.1 Live View and Playback
Once the system is set up, you can view live footage and playback recorded video.
- Local View: Access live feeds directly from the monitor connected to the DVR.
- Remote View: Use the XMEYE APP or CMS software to view live video from your smartphone, tablet, or computer (excluding Windows for direct app, use CMS).
- Playback: The system supports 24/7 recording. Access recorded footage through the DVR interface or remote applications. Utilize the smart search function to quickly locate events by time or motion detection.

Image 3.1: A monitor displaying a multi-camera view, illustrating the 24/7 surveillance capability of the system.
3.2 Motion Detection and Alerts
The system features intelligent motion detection to enhance security and reduce false alarms.
- Configuration: Access the DVR settings to configure motion detection zones and sensitivity for each camera. The system can distinguish between humans, vehicles, and other objects.
- Alerts: When motion is detected, the system will send instant alerts via email and push notifications to your authorized mobile APP.

Image 3.2: A smartphone screen showing an alert for detected motion, with options for email and app notifications.
4. Maintenance
4.1 General Care
- Keep the DVR in a well-ventilated area, away from direct sunlight, heat sources, and moisture.
- Regularly clean the camera lenses with a soft, dry cloth to ensure clear image quality.
- Ensure all cables are securely connected and free from damage.
4.2 Storage Management
The DVR automatically overwrites the oldest footage when the storage device is full. Periodically review your recordings and back up any important footage to an external USB drive if needed.
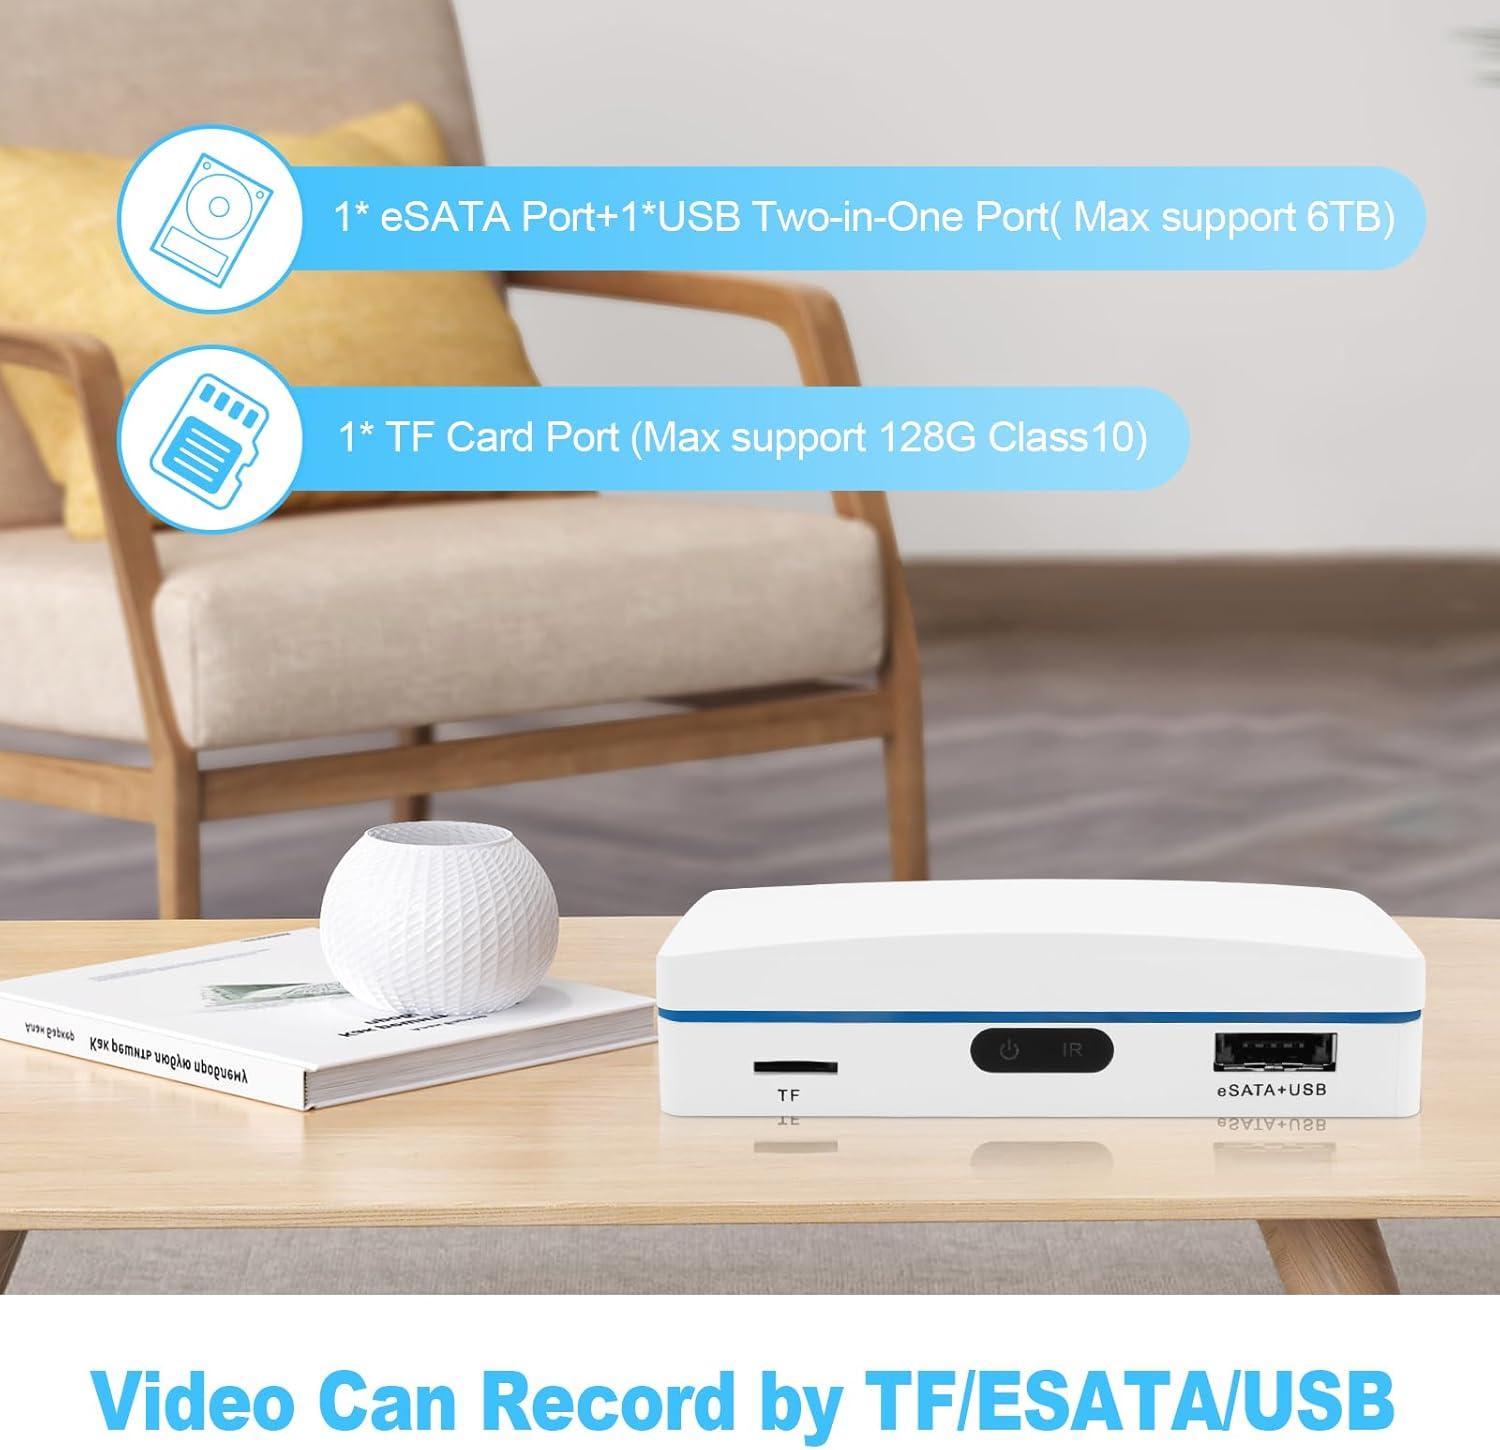
Image 4.1: The DVR unit highlighting its TF card slot and eSATA+USB port for various recording storage options.
5. Troubleshooting
This section addresses common issues you might encounter.
| Problem | Possible Cause | Solution |
|---|---|---|
| No video display on monitor | Loose cable connection, incorrect input source, power issue. | Check HDMI/VGA cable connections. Ensure monitor is on correct input. Verify DVR and camera power. |
| Cannot access remotely via APP | DVR not connected to network, incorrect network settings, APP registration issue. | Ensure DVR is connected to router. Verify network settings on DVR. Re-check APP account and device ID. Ensure internet connection on viewing device. |
| Poor image quality | Dirty camera lens, low light conditions, cable interference. | Clean camera lenses. Ensure adequate lighting or verify night vision is active. Check cable integrity. |
| No recording | No storage device, storage device full, recording schedule not set. | Install an SD card or external HDD. Check storage capacity. Configure recording schedule in DVR settings. |
| False motion detection alerts | High sensitivity, environmental factors (e.g., moving branches). | Adjust motion detection sensitivity. Refine detection zones to exclude areas with frequent non-threat movement. |
If you encounter issues not listed here or require further assistance, please contact EVERSECU customer support.
6. Specifications
| Feature | Detail |
|---|---|
| Brand | EVERSECU |
| Model Number | MINI-K03 |
| Video Capture Resolution | 1080p |
| Number of Channels | 4 |
| Night Vision Range | 60 Feet |
| Power Source | Corded Electric |
| Video Compression | H.265+ |
| Storage Options | TF Card (Max 128GB Class 10), External eSATA/USB HDD (Max 6TB) |
| Connectivity Technology | Wired |
| Compatible Devices | Smartphones (Android & iOS), Tablets, Personal Computers (Windows CMS, MAC CMS) |
| DVR Dimensions (L x W x H) | Approx. 4.7 x 3.7 x 1.1 inches (120mm x 95mm x 28mm) |
| Included Components | 1 Mini DVR, 2 Mini Cameras, 2 Cables, 2 Power adapters |
| Batteries Required | Yes (1 CR2032 battery included for DVR internal clock) |
7. Warranty and Support
For warranty information, technical support, or software downloads (e.g., Windows/MAC CMS software), please contact EVERSECU customer service directly. Refer to the product packaging or the official EVERSECU website for contact details.


