1. Introduction
Thank you for choosing the AUBOR MENTECH P6 Mini Projector. This portable smart projector is designed to deliver a high-quality home theater experience with its advanced features, including WiFi6 and Bluetooth 5.2 connectivity, Android TV 11.0, and flexible projection options. This manual provides essential information for setting up, operating, and maintaining your projector to ensure optimal performance.

Figure 1.1: The AUBOR MENTECH P6 Mini Projector in use, highlighting its compact size and projection capabilities.
Video 1.1: An overview of the AUBOR MENTECH Mini Projector's features and portability.
2. What's in the Box
Please check the contents of your package to ensure all items are present:
- AUBOR MENTECH P6 Mini Projector
- Remote Control
- HDMI Cable
- HD Cable
- Power Adapter
- User Manual
3. Product Overview & Specifications
The AUBOR MENTECH P6 projector offers a range of features for a versatile viewing experience.
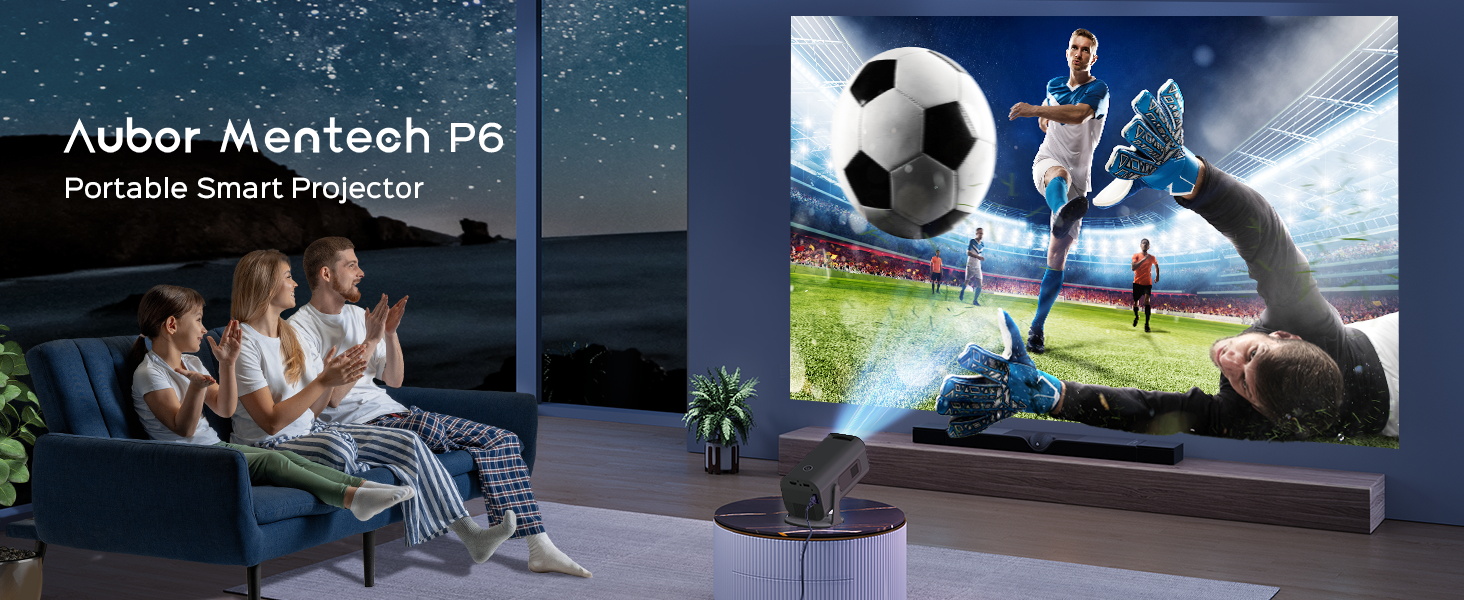
Figure 3.1: Key features of the AUBOR MENTECH P6 Mini Projector.
Technical Specifications
| Feature | Specification |
|---|---|
| Model Number | P6 |
| Display Resolution | Native 1920 x 1080 (1080P), Supports 4K Decoding |
| Brightness | 300 ANSI Lumens |
| Contrast Ratio | 10000:1 |
| Connectivity | 2.4G/5G WiFi6, Bluetooth 5.2 |
| Operating System | Android TV 11.0 |
| Max Screen Size | 150 inches (381 cm) |
| Adjustable Stand | 180° Rotation |
| Keystone Correction | Auto & 4P/4D Keystone |
| Zoom Function | 50% - 100% |
| Dimensions (L x W x H) | 8.58 x 5.31 x 5.31 inches |
| Item Weight | 2.16 pounds |
| Recommended Use | Indoor/Outdoor |
Ports and Interfaces
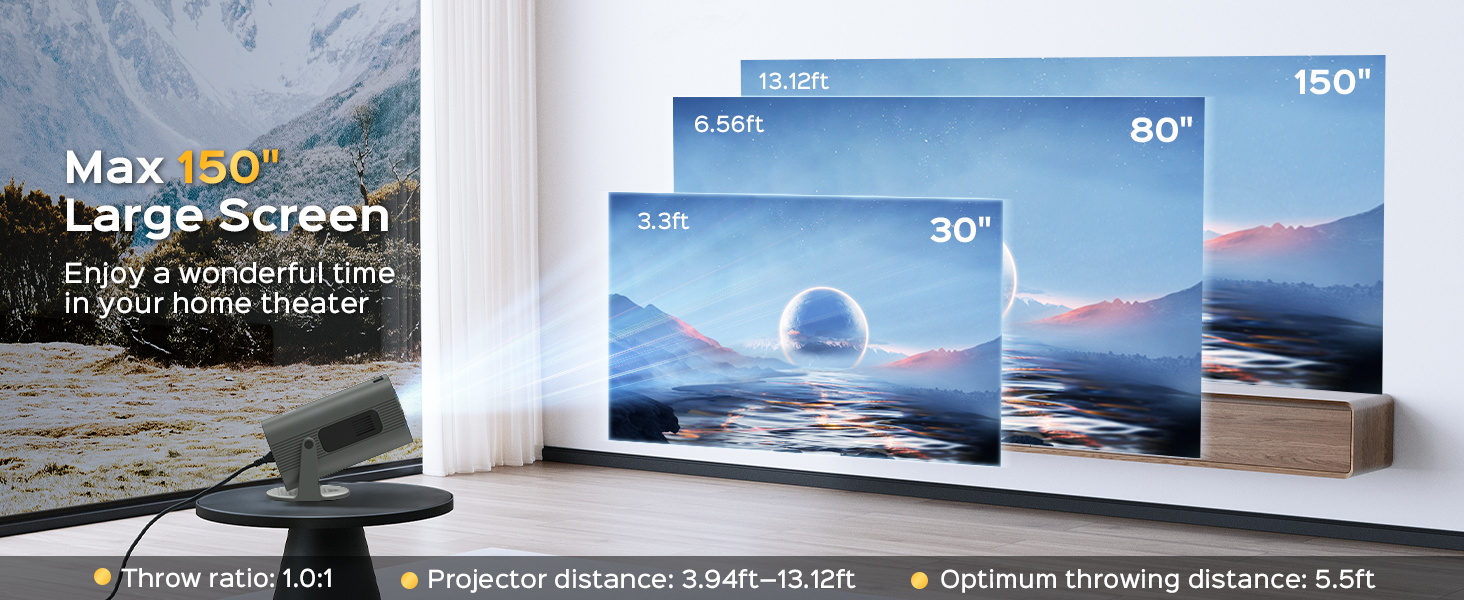
Figure 3.2: Available ports and interfaces on the P6 Mini Projector.
Portability
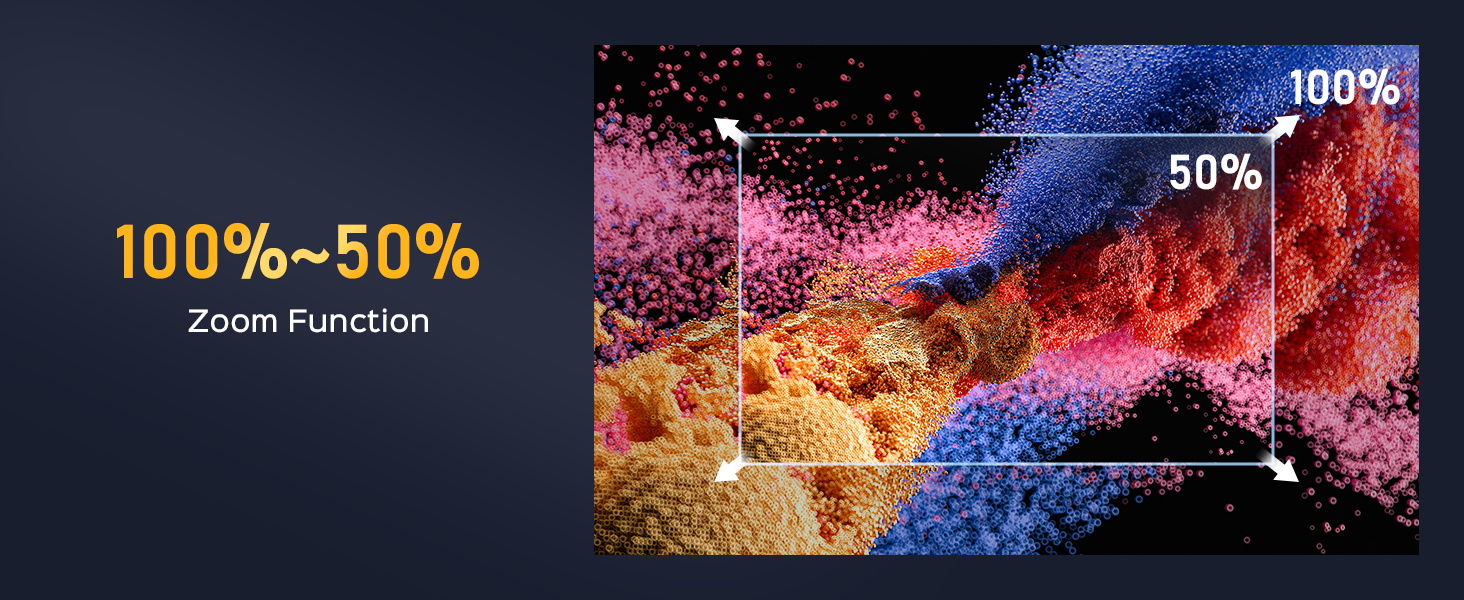
Figure 3.3: The compact design of the P6 Mini Projector allows for easy portability.
4. Setup
Initial Power-On
- Connect the power adapter to the projector's Power Interface and plug it into a wall outlet.
- Press the power button on the projector or the remote control to turn on the device.
- The projector will boot up and display the main interface.
Placement and Adjustment
The P6 Mini Projector features a 180° adjustable stand, allowing for flexible placement and projection angles, including ceiling projection.
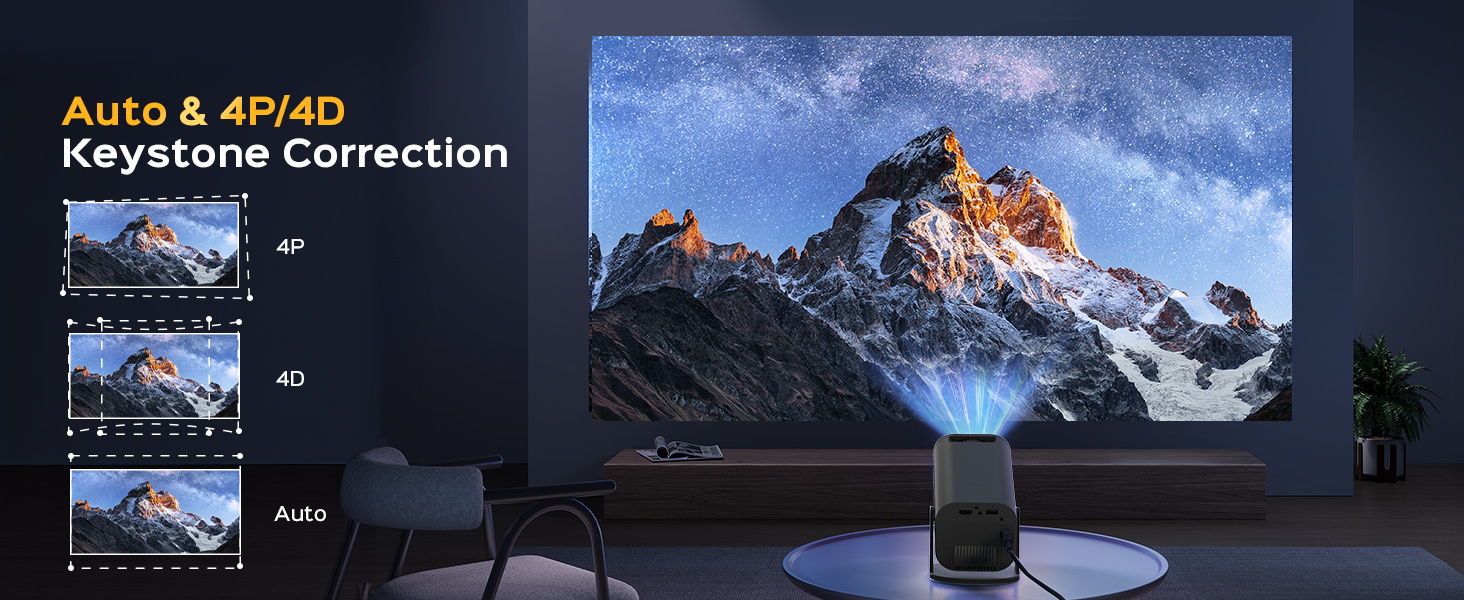
Figure 4.1: The 180° adjustable stand enables convenient ceiling projection.
For optimal viewing, ensure the projector is placed on a stable, flat surface. Adjust the stand to direct the image onto your desired projection surface (wall, screen, or ceiling).
5. Operating Instructions
5.1 Connectivity
The P6 Mini Projector offers multiple connectivity options for seamless integration with your devices.
WiFi Connection (2.4G/5G WiFi6)
Connect your projector to a stable WiFi network for internet access and smart features.
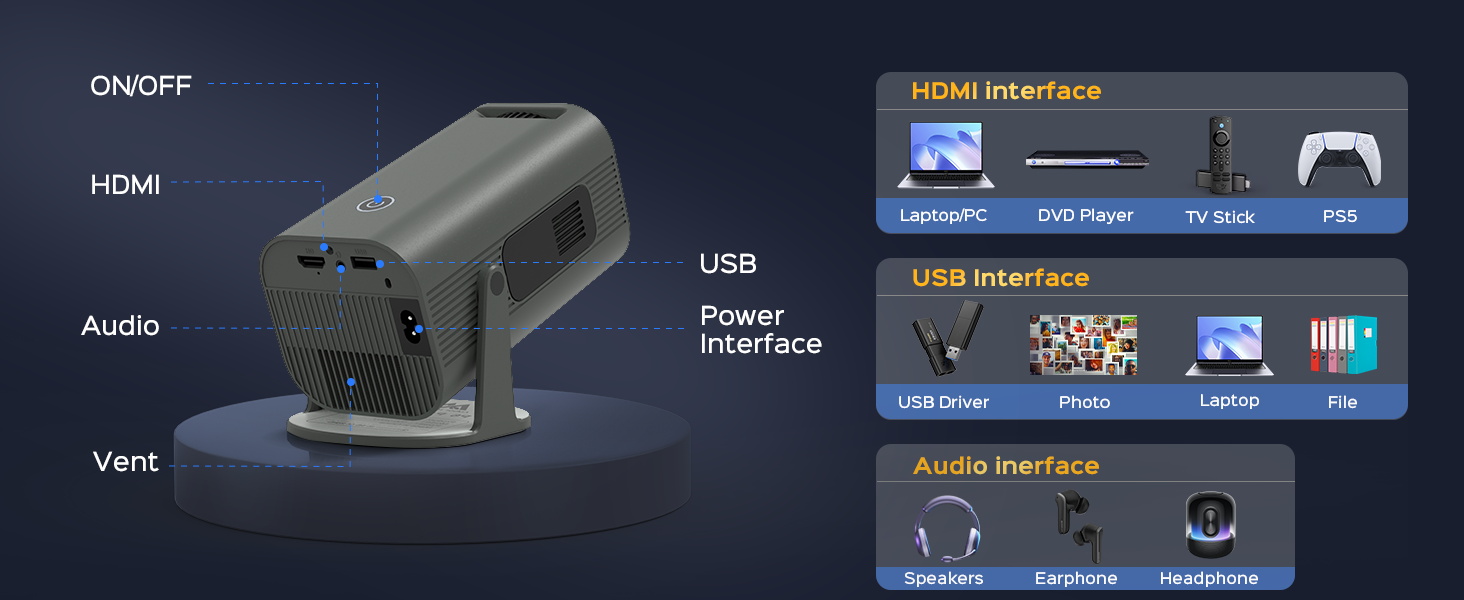
Figure 5.1: Ultra-Fast WiFi6 Connection for various devices.
Bluetooth 5.2
Connect external Bluetooth speakers or headphones for enhanced audio experience.

Figure 5.2: Advanced Bluetooth 5.2 for connecting external audio devices.
Screen Mirroring (Miracast, Airplay, DLNA)
Mirror content from your Android, iOS, or Windows devices directly to the projector.
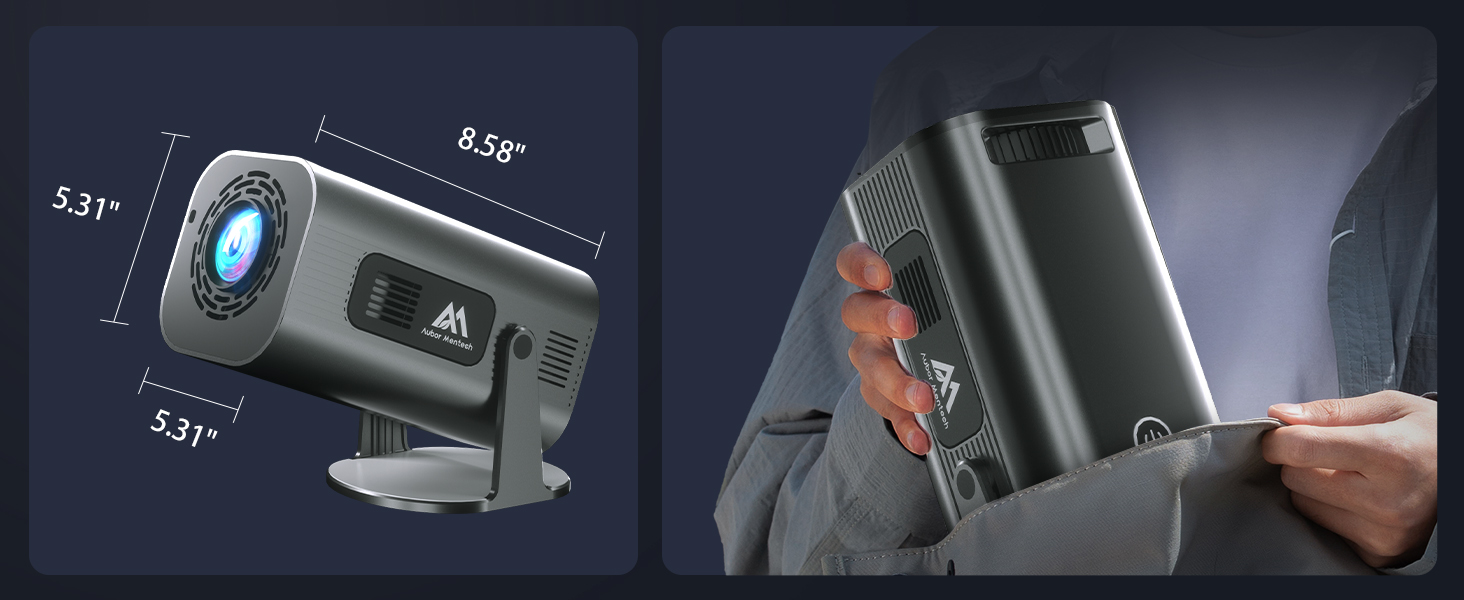
Figure 5.3: Screen Mirroring capabilities for various devices.
Video 5.1: Instructions on how to connect Airplay for screen mirroring.
HDMI & USB Inputs
Connect external devices such as laptops, gaming consoles, DVD players, or USB drives using the HDMI and USB ports.
5.2 Picture Adjustment
Achieve the perfect image with the projector's adjustment features.
Auto & 4P/4D Keystone Correction
The projector automatically corrects distorted images. You can also manually adjust the keystone using 4-point or 4-directional correction for precise alignment.

Figure 5.4: Auto and manual keystone correction for optimal image shape.
Screen Zoom Function (50%-100%)
Adjust the screen size without moving the projector, allowing for flexible installation in various spaces.
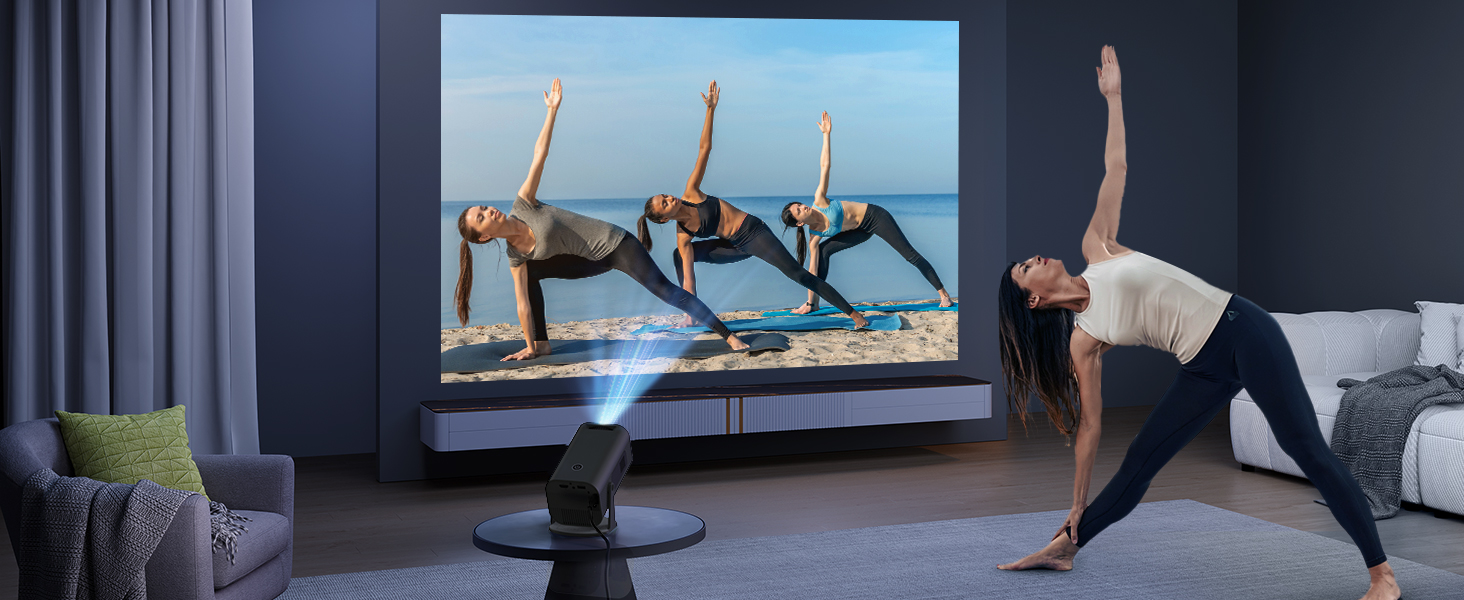
Figure 5.5: Screen zoom function for adjusting image size.
Manual Focus
Use the focus wheel on the projector to sharpen the image until it is clear and crisp.
5.3 Smart Features (Built-in Android TV 11.0)
The P6 Mini Projector comes with Android TV 11.0, providing access to a world of entertainment.
Accessing Applications
Navigate the home screen to access pre-installed applications like YouTube, Netflix, and Prime Video, or download new apps from the Google Play Store or AppStore.
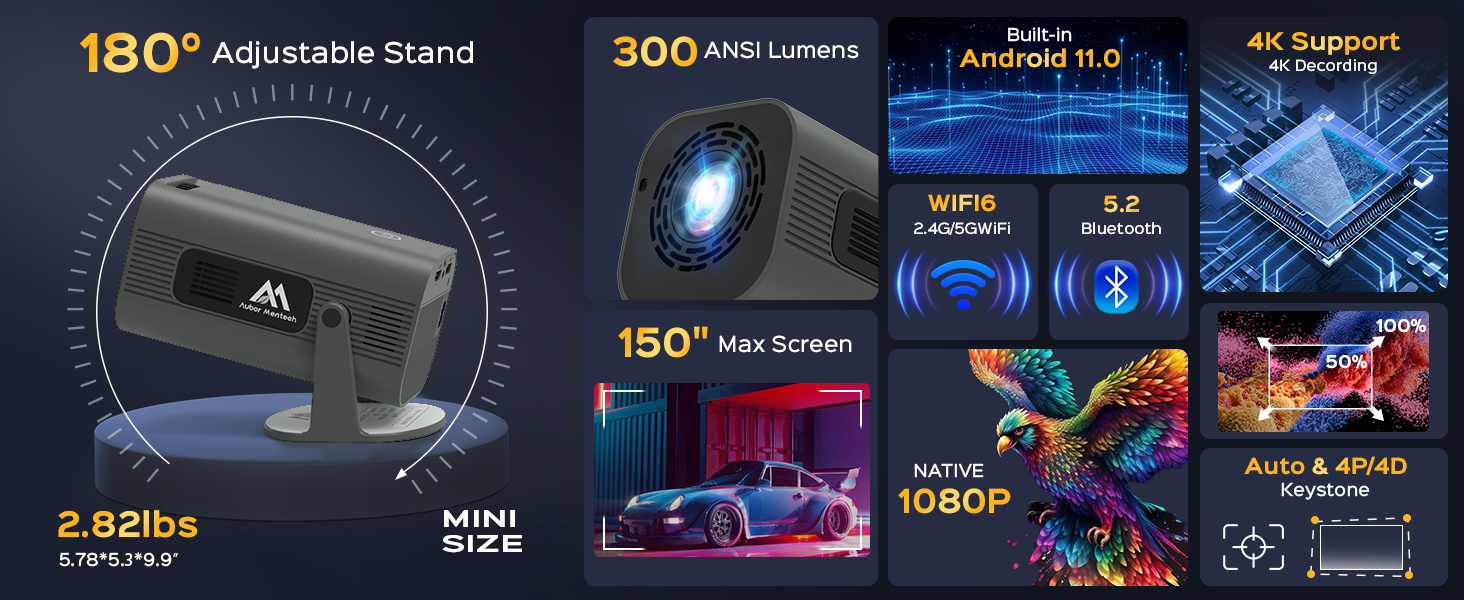
Figure 5.6: Built-in Android 11.0 applications.
Video 5.2: Guide on how to download software programs from Google Play.
Video 5.3: Instructions on how to download apps from the App Market.
6. Maintenance
Proper maintenance ensures the longevity and optimal performance of your projector.
Cleaning the Lens
Use a soft, lint-free cloth specifically designed for optical lenses to gently wipe the projector lens. Avoid using abrasive materials or harsh chemicals that could scratch or damage the lens.
Cleaning Vents and Exterior
Regularly clean the projector's vents to prevent dust buildup, which can affect cooling and performance. Use a soft brush or a can of compressed air to remove dust from the vents. Wipe the exterior of the projector with a soft, dry cloth.
General Care
- Store the projector in a cool, dry place when not in use.
- Avoid exposing the projector to extreme temperatures or humidity.
- Do not block the ventilation openings during operation.
- Handle the projector with care to prevent drops or impacts.
7. Troubleshooting
If you encounter issues with your projector, refer to the common problems and solutions below.
No Picture / Blurry Image
- Ensure the power adapter is securely connected and the projector is turned on.
- Adjust the manual focus wheel until the image is clear.
- Check keystone correction settings if the image is distorted.
- Verify the input source is correctly selected (HDMI, USB, or screen mirroring).
No Sound
- Increase the volume on the projector and the connected device.
- If using external speakers, ensure they are properly connected via Bluetooth or audio cable.
- Check audio output settings on the projector.
Connectivity Issues (WiFi/Bluetooth/Screen Mirroring)
- Ensure the projector and your device are connected to the same WiFi network.
- Restart the projector and your device.
- Check for any obstructions between the projector and your device that might interfere with the signal.
- For Netflix or other streaming app issues, ensure the app is updated to the latest version.
Video 7.1: Guide on how to upgrade Netflix and resolve related issues.
8. Warranty & Support
AUBOR MENTECH is committed to providing high-quality products and excellent customer service.
Warranty Information
Your AUBOR MENTECH P6 Mini Projector comes with a 3-year free replacement warranty. We also offer a 30-day no-reason return policy.
Customer Support
For any questions, technical assistance, or warranty claims, please contact our customer support team. We provide lifetime support and aim for quick responses within 24 hours via phone or email.
Email: support@aubormentech.com
Please have your product model (P6) and purchase details ready when contacting support.