Introduction
This manual provides essential instructions for the safe operation and maintenance of your TEEROK T20 Mini Drone. Please read this manual thoroughly before operating the drone to ensure proper function and to prevent damage or injury. This drone is designed for beginners and children aged 6-10 years, offering features like 3D flips, headless mode, and multiple speed settings.
Package Contents
Verify that all items listed below are included in your package:
- 1 x TEEROK T20 Drone
- 1 x Remote Control
- 3 x Drone Batteries
- 4 x Spare Propellers
- 1 x USB Type-C Charging Cable
- 1 x Screwdriver
- 1 x Propellers Spanner
- 1 x User Manual (this document)

Image: The TEEROK T20 Mini Drone, remote control, three batteries, spare propellers, screwdriver, and propeller spanner.
Setup Guide
1. Charging the Drone Batteries
The TEEROK T20 Mini Drone includes three rechargeable Lithium Polymer batteries. Ensure batteries are fully charged before first use.
- Connect the USB Type-C charging cable to a power source (e.g., computer USB port, USB wall adapter).
- Connect the other end of the cable to the drone battery.
- The charging indicator light on the battery will show its status (refer to battery specific instructions for light patterns).
- Charging typically takes approximately 60-90 minutes per battery.
- Disconnect the battery once fully charged. Do not overcharge.

Image: Three drone batteries, ready for charging or installation.
2. Installing Drone Batteries
- Ensure the drone is powered off.
- Carefully insert a charged battery into the battery compartment on the drone.
- Ensure the battery is securely latched in place.
3. Remote Control Setup
The remote control requires 3 AAA batteries (not included).
- Open the battery compartment on the back of the remote control.
- Insert 3 AAA batteries, observing correct polarity (+/-).
- Close the battery compartment.
4. Propeller Installation/Replacement
The drone comes with propellers pre-installed. If replacement is necessary:
- Identify the correct propeller for each motor. Propellers are marked 'A' or 'B' and must match the corresponding motor arm.
- Use the provided propeller spanner to gently remove the old propeller.
- Press the new propeller firmly onto the motor shaft, ensuring it is seated correctly.
Operating Instructions
1. Power On and Pairing
- Place the drone on a flat, level surface.
- Press and hold the power button on the drone until the LED lights illuminate.
- Turn on the remote control. The indicator light on the remote will flash.
- Push the left joystick (throttle) up once, then pull it down once. The drone's lights will stop flashing and remain solid, indicating successful pairing.
2. One Key Start/Landing
After pairing, press the One Key Start/Landing button on the remote control. The drone will automatically take off and hover at a stable altitude, or land gently.

Image: Illustration of the drone performing a one-key take-off or landing from a designated spot.
3. Altitude Hold
The TEEROK T20 features an altitude hold function, allowing it to maintain a consistent height without continuous throttle input, making it easier for beginners to control.
4. Headless Mode
In Headless Mode, the drone's orientation is relative to the pilot, regardless of which way the drone's front is facing. This simplifies control for new pilots.
- To activate Headless Mode, press the Headless Mode button on the remote control.
- The drone's lights will flash to indicate Headless Mode is active.
- To exit Headless Mode, press the button again.

Image: Diagram showing the drone's movement in Headless Mode, where direction is relative to the remote control.
5. Speed Modes
The drone offers three adjustable speed modes (Low, Medium, High) to suit different skill levels and flying environments.
- Press the Speed button on the remote control to cycle through the speed settings.
- The remote control will typically beep to indicate the current speed mode (e.g., one beep for Low, two for Medium, three for High).
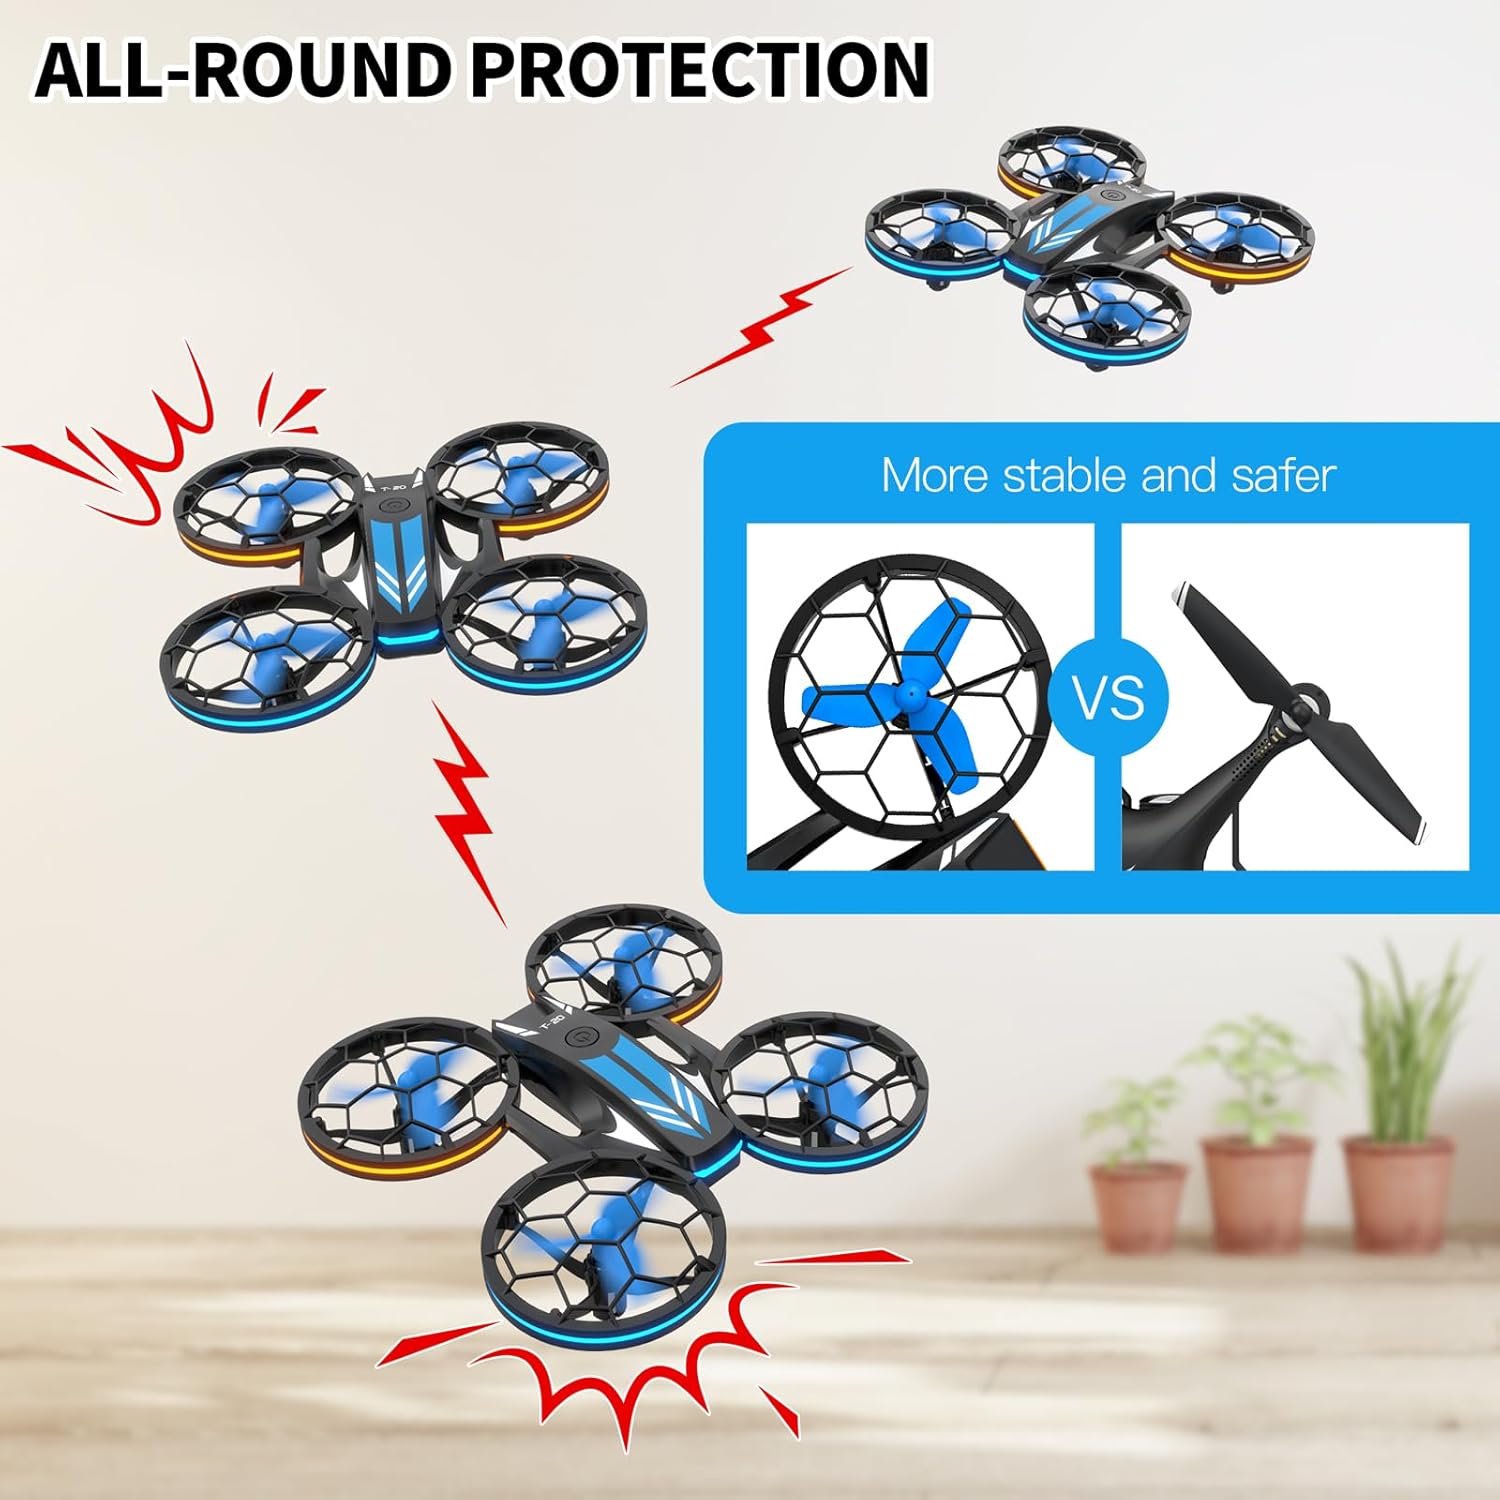
Image: The drone shown with visual indicators for Low, Medium, and High speed settings, and the remote control button for speed adjustment.
6. 3D Flips
Perform exciting 3D flips with a single button press.
- Ensure the drone is flying at a sufficient height (at least 2-3 meters).
- Press the 3D Flip button on the remote control.
- Immediately push the right joystick in the desired direction (forward, backward, left, or right) to execute the flip.

Image: The drone depicted in mid-air, illustrating a 3D flip maneuver with directional arrows.
7. LED Lighting Modes
The drone features blue and orange LED lights on its propeller positions with multiple lighting effects.
- Press the LED Light Mode button on the remote control to cycle through different lighting patterns.
- Available modes include: Flashing one by one, Flashing back and forth alternately, Flashing left and right alternately, and lights off.

Image: The drone displaying different LED lighting configurations, including lights on, off, and various flashing patterns.
Safety Guidelines
- Always operate the drone in an open, clear area, away from people, animals, and obstacles.
- The propeller guards are designed to protect users from spinning propellers and the drone from minor impacts.
- Do not fly the drone in strong winds or adverse weather conditions.
- Keep fingers and hair away from propellers when the drone is powered on.
- Adult supervision is recommended for children operating the drone.
- Do not modify or disassemble the drone or its components.

Image: The drone highlighting its protective propeller guards, emphasizing safety and durability against impacts.
Maintenance
1. Cleaning
Wipe the drone with a soft, dry cloth. Do not use water or cleaning agents that could damage electronic components.
2. Battery Care
- Store batteries in a cool, dry place when not in use.
- Do not expose batteries to extreme temperatures or direct sunlight.
- The batteries are protected against over-expansion, enhancing charging safety.
- The drone has an auto-landing function when the battery is low to prevent sudden crashes.
3. Propeller Inspection
Regularly inspect propellers for damage (cracks, bends). Replace any damaged propellers using the provided spare parts and spanner to ensure optimal flight performance.
Troubleshooting
- Drone does not respond: Ensure both the drone and remote control are powered on and successfully paired. Check remote control batteries.
- Drone flies erratically: Recalibrate the drone by placing it on a flat surface and performing the calibration sequence (refer to specific remote control instructions if available, typically holding both joysticks down and to the bottom-right/left). Check for damaged propellers.
- Short flight time: Ensure batteries are fully charged. Flight time is approximately 9 minutes per battery, with 3 batteries providing up to 27 minutes total.
- Drone automatically lands: This is a safety feature indicating low battery. Recharge the drone battery.

Image: A child operating the drone, with an overlay indicating a low battery warning, prompting the user to recharge.
Specifications
| Brand | TEEROK |
| Model Name | T20 |
| Special Features | 360 Degree Flip, Lightweight, Long Battery Life, One Key Rotation, Speed Adjustment, Headless Mode, Altitude Hold, LED Lighting |
| Age Range (Description) | 6 - 10 Years |
| Color | Blue |
| Connectivity Technology | Wi-Fi (for control) |
| Skill Level | Beginner |
| Item Weight | 0.32 Kilograms (approx. 11.3 ounces) |
| Battery Capacity | 600 Milliamp Hours (per battery) |
| Battery Type | Lithium Polymer |
| Product Dimensions | 7.48"L x 7.48"W x 0.79"H |
| Material | Plastic |
Warranty and Support
Warranty Information
- 30-Day Whole Unit Warranty: Covers quality-related issues for the entire drone unit.
- 100-Day Accessories Warranty: Covers accessories for any reason.
For warranty claims or technical assistance, please contact TEEROK customer support through the retailer's platform or the official TEEROK website.
Customer Support
TEEROK provides quick responsive after-sales support. If you encounter any issues or have questions regarding your T20 Mini Drone, please reach out to our support team for assistance.