
1. Important Safety Information
Please read and understand all instructions before assembly and use. Keep this manual for future reference.
CAUTION: This product requires assembly. Follow the assembly instructions carefully to avoid injury. Keep fingers away from drawer openings and the open compartment to prevent pinch points. Ensure the product is stable and properly anchored to prevent tipping or collapse.
2. Product Overview
The HOMMPA LED Nightstand is a modern bedside table featuring integrated wireless charging, USB ports, AC outlets, and adjustable RGB LED lighting. It includes two drawers and an open storage compartment for convenience.

3. Setup and Assembly
Follow these step-by-step instructions for assembling your HOMMPA LED Nightstand. It is recommended to have a screwdriver and a hammer for certain steps.
Assembly Video Guide
Step-by-Step Assembly Instructions
- Unpack Components: Carefully open the packaging and lay out all parts and hardware. Refer to the included parts list to ensure all items are present.
- Assemble Base Frame (Steps 1-5 in video):
- Attach the side panels to the bottom panel using the provided screws and dowels. Ensure the holes align correctly.
- Secure the LED strip to the designated area on the bottom panel, ensuring the wiring is correctly positioned.
- Attach the support bars to the side panels.
- Construct Main Body (Steps 6-11 in video):
- Assemble the main frame of the nightstand, connecting the side panels and the back panel.
- Integrate the LED-equipped base frame into the main body structure.
- Secure all connections with screws and dowels as indicated in the manual.
- Install Back Panel and Drawer Rails (Steps 12-13 in video):
- Attach the back panel to the main body.
- Install the drawer rails on the inner sides of the nightstand frame. Ensure they are level and securely fastened.
- Assemble Drawers (Steps 14-16 in video):
- Assemble the drawer boxes by connecting the side, front, and back panels.
- Slide the bottom panel into the drawer grooves.
- Attach the drawer handles.
- Insert Drawers (Step 17 in video): Carefully slide the assembled drawers onto the installed rails.
- Install Charging Station (Step 18 in video):
- Place the wireless charging station and power strip into the cutout on the top surface.
- Secure it with the provided screws.
- Connect the power cable.
4. Operating Instructions
4.1 Wireless Charging Station & USB Ports
The nightstand is equipped with a versatile charging station on its top surface.
- Wireless Charging: Place your Qi-compatible device on the designated wireless charging pad. Ensure the device is centered for optimal charging.
- USB Ports: Use the built-in USB-A and Type-C ports to charge your electronic devices with appropriate cables.
- AC Outlets: Two standard AC outlets are available for plugging in other electronic devices or lamps.

4.2 LED Lighting
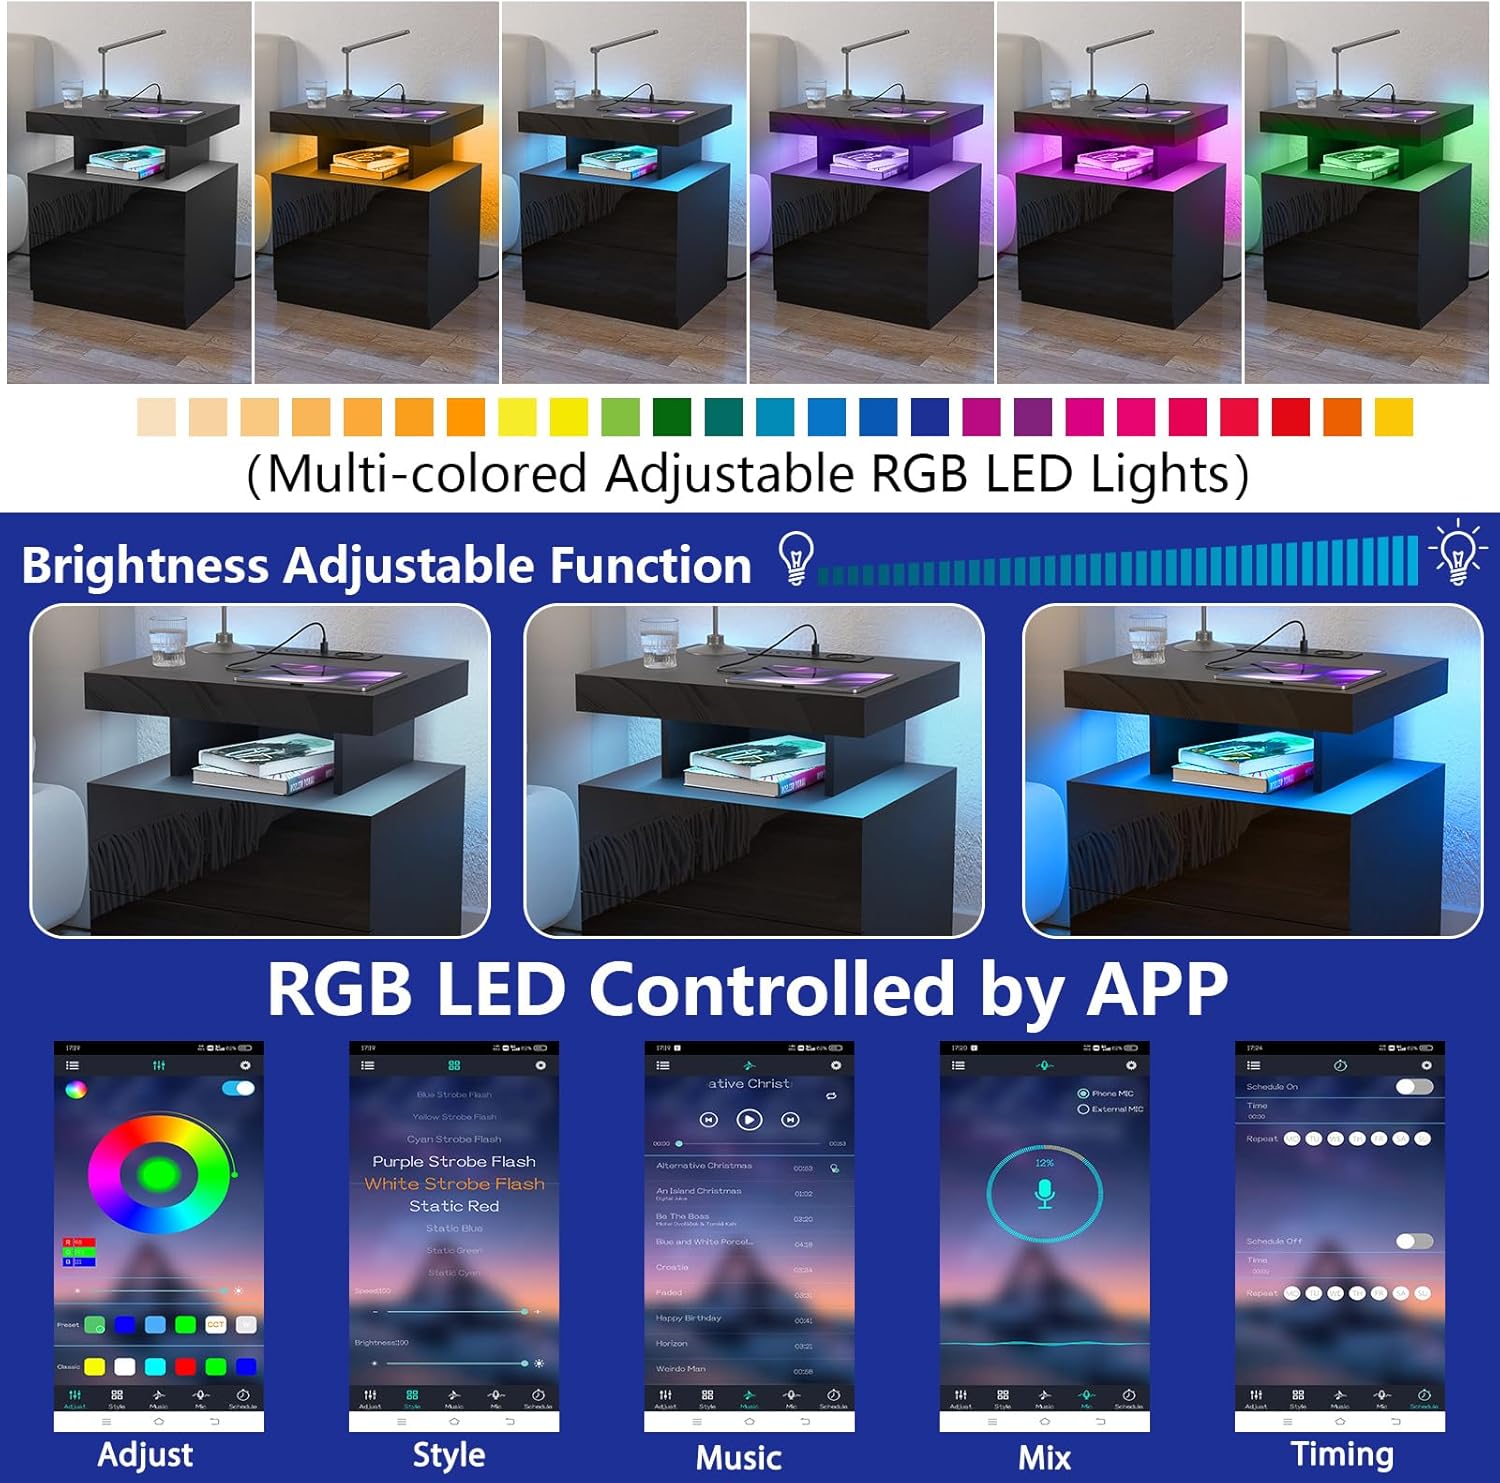
The nightstand features RGB LED lighting with adjustable brightness and multiple modes.
- Remote Control: Use the provided remote control to power the lights on/off, change colors, adjust brightness, and select different lighting modes (e.g., static, flash, strobe, fade).
- APP Control: For enhanced control, download the companion mobile application (refer to the quick start guide for QR code or app name). The app allows for more precise color selection, custom modes, music synchronization, and timing functions via Bluetooth.
5. Maintenance
To ensure the longevity and appearance of your nightstand, follow these simple maintenance guidelines:
- Cleaning: Wipe the surfaces with a dry, soft cloth. Avoid abrasive cleaners or harsh chemicals that may damage the finish.
- Spills: Immediately wipe up any spills to prevent staining or damage to the wood.
- Drawer Care: Periodically check drawer rails for smooth operation. If drawers become stiff, a small amount of silicone lubricant can be applied to the rails.
- Electrical Components: Ensure the charging station and LED light connections are secure. Do not attempt to repair electrical components yourself.
6. Troubleshooting
If you encounter any issues with your HOMMPA LED Nightstand, refer to the following common troubleshooting steps:
- LED Lights Not Working:
- Check if the power cable for the LED lights is securely plugged into both the nightstand and a working power outlet.
- Ensure the remote control has working batteries and is pointed directly at the receiver.
- Verify that the LED strip connections are intact and not loose.
- Wireless Charging Not Functioning:
- Confirm that the nightstand's main power cable is plugged in and the charging station is receiving power.
- Ensure your device is Qi-compatible and correctly aligned on the charging pad.
- Remove any thick phone cases that might interfere with wireless charging.
- USB Ports/AC Outlets Not Providing Power:
- Check the main power connection of the nightstand.
- Test with a different device or cable to rule out device-specific issues.
- Drawers Sticking or Not Sliding Smoothly:
- Ensure the drawer rails are properly aligned and securely fastened.
- Check for any obstructions inside the drawer or along the rails.
- Apply a small amount of silicone lubricant to the drawer slides if needed.
- Nightstand Instability:
- Verify that all screws and connections from the assembly steps are tightened.
- Ensure the nightstand is placed on a flat, level surface.
7. Specifications
| Feature | Detail |
|---|---|
| Brand | HOMMPA |
| Model Name | Nightstand 06XL BK |
| Product Dimensions | 15.8"D x 19.7"W x 22.8"H |
| Item Height | 22.8 inches |
| Frame Material | Metal |
| Top Material Type | Wood |
| Color | Black |
| Finish Types | Glossy |
| Number of Drawers | 2 |
| Charging Station | Wireless Charging (15W), 1 USB Port (5V/2A), 1 Type-C Port (5V/2A), 2 AC Outlets (120V/12A) |
| LED Lighting | RGB, Adjustable Brightness, Remote & APP Control |
| Power Cord Length | 4.9 Feet |
| Recommended Uses | Bedroom use |
| Tools Recommended for Assembly | Screwdriver |

8. Warranty and Support
For warranty information, product support, or to purchase protection plans, please refer to your purchase documentation or contact HOMMPA customer service. Keep your proof of purchase for any warranty claims.
Contact Information: Refer to the seller's contact details on your purchase platform or the official HOMMPA website.