1. Introduction
This manual provides detailed instructions for the installation, operation, and maintenance of your AuCar Mark 7 Android 13 Car Radio Head Unit. This unit is designed for Infiniti Q50, Q50S, Q60, and Q60S models manufactured between 2014 and 2019. It features a 13.6-inch T-Style display, Android 13 operating system, 8GB RAM, and 128GB ROM.

Image 1: AuCar Mark 7 Head Unit installed in an Infiniti Q50 dashboard.
2. Key Features
- Operating System: Android 13.0 with Snapdragon 665AIE processor.
- Memory: 8GB RAM + 128GB ROM.
- Display: 13.6-inch 1920*1080 capacitive multi-touch screen.
- Connectivity: Built-in WiFi, 4G SIM card support, Bluetooth 5.0.
- Navigation: Built-in GPS (offline map) and support for online maps.
- Audio: 4*45W Audio Output, 7850 amplifier, 9 Equalizers, AM/FM with RDS.
- Integration: Wireless CarPlay & Android Auto, USB port, Steering Wheel Control support.
- Compatibility: Fully compatible with OEM InTouch system, includes OEM JBL system cables.
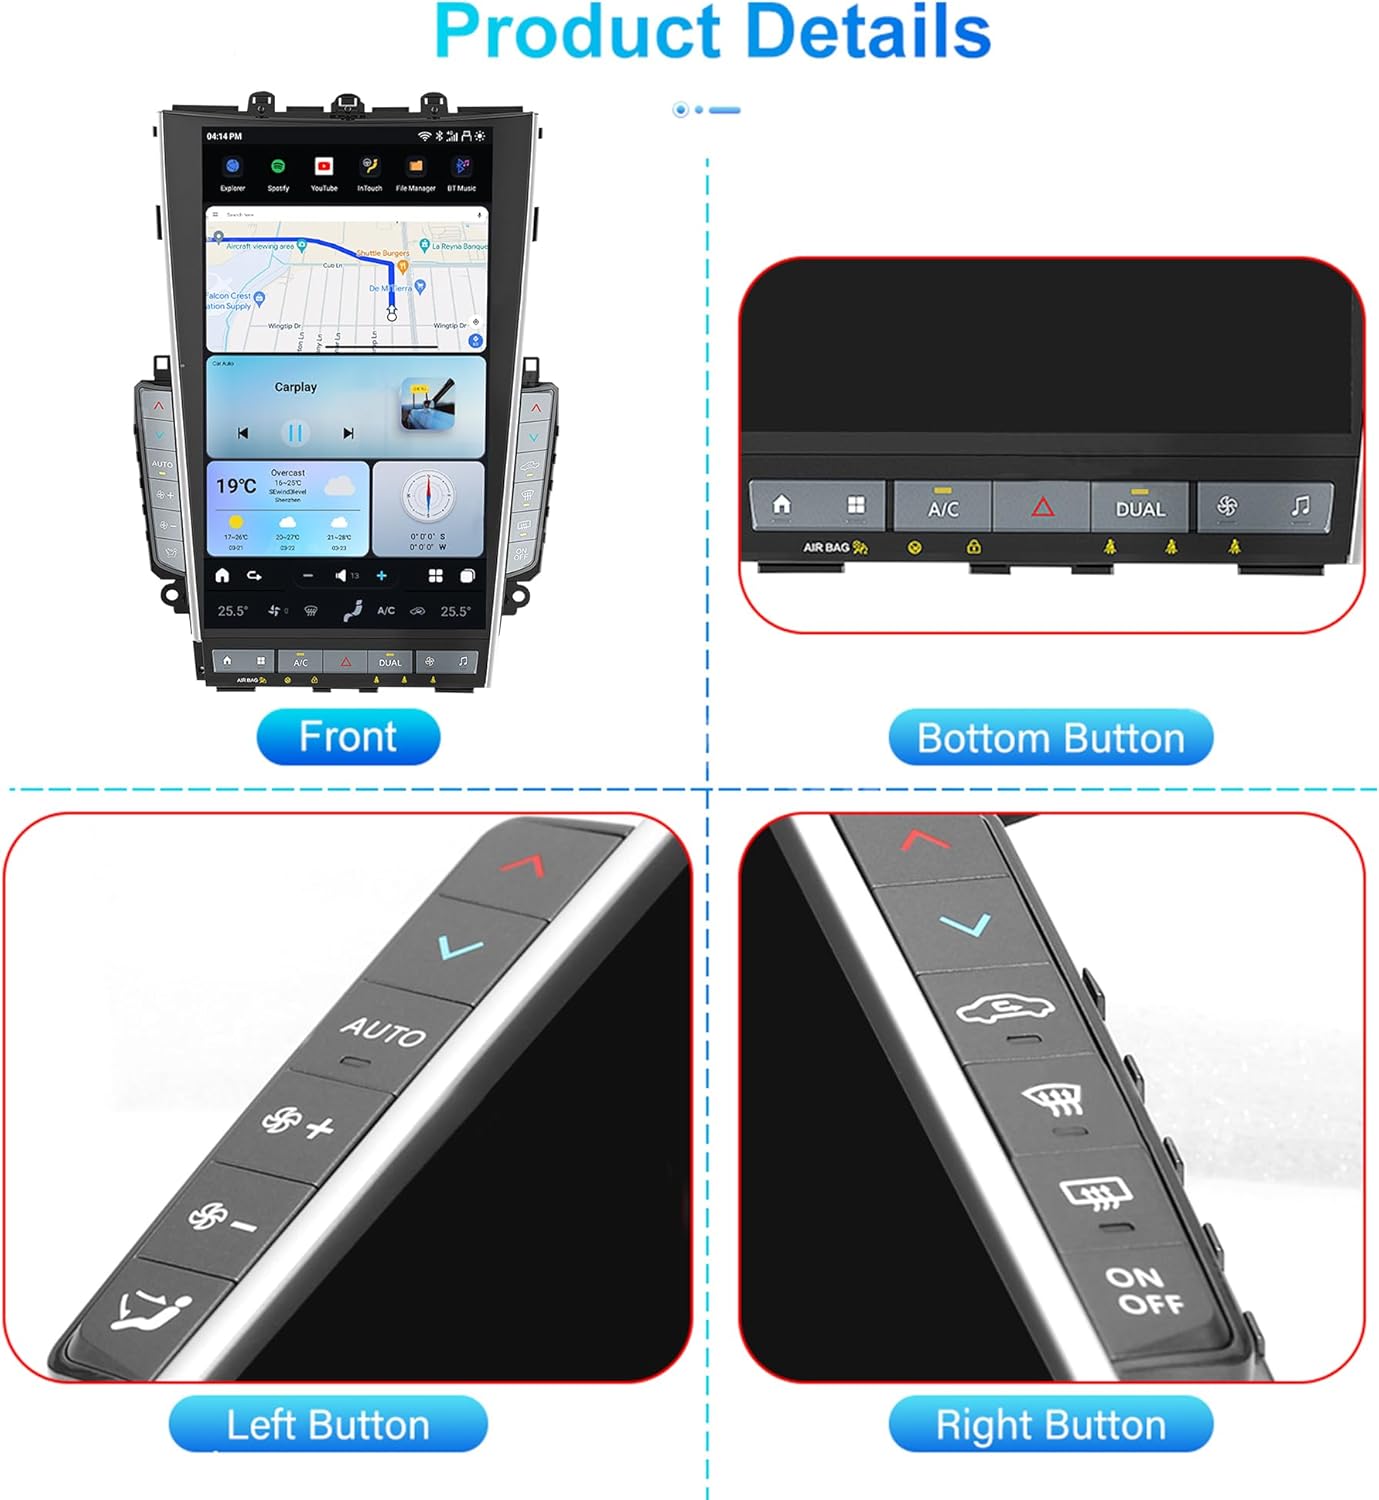
Image 2: Overview of AuCar Mark 7 Head Unit features.
3. Setup and Installation
The AuCar Mark 7 Head Unit is designed for a fully plug-and-play installation, requiring no cutting or jointing of wires. It is crucial to ensure all original components are correctly reconnected or integrated.
3.1 Essential Connections
- Antennas: Connect the 4G LTE signal antenna (for SIM card) and the GPS antenna to the designated screw-on ports on the back of the unit.
- SIM Card: The unit has a SIM card slot. An additional SIM card slot is available on the harness. Use one or the other.
- Power & CANbus: Connect the main power cord and the CANbus connector.
- AC Control Box: When removing the factory radio, retain the original air conditioning control box and keep its connectors attached to their original positions. This box is essential for the new unit's AC functionality.
- USB Ports: Two USB cables are provided (one 6-pin, one 4-pin). The 4-pin is the primary USB port, recommended for CarPlay/Android Auto.
- RCA Connections: Subwoofer RCA, Aux AV IN RCA (female), Aux R IN, Aux L IN, RL OUT, RR OUT, FL OUT, FR OUT are available for various audio/video inputs and outputs, including aftermarket amplifiers.
- Backup Camera: A female RCA labeled CCD AV IN is for the factory backup camera. An additional RCA is available for aftermarket backup cameras.
- Airbag Connector: A 4-pin airbag connector is provided. Connect it to the corresponding port in your vehicle to prevent the airbag sensor light from appearing. If the light persists, an OBD scanner may be needed to clear codes.
3.2 Installation Video Guide
Video 1: Detailed installation guide for AuCar Mark 6/7 Car Radio in Infiniti Q50 models. This video demonstrates the connection points for various cables and components.
3.3 Post-Installation Check
After installation, verify that the hazard button on the unit is functional. If it is not, recheck the connection of the AC panel plug, as incorrect connection can affect its operation.

Image 3: Comparison of the Infiniti Q50 dashboard before and after installing the AuCar Mark 7 Head Unit.
4. Operating Instructions
4.1 Wireless CarPlay & Android Auto
The unit supports wireless CarPlay and Android Auto. Connect your smartphone via Bluetooth and then launch the CarPlay/Android Auto application on the head unit.
Video 2: Demonstration of connecting and using CarPlay and Android Auto on the Android Head Unit.

Image 4: Wireless CarPlay and Android Auto interface on the head unit.
4.2 Radio Functionality
Access the built-in AM/FM radio tuner with RDS support. You can scan for stations and save your favorites.

Image 5: Radio interface on the head unit.
4.3 Digital Sound Processor (DSP)
Utilize the 9-band equalizer and sound field adjustments to customize your audio experience.

Image 6: Digital Sound Processor (DSP) interface.
4.4 AC Control
Control your vehicle's air conditioning directly from the head unit's touchscreen interface.

Image 7: AC Control interface on the head unit.
4.5 Split-Screen Functionality
Utilize the split-screen feature to run two applications simultaneously, such as navigation and music playback.

Image 8: Split-screen functionality on the head unit.
4.6 Steering Wheel Control (SWC)
The unit supports your vehicle's original steering wheel controls for convenient operation.

Image 9: Steering Wheel Control integration with the head unit.
4.7 Video Playback
The unit supports HD 1080P video playback and includes HDMI multimedia output for connecting to secondary displays.

Image 10: HDMI Multimedia Output for secondary displays.
5. Troubleshooting
- Hazard Button Not Working: If the hazard button does not function after installation, ensure the correct AC panel plug is connected. Refer to the installation video for proper connection.
- Audio Issues: If no audio plays, ensure the sound button (note icon) is pressed to automatically switch the car's audio source to what Android Auto uses.
- Incorrect Time/Weather Widget: Manually set the time if automatic settings are inconsistent. Weather widgets may not update correctly; this is a known minor issue.
- Airbag Light: If the airbag light appears after installation, ensure the 4-pin airbag connector is correctly plugged in. An OBD scanner may be required to clear persistent codes.
- Unit Reset: If the unit becomes unresponsive, locate the RST button (usually a small pinhole) and press it once with a paperclip or pin. The unit will reboot.
6. Specifications
- Model Name: MK7
- Operating System: Android 13
- Processor: Snapdragon 665AIE (8 CORES)
- RAM: 8GB
- ROM: 128GB
- Display Size: 13.6 Inches
- Screen Resolution: 1920*1080
- Connectivity: USB, Bluetooth 5.0, Built-in WiFi, 4G SIM Card Slot
- Audio Output: 4*45W
- Amplifier: 7850
- Radio Chip: NXP6686
- Mounting Type: Dashboard Mount
- Product Dimensions: 9 x 9 x 5 inches
- Item Weight: 9.9 pounds
7. Warranty and Support
The AuCar Mark 7 Head Unit comes with a 30-day manufacturer warranty. Installation manuals and online technical support are available. For further assistance, please contact customer support with a photo of your car's dashboard, year, and model after placing an order.