1. Introduction
This manual provides comprehensive instructions for assembling and maintaining your Leo Jaymz DIY ST Lefthand Style Electric Guitar Kit. This kit is designed for enthusiasts who wish to build their own electric guitar, featuring a solid mahogany body, a maple neck, and a laurel wood fretboard. All necessary components are included, and the design incorporates plug-in connections to simplify assembly without requiring soldering.

Figure 1.1: Example of an assembled Leo Jaymz electric guitar, showcasing the finished product.
2. What's in the Box
Your Leo Jaymz DIY ST Lefthand Electric Guitar Kit includes all the essential components required for assembly. Please verify that all items listed below are present before beginning the assembly process.

Figure 2.1: Overview of all components included in the DIY guitar kit.
- Mahogany Body (ST Lefthand style, pre-drilled and polished)
- Maple Neck with Laurel Wood Fretboard (21 frets, 25.5" scale)
- Pre-wired Pickguard with Pickups
- Tuning Pegs (6-in-line, alloy material)
- Bridge and Bridge Springs
- Output Jack
- Guitar Strings
- Audio Cable
- Copper Foil Tape (for noise reduction)
- Neckplate
- Back Cover
- Allen Wrench & Tremolo Arm
- Guitar Strap
- Guitar Strap Locks with Security Quick Retainer System
- Spring Claw & Screw Kits (various screws for assembly)

Figure 2.2: Detailed view of individual guitar accessories and their labels.
3. Assembly Instructions
Follow these steps carefully to assemble your electric guitar kit. The kit features plug-in connections, eliminating the need for soldering.
3.1. Body and Neck Preparation

Figure 3.1.1: The mahogany guitar body with pre-reserved holes for assembly.
- Inspect Components: Carefully inspect the mahogany body and maple neck for any imperfections. The body is pre-polished and has a bottom varnish applied.
- Neck Attachment: Align the maple neck with the neck pocket on the guitar body. Ensure a snug fit. Secure the neck to the body using the provided neck plate and screws.

Figure 3.1.2: Various views of the maple neck, highlighting the fretboard and headstock.
3.2. Headstock and Tuning Pegs
- Install Tuning Pegs: Attach the 6-in-line alloy tuning pegs to the headstock of the maple neck. Ensure they are securely fastened.
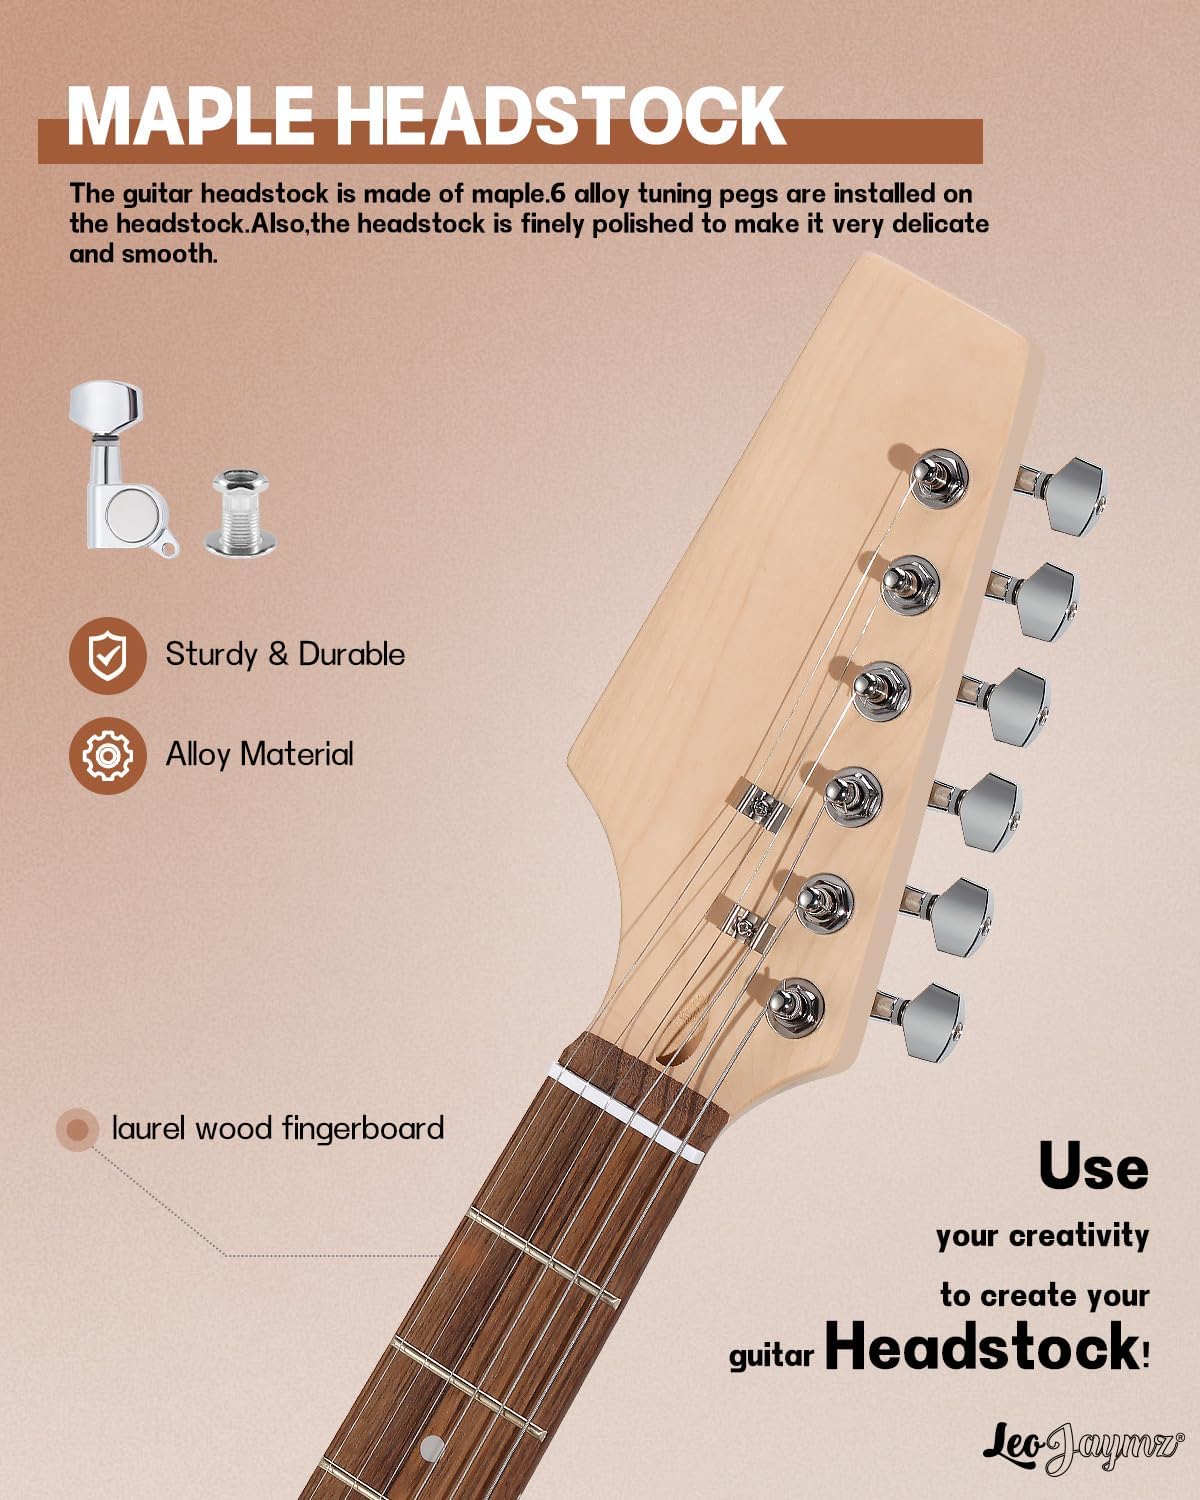
Figure 3.2.1: The maple headstock with installed tuning pegs and the laurel wood fretboard.
3.3. Electronics and Pickguard Installation
- Apply Copper Foil Tape: For effective noise reduction, apply the provided copper foil tape to the wire compartment and pickup grooves within the guitar body.
- Connect Pickguard: The pickguard comes pre-wired with pickups and controls. Utilize the plug-in connections to link the pickguard's wiring to the guitar's output jack and other internal connections. No soldering is required.
- Secure Pickguard: Carefully place the pickguard onto the guitar body, aligning it with the screw holes. Secure it with the appropriate screws from the screw kit.
- Install Output Jack: Connect and secure the output jack into its designated cavity on the guitar body.

Figure 3.3.1: Illustration of the simple plug-and-play wiring system, eliminating the need for welding.
3.4. Bridge and Strings
- Install Bridge: Mount the bridge assembly onto the guitar body. Ensure the bridge springs are correctly installed for tremolo functionality.
- Stringing the Guitar: Carefully thread the guitar strings through the bridge and up to the tuning pegs. Wind the strings around the tuning pegs and tighten them until they are taut.
3.5. Final Touches
- Attach Back Cover: Secure the back cover plate to the rear of the guitar body using the provided screws.
- Install Strap and Strap Locks: Attach the guitar strap to the body using the included security quick retainer system strap locks.
- Initial Tuning: Perform an initial tuning of the guitar strings. Fine-tune as needed.
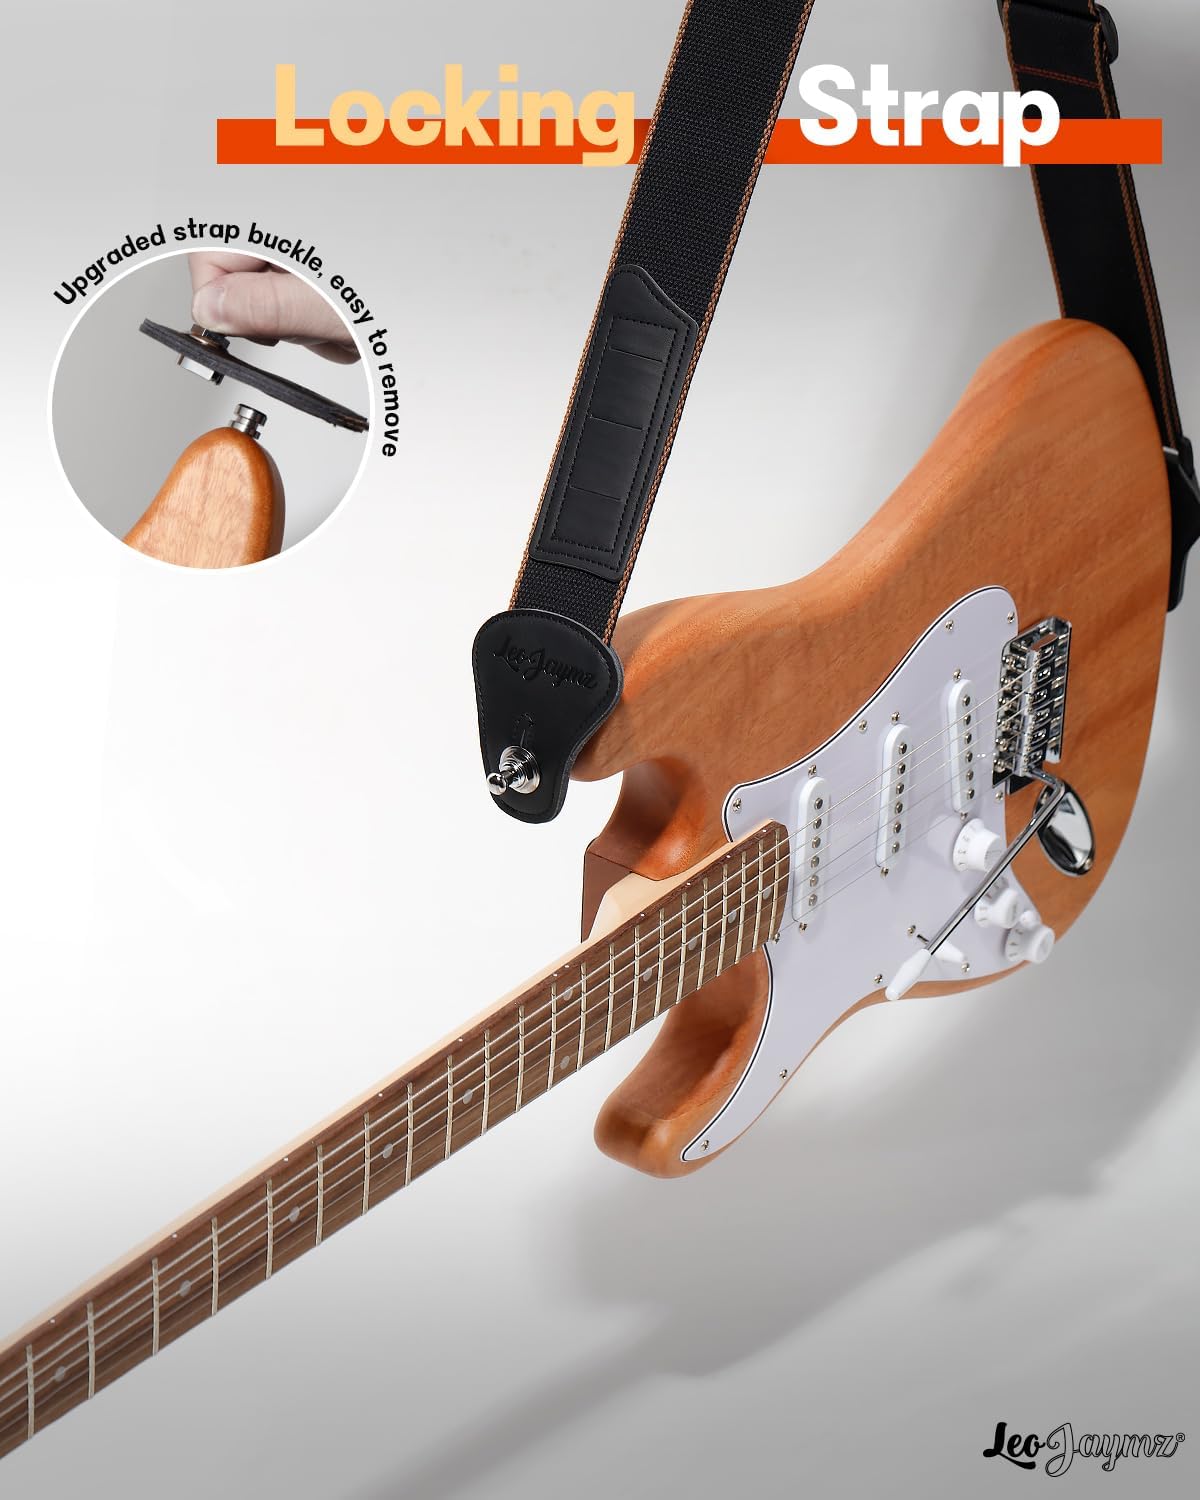
Figure 3.5.1: The upgraded strap buckle and security quick retainer system for the guitar strap.
4. Operating Your Electric Guitar
Once assembled, your Leo Jaymz electric guitar is ready for use. Here are basic operating guidelines:
- Tuning: Use an electronic tuner to accurately tune each string to standard E-A-D-G-B-e (low to high) or your preferred tuning.
- Connecting to an Amplifier: Use the provided audio cable to connect the guitar's output jack to an electric guitar amplifier.
- Volume and Tone Controls: Experiment with the volume and tone knobs on your guitar to shape your sound. The pickguard includes pre-wired controls for convenience.
- Pickup Selector: Utilize the pickup selector switch to choose between different pickups (neck, middle, bridge) or combinations thereof, each offering a unique tonal characteristic.
- Tremolo System: The installed tremolo bridge allows for pitch bending effects. Use the tremolo arm to manipulate the pitch of the strings.
5. Maintenance
Proper maintenance will ensure the longevity and optimal performance of your electric guitar:
- Cleaning: Regularly wipe down the body, neck, and strings with a soft, lint-free cloth after each use to remove sweat and grime. Use guitar-specific cleaning products for deeper cleaning.
- String Replacement: Replace strings regularly, typically every 1-3 months depending on usage, to maintain optimal tone and playability.
- Fretboard Care: Condition the laurel wood fretboard periodically (e.g., every 6 months) with a suitable fretboard oil to prevent drying and cracking.
- Hardware Check: Periodically check all screws and hardware (tuning pegs, bridge, strap locks) for tightness and tighten as needed to prevent rattling or instability.
- Storage: Store the guitar in a stable environment, away from extreme temperature changes and humidity fluctuations, preferably in a guitar case or gig bag.
6. Troubleshooting
Here are some common issues and their potential solutions:
| Problem | Possible Cause | Solution |
|---|---|---|
| No Sound from Amplifier | Loose cable connection, amplifier off, guitar volume down, faulty cable/pickup. | Ensure all cables are securely connected. Check amplifier power and settings. Increase guitar volume. Test with a different cable or amplifier if possible. Verify pickup connections are secure. |
| Excessive Buzzing/Humming | Improper grounding, unshielded cavities, faulty wiring, single-coil hum. | Ensure copper foil tape is properly applied in cavities. Check all plug-in connections for tightness. This kit uses single-coil pickups, which naturally produce some hum; proper shielding helps minimize it. |
| Strings Buzzing on Frets | Low string action, uneven frets, warped neck. | Check neck relief. Adjust bridge saddle height to raise string action. If buzzing persists, professional setup may be required. |
| Guitar Not Staying in Tune | New strings stretching, improperly wound strings, faulty tuning pegs, nut issues. | Stretch new strings thoroughly. Ensure strings are properly wound around tuning pegs. Check tuning pegs for looseness and tighten if necessary. Lubricate nut slots if strings are binding. |
7. Specifications
Key technical specifications for your Leo Jaymz DIY ST Lefthand Electric Guitar Kit:
- Model Number: DLH0052
- Body Material: Mahogany
- Neck Material: Maple
- Fretboard Material: Laurel Wood
- Scale Length: 25.5 Inches
- Number of Frets: 21
- Hand Orientation: Left
- Pickup Configuration: S (Single-coil)
- Bridge System: Tremolo
- Item Weight: Approximately 10.25 pounds (assembled)
- Package Dimensions: 28.66 x 20.16 x 3.15 inches
8. Warranty and Support
For information regarding product warranty, returns, or technical support, please refer to the retailer's policy or contact Leo Jaymz customer service directly. Standard return policies typically allow for returns within 30 days of purchase.
You can find more information and contact details on the official Leo Jaymz brand store: Leo Jaymz Store