1. Overview
The Dvsripa All Terrain 4-Wheel Mobility Scooter is designed to provide reliable and comfortable mobility across various terrains. Equipped with a powerful motor and robust suspension, it offers stability and ease of use for individuals seeking enhanced independence. This manual provides essential information for the safe and effective operation and maintenance of your scooter.
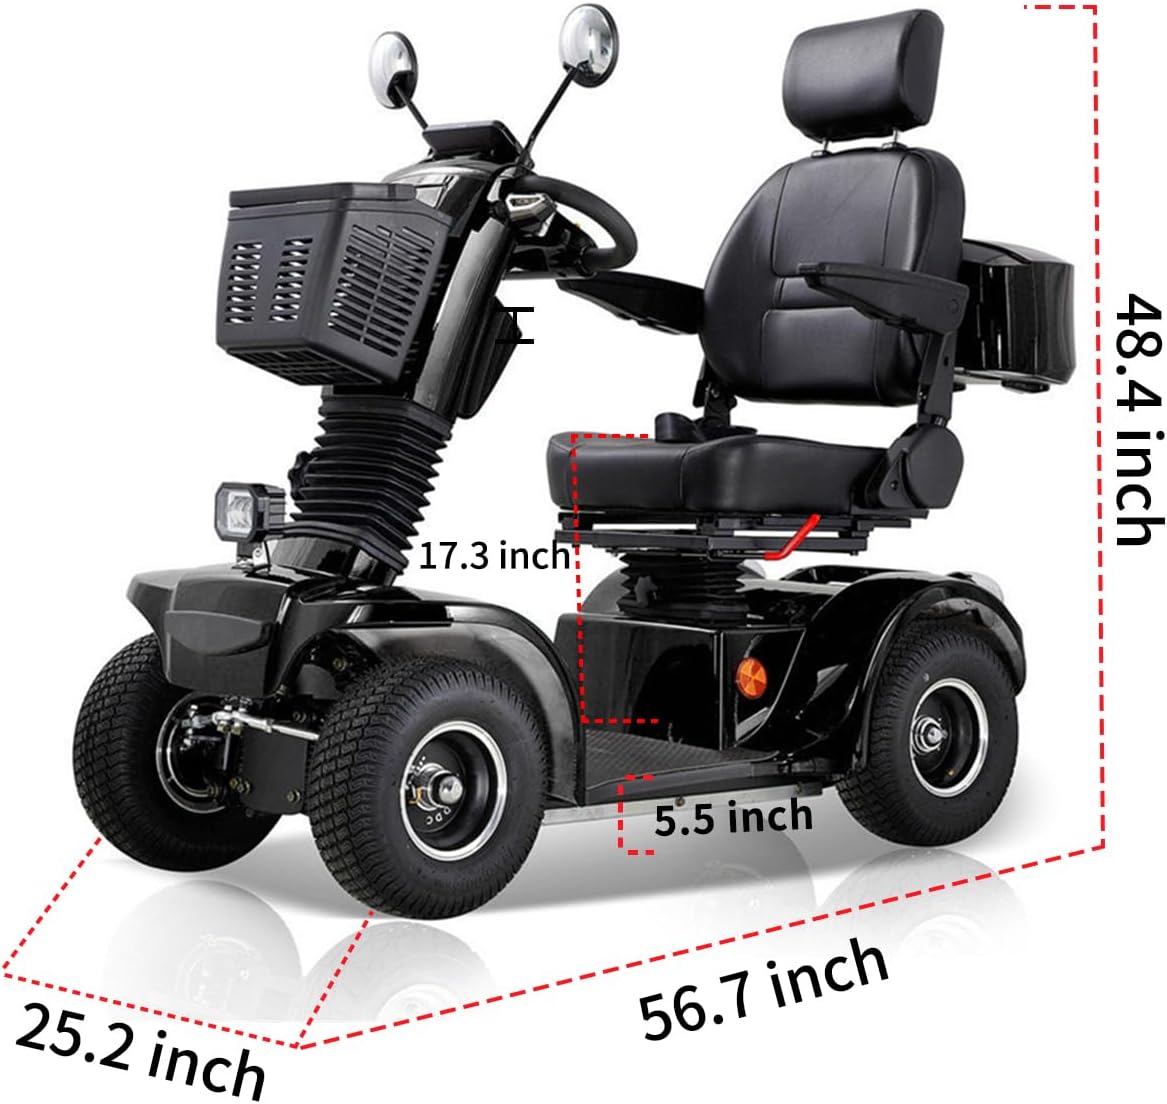
Figure 1: Dvsripa All Terrain 4-Wheel Mobility Scooter (Black Model)
Key Features:
- 500W High-Power Motor: Capable of tackling slopes up to 25 degrees.
- 48V 20Ah Battery: Provides extended range for various travel needs.
- 3-Speed Control: Adjustable speed from 1 MPH to 10 MPH.
- Comfortable Seating: Features adjustable neck support, handlebars, and a rotatable, angle-adjustable seat with thick leather cushions and high-density foam.
- All-Terrain Performance: Equipped with thick pneumatic tires, four-wheel suspension, and dual rear shock absorbers for stability on diverse surfaces including grass, sand, snow, and mud.
- Enhanced Safety: Includes seat belts, turn signals, high and low beams, and a multifunctional digital dashboard with LED display for monitoring speed, mileage, and battery.
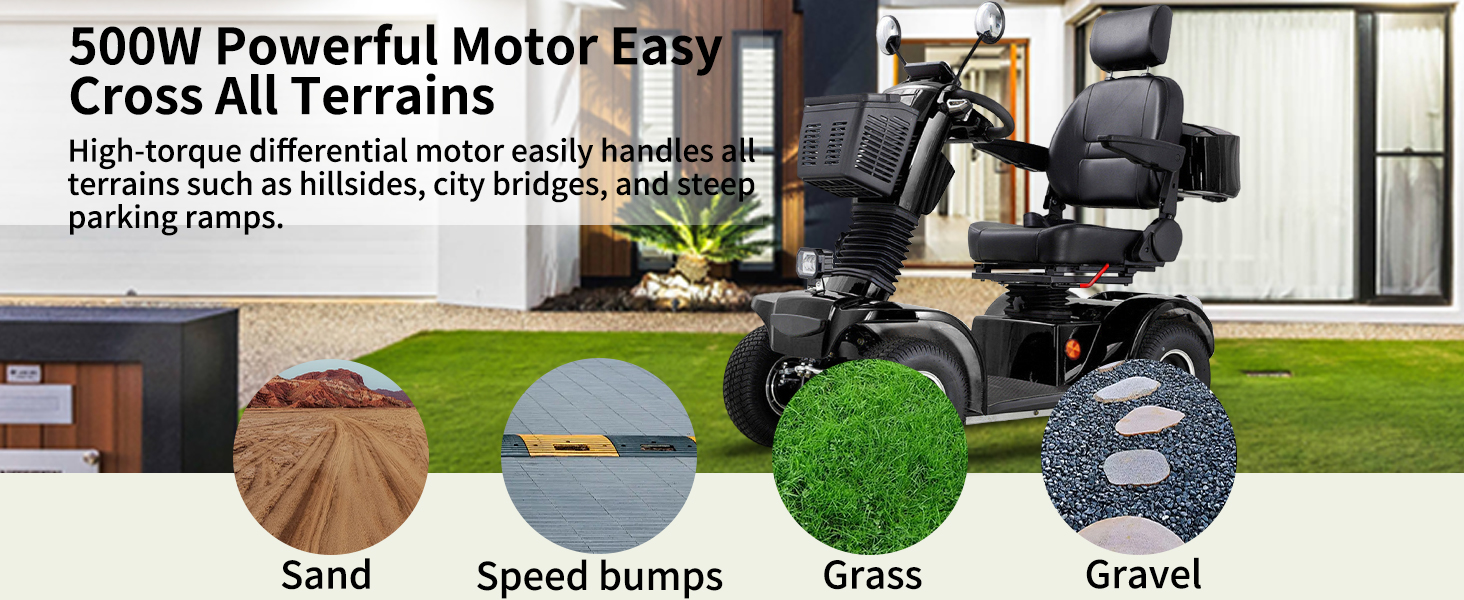
Figure 2: All-Terrain Performance on various surfaces.

Figure 3: Four-Wheel Suspension for Comfort Driving.
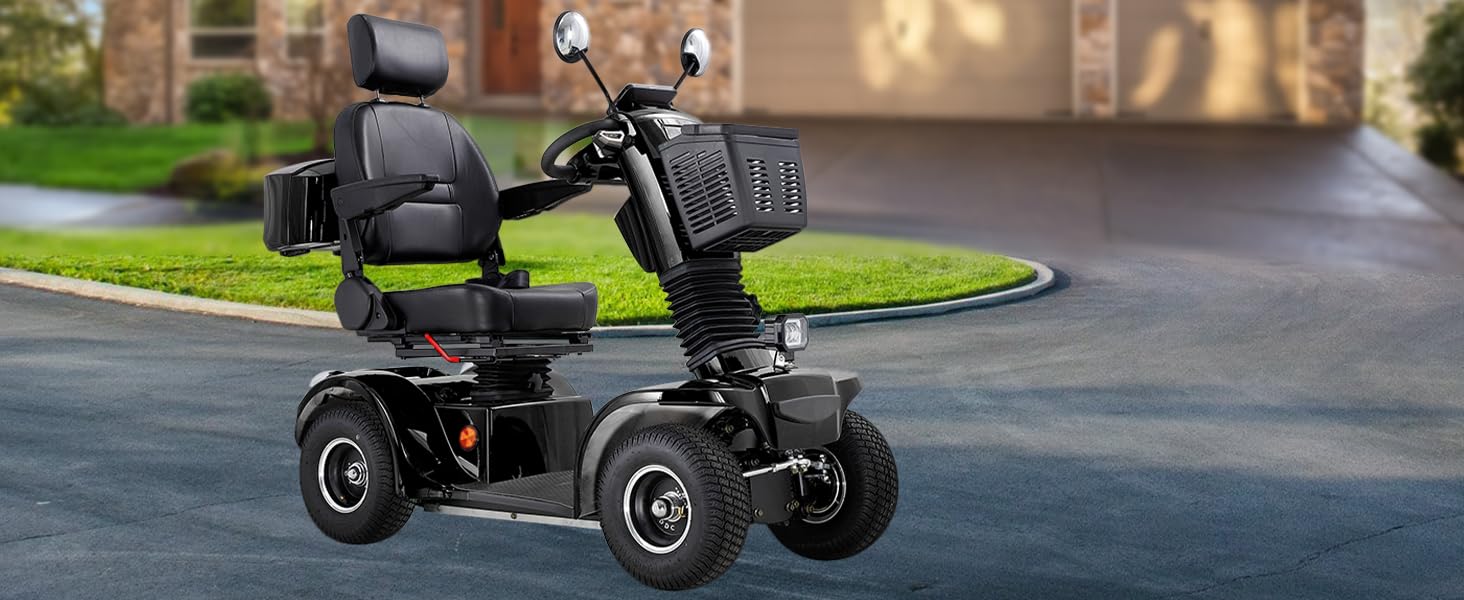
Figure 4: Integrated Safety Features.
Video 1: Demonstrating the All Terrain Mobility Scooter's capabilities on various surfaces.
2. Setup and Assembly
Follow these steps to set up your Dvsripa All Terrain 4-Wheel Mobility Scooter.
- Adjust Steering Column: Locate the adjustment knob on the steering column. Loosen it, adjust the column to your desired angle, and then tighten the knob securely.
- Retrieve Accessories: Open the rear storage compartment to retrieve the rear-view mirrors, charger, and bolts.
- Install Rear Case: Align the holes on the rear case with the corresponding holes on the bracket located behind the seat. Secure the rear case using the provided bolts.
- Install Headrest: Insert the headrest posts into the designated slots on the top of the seat back. Press the adjustment buttons to set the headrest to a comfortable height.
- Install Shopping Basket: Insert the front shopping basket into the slot located on the front of the steering column.
- Fasten Rear-View Mirrors: Turn the mirrors clockwise into the designated slots on the handlebars until they are securely fastened. Adjust the mirror angle for optimal rear visibility.
Video 2: Detailed assembly and setup instructions for the mobility scooter.

Figure 5: Adjustable Seat Design for personalized comfort.
3. Operating Instructions
Familiarize yourself with the controls and adjustments before operating the scooter.
3.1 Seat Adjustments:
- Seatbelt: Always fasten the seatbelt before driving.
- Armrest: Roll the armrest adjustment lever to raise or lower the armrests for comfort.
- Seat Swivel: Pull the lever located under the seat to swivel the seat for easier entry and exit.
- Backrest: Adjust the backrest angle by pulling the lever on the side of the seat.
- Seat Position: Use the lever under the seat to slide the seat forward or backward to achieve an optimal driving position.
3.2 Power and Driving:
- Engage Drive Mode: Locate the electromagnetic brake lever (usually red) near the rear wheel. Turn it upward to engage Drive Mode.
- Turn Power ON: Locate the main power switch (often indicated by an arrow) and turn it to the ON position.
- Ignition: Insert the key into the ignition and turn it clockwise to power on the scooter. The digital dashboard will illuminate.
- Lights and Signals:
- Press the appropriate button on the dashboard to activate the double flasher.
- Press the horn button to sound the horn.
- Use the turn signal switch to indicate turns.
- Press the light button to turn on the headlights and taillights.
- Adjust Speed: Use the speed dial on the dashboard to set your desired maximum speed.
- Drive: Grip the right lever on the handlebar to move forward.
- Reverse: Grip the left lever on the handlebar to move backward.
- Stop: Release both levers to engage the automatic electromagnetic brake and stop the scooter.

Figure 6: Dashboard Controls and Indicators.
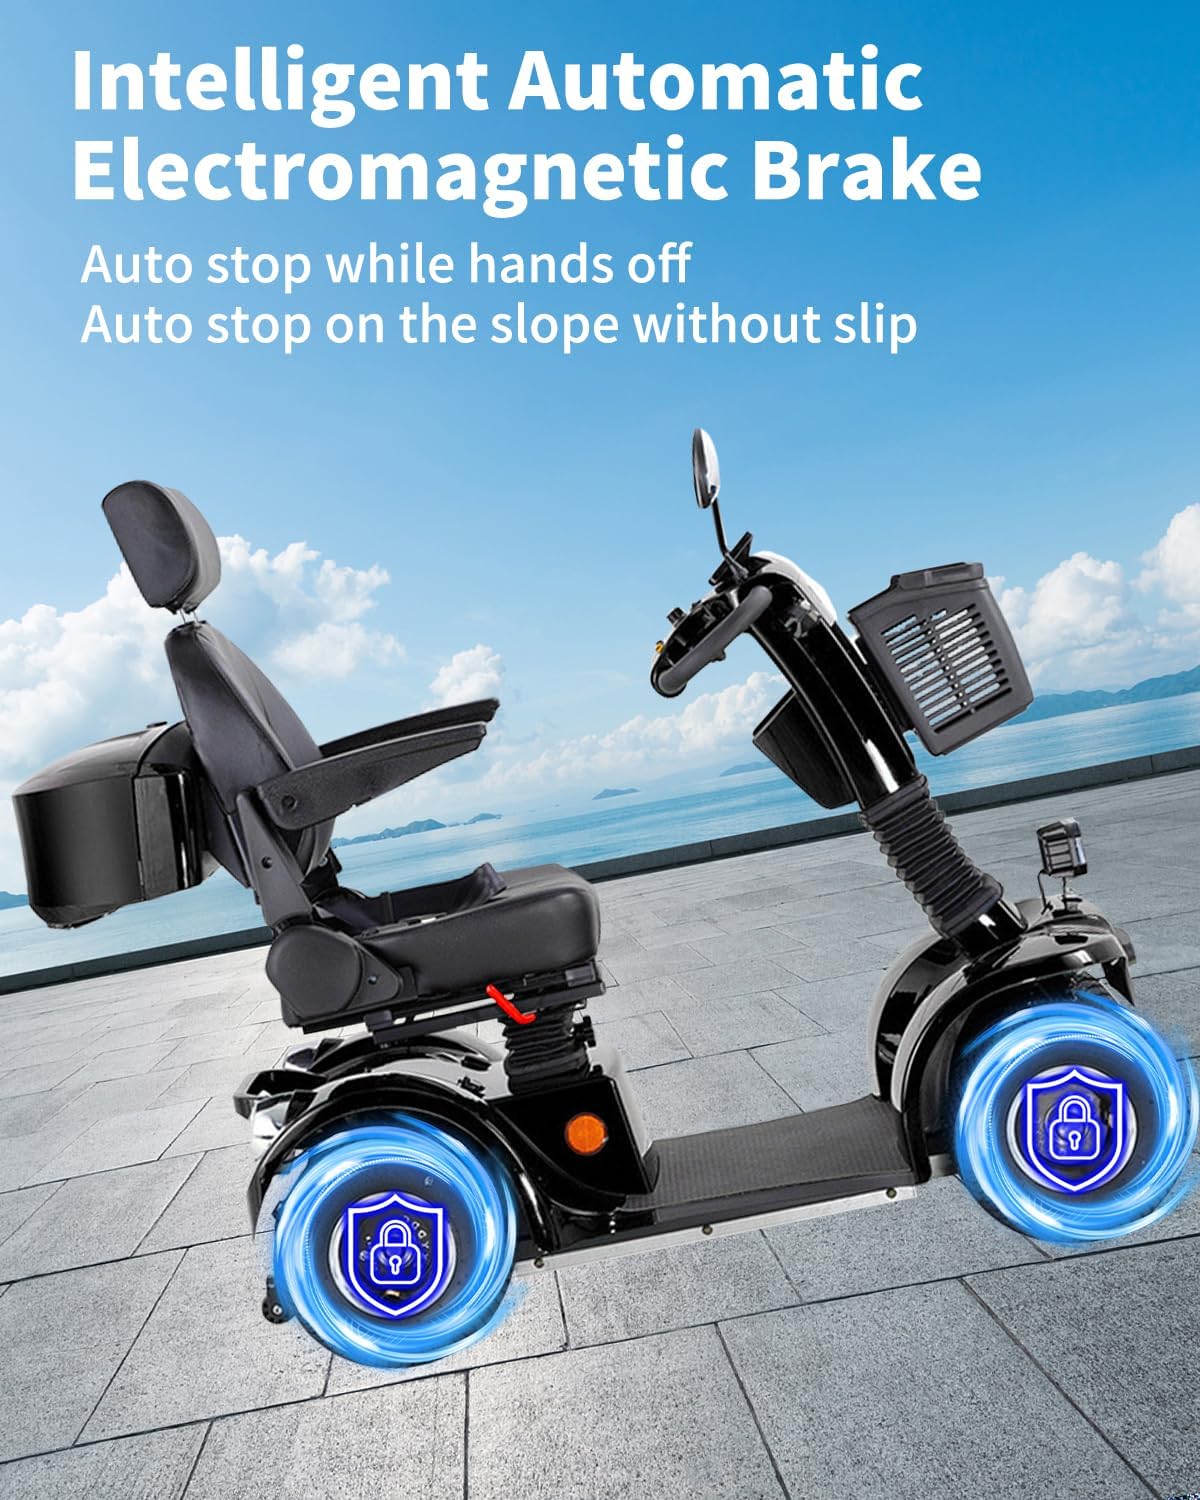
Figure 7: Intelligent Automatic Electromagnetic Brake.
4. Maintenance
Regular maintenance ensures the longevity and optimal performance of your mobility scooter.
- Cleaning: Regularly wipe down the scooter with a damp cloth. Avoid using harsh chemicals or excessive water.
- Battery Care: Charge the battery fully after each use. Avoid completely draining the battery. Store the scooter in a cool, dry place when not in use for extended periods.
- Tire Pressure: Check tire pressure periodically and inflate to the recommended PSI as indicated on the tire sidewall.
- General Inspection: Periodically check all bolts, connections, and moving parts for tightness and wear.
4.1 How to Charge:
To charge your scooter, locate the charging port, typically found near the base of the seat or on the side panel. Open the protective cover, plug the charger into the port, and then plug the charger into a standard electrical outlet. The charger's indicator light will show the charging status. Disconnect the charger once the battery is fully charged.

Figure 8: Charging port location and charging process (refer to Video 2 for visual guide).
5. Troubleshooting
If you encounter issues with your scooter, refer to the following common troubleshooting steps:
| Problem | Possible Cause | Solution |
|---|---|---|
| Scooter does not power on. | Battery is low or depleted; power switch is off; key not fully turned. | Charge the battery; ensure power switch is ON; turn key fully clockwise. |
| Scooter moves slowly or lacks power. | Low battery charge; speed dial set too low; rough terrain. | Charge the battery; adjust speed dial to a higher setting; avoid excessively challenging terrain. |
| Unusual noises during operation. | Loose components; worn parts; foreign object. | Inspect for loose parts and tighten; check for obstructions; contact support if noise persists. |
| Brakes not engaging properly. | Electromagnetic brake lever not in correct position; brake system malfunction. | Ensure electromagnetic brake lever is in Drive Mode; contact support for inspection. |
For issues not covered here or if problems persist, please contact Dvsripa customer support.
6. Specifications
Detailed technical specifications for the Dvsripa All Terrain 4-Wheel Mobility Scooter.
| Feature | Detail |
|---|---|
| Motor Power | 500W |
| Battery | 48V 20Ah |
| Maximum Speed | 10 Miles per Hour |
| Maximum Weight Recommendation | 500 Pounds |
| Slope Capability | Up to 25 degrees |
| Turn Radius | 48 Inches |
| Brake Style | Electromagnetic |
| Wheel Type | Pneumatic |
| Suspension | Four-wheel suspension, dual rear shock absorbers |
| Frame Material | Aluminum or Stainless Steel |
| Seat Material | Leather (thick cushions, high-density foam) |
| Product Dimensions (Package) | 52 x 33.5 x 27.6 inches |

Figure 9: Scooter Dimensions.
7. Warranty and Support
Dvsripa is committed to providing quality products and excellent customer service.
7.1 Warranty Information:
- Your Dvsripa All Terrain 4-Wheel Mobility Scooter comes with a comprehensive 1-year warranty.
- This warranty covers the free replacement of all parts, with the exception of motors.
7.2 Customer Support:
- For any questions, technical assistance, or warranty claims, please contact our professional support team.
- Local support services are available in Delaware for convenient after-sales service and repairs.