1. Introduction
Thank you for choosing the COVVY G3 Mini Digital Voice Recorder. This device is designed for high-quality audio recording and playback, featuring a compact design, 64GB internal storage, and various useful functions. Please read this manual carefully to understand the operation and ensure optimal performance.

Image 1.1: COVVY G3 Mini Digital Voice Recorder and Accessories
This image displays the COVVY G3 Mini Digital Voice Recorder, a compact black device with a screen and control buttons. Alongside it are a small microSD card and a pair of white wired earphones, indicating the included accessories.
2. Package Contents
Please check the package for the following items:
- COVVY G3 Digital Voice Recorder
- USB-C Cable
- Wired Earphones
- User Manual

Image 2.1: Package Contents
This image shows the brown cardboard box labeled 'Digital Voice Recorder' and its contents laid out: the COVVY G3 device, a pair of earphones, a USB cable, and a small instruction manual.
3. Product Overview
Familiarize yourself with the buttons and ports of your COVVY G3 recorder:

Image 3.1: Device Diagram
This diagram provides a detailed view of the COVVY G3 recorder from multiple angles, with numbered labels pointing to specific components such as the display screen, menu button, volume controls, playback keys, record switch, USB port, microphone, and headphone jack.
- Display screen
- Menu button
- Return button
- Volume+ button
- Volume- button
- Next track/Fast forward button
- Previous track/Fast reverse button
- Play key
- Repeat button (A-B)
- Bookmark button (T-Mark)
- Delete button (ERASE)
- Lanyard hole
- Record switch
- On/Off switch
- Reboot button
- USB-C port
- TF card slot (MicroSD)
- External microphone port
- Headphone plug
- Built-in Microphone
- Speaker
4. Setup
4.1 Charging the Device
Before first use, fully charge the recorder. Connect the device to a computer's USB port or a USB wall adapter (not included) using the provided USB-C cable. The battery indicator on the screen will show charging status.
4.2 Powering On/Off
- To power on: Slide the On/Off switch (14) to the 'On' position.
- To power off: Slide the On/Off switch (14) to the 'Off' position.
5. Operating Instructions
5.1 One-Touch Recording
The COVVY G3 features a convenient one-touch recording function:
- To start recording: Slide the Record switch (13) upwards. The device will immediately begin recording.
- To save recording: Slide the Record switch (13) downwards. The current recording will be saved, and the device will stop recording.

Image 5.1: One-Touch Recording
This image demonstrates the simplicity of starting and stopping recordings. It shows the side of the recorder with a switch, indicating 'Push Up Recording' and 'Push Down Save' with red arrows, highlighting the quick action for recording.
5.2 Playback
- To play a recording: Navigate to the file list using the Menu and navigation buttons. Select the desired file and press the Play key (8).
- Volume adjustment: Use the Volume+ (4) and Volume- (5) buttons during playback.
- Skip tracks: Use the Next track/Fast forward (6) and Previous track/Fast reverse (7) buttons.
5.3 Managing Recordings with T-Mark
The T-Mark function allows you to mark important points within a recording for easier navigation and management.
- During recording or playback, press the T-Mark button (10) to insert a bookmark.
- Timestamped recordings: All recordings are automatically timestamped, making it easy to identify and organize files by date and time.

Image 5.2: T-Mark Function
This image illustrates the 'T-Mark' feature, showing a folder icon next to the recorder, emphasizing how pressing the 'T-Mark' button helps in easily managing and organizing recording files.
6. Advanced Features
6.1 High-Quality Recording
The COVVY G3 utilizes intelligent noise reduction technology to deliver clear stereo recordings up to 1536 Kbps (WAV format). Multiple recording quality options are available:
- WAV: 1536 Kbps, 1024 Kbps, 512 Kbps
- MP3: 128 Kbps, 32 Kbps

Image 6.1: High-Resolution Recording
This graphic highlights the 1536Kbps resolution and high sensitivity of the voice recorder, detailing features like professional chip, PCM intelligent noise reduction, and various recording quality options for both MP3 and WAV formats.
6.2 A-B Repeat Function
The A-B Repeat function allows you to loop a specific segment of an audio file, which is useful for learning or transcribing.
- During playback, press the A-B button (9) once to set point A.
- Press the A-B button (9) again to set point B. The segment between A and B will then loop.
- Press the A-B button (9) a third time to exit A-B repeat mode.

Image 6.2: A-B Repeat Function
This image illustrates the A-B Repeat function in a learning context, showing a child and an adult with a microphone and the COVVY G3 recorder, suggesting its use for repeating audio segments for study.
6.3 Password Protection
Protect your recordings and personal information by setting a password for the device.
- Access the password settings through the device's menu.
- Follow the on-screen prompts to set or change your PIN.

Image 6.3: Password Protection
This image visually explains the password protection feature, showing a lock icon and a screen on the recorder displaying 'NEW PIN' with input fields, indicating the ability to secure the device with a personal identification number.
6.4 MP3 Player Functionality
The COVVY G3 can also function as an MP3 player. Transfer your music files to the device and enjoy playback through the built-in speaker or connected earphones.

Image 6.4: Music Playback
This image depicts a person wearing headphones and using the COVVY G3 recorder, highlighting its capability to play music, effectively functioning as an MP3 player.
7. Connecting to a Computer
To transfer files, connect your COVVY G3 to a computer using the supplied USB-C cable.
- Connect the USB-C cable to the recorder's USB-C port (16) and to an available USB port on your computer.
- The device will appear as a removable disk drive on your computer.
- You can then drag and drop recording files to your computer, or transfer music files to the recorder.
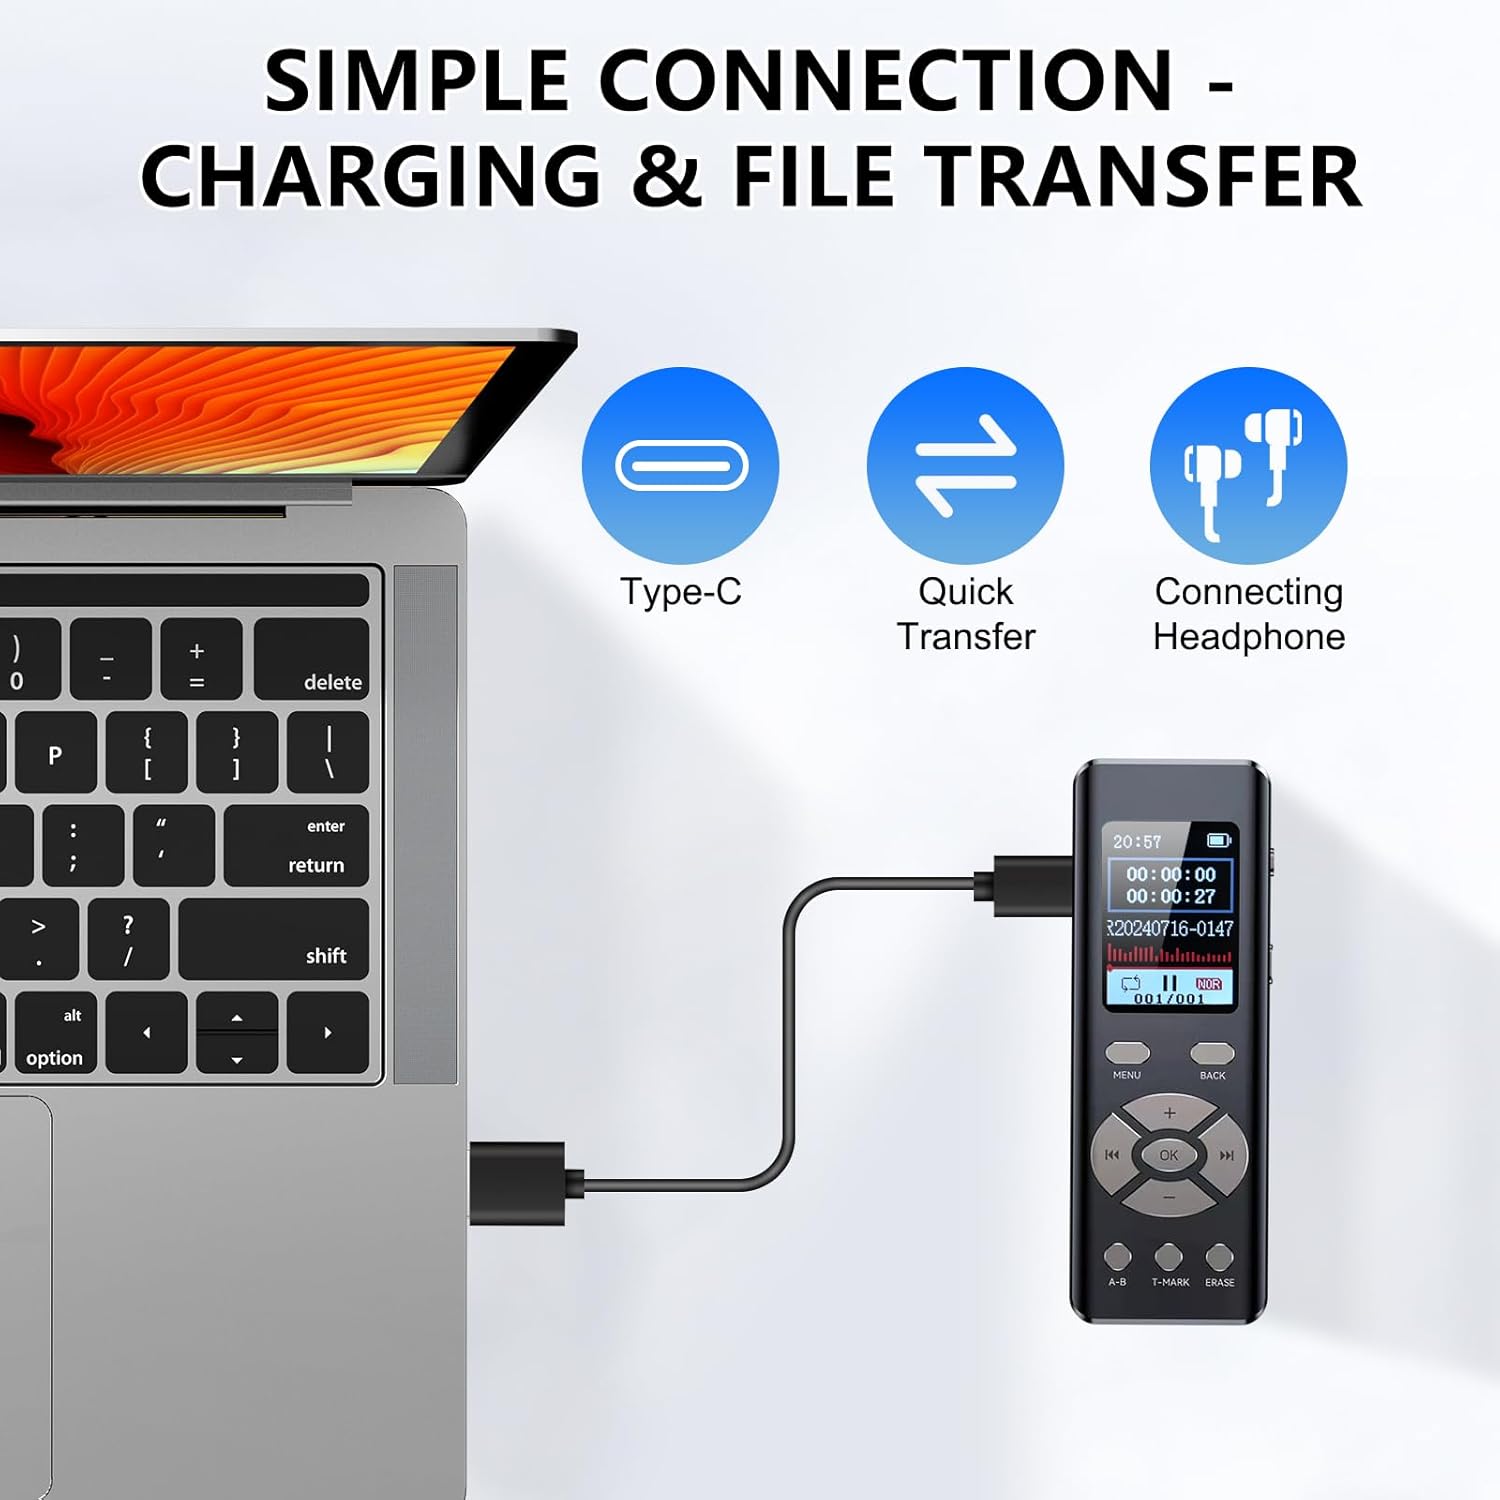
Image 7.1: Simple Connection for Charging & File Transfer
This image illustrates the process of connecting the COVVY G3 recorder to a laptop using a USB-C cable, indicating its use for both charging and quick file transfer. It also shows an icon for connecting headphones.
8. Maintenance
- Keep the device dry. Avoid exposure to moisture or liquids.
- Do not expose the device to extreme temperatures.
- Clean the device with a soft, dry cloth. Do not use harsh chemicals or solvents.
- Avoid dropping or subjecting the device to strong impacts.
- Regularly back up important recordings to your computer.
9. Troubleshooting
9.1 Device Not Turning On
- Ensure the battery is charged. Connect the device to a power source and allow it to charge for at least 30 minutes.
- Check the On/Off switch (14) is in the 'On' position.
- If the device is unresponsive, try pressing the Reboot button (15) with a thin object (e.g., a paperclip).
9.2 Poor Recording Quality
- Ensure the microphone (20) is not obstructed.
- Record in a quiet environment to minimize background noise.
- Adjust recording settings (e.g., higher bitrate) in the device menu if available.
9.3 Cannot Connect to Computer
- Ensure the USB-C cable is securely connected to both the recorder and the computer.
- Try a different USB port on your computer.
- Ensure the device is powered on when connecting to the computer.
- Try a different USB-C cable if available.
10. Specifications
| Brand | COVVY |
| Model Number | G3 |
| Memory Storage Capacity | 64 GB |
| Screen Size | 1.44 Inches |
| Audio Format | MP3, WAV |
| Recording Quality | Up to 1536 Kbps (WAV) |
| Microphone Form Factor | Integrated |
| Interface Hardware | USB-C |
| Headphone Jack | 3.5 mm |
| Product Dimensions | 100 x 10 x 35 mm |
| Battery Life (Recording) | Up to 92 hours (1536 Kbps) |
11. Warranty & Support
For warranty information and customer support, please refer to the documentation included with your purchase or contact COVVY customer service through the retailer where you purchased the product. Please retain your proof of purchase for warranty claims.