1. Safety Information
Please read and understand all instructions before beginning assembly and installation. Failure to follow these instructions may result in injury or product damage.
- Potential hazards include improper installation leading to instability, doors swinging open unexpectedly, and pinch points.
- Always follow the assembly instructions carefully.
- Ensure the cabinet is securely mounted to a wall.
- Keep the area around the cabinet clear to prevent injuries.
- Assembly typically requires two people and basic hand tools.
2. Package Contents
Verify that all components and hardware are present before starting assembly. If any parts are missing or damaged, contact Prepac customer support.
- Cabinet panels (sides, top, bottom, shelves, doors)
- Assembly Hardware (screws, cam locks, dowels, hinges, handles)
- User Manual
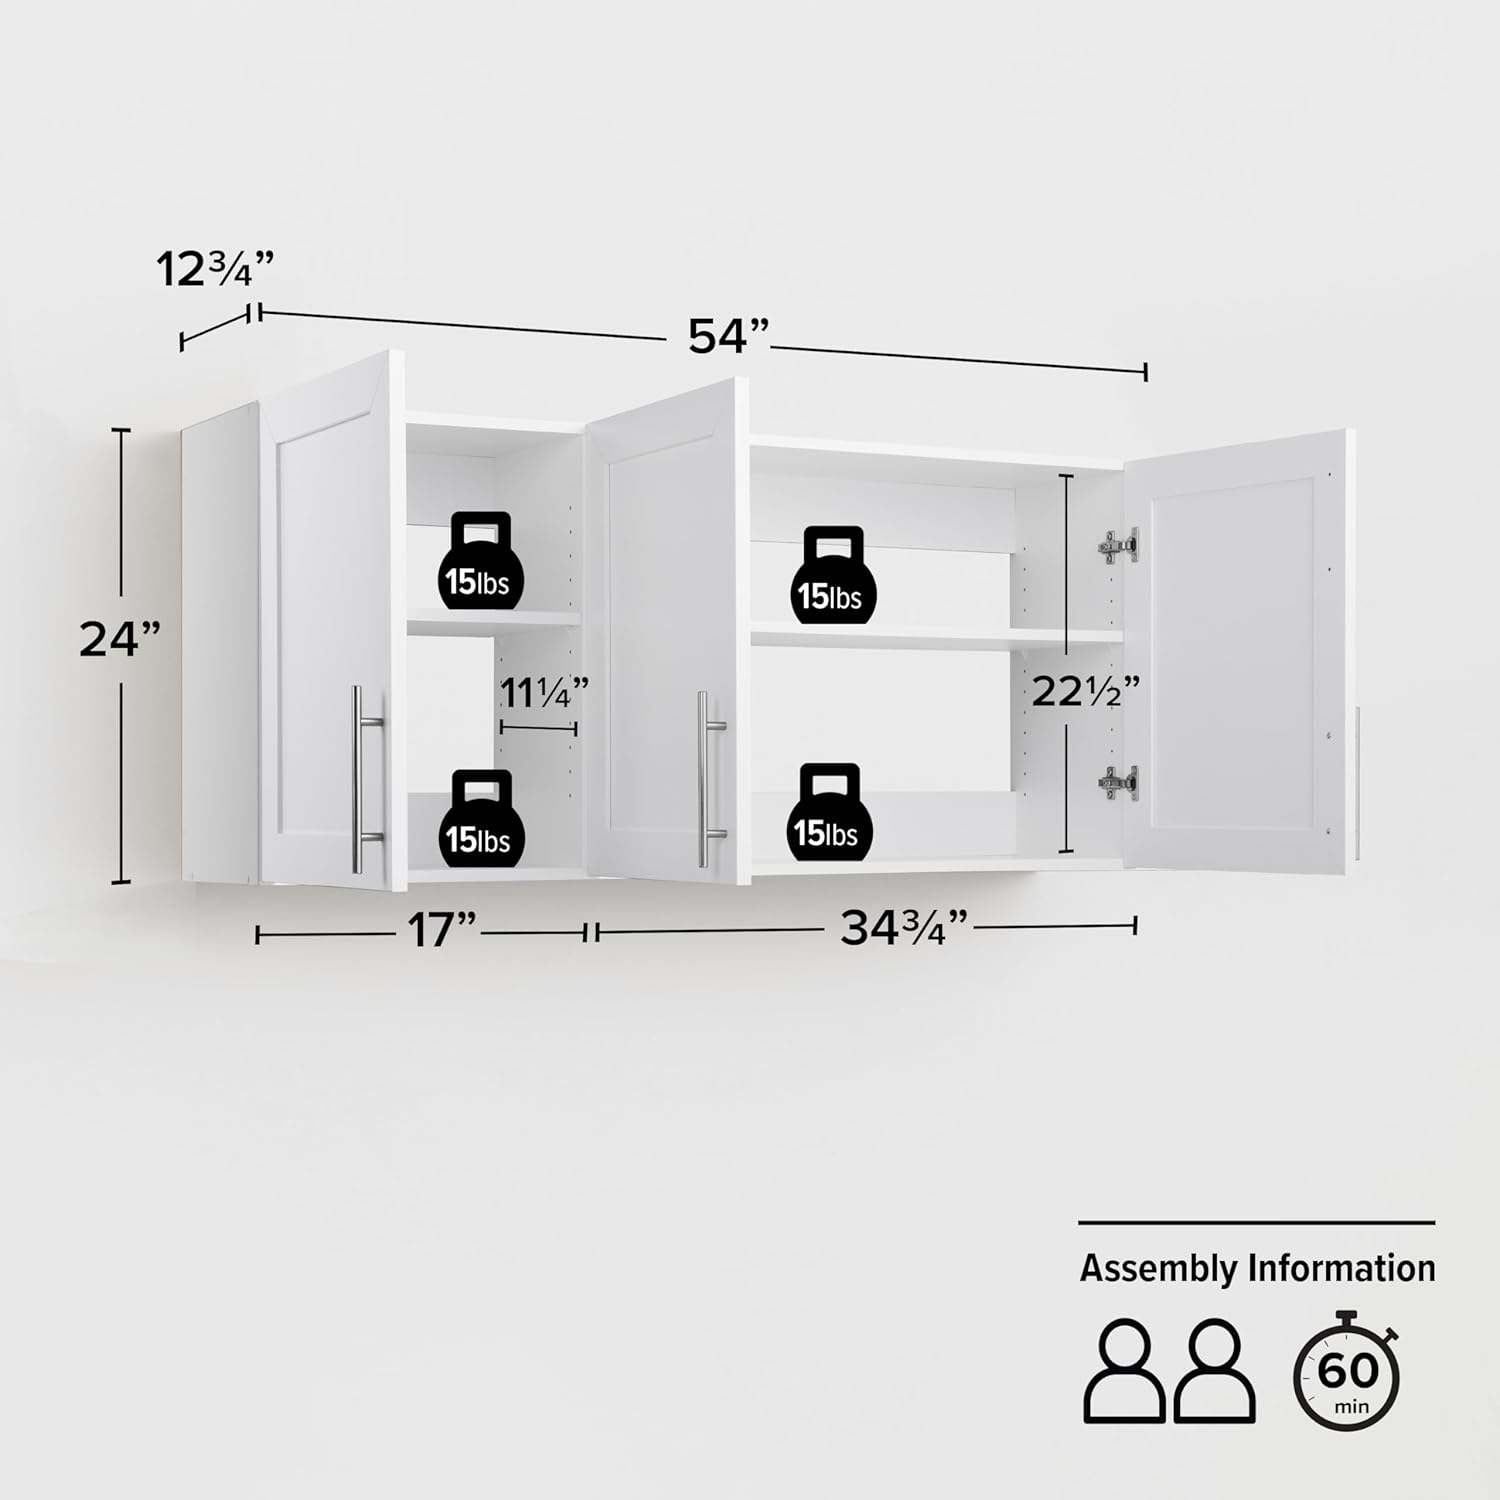
Figure 2.1: Diagram showing the dimensions of the 54-inch wall cabinet and estimated assembly time for two people.
3. Product Specifications
| Feature | Detail |
|---|---|
| Brand | Prepac |
| Model Number | WSUR-1004-1 |
| Dimensions (D x W x H) | 12.75"D x 54"W x 24"H |
| Item Weight | 69 Pounds |
| Material | Engineered Wood |
| Color | White |
| Number of Doors | 3 |
| Number of Shelves | 4 (1 adjustable) |
| Weight Capacity (Maximum) | 60 Pounds |
| Installation Type | Wall Mounted |
| Required Assembly | Yes |
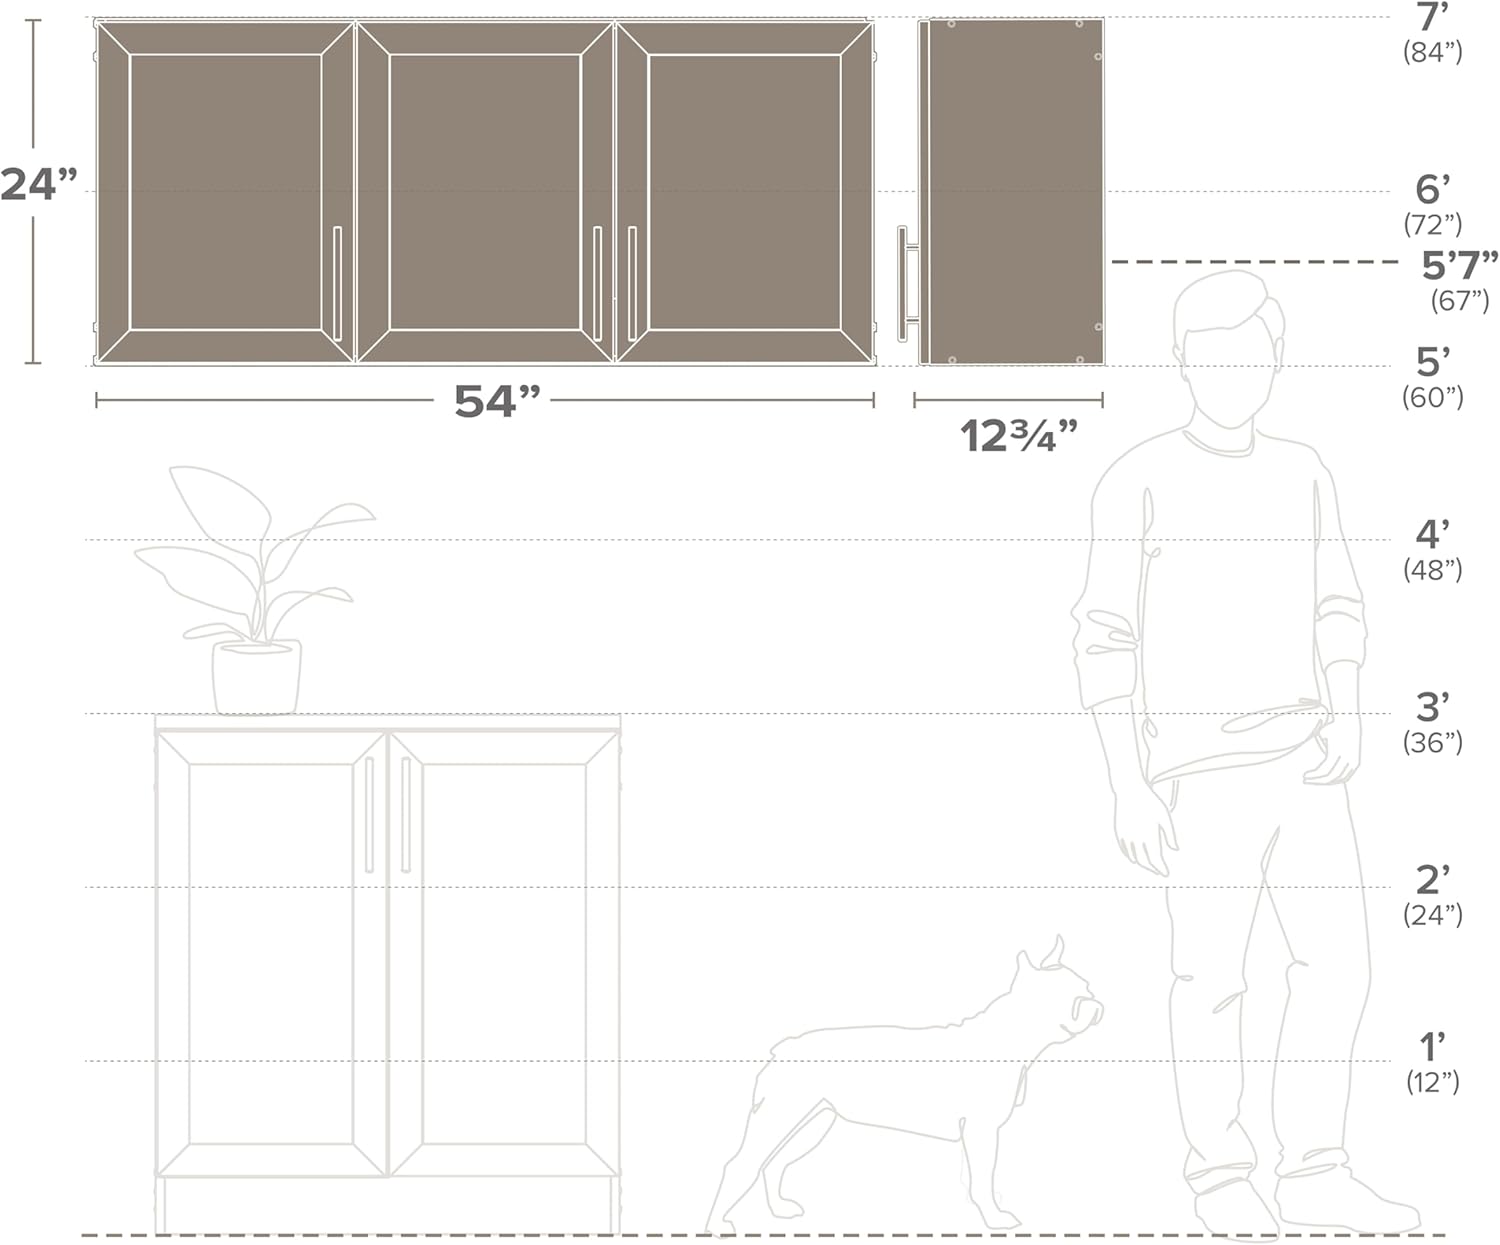
Figure 3.1: Scale diagram illustrating the cabinet's dimensions in relation to an average adult and a dog.
4. Assembly Instructions
The Prepac Elite Wall Cabinet is designed for straightforward assembly. It is recommended that two people assemble the unit using basic hand tools. An instructional booklet is included with your product.
4.1. Understanding Hardware
Familiarize yourself with the different types of hardware used in Prepac products. This video demonstrates common hardware and their proper use.
Video 4.1: How To Use The Prepac Hardware. This video provides an overview of the various hardware components and their assembly methods.
4.2. Step-by-Step Assembly
Follow the detailed, step-by-step instructions provided in the included booklet. Ensure all parts are correctly oriented and securely fastened.

Figure 4.2: Key features of the cabinet, including hinges, adjustable shelves, and handles.
5. Installation
This cabinet is designed for wall-mounted installation. Ensure you have appropriate wall anchors and tools for secure mounting. Consult the assembly manual for specific wall mounting hardware and instructions.

Figure 5.1: The Prepac Elite 54" Wall Cabinet installed in a laundry room, demonstrating a typical application.
6. Operating Instructions
6.1. Adjusting Shelves
The cabinet features adjustable shelves with 9 possible positions. To adjust a shelf, carefully remove it from its current position, reposition the shelf pins to the desired height, and then place the shelf back onto the pins. Ensure the shelf is level and secure before placing items on it.
6.2. Opening and Closing Doors
The cabinet doors are equipped with easy-pivot, six-way adjustable European style hinges. Open and close doors gently using the brushed nickel bar pulls. Avoid slamming doors to prevent damage to hinges and the cabinet structure.
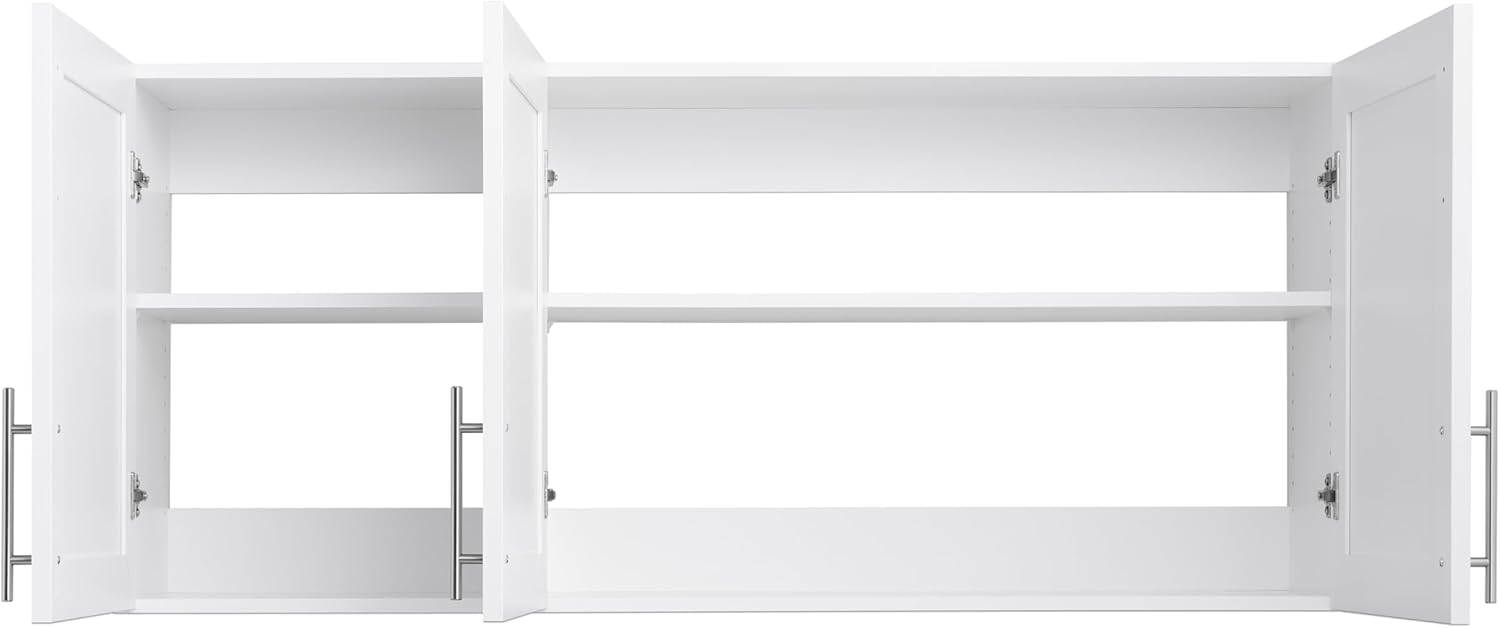
Figure 6.1: Interior view of the cabinet with all three doors open, showcasing the adjustable shelves.
7. Maintenance
To maintain the appearance and longevity of your Prepac Elite Wall Cabinet, wipe surfaces with a damp cloth as needed. Avoid using harsh chemicals or abrasive cleaners, which can damage the laminate finish.
8. Troubleshooting
8.1. Door Alignment Issues
If the cabinet doors appear misaligned or do not close properly, the European style hinges can be adjusted. Refer to the video below for detailed instructions on how to adjust the 6-way adjustable hinges.
Video 8.1: Hinge Adjustment Video. This video demonstrates how to adjust 6-way adjustable hinges to correct door alignment.
8.2. Cabinet Stability
Ensure the cabinet is securely mounted to the wall according to the installation instructions. If the cabinet feels wobbly, re-check all connections and wall anchors to ensure they are tightened correctly.
9. Warranty and Support
All Prepac products are backed by a 5 Year Limited Warranty. If your product arrives damaged or with missing parts, please contact Prepac customer support for replacement parts at no charge. Prepac offers North America-based customer support to assist with any inquiries or issues.

Figure 9.1: Prepac's commitment to quality, warranty, and customer support.


