Introduction
This manual provides detailed instructions for the assembly, operation, and maintenance of your AODK 71-inch L-Shaped Desk. This versatile desk features a reversible L-shaped design, integrated LED lighting, and convenient power outlets, making it ideal for home office or gaming setups.
Important Safety Information
Please read all instructions carefully before assembly and use.
- Weight Limit: Be aware of the desk's weight capacity. Do not overload shelves or desktop surfaces.
- Assembly: Exercise caution during assembly. Some components may be heavy. Two people are recommended for lifting and positioning large parts.
- Stability: Ensure all screws and connections are tightened securely to prevent wobbling. Periodically check and re-tighten fasteners.
- Electrical Safety: Only use the integrated power outlets and USB ports as intended. Do not exceed the specified electrical ratings (125V/12A AC, 5V/2A USB).
Package Contents
Verify all components are present before beginning assembly.
| Part | Description | Quantity |
|---|---|---|
| Desktop Panels | L-shaped desk surfaces | 2 |
| Metal Frame Components | Legs, support bars, shelf frames | Various |
| Fabric Drawers | Storage drawers | 5 |
| Storage Shelves | Wooden shelves for storage | 4 |
| Power Outlet Unit | 3 AC outlets, 2 USB ports | 1 |
| LED Light Strip | RGB LED strip with remote | 1 |
| CPU Stand | Mobile CPU holder | 1 |
| Hardware Pack | Screws, bolts, Allen wrench, screwdriver | 1 |
| Instruction Manual | Assembly guide | 1 |
Assembly Instructions
Follow these steps carefully. An electric drill with a 4mm hex socket can expedite the process.
1.1 Unpack All Components
Carefully open the packaging and lay out all parts on a clean, soft surface to prevent scratches.
Video: A person unboxes the L-shaped desk, showing the large cardboard box and the initial contents. The box is labeled "L SHAPED DESK".
1.2 Identify Hardware and Tools
Locate the hardware bag. Verify all screws, bolts, and the provided Allen wrench are present according to the parts list in the manual.

Image: All components of the L-shaped desk are laid out on the floor, including the desktop panels, metal frames, and hardware bags.
2.1 Attach Adjustable Feet
Screw the adjustable feet (Part Y) into the bottom of all vertical metal frame pieces (Parts A, B, C, D, etc.). Ensure they are finger-tight for now.

Image: Close-up of an adjustable foot being screwed into the bottom of a metal frame leg.
3.1 Connect Frame Sections
Using the provided screws (Part 3) and the Allen wrench, connect the main desk frame sections. Refer to the diagram in your manual for the desired L-shape orientation (Model 1-1-14 is shown). Pay close attention to the double holes on certain parts, ensuring the connector is screwed into the correct side.

Image: The metal frame of the L-shaped desk is partially assembled, showing the connections between different sections.
4.1 Attach Shelves
Secure the wooden shelves (Parts E, F, G, H) to the designated areas on the metal frame using the appropriate screws. Ensure all holes align before tightening.

Image: The desk frame with shelves being installed, highlighting the various storage tiers.
4.2 Insert Fabric Drawers
Assemble the fabric drawers by inserting the bottom board into each drawer. Slide the completed drawers into their respective compartments on the desk frame.

Image: A close-up of the fabric drawers, showing their capacity and how they fit into the desk.
5.1 Install Power Outlet Unit
Place the power outlet unit (Part 10) into the designated slot on the desktop. Ensure it is securely fitted.
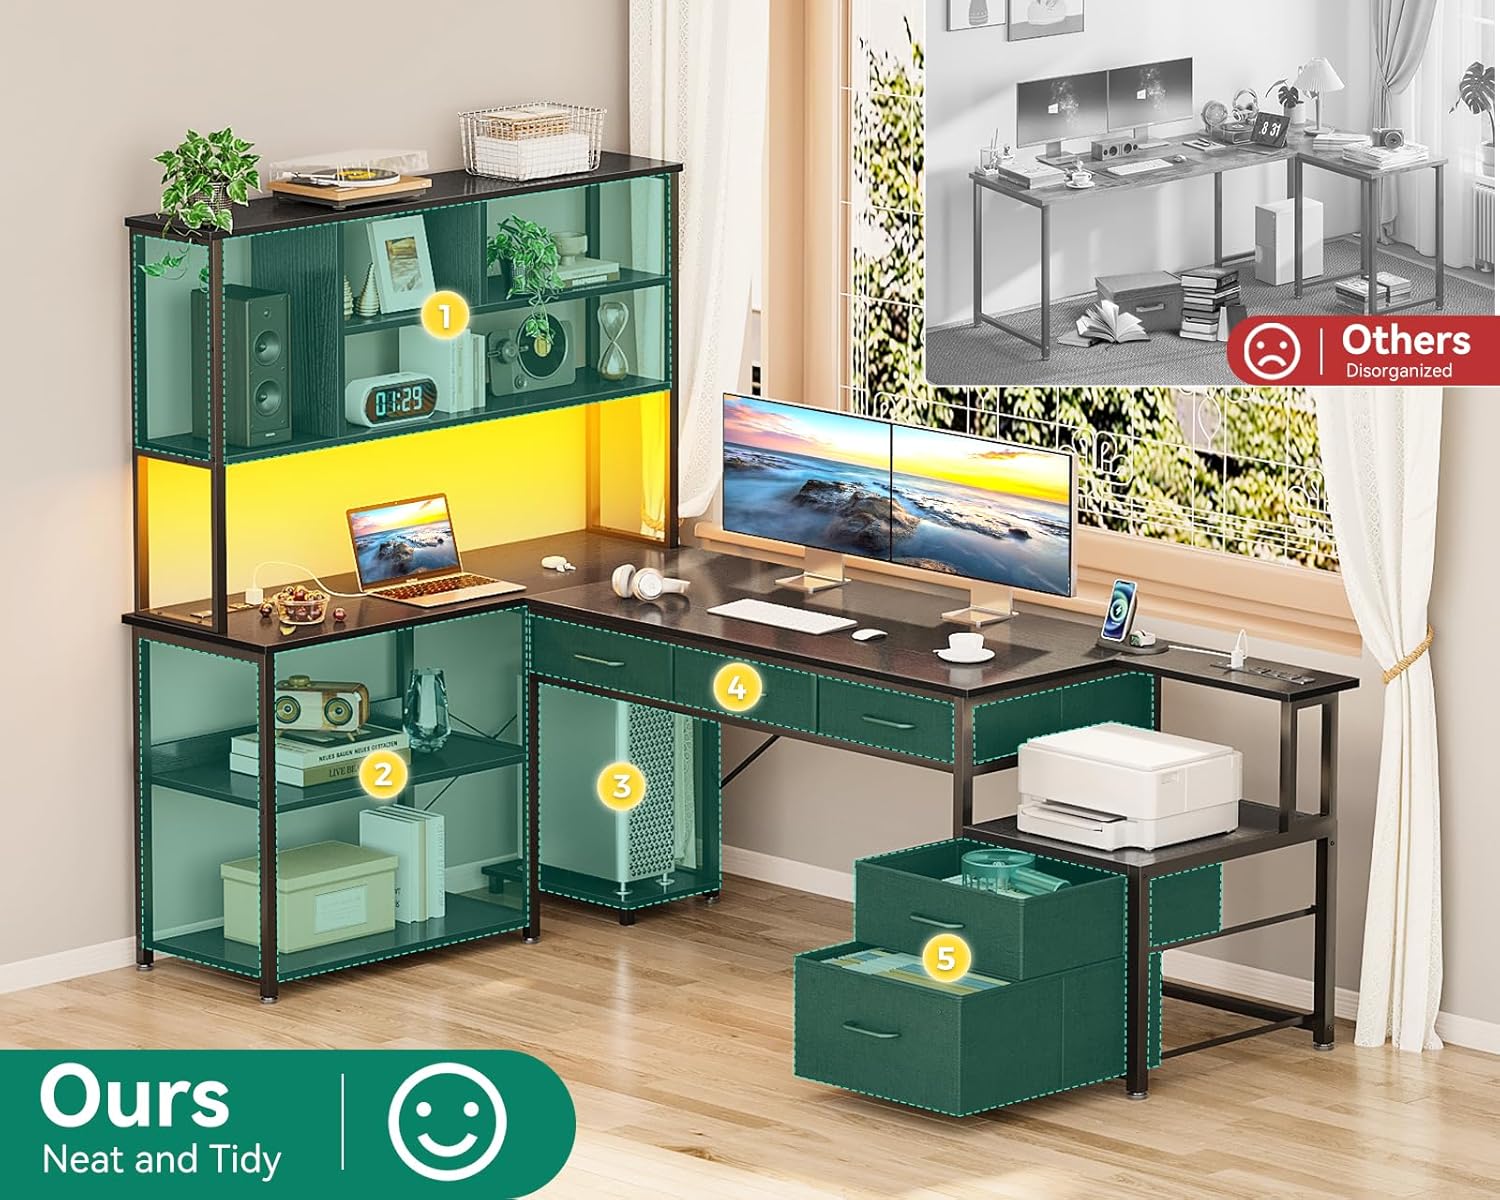
Image: The desk surface with the integrated power outlet unit, showing 3 AC outlets and 2 USB ports.
5.2 Attach LED Light Strip
Adhere the LED light strip to the underside of the top shelf or along the desk frame as desired. Plug the LED strip into the power outlet unit.

Image: The L-shaped desk illuminated by RGB LED lighting strips, showcasing different color modes.
Operating Your Desk
LED Lighting
Use the provided remote control to select from 10 lighting modes and 10 color variations.
Power Outlets
The desk includes 3 AC outlets (125V/12A) and 2 USB ports (5V/2A) for convenient charging of your devices. The power cord is 4.9 feet long.
Maintenance
- Cleaning: Wipe surfaces with a soft, damp cloth. Avoid harsh chemicals that may damage the finish.
- Fasteners: Periodically check all screws and bolts to ensure they remain tight. Re-tighten as necessary to maintain stability.
- Adjustable Feet: Adjust the feet as needed to ensure the desk remains level on uneven floors.
Troubleshooting
- Desk Wobbles: Ensure all screws are fully tightened. Check that the adjustable feet are making firm contact with the floor and are properly leveled.
- LED Lights Not Working: Verify the power cord is securely plugged into both the desk unit and a wall outlet. Check the remote control battery.
- Drawers Stick: Ensure the fabric drawers are properly assembled and not overloaded. Check for any obstructions in the drawer compartments.
Product Specifications
| Feature | Detail |
|---|---|
| Brand | AODK |
| Model | B0D5BBD63N |
| Product Dimensions | 70.86"D x 18.9"W x 60.62"H |
| Color | Black |
| Style | Modern |
| Base Material | Alloy Steel |
| Finish Type | Powder Coated |
| Special Feature | Built-In USB Outlet |
| Included Components | LED Light, Power Outlets, Open Shelves, Fabric Drawers, CPU Stand |
| Number of Drawers | 5 |
| Number Of Shelves | 4 |
| Required Assembly | Yes |
| Includes All Assembly Tools | Yes |
Warranty and Customer Support
This AODK desk comes with a limited warranty. For detailed warranty information or customer support, please refer to the contact information provided on the product packaging or visit the official AODK website.
