
1. Introduction
The FEISIKE Radar Backup Camera with Buzzer 7'' HD Monitor is designed to enhance vehicle safety during reversing and parking maneuvers. This system provides a clear, wide-angle view of the area behind your vehicle, complemented by a radar sensor that alerts you to obstacles. Its robust design ensures reliable performance in various environmental conditions.

Image 1.1: Overview of the FEISIKE Radar Backup Camera System.
2. Package Contents
Verify that all components are present in the package:
- 7-inch HD Monitor (x1)
- Backup Camera with Radar Sensor (x1)
- Suction Cup Mount Bracket (x1)
- Buzzer (x1)
- Cigarette Lighter Power Adapter with On/Off Switch (x1)
- Power Cable (x1)
- User Manual (x1)
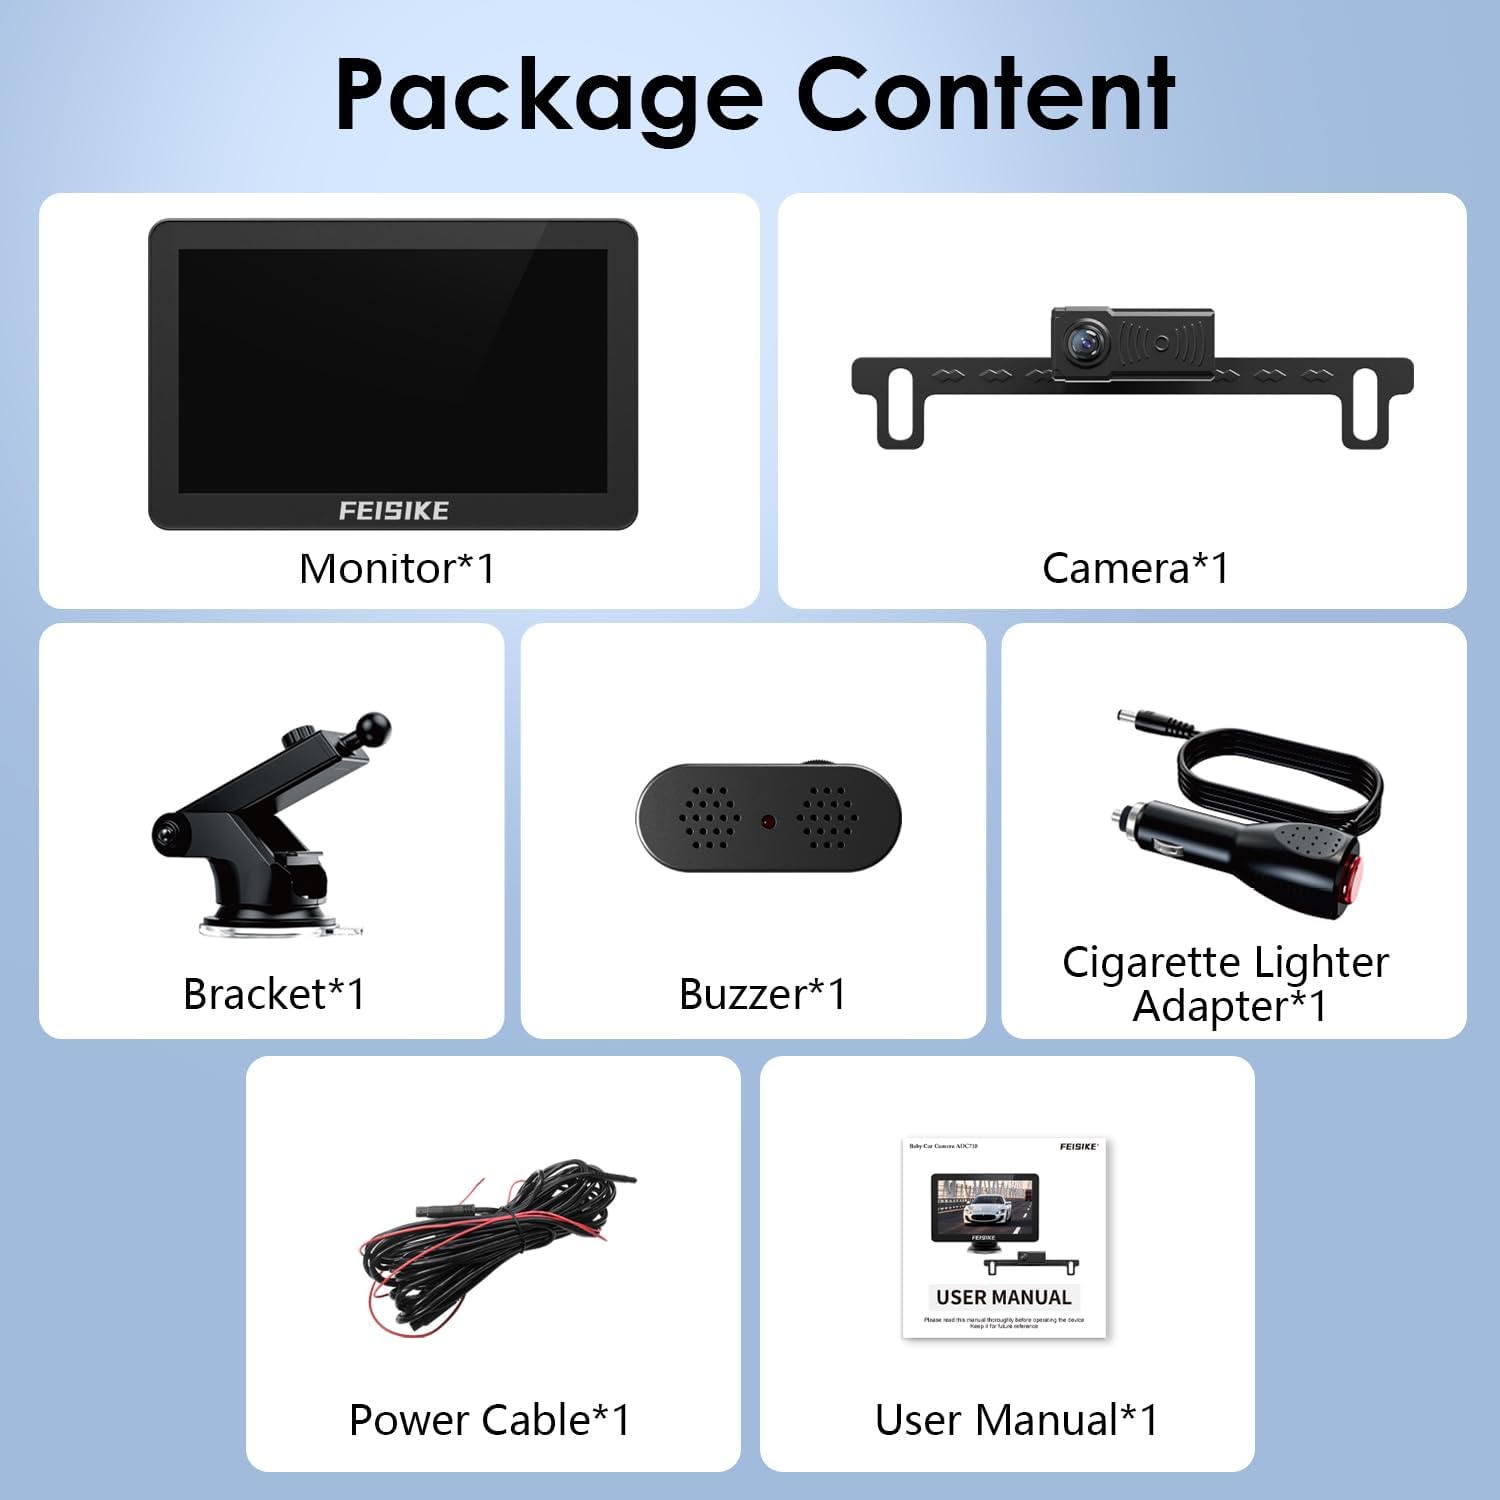
Image 2.1: All components included in the product package.
3. Setup and Installation
This system is designed for a plug-and-play installation. Follow these steps for proper setup:
3.1. Monitor Installation
The 7-inch HD monitor can be mounted on your dashboard or windshield using the provided suction cup bracket.
- Clean the desired mounting surface (dashboard or windshield) thoroughly.
- Attach the suction cup mount to the monitor.
- Press the suction cup firmly against the cleaned surface and engage the locking mechanism to secure it.
- Adjust the monitor angle for optimal viewing. The flexible suction cup holder allows for 360-degree rotation.

Video 3.1: Demonstration of the monitor's flexible suction cup holder for angle adjustment.

Video 3.2: Visual guide for installing the HD monitor on the dashboard or windshield.
3.2. Camera Installation
The camera is designed to be mounted on the license plate frame.
- Remove your vehicle's rear license plate.
- Position the camera bracket behind the license plate, aligning the mounting holes.
- Secure the license plate and camera bracket using your vehicle's license plate screws. Ensure the camera lens is unobstructed and facing outwards.

Image 3.1: Wiring diagram for the system components.
3.3. Wiring Connections
Connect the components as follows:
- Connect the power cable to the monitor.
- Connect the camera cable to the main wiring harness.
- Connect the buzzer cable to the main wiring harness.
- Route the camera cable from the rear of the vehicle to the front, ensuring it is secured and not interfering with moving parts.
- Connect the red wire from the camera harness to your vehicle's reverse light power wire. This allows the camera to activate automatically when reversing.
- Plug the cigarette lighter power adapter into your vehicle's 12V power outlet. Use the on/off switch on the adapter to power the system.

Video 3.3: Comprehensive installation guide for the backup camera system.
4. Operating Instructions
4.1. Powering On/Off
To power on the system, press the on/off switch located on the cigarette lighter adapter. If wired to the reverse light, the system will activate automatically when the vehicle is shifted into reverse.
4.2. Monitor Adjustments
The 7-inch HD IPS monitor offers several adjustable settings:
- Brightness: Adjust the screen brightness for optimal visibility in different lighting conditions.
- Contrast: Modify the contrast level to enhance image clarity.
- Saturation: Adjust color saturation for desired vibrancy.
- Image Flip: Flip the image horizontally or vertically if needed, depending on camera orientation.

Image 4.1: The 7-inch HD IPS monitor and its adjustable display settings.
4.3. Radar Function and Buzzer
The integrated radar sensor detects obstacles behind your vehicle and displays colored stop boxes on the monitor, indicating distance. A buzzer provides audible alerts, with the alarm sound intensifying as the vehicle approaches an obstacle.
- Green Zone: 2-3 meters (6.5-9.8 feet)
- Yellow Zone: 1-2 meters (3.3-6.5 feet)
- Orange Zone: 0.65-1 meter (2.1-3.3 feet)
- Red Zone (STOP): Less than 0.65 meters (2.1 feet)
The buzzer volume can be adjusted using the control on the buzzer unit.

Image 4.2: Visual representation of the radar function's distance zones.

Video 4.1: Demonstration of the radar function and parking safety alerts.

Video 4.2: Guide on adjusting the radar buzzer sound.
4.4. DIY Guide Lines
The parking guide lines displayed on the monitor are adjustable. You can customize their width, move them left, right, up, or down to suit your vehicle and parking preferences. The guide lines can also be turned off if not desired.
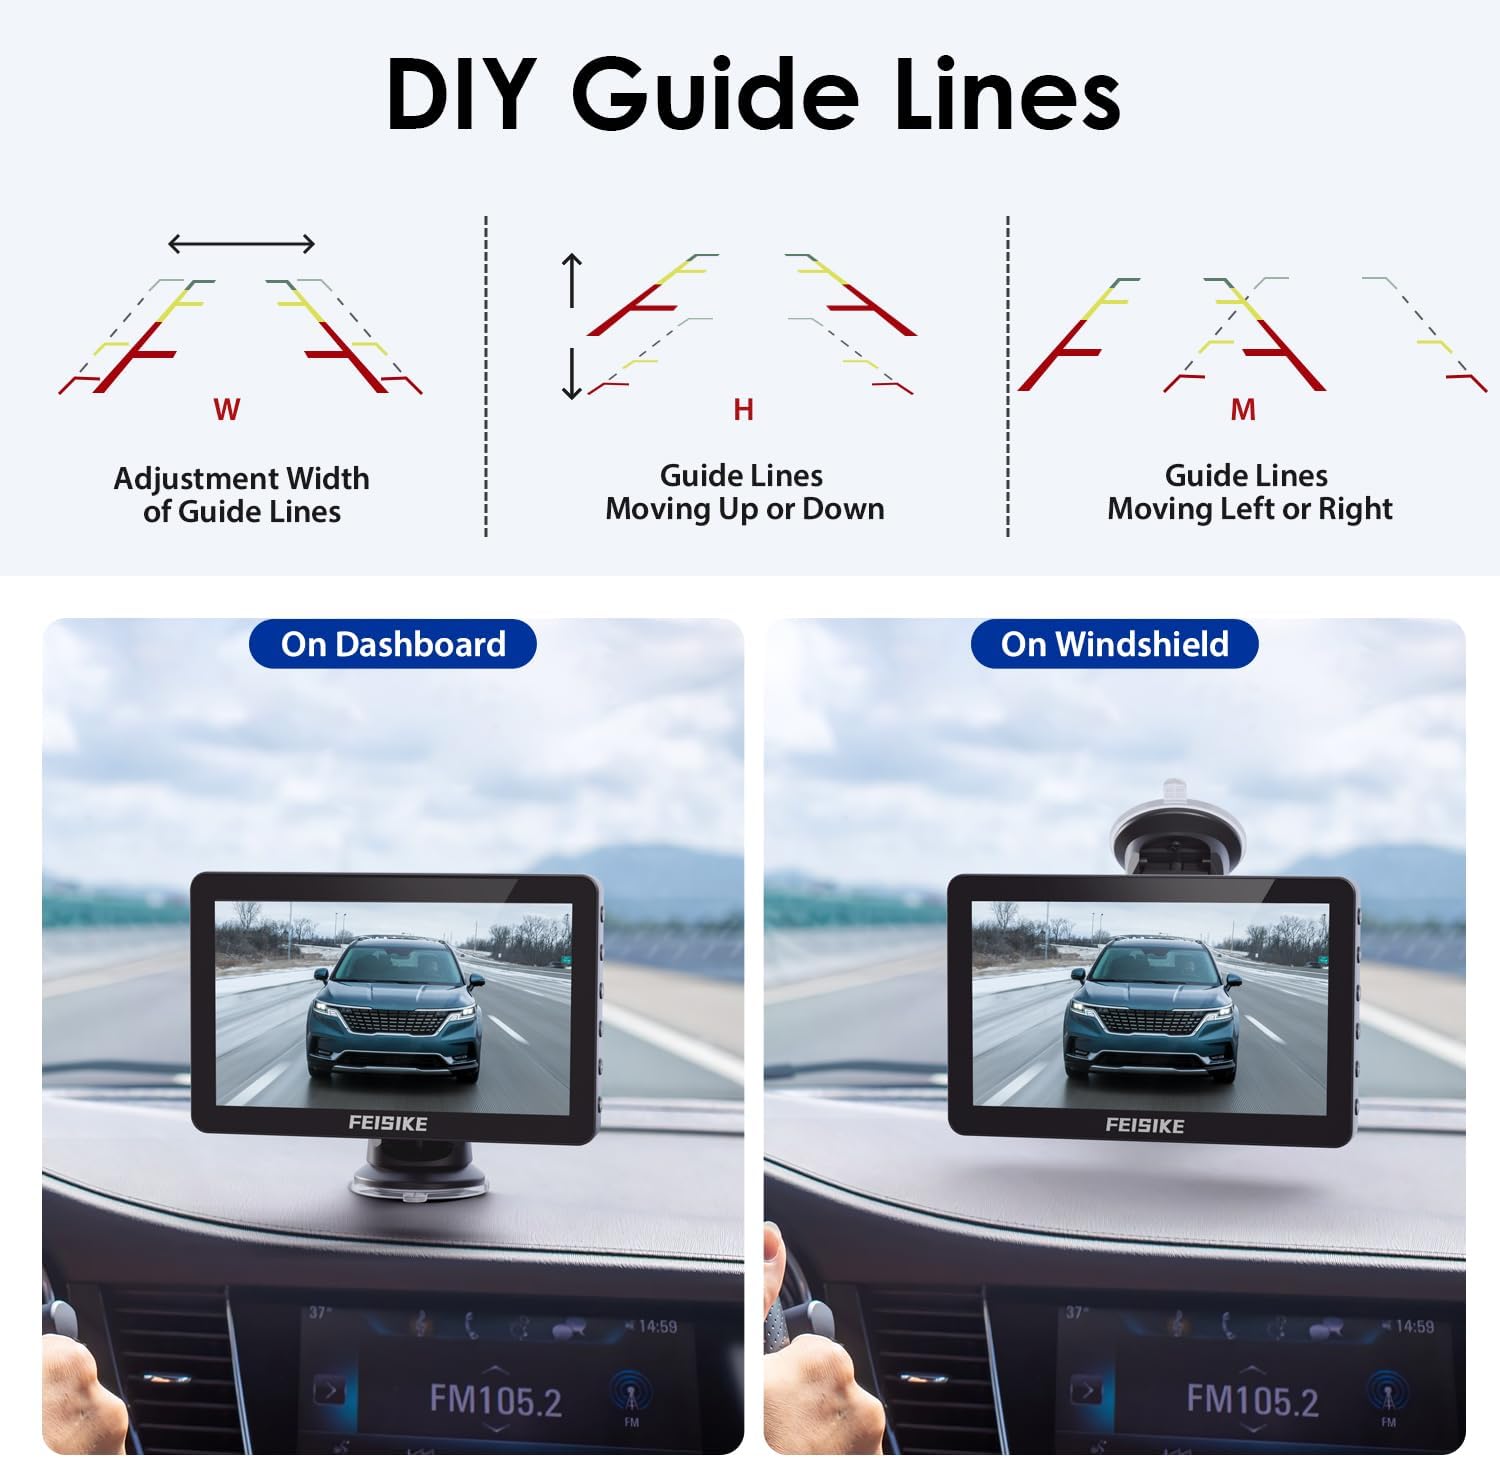
Image 4.3: Customization options for DIY guide lines.
5. Key Features
- 1080P HD IPS Monitor: Provides clear and consistent images from various viewing angles.
- Radar Function: Offers visual distance indicators and audible alerts for enhanced parking safety.
- IP67 Waterproof Camera: Ensures reliable operation in extreme weather conditions, from -22°F to 176°F.
- 149° Wide Angle View: Minimizes blind spots behind the vehicle.
- DIY Guide Lines: Customizable parking assistance lines.
- Wide Application: Compatible with various vehicles including SUVs, trucks, trailers, vans, and campers.
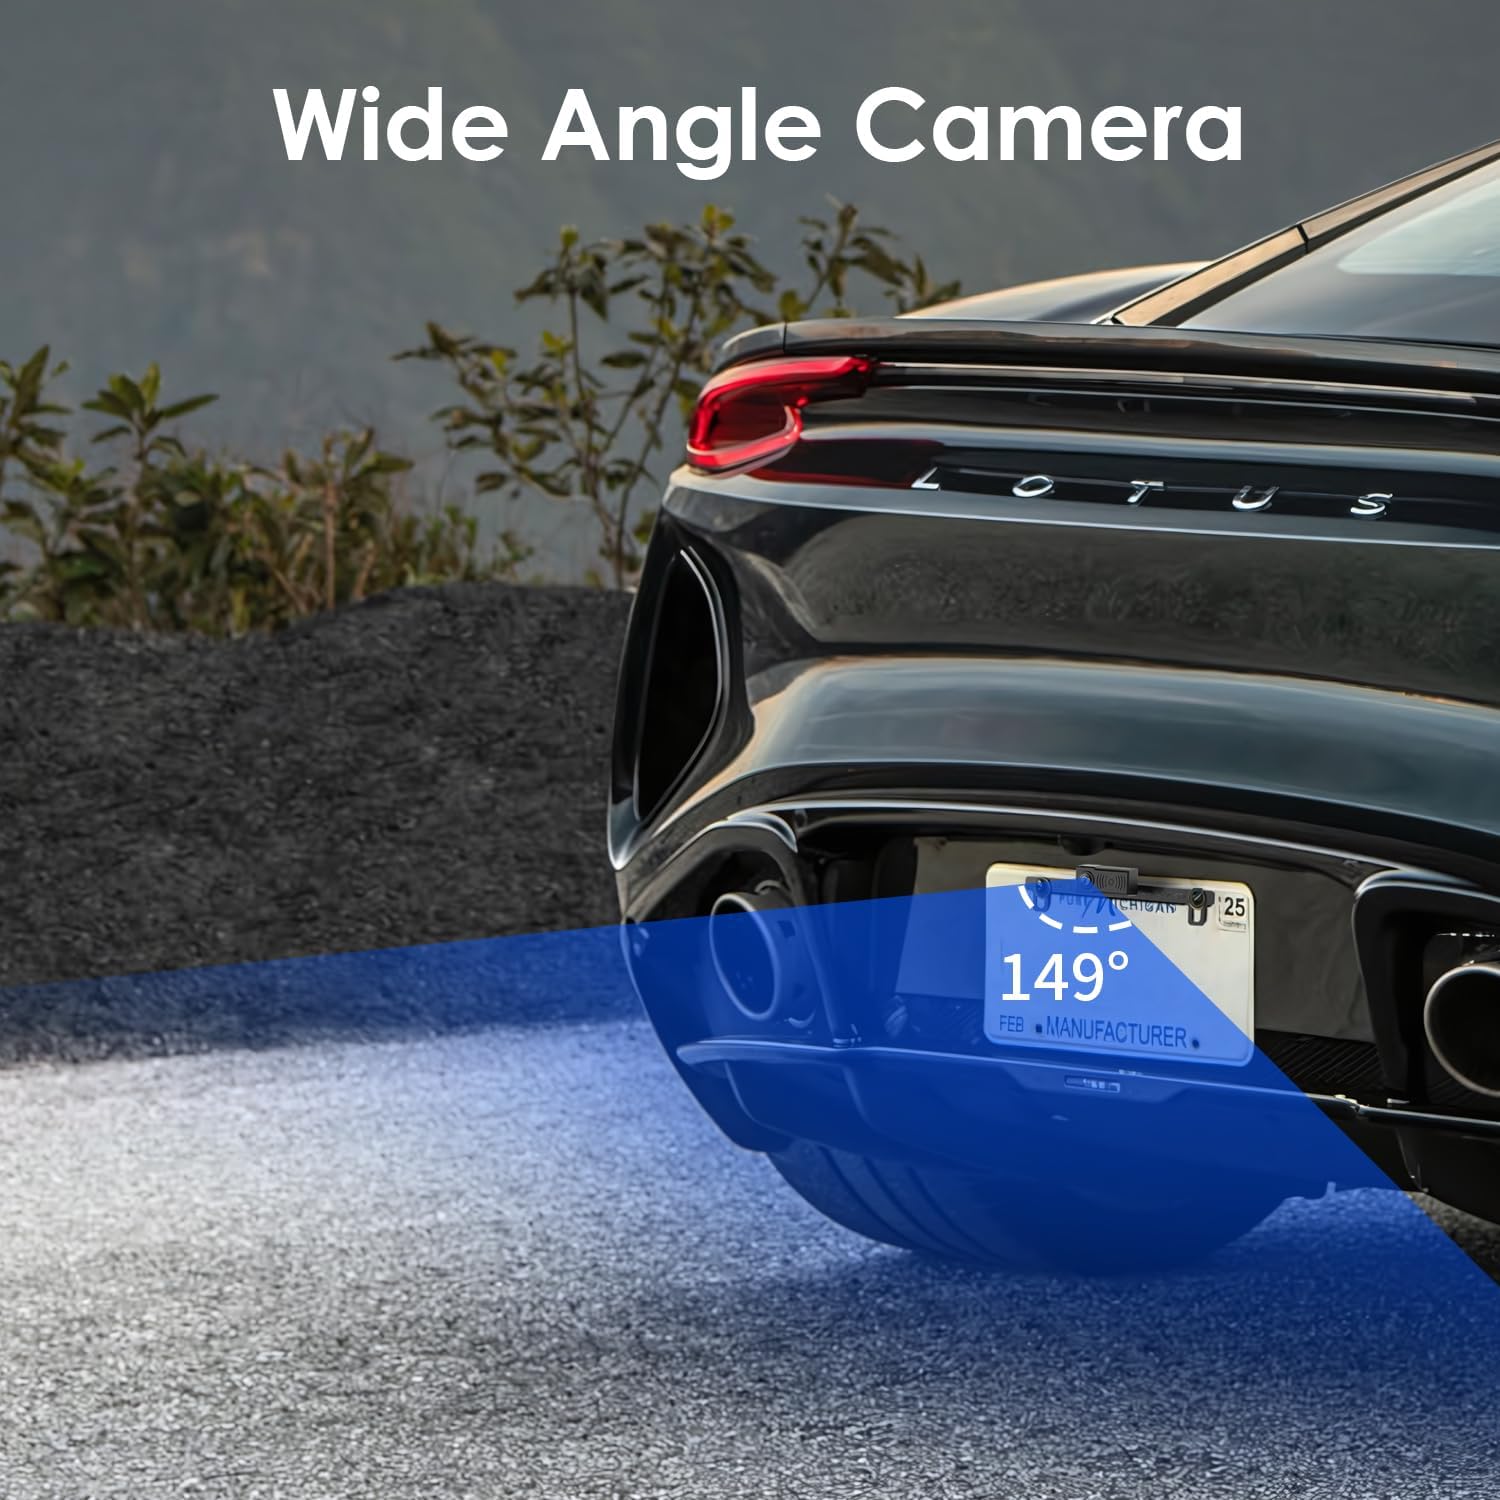
Image 5.1: Illustration of the 149-degree wide-angle camera view.

Image 5.2: The IP67 waterproof camera operating in water.

Image 5.3: Examples of vehicles compatible with the backup camera system.
6. Maintenance
To ensure the longevity and optimal performance of your FEISIKE Radar Backup Camera system, follow these maintenance guidelines:
- Clean the Monitor: Regularly wipe the monitor screen with a soft, dry, anti-static cloth. Avoid harsh chemicals or abrasive materials.
- Clean the Camera Lens: Keep the camera lens free from dirt, mud, snow, or ice. Use a soft, damp cloth to gently clean the lens.
- Check Connections: Periodically inspect all cable connections to ensure they are secure and free from corrosion or damage.
- Cable Management: Ensure all cables are properly routed and secured to prevent pinching, fraying, or interference with vehicle operations.
- Environmental Care: While the camera is IP67 waterproof, avoid prolonged submersion or high-pressure water jets directly on the camera or monitor.
7. Troubleshooting
If you encounter issues with your backup camera system, refer to the following troubleshooting tips:
| Problem | Possible Cause | Solution |
|---|---|---|
| No image on monitor |
|
|
| Image is blurry or unclear |
|
|
| Buzzer not alarming or too quiet/loud |
|
|
| Guide lines not appearing or incorrect |
|
|
8. Specifications
- Product Dimensions: 5.9 x 3.54 x 8.27 inches
- Item Weight: 1.76 pounds
- Screen Size: 7 Inches
- Display Technology: LCD (IPS)
- Voltage: 12 Volts
- Optical Sensor Technology: CMOS
- Lens Type: Wide Angle
- Real Angle of View: 149 Degrees
- Waterproof Rating: IP67
- Operating Temperature: -22°F to 176°F
- Installation Type: Surface Mount
9. Warranty and Support
For warranty information or technical support, please contact FEISIKE customer service through the retailer where the product was purchased or refer to the contact details provided in the original product packaging.