1. Introduction
The Fookoo DCM102 Wireless Backup Camera System is designed to enhance driving safety and convenience for various vehicles, including RVs, trucks, and campers. This system features a 10.1-inch IPS touchscreen monitor and two HD 1080P cameras with magnetic bases for quick and easy installation. With its built-in rechargeable battery and solar panel, it offers extended operation without complex wiring.
Key features include a robust 2.4GHz wireless signal, IP69 waterproof cameras with night vision, loop recording capabilities, and parking assistance. This manual provides detailed instructions for setup, operation, maintenance, and troubleshooting to ensure optimal performance of your Fookoo DCM102 system.
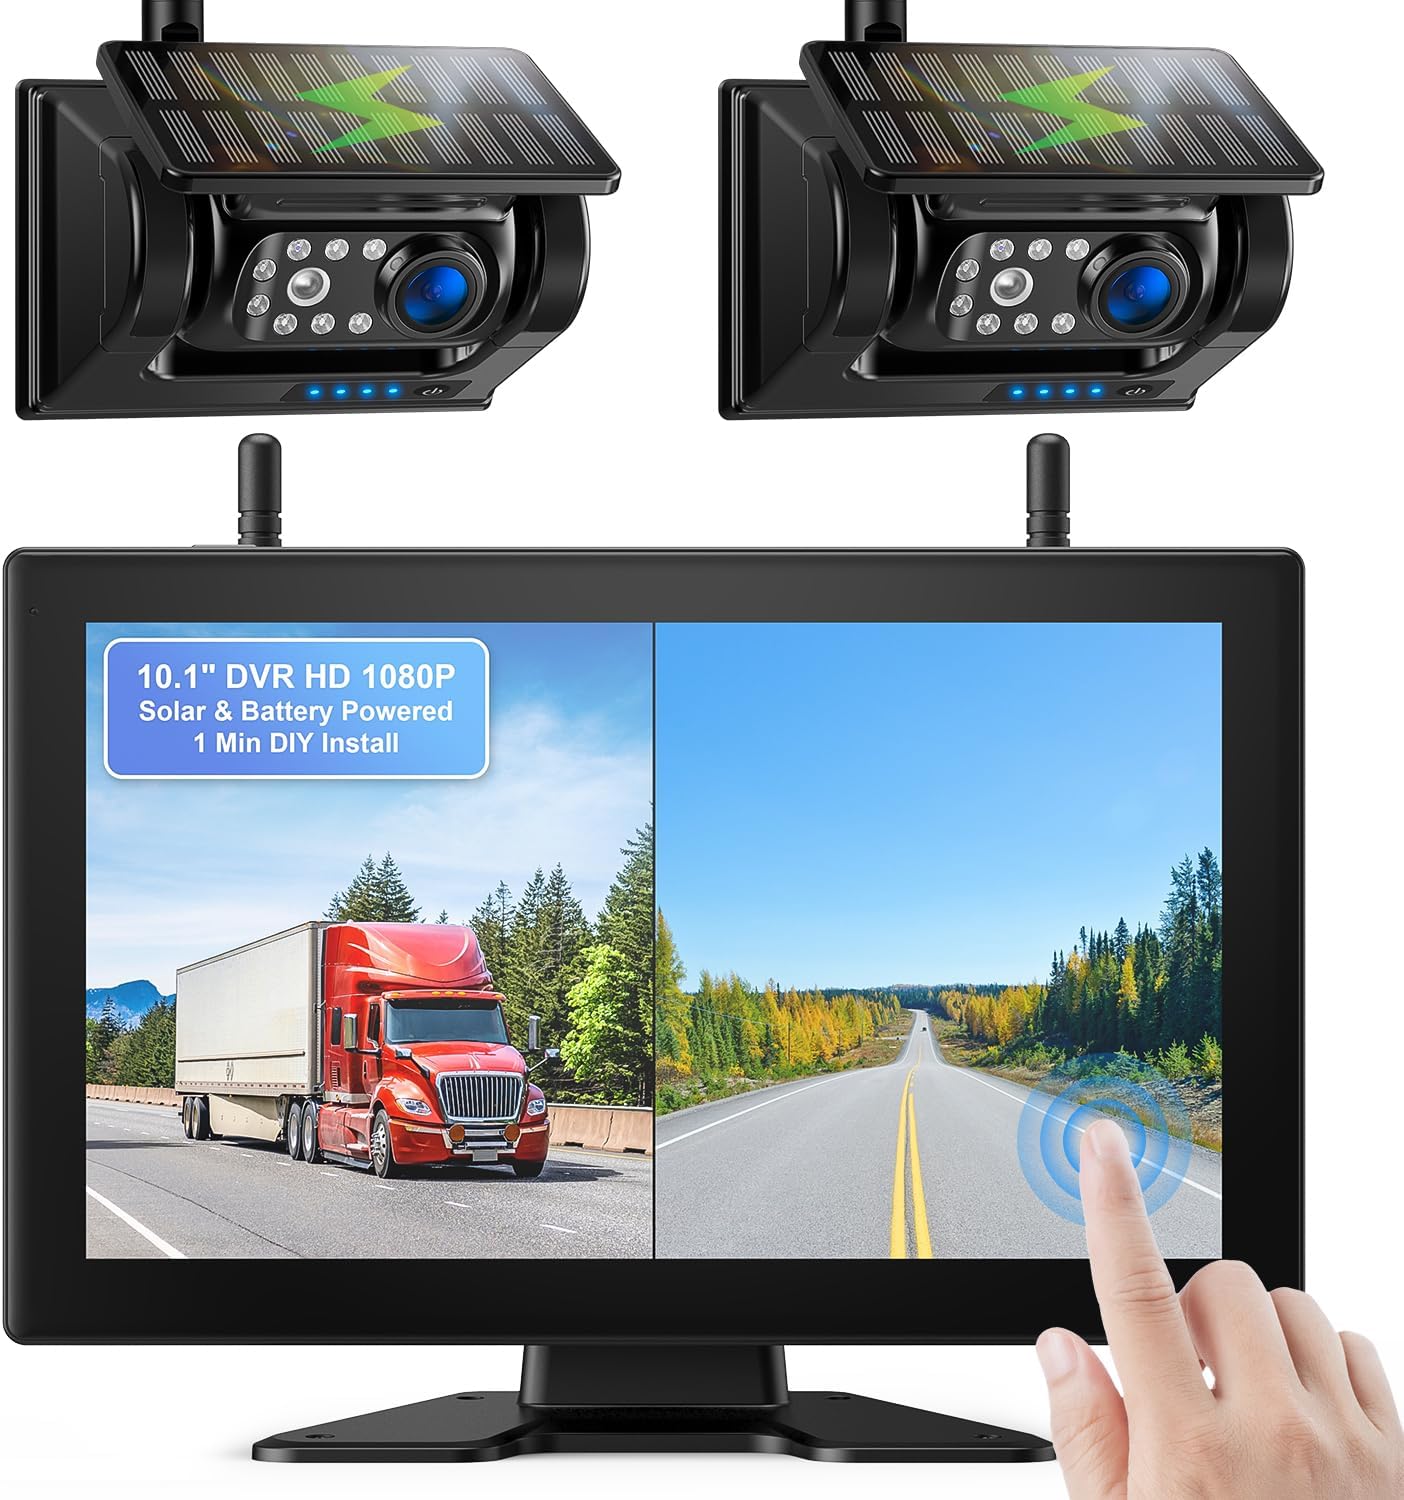
Figure 1.1: Overview of the Fookoo DCM102 Wireless Backup Camera System.
2. Package Contents
Please verify that all items listed below are included in your package. If any items are missing or damaged, please contact customer support.
- 10.1-inch Monitor (x1)
- Solar Magnetic Camera (x2)
- Car Charger with USB Port (x1)
- Type-C Cable (x2)
- Hardwired Power Cord (x1)
- AC Adapter (x2)
- Suction Cup Mount & Adapter (x1)
- A-shaped Bracket & Screws (x1)
- Antenna (x4)
- Installation Kit (x1)
- Instructions Manual (x1)

Figure 2.1: All components included in the Fookoo DCM102 system package.
3. Setup and Installation
3.1 Camera Installation
The Fookoo DCM102 cameras feature a strong magnetic base for quick and easy installation. No drilling or complex wiring is required for power, as the cameras are battery-powered with solar charging capabilities.
- Ensure the camera is fully charged before initial use. Use the provided Type-C cable and AC adapter if necessary.
- Identify a suitable metallic surface on your vehicle (e.g., rear bumper, trailer hitch, or any flat metal area) where the camera can securely attach.
- Place the camera firmly onto the chosen metallic surface. The strong magnetic base will hold it in place.
- Adjust the camera angle to achieve the desired viewing perspective.
- For optimal battery life, position the camera where the solar panel receives maximum sunlight exposure.

Figure 3.1: Magnetic camera with solar panel and battery details.

Figure 3.2: Camera power efficiency with solar charging.
3.2 Monitor Installation
The 10.1-inch IPS touchscreen monitor can be installed using either the suction cup mount or the A-shaped bracket, depending on your preference and vehicle's dashboard configuration.
- Suction Cup Mount: Attach the suction cup mount to a clean, smooth surface on your windshield or dashboard. Secure the monitor to the mount.
- A-shaped Bracket: Use the provided screws to secure the A-shaped bracket to a flat surface on your dashboard. Attach the monitor to the bracket.
- Connect the monitor to your vehicle's power source using the included car charger with a USB port.
- Adjust the monitor's position and angle for optimal viewing without obstructing your driving view.

Figure 3.3: The 10.1-inch IPS touchscreen monitor.
3.3 Initial Pairing (if necessary)
The cameras and monitor are typically pre-paired at the factory. If you experience connection issues, follow these steps to re-pair:
- Power on both the monitor and the camera.
- On the monitor, navigate to the system settings.
- Select the "Pairing" or "Add Camera" option.
- Follow the on-screen prompts to complete the pairing process.
4. Operation
4.1 Powering On/Off
The system is designed for convenience. When the monitor is turned off, the camera automatically enters sleep mode to conserve power. When the monitor is turned on, the camera automatically activates.
- To Power On: Connect the monitor to power, and it will automatically turn on.
- To Power Off: Disconnect the monitor from power, or use the power button on the monitor if available.
4.2 Touchscreen Interface
The 10.1-inch IPS touchscreen monitor provides an intuitive interface for controlling the system. Simply touch the screen to access various functions and settings.

Figure 4.1: Touchscreen interface with main functions.
4.3 Dual-Split Screen Mode
The system supports a dual-split screen mode, allowing you to view images from two cameras simultaneously. This feature helps reduce blind spots and provides a more comprehensive view of your surroundings.
- To activate dual-split screen, select the corresponding option on the touchscreen interface.
- You can switch between single camera view and dual-split view as needed.

Figure 4.2: Dual-split screen functionality with two cameras.
4.4 Loop Recording
The monitor can record driving conditions to an SD card (supports 32-128GB, sold separately). The loop recording function ensures continuous recording by overwriting the oldest footage when the SD card is full.
- Insert a compatible SD card into the designated slot on the monitor.
- Access the "Record" or "DVR" section on the touchscreen to manage recording settings and playback recorded videos.
4.5 Parking Assistance
The system provides parking lines on the monitor display to assist with safer and faster parking maneuvers. These lines serve as a visual guide for distance and alignment.
- Parking lines are automatically displayed when the camera is active.
- Refer to the parking lines to gauge your vehicle's position relative to obstacles.
4.6 Night Vision
Equipped with 7 infrared lights and a photoreceptor, the cameras automatically activate night vision in low-light conditions, providing clear, high-definition images to ensure driving safety at night.
5. Maintenance
- Cleaning: Regularly clean the camera lens and monitor screen with a soft, damp cloth. Avoid abrasive cleaners that could scratch surfaces.
- Battery Care: The camera's built-in 9600mAh battery is designed for extended use with solar panel assistance. For optimal battery longevity, ensure the solar panel is clean and exposed to sunlight. If prolonged periods of low light occur, use the provided Type-C cable and charger to fully recharge the camera.
- Waterproof Rating: The cameras are IP69 waterproof, designed to withstand harsh weather conditions. However, avoid submerging the cameras in water for extended periods.
- Storage: If storing the system for an extended period, ensure both the cameras and monitor are fully charged and stored in a cool, dry place.
6. Troubleshooting
| Problem | Possible Cause | Solution |
|---|---|---|
| No image on monitor | Camera not powered on; Signal interference; Camera/monitor not paired. | Ensure camera battery is charged. Move camera/monitor closer. Re-pair camera and monitor (refer to Section 3.3). |
| Image flickering or unstable | Weak signal; Obstructions between camera and monitor. | Ensure antennas are properly attached. Reduce distance or remove obstructions. |
| Poor night vision quality | Dirty camera lens; Insufficient ambient light for IR activation. | Clean camera lens. Ensure no obstructions are blocking the IR lights. |
| Camera battery drains quickly | Insufficient solar charging; Frequent use in low-light conditions. | Ensure solar panel is clean and exposed to direct sunlight. Recharge via Type-C cable more frequently. |
| Monitor not responding to touch | Software glitch; Screen protector interference. | Restart the monitor. Ensure screen is clean and free of debris. Remove and reapply screen protector if applicable. |
7. Specifications
| Feature | Detail |
|---|---|
| Model | DCM102 (DCMX1002) |
| Monitor Size | 10.1 Inches IPS Touchscreen |
| Video Capture Resolution | 1080p HD |
| Camera Battery Capacity | 9600mAh (Rechargeable) |
| Charging Method | Solar Panel Assisted, Type-C Cable |
| Wireless Signal | 2.4GHz Dual-Antenna |
| Camera Waterproof Rating | IP69 |
| Viewing Angle | 130 Degrees |
| Mounting Type | Magnetic Mount (Camera), Suction Cup/Bracket (Monitor) |
| Supported SD Card | 32-128GB (for Loop Recording) |
| Product Dimensions | 27.18 x 18.29 x 16 cm; 2.86 kg (Overall package/system) |
| Voltage | 12 Volts (DC) |
8. Warranty and Support
Fookoo provides comprehensive customer support for the DCM102 Wireless Backup Camera System.
- Warranty: The product comes with 24 months replacement support.
- After-sales Service: Lifetime after-sales service is provided.
- Contact: If you encounter any issues, have questions, or require assistance, please reach out to Fookoo customer service. They are available 24 hours a day to ensure customer satisfaction.
