1. Introduction
Thank you for choosing the KJK Trail Camera. This advanced game camera is designed for wildlife monitoring, outdoor security, and property surveillance, offering high-resolution images and videos with robust features. This manual provides detailed instructions to help you set up, operate, and maintain your camera for optimal performance.
2. Package Contents
- KJK Trail Camera (KJK230)
- Mounting Strap
- USB Cable
- User Manual
- 64GB SD Card
- 8 AA Batteries

Figure 2.1: KJK Trail Camera and included accessories.
3. Product Overview
Familiarize yourself with the main components of your KJK Trail Camera:
- Lens: Captures images and videos.
- Infrared (IR) LEDs: Provide illumination for night vision without startling wildlife.
- PIR Motion Sensor: Detects movement to trigger recording.
- Control Panel/Screen: For navigating menus and viewing settings.
- Battery Compartment: Holds 8 AA batteries.
- SD Card Slot: For inserting the memory card.
- Mounting Points: For attaching the strap or other mounting accessories.
4. Setup
4.1 Battery Installation
- Open the battery compartment latch on the side or bottom of the camera.
- Insert 8 AA batteries, ensuring correct polarity (+/-) as indicated inside the compartment.
- Close the battery compartment securely to ensure waterproof sealing.
4.2 Memory Card Installation
- Locate the SD card slot, usually next to the control panel.
- Insert the provided 64GB SD card with the metal contacts facing down (or as indicated by the slot diagram) until it clicks into place.
- To remove, push the card in slightly until it springs out.
4.3 Mounting the Camera
The KJK Trail Camera is designed for outdoor use and can be mounted on trees, poles, or other stable surfaces.
- Thread the provided mounting strap through the slots on the back of the camera.
- Secure the camera to a tree or pole at a height of approximately 3-6 feet (1-2 meters) from the ground.
- Ensure the camera is stable and pointed towards the desired monitoring area. Avoid pointing directly at the sun or reflective surfaces to prevent false triggers.

Figure 4.1: Camera mounted in an outdoor environment, showcasing its waterproof design.
4.4 App Installation and WiFi Connection
The KJK Trail Camera features WiFi connectivity for remote access and control via a smartphone app.
- Download the official KJK Trail Camera app from your smartphone's app store (iOS or Android).
- On the camera, switch the mode to 'ON' or 'SETUP' (refer to camera's physical switch).
- Activate the camera's WiFi mode (usually by pressing a dedicated WiFi button or selecting it from the menu). The camera will broadcast a WiFi signal.
- On your smartphone, go to WiFi settings and connect to the camera's WiFi network (SSID will typically start with 'KJK_Cam' followed by numbers). The password will be provided on the camera screen or in the manual.
- Open the KJK app. You should now be able to view live feed, change settings, and review captured media.
5. Operating Instructions
5.1 Powering On/Off
To power on the camera, slide the mode switch from 'OFF' to 'SETUP' or 'ON'. To power off, slide the switch to 'OFF'.
5.2 Mode Selection
The camera typically offers three main modes:
- Photo Mode: Captures still images when triggered.
- Video Mode: Records video clips when triggered.
- Photo + Video Mode: Captures a still image followed by a video clip when triggered.
Select your desired mode via the camera's menu or the mobile app.
5.3 Configuring Settings
Access the camera's menu via the built-in screen and buttons, or more conveniently, through the connected mobile app. Key settings include:
- Resolution: Set photo resolution up to 64MP and video resolution up to 4K. Higher resolutions provide more detail but consume more storage space.
- Trigger Speed: Adjust the speed at which the camera reacts to motion. The KJK Trail Camera boasts a fast 0.05s trigger speed.
- PIR Sensitivity: Adjust the sensitivity of the motion sensor (Low, Medium, High) to suit the environment and avoid false triggers.
- Time Stamp: Enable or disable date, time, and temperature stamps on captured media.
- Loop Recording: If enabled, the camera will overwrite the oldest files when the memory card is full.
- Time Lapse: Capture images at set intervals regardless of motion.

Figure 5.1: High-resolution image and video capabilities.

Figure 5.2: Fast trigger speed in action.
5.4 Viewing Captured Media
You can view photos and videos in several ways:
- On Camera: Use the built-in screen to review media directly.
- Via App: Connect your smartphone to the camera's WiFi and use the app to browse, download, or delete files.
- On Computer: Remove the SD card and insert it into a computer's card reader, or connect the camera directly to a computer using the USB cable.
6. Maintenance
- Cleaning: Gently wipe the lens and IR LEDs with a soft, lint-free cloth. Clean the camera body with a damp cloth as needed. Do not use harsh chemicals.
- Battery Replacement: Replace all 8 AA batteries when the battery indicator shows low power. Use high-quality alkaline or rechargeable batteries for best performance.
- SD Card Management: Regularly format the SD card (after backing up important files) to maintain optimal performance and prevent data corruption.
- Storage: When not in use for extended periods, remove batteries and store the camera in a cool, dry place away from direct sunlight.
7. Troubleshooting
7.1 Camera Not Powering On
- Ensure batteries are inserted correctly with proper polarity.
- Check if batteries are fully charged or replace them with new ones.
- Verify the power switch is in the 'SETUP' or 'ON' position.
7.2 Poor Image/Video Quality
- Clean the camera lens and IR LEDs.
- Ensure the camera is set to the desired high resolution (4K for video, 64MP for photos).
- Check for obstructions in front of the lens or IR LEDs.
- For night vision issues, ensure IR LEDs are not blocked and batteries have sufficient power.
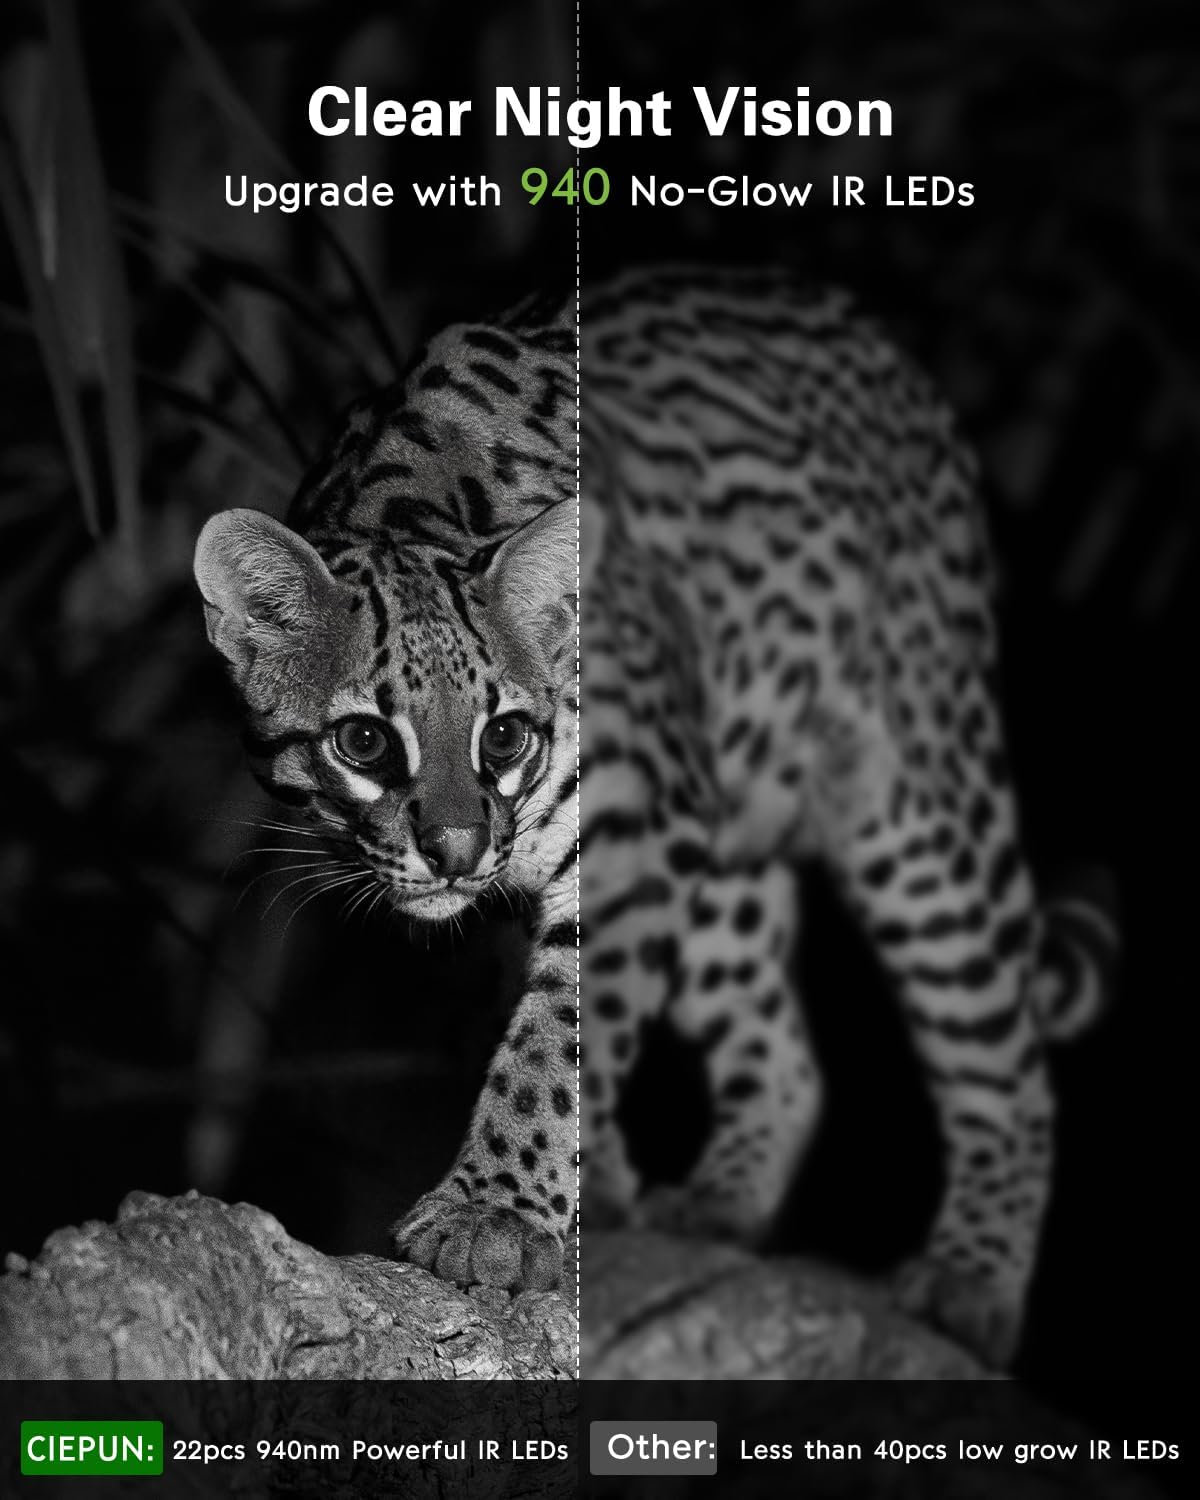
Figure 7.1: Enhanced night vision capabilities.
7.3 WiFi Connection Issues
- Ensure the camera's WiFi mode is activated.
- Check that your smartphone is within range of the camera's WiFi signal.
- Restart both the camera and your smartphone.
- Verify you have the correct app and password.
7.4 Camera Not Triggering
- Adjust PIR sensitivity to 'High'.
- Ensure the camera is not pointed at heat sources or moving branches that could cause false triggers.
- Check that the SD card is inserted correctly and has sufficient space.
- Verify the camera is in 'ON' mode, not 'SETUP'.
8. Specifications
| Feature | Specification |
|---|---|
| Image Resolution | Up to 64 Megapixels |
| Video Resolution | Up to 4K (MPEG-4) |
| Trigger Speed | 0.05 seconds |
| Field of View | 130° Wide-Angle |
| Night Vision | 45pcs Infrared LEDs (No-Glow) |
| Waterproof Rating | IP67 |
| Storage | 64GB SD Card (included), supports up to 256GB |
| Power Source | 8 AA Batteries |
| Connectivity | Wi-Fi |
| Operating Temperature | -22°F to +158°F (-30°C to +70°C) |
| Dimensions (LxWxH) | 4.12 x 2.5 x 5.3 inches |
9. Safety Information
- Do not mix old and new batteries, or different types of batteries.
- Dispose of batteries according to local regulations.
- Do not expose the camera to extreme temperatures outside its operating range.
- Avoid pointing the camera directly at the sun for extended periods, as this may damage the image sensor.
- Keep the camera out of reach of children.
10. Warranty and Support
KJK products are manufactured to high-quality standards. For warranty information, technical support, or service inquiries, please refer to the contact information provided with your purchase or visit the official KJK brand store on Amazon. Please have your model number (KJK230) and purchase details ready when contacting support.


