
1. Introduction
This manual provides detailed instructions for the installation, setup, operation, and maintenance of your Fafeicy Glass Door Smart Lock. Please read this manual thoroughly before installation and use to ensure proper function and safety. Keep this manual for future reference.
2. Product Overview
2.1 Key Features
- Multiple Unlocking Methods: Supports fingerprint, password, swiping card (M1, IC), and mechanical key.
- High Capacity: Stores up to 100 fingerprints, 100 IC cards, and 100 sets of passwords.
- Emergency Power: Type-C interface for emergency power supply when batteries are depleted.
- Low Power Consumption: Operates on 4 x AA dry batteries for over 6 months, with low battery warning.
- Virtual Password Function: Enhances security by allowing incorrect digits before or after the correct password.
- Intelligent Sensor: Automatically recognizes left and right door opening directions.
- Voice Navigation: Features real voice alarm and doorbell function with full voice guidance.
- Durable Construction: Internal double hook design for secure locking.
2.2 Components
The package includes the following components:
- 1 x Main Lock Body
- 1 x Sub Lock Body
- 2 x Installation Slabs
- 2 x Soft Enamel Cards (IC Cards)
- 2 x Mechanical Keys
- 1 x User Manual (this document)
- 10 x Installation Screws
3. Specifications
| Item Type | Glass Door Smart Lock |
| Material | ABS Plastics, Aluminum Alloy |
| Unlocking Methods | Fingerprint, Password, Swiping Card, Mechanical Key |
| Working Temperature | -25°C to +65°C |
| Card Type | M1, IC |
| Door Crevice Space | Approx. 3-10mm / 0.12-0.39in |
| Fit Door Type Thickness | Approx. 8-12mm / 0.31-0.47in (8mm glass doors require a thick plate) |
| Battery | 4 x AA Dry Batteries (Not Included) |
| Emergency Power Supply | TYPE C Interface |
| Door Opening Method | Push and Pull or Swing Left, Right |
| Applicable Doors | Glass Doors, Aluminum Alloy Doors with Frame, Wooden Doors, Sliding Doors, Automatic Doors |
| Dimensions (Main Lock Body) | Height: 185mm / 7.28in, Width: 70mm / 2.76in, Depth: 40mm / 1.57in |
| Dimensions (Sub Lock Body) | Height: 185mm / 7.28in, Width: 35mm / 1.38in, Depth: 25mm / 0.98in |
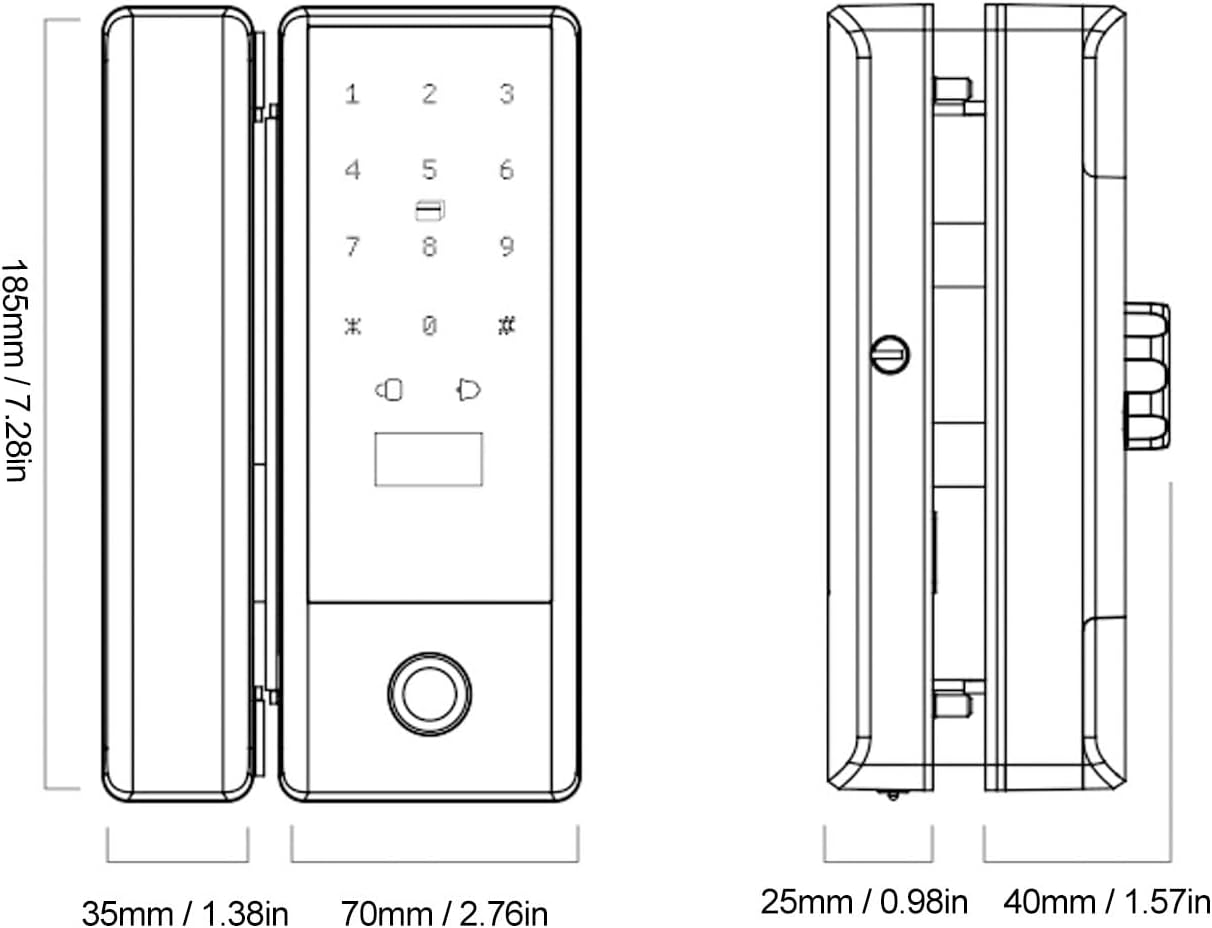
Image: Detailed dimensions of the main and sub lock bodies, showing height, width, and depth measurements in millimeters and inches.
4. Installation
Proper installation is crucial for the smart lock's functionality and security. Please follow these steps carefully.
4.1 Door Type Compatibility
The lock is designed for various door types, including frameless glass doors, single or double doors, left or right doors, sliding doors, and automatic doors. Ensure your door thickness is between 8-12mm. For 8mm glass doors, an additional thick plate is required for proper fit.

Image: Visual guide illustrating compatibility with single opening glass doors (with glass or wall sides), frameless double opening glass doors, and framed double opening glass doors. Includes notes on door thickness, seam size, and installation requirements like drilling for framed doors.
4.2 Installation Steps (General Guide)
- Prepare the Door: Ensure the door surface is clean and free from obstructions. Verify the door thickness and crevice space meet the specifications (3-10mm crevice, 8-12mm thickness).
- Position the Lock Bodies: Place the main lock body (with keypad) and sub lock body on opposite sides of the glass door, aligning them correctly. The lock features an intelligent sensor that automatically recognizes left and right door opening, simplifying orientation.
- Secure with Installation Slabs: Use the provided installation slabs to secure the lock bodies to the door.
- Insert Screws: Fasten the lock bodies using the 10 installation screws provided. Ensure all screws are tightened securely but do not overtighten to avoid damaging the glass.
- Check Latch Mechanism: Verify the double hook locking latch operates smoothly. This design ensures sturdy and long service life.
- Install Batteries: Insert 4 x AA dry batteries (not included) into the designated battery compartment. Observe correct polarity.

Image: Close-up view of the smart lock installed on a glass door, highlighting the double hook locking latch mechanism and its sturdy construction. The image also indicates compatibility with push-pull, sliding, partition, and induction doors.

Image: Depicts the smart lock's intelligent sensor feature, which automatically recognizes left and right door opening directions, eliminating the need for manual adjustment during installation.
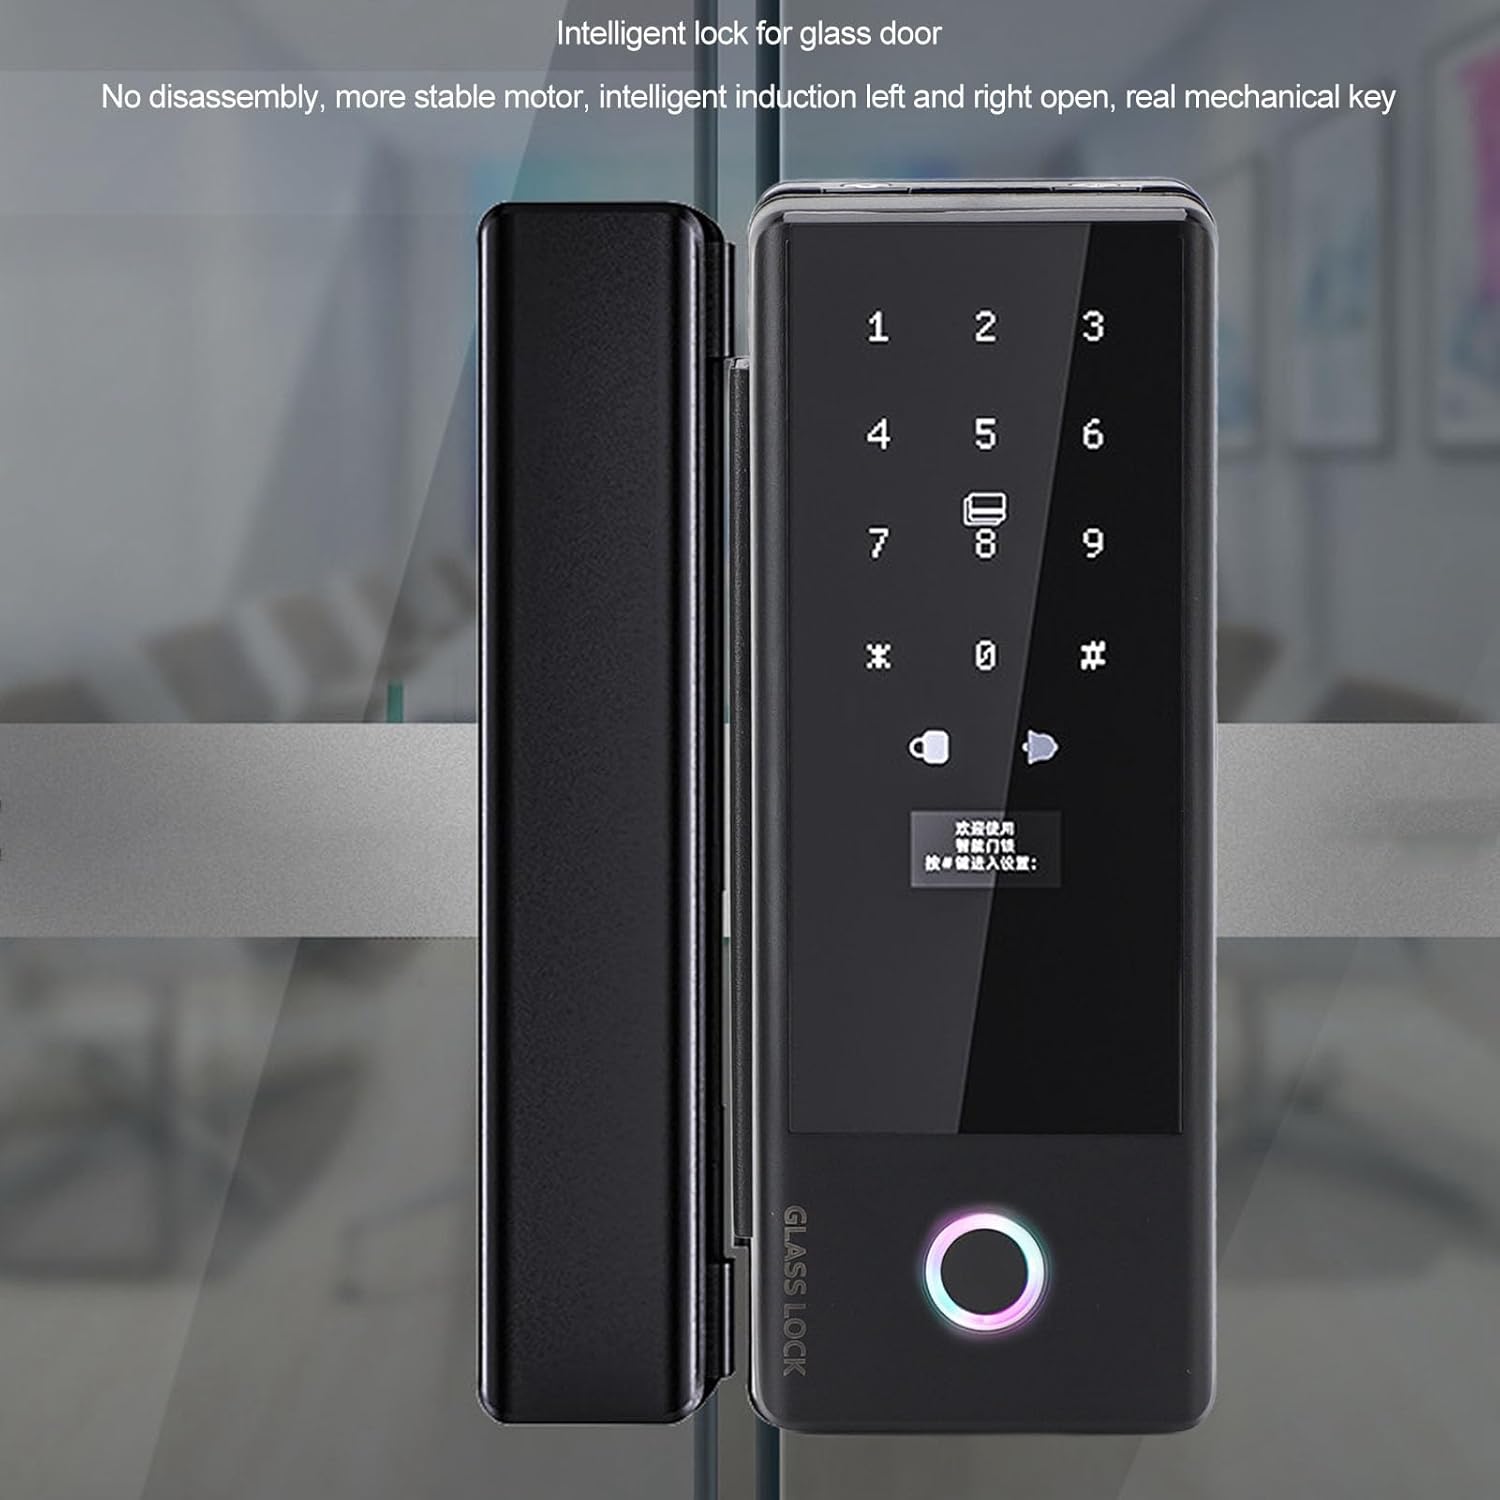
Image: Shows the smart lock securely installed on a glass door, illustrating its design for easy installation without requiring disassembly, featuring a stable motor and real mechanical key access.
5. Setup and Programming
After installation, you need to set up the lock by registering administrator and user credentials.
5.1 Initial Setup (Administrator Registration)
- Power On: Ensure batteries are installed. The lock will typically provide a voice prompt.
- Enter Programming Mode: Follow the voice prompts or refer to the quick start guide for entering the initial programming mode. This usually involves pressing a specific key (e.g., '*' or '#') and then an administrator code if one exists, or a default code.
- Register Administrator: The first fingerprint, password, or IC card registered will automatically be designated as the administrator.
- Fingerprint: Place your finger on the fingerprint sensor multiple times as prompted until registration is complete.
- Password: Enter a new password (6-12 digits recommended) followed by '#' and re-enter to confirm.
- IC Card: Present the IC card to the card reader as prompted.
- Exit Programming Mode: The lock will usually exit programming mode automatically after a period of inactivity or by pressing a specific key.
5.2 Adding User Credentials
Only an administrator can add or delete user credentials.
- Enter Administrator Mode: Access the programming menu using your administrator fingerprint, password, or IC card.
- Select Add User Option: Follow the voice prompts to select the option for adding new users.
- Register User Credentials:
- Fingerprint: Instruct the user to place their finger on the sensor multiple times.
- Password: Instruct the user to enter their desired password (6-12 digits) and confirm.
- IC Card: Instruct the user to present their IC card to the reader.
- Confirm: The lock will provide a voice confirmation upon successful registration.

Image: A user swiping an IC card on the smart lock's card reader, demonstrating the card swiping unlocking method. The image also specifies compatibility with M1 and IC card types.
6. Operation
Operating your smart lock is straightforward once setup is complete.
6.1 Unlocking the Door
The lock supports five unlocking methods:

Image: The smart lock's keypad and fingerprint sensor, with text indicating the available unlocking methods: Fingerprint, Password, Swipe Card, and Key.
- Fingerprint: Place your registered finger on the fingerprint sensor. The lock will verify and unlock.
- Password: Enter your registered password followed by the '#' key. The lock will verify and unlock. Utilize the virtual password feature by entering random digits before or after your actual password for enhanced security.
- Swiping Card: Present your registered IC card to the card reader area. The lock will verify and unlock.
- Mechanical Key: In case of emergency or battery failure, insert the mechanical key into the keyhole and turn to unlock.
- Remote Unlocking: (If applicable and configured) Use the associated mobile application or remote control to unlock the door.
6.2 Locking the Door
The lock typically locks automatically after the door closes. To manually lock, press the '#' key on the keypad.
6.3 Voice Prompts and Doorbell
The lock provides full voice navigation for operations and includes a doorbell function. Press the doorbell icon on the keypad to activate the doorbell.
7. Maintenance
Regular maintenance ensures the longevity and optimal performance of your smart lock.
- Battery Replacement: The lock will provide a low battery warning. Replace all four AA dry batteries promptly when this warning appears. The lock can still be unlocked approximately 200 times after the warning.
- Emergency Power: If batteries completely drain, use a Type-C cable to connect an external power bank for emergency unlocking.
- Cleaning: Wipe the lock's surface with a soft, dry cloth. Avoid using abrasive cleaners, solvents, or harsh chemicals that could damage the finish or electronic components.
- Fingerprint Sensor: Keep the fingerprint sensor clean and dry for accurate readings.
- Mechanical Key: Store the mechanical keys in a safe, accessible location outside the locked area for emergency use.
8. Troubleshooting
Refer to this section for common issues and their solutions.
| Problem | Possible Cause | Solution |
|---|---|---|
| Lock does not respond. | Dead batteries. | Replace batteries. Use Type-C emergency power if needed. |
| Fingerprint not recognized. | Finger is wet, dirty, or sensor is obstructed. Fingerprint not registered. | Clean finger and sensor. Try again. Ensure fingerprint is registered. Re-register if necessary. |
| Password not accepted. | Incorrect password entered. | Ensure correct password is entered, followed by '#'. Remember virtual password rules. |
| IC card not working. | Card not registered or damaged. | Ensure card is registered. Try another registered card. |
| Lock mechanism is stiff or jammed. | Misalignment during installation or debris. | Check door alignment and ensure no obstructions. Re-check installation if issue persists. |
9. Warranty and Support
For warranty information and technical support, please refer to the product packaging or contact Fafeicy customer service directly. Keep your purchase receipt as proof of purchase.
Manufacturer: Fafeicy
Model Number: Fafeicyhvb1k674x9