
1. Introduction
Thank you for choosing the Mxmoonfree Digital Force Gauge 500N. This portable force meter is designed for precise measurement of push and pull forces, suitable for a wide range of applications including compression, tensile, and destructive testing. This manual provides essential information for the safe and effective operation of your device. Please read it thoroughly before use and retain it for future reference.
The Mxmoonfree Digital Force Gauge 500N offers flexibility with four measurement units (N, Lb, Kg, Oz) and three measurement modes (Real-Time, PEAK, First-PEAK). Its robust design and user-friendly features make it an invaluable tool for various industrial and scientific applications.
2. Safety Information
- Always operate the device within its specified load capacity (500N/50kg/110Lb/1800Oz) to prevent damage and ensure accurate readings.
- Do not expose the device to extreme temperatures, humidity, or corrosive environments.
- Avoid dropping or subjecting the device to strong impacts.
- Ensure proper battery installation and replacement. Remove batteries if the device will not be used for an extended period.
- Keep the device and its accessories out of reach of children.
- This device is not suitable for all test stands. Refer to the dimensions provided in Section 4.4 for compatibility.
3. Package Contents
Upon unpacking, please verify that all items listed below are present and in good condition:

Figure 3.1: Package Contents
- Digital Force Gauge (KF-500N)
- Storage Case
- AA Batteries (2 pcs)
- Various Test Heads/Accessories (e.g., flat disc, point, chisel, concave wedge, hook, extension rod, hex nut)
- Calibration Certificate
- User Manual (this document)
- Service Card
4. Product Overview
4.1 Display and Controls

Figure 4.1: Display Indicators
The device features an auto-backlit LCD display and intuitive buttons for easy operation:
- SET Button: Used for entering settings menus and confirming selections.
- ZERO Button: Resets the current reading to zero.
- POWER Button: Turns the device on or off.
- PEAK Button: Toggles between Real-Time, PEAK, and First-PEAK measurement modes.
- UNIT Button: Cycles through the available measurement units (N, Lb, Kg, Oz).
4.2 Measurement Units
The force gauge supports four common units of measurement:

Figure 4.2: Unit Conversion Display
- N (Newton): Standard international unit of force.
- Lb (Pound): Imperial unit of force.
- Kg (Kilogram): Unit of mass, often used as a force unit (kilogram-force).
- Oz (Ounce): Imperial unit of force.
4.3 Measurement Modes
The device offers three distinct measurement modes:

Figure 4.3: Measurement Modes
- Real-Time Mode: Displays the current force reading as it changes. This is the default mode upon power-on.
- PEAK Mode: Captures and holds the maximum force value detected during a measurement. The display will show 'P'.
- First-PEAK Mode: Captures and holds the first peak force value detected. The display will show 'P T'.
4.4 Power Supply and Dimensions
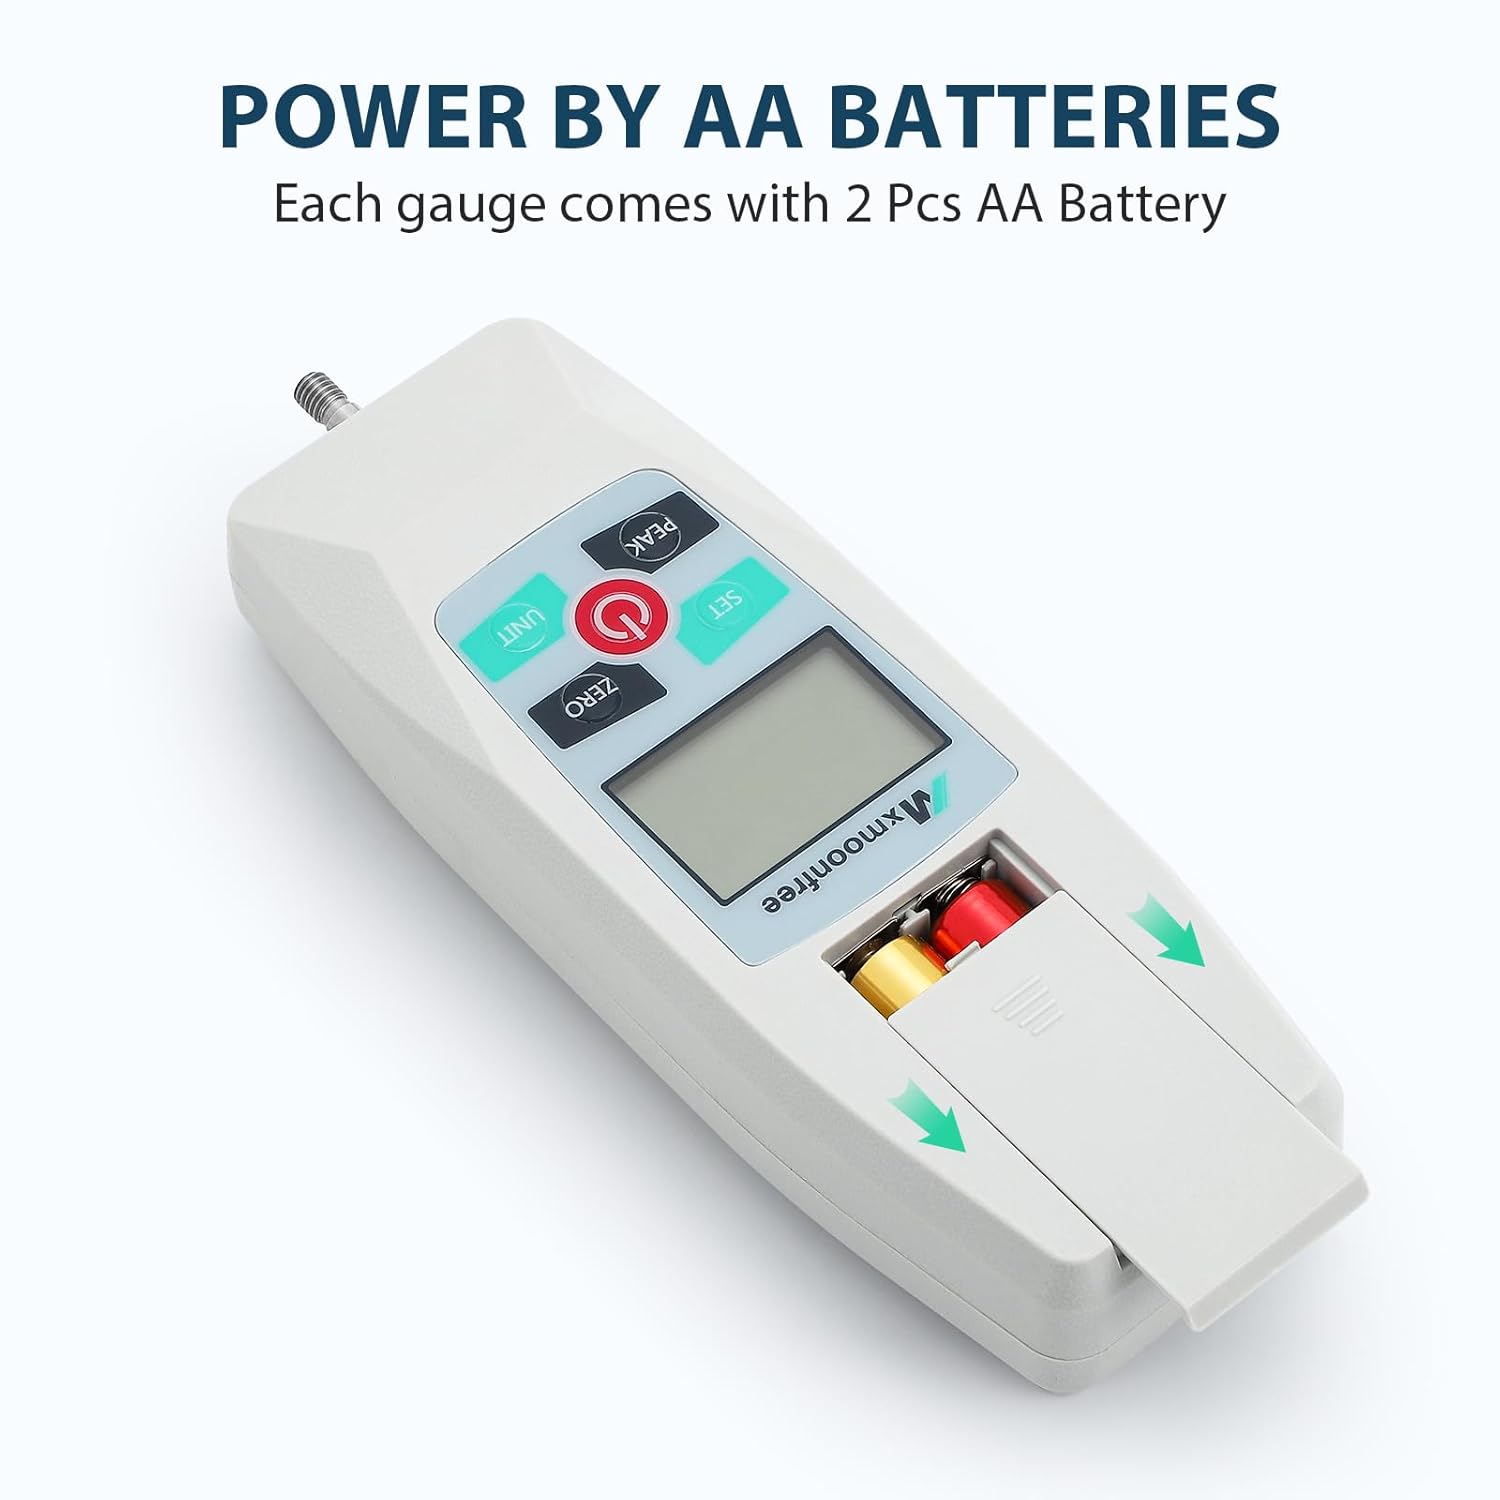
Figure 4.4: Battery Compartment
The device is powered by 2 AA batteries (included). It features an auto power-off function to conserve battery life, which can be set between 0 to 15 minutes (default 10 minutes).

Figure 4.5: Device Dimensions and Test Stand Compatibility
Note on Test Stands: The mounting holes for the KF Force Gauge are 30 x 145 mm and use M3 screws. It is not compatible with APH and ESD models of test stands. Please verify compatibility before attempting to mount the device.
5. Setup
5.1 Battery Installation
- Locate the battery compartment cover on the back of the device.
- Slide the cover open.
- Insert two AA batteries, ensuring correct polarity (+/-).
- Close the battery compartment cover securely.
5.2 Attaching Accessories
The force gauge comes with various test heads and accessories. To attach an accessory:
- Identify the threaded shaft at the bottom of the force gauge.
- Select the appropriate test head for your measurement task. The accessories use 1/4"-28 threads.
- Screw the chosen test head onto the shaft clockwise until it is finger-tight. Do not overtighten.
6. Operation
6.1 Power On/Off
- To power on the device, press the POWER button. The display will illuminate.
- To power off the device, press and hold the POWER button until the display turns off.
6.2 Unit Conversion
To change the measurement unit:
- Press the UNIT button repeatedly to cycle through N, Lb, Kg, and Oz. The selected unit will be displayed on the screen.
6.3 Mode Selection
To select a measurement mode:
- Press the PEAK button to switch between Real-Time, PEAK, and First-PEAK modes.
- In Real-Time mode, the display shows the current force.
- In PEAK mode, 'P' will appear on the display, and the maximum force applied will be held.
- In First-PEAK mode, 'P T' will appear, and the first peak force detected will be held.
6.4 Zeroing the Display
Before taking a measurement, it is recommended to zero the display:
- Ensure no force is being applied to the test head.
- Press the ZERO button. The display should show 0.0.
6.5 Minimum Force Shielding
The device includes a minimum force shielding feature that can prevent readings below 0.5% of the full scale from being displayed. This feature is enabled by default.
- To enable or disable this feature, refer to the detailed instructions in the full user manual (not included in this summary).
6.6 Upper/Lower Limit Alert
You can set upper and lower limit values for your tests. The gauge will provide an alert if readings exceed the upper limit or fall below the lower limit.
- Setting these limits requires navigating through the device's menu using the SET button. Consult the comprehensive user manual for detailed steps.
6.7 Auto Power-Off Function
The auto power-off time can be adjusted to save battery life:
- The default auto power-off time is 10 minutes.
- This setting can be adjusted from 0 to 15 minutes via the device's settings menu. A setting of 0 minutes disables the auto power-off function.
7. Maintenance
- Cleaning: Wipe the device with a soft, dry cloth. Do not use abrasive cleaners or solvents.
- Storage: Store the force gauge and its accessories in the provided storage case in a dry, cool place when not in use. Remove batteries if storing for extended periods to prevent leakage.
- Calibration: The device comes with a calibration certificate. Regular calibration by a qualified laboratory is recommended to maintain accuracy, especially for critical applications.
8. Troubleshooting
| Problem | Possible Cause | Solution |
|---|---|---|
| Device does not power on. | Dead or incorrectly installed batteries. | Replace batteries with new AA batteries, ensuring correct polarity. |
| Inaccurate readings. | Device not zeroed; Overload; Environmental factors; Needs calibration. | Press ZERO button before measurement. Ensure load is within capacity. Avoid extreme conditions. Consider professional calibration. |
| Display shows 'OL' or 'Err'. | Overload condition. | Remove the load immediately. Ensure future measurements are within the 500N capacity. |
| Buttons are unresponsive. | Temporary software glitch; Low battery. | Try removing and reinserting batteries. Replace batteries if low. |
9. Specifications
| Feature | Specification |
|---|---|
| Model Number | KF-500N |
| Maximum Load Capacity | 500N / 50kg / 110Lb / 1800Oz |
| Measurement Accuracy | ±1% |
| Measurement Units | N, Lb, Kg, Oz |
| Measurement Modes | Real-Time, PEAK, First-PEAK |
| Power Supply | 2 x AA Batteries (Alkaline, included) |
| Auto Power-Off | Adjustable (0-15 minutes, default 10 minutes) |
| Minimum Force Shielding | Enabled by default (below 0.5% of full scale) |
| Material | Acrylonitrile Butadiene Styrene (ABS) |
| Item Weight | 500 g (0.5 Kilograms) |
| Product Dimensions (L x W x H) | 17.7 x 6.7 x 3.4 cm (177 x 67 x 34 mm) |
| Mounting Hole Pattern | 30 x 145 mm (M3 screws) |
| Included Components | Storage Case, AA Batteries, Test Heads |
10. Warranty and Support
Mxmoonfree products are designed for reliability and performance. For warranty information, technical support, or service inquiries, please refer to the Service Card included in your package or visit the official Mxmoonfree website. Please have your model number (KF-500N) and purchase details ready when contacting support.