S-MTK
Motorcycle Rear Brake Pedal Foot Lever User Manual
Model: S-MTK
1. Introduction
This user manual provides essential information for the installation, operation, and maintenance of your new Motorcycle Rear Brake Pedal Foot Lever. Please read this manual thoroughly before installation and use to ensure proper function and safety.
2. Product Description
The Motorcycle Rear Brake Pedal Foot Lever is a high-quality replacement part designed to enhance your motorcycle's braking system. Crafted from durable materials, it ensures long-term reliability for a safe riding experience. Its superior control and ergonomic design contribute to smoother braking, instilling confidence during your rides.
Key Features:
- Perfect Fit: Specifically designed to seamlessly integrate with the RKS 150 / VLR150 / XL073 / AGAT-2377 / BE056 motorcycle, ensuring a snug and secure fit without any modifications required.
- Premium Quality: Crafted from high-strength materials, this rear brake lever is built to withstand the rigors of motorcycle riding, ensuring long-lasting durability and reliable performance.
- Enhanced Control: Engineered for precise control and responsive braking, allowing you to confidently navigate various road conditions and maneuvers with ease.
- Easy Installation: Designed for hassle-free installation, saving you time and effort. Simply replace your existing brake lever with this upgraded version to experience immediate improvements in performance.
- Versatile Compatibility: This rear brake lever may also be compatible with other similar motorcycle models, offering versatility and convenience for riders with different bikes.

Figure 2.1: Overview of the Motorcycle Rear Brake Pedal Foot Lever.
3. Safety Information
Always prioritize safety when working on your motorcycle. Improper installation or maintenance of brake components can lead to serious injury or death. If you are unsure about any step, consult a qualified motorcycle mechanic.
- Ensure the motorcycle is stable and securely supported before beginning any work.
- Wear appropriate personal protective equipment (PPE), such as gloves and eye protection.
- Do not operate the motorcycle if the brake pedal feels loose, unresponsive, or exhibits any unusual behavior after installation.
- Regularly inspect all brake components for wear, damage, or corrosion.
- Keep children and pets away from the work area.
4. Package Contents
Verify that all components are present and undamaged upon opening the package:
- 1 x Motorcycle Rear Brake Pedal Foot Lever
Note: Additional tools required for installation (e.g., wrenches, screwdrivers) are not included.
5. Setup and Installation
This section outlines the general steps for installing the rear brake pedal. Specific procedures may vary slightly depending on your motorcycle model. Refer to your motorcycle's service manual for detailed instructions.
Before Installation:
- Park your motorcycle on a level surface and ensure it is stable, preferably on a center stand or paddock stand.
- Allow the engine and exhaust system to cool down completely to prevent burns.
- Gather all necessary tools.
Installation Steps:
- Remove the Old Brake Pedal: Carefully identify and remove any retaining clips, bolts, or pins securing the existing rear brake pedal to the motorcycle frame and brake master cylinder linkage. Keep track of all removed hardware.
- Clean the Mounting Area: Clean any dirt, grease, or rust from the mounting points on the motorcycle frame to ensure a proper fit for the new pedal.
- Install the New Brake Pedal: Align the new Motorcycle Rear Brake Pedal Foot Lever with the mounting points. Insert the necessary bolts, pins, or clips. Ensure the pedal pivots freely without binding.
- Connect to Brake Linkage: Reconnect the brake pedal to the brake master cylinder linkage. Ensure the brake light switch (if applicable) is properly engaged and functioning.
- Adjust Pedal Position (if applicable): Some brake pedals allow for minor adjustments to their height or angle. Adjust as needed for comfortable and effective braking.
- Secure All Fasteners: Tighten all bolts and fasteners to the manufacturer's specified torque settings. Do not overtighten.
- Test Functionality: Before riding, thoroughly test the brake pedal's operation. Ensure it depresses smoothly, returns to its original position, and activates the rear brake effectively. Check that the brake light illuminates when the pedal is pressed.
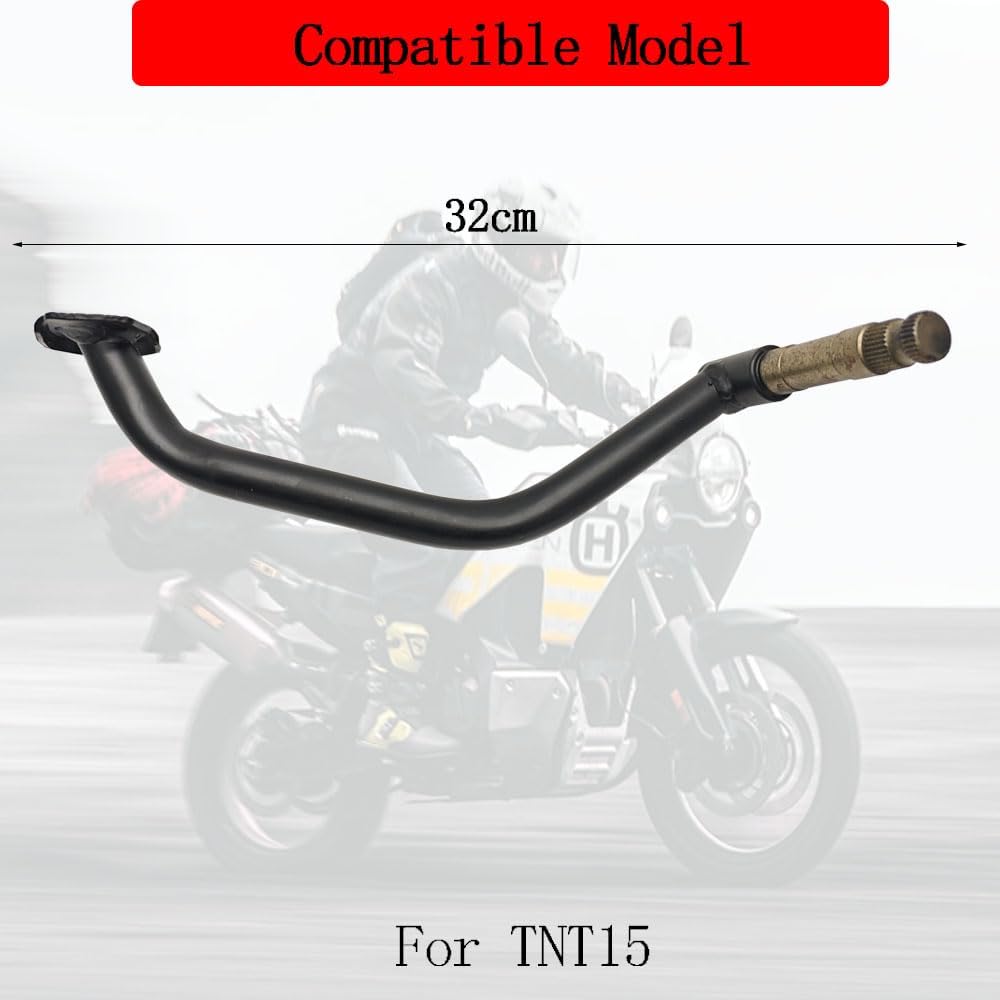
Figure 5.1: The brake pedal measures approximately 32cm in length, suitable for compatible models.

Figure 5.2: Detailed dimensions of the mounting shaft: 37mm, 68mm, and 16mm diameter, ensuring precise fitment.

Figure 5.3: Close-up view highlighting the quality materials and workmanship of the pedal's textured footrest surface for improved grip.
6. Operating Instructions
Once properly installed, the rear brake pedal operates as a direct replacement for your motorcycle's original pedal. To engage the rear brake, simply press down on the pedal with your foot. The pedal's ergonomic design and responsive action ensure smooth and effective braking.

Figure 6.1: The rear brake pedal installed on a motorcycle, ready for use.
7. Maintenance
Regular maintenance ensures the longevity and safe operation of your brake pedal and overall braking system.
- Regular Inspection: Periodically check the brake pedal for any signs of wear, damage, bending, or corrosion. Ensure all fasteners are tight.
- Lubrication: Apply a small amount of appropriate grease to the pivot points of the pedal to ensure smooth operation and prevent squeaking.
- Cleaning: Keep the pedal and surrounding area clean from dirt, mud, and road grime.
- Brake Fluid Check: While not directly related to the pedal itself, regularly check your motorcycle's brake fluid level and condition as part of overall brake system maintenance.
8. Troubleshooting
If you encounter issues with your rear brake pedal, consider the following:
- Pedal feels stiff or sticky:
- Check for proper lubrication at the pivot points.
- Ensure no debris is obstructing the pedal's movement.
- Verify that the pedal is not bent or damaged.
- Brake light not activating:
- Check the connection to the brake light switch.
- Inspect the brake light switch for damage or malfunction.
- Verify the brake light bulb is functional.
- Poor braking performance:
- Ensure the pedal is correctly connected to the master cylinder linkage.
- Check for air in the brake lines (requires bleeding the brake system, consult a mechanic).
- Inspect brake pads and rotor for wear.
If problems persist after troubleshooting, it is recommended to consult a professional motorcycle mechanic.
9. Specifications
| Feature | Detail |
|---|---|
| Brand | Generic |
| Model Number | S-MTK |
| Colour | Black |
| Product Dimensions | 25.4 x 7.62 x 7.62 cm (10L x 3W x 3H inches) |
| Number of Pieces | 1 |
| Special Features | Easy to Install, Durable |
| Included Components | Rear Brake Pedal Foot Lever |
| Handle Type | Lever |
| Theme | Motorcycle |
10. Warranty and Support
Specific warranty information for this product is not provided in the available documentation. For details regarding warranty coverage, returns, or technical support, please contact the seller or manufacturer directly through your purchase platform.
For general inquiries or assistance, please refer to the contact information provided by the retailer where the product was purchased.
Ask a question about this manual
Ask about setup, troubleshooting, compatibility, parts, safety, or missing instructions. Manuals+ will review the question and use this page’s manual context to help answer it.