1. Introduction
The Velamp Key Safe Basic Model IG006 is designed to provide secure storage for your keys, allowing authorized access via a customizable 4-digit combination lock. This robust, wall-mounted safe is constructed from a durable steel alloy, offering resistance against physical tampering and adverse weather conditions. It is suitable for storing various types of keys, including home, car, and emergency keys, for personal use or for shared access in settings like B&Bs or for service personnel.

Figure 1: Front view of the Velamp Key Safe Basic Model IG006, illustrating its 4-digit combination lock and key security features. Icons indicate resistance to hammering and prying, high security, and waterproof design.
2. Safety Information
- Ensure the key safe is mounted securely to a solid surface to prevent removal.
- Do not share your combination code with unauthorized individuals.
- Regularly check the mounting for any signs of loosening or damage.
- Avoid storing the key safe in easily accessible or highly visible locations if possible.
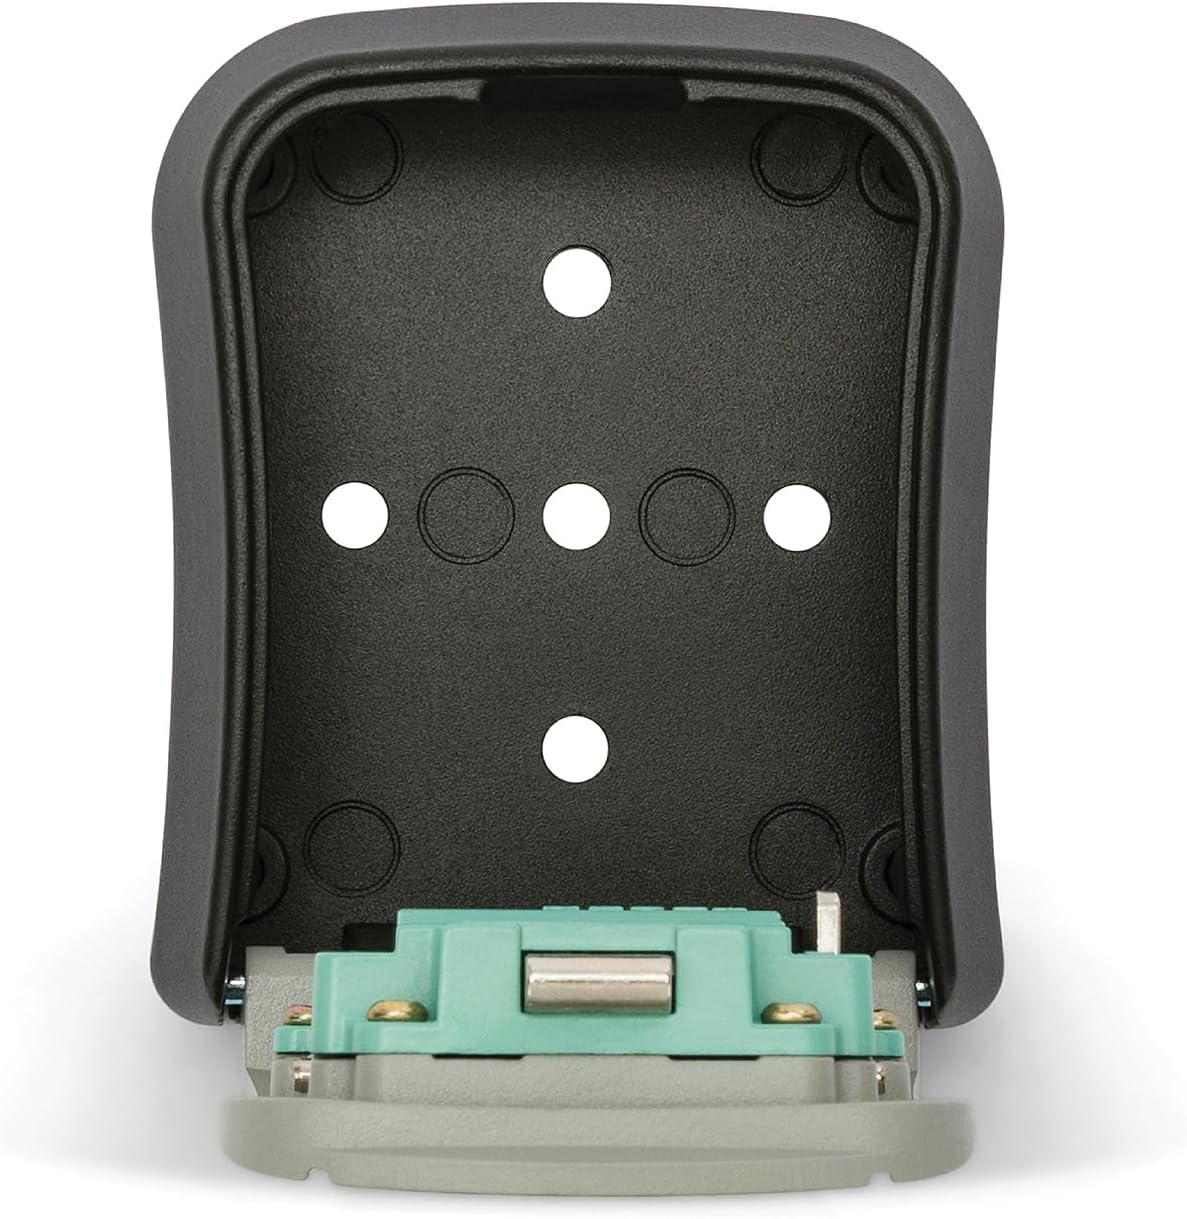
Figure 2: This image contrasts the secure storage provided by the Velamp Key Safe, mounted on a wall, with insecure methods like hiding keys under a mat or a rock, which are easily discoverable.
3. Package Contents
Verify that all components are present in the package:
- Velamp Key Safe Basic Model IG006
- Mounting hardware (screws and wall plugs)
- Instruction Manual
4. Specifications
| Feature | Detail |
|---|---|
| Model Number | IG006 |
| External Dimensions (H x W x D) | 94 mm x 80 mm x 36 mm |
| Internal Dimensions (H x W x D) | 75 mm x 55 mm x 30 mm |
| Material | Steel Alloy |
| Color | Grey |
| Lock Type | 4-Digit Combination |
| Installation Type | Wall Mount |
| Special Features | Water Resistant, Weather Resistant, Corrosion Resistant |
| Weight | 230 g |

Figure 3: This diagram illustrates the precise internal and external measurements of the key safe. Internal dimensions are 55mm width, 75mm height, and 30mm depth. External dimensions are 80mm width, 94mm height, and 36mm depth.
5. Setup and Installation
The key safe is designed for wall mounting. Choose a discreet and secure location for installation.
- Mark Drilling Points: Hold the key safe against the desired mounting surface. Use a pencil to mark the positions of the mounting holes on the wall.
- Drill Holes: Using an appropriate drill bit for your wall type, drill holes at the marked positions.
- Insert Wall Plugs: Insert the provided wall plugs into the drilled holes.
- Mount the Safe: Align the key safe's mounting holes with the wall plugs. Insert the screws through the safe and into the wall plugs. Tighten the screws firmly until the safe is securely fastened to the wall. Do not overtighten.

Figure 4: This view from the back of the key safe displays the pre-drilled holes designed for secure wall mounting.

Figure 5: The key safe securely installed on an exterior wall beside a door, illustrating a typical mounting location for convenient access.
6. Operating Instructions
6.1. Opening the Key Safe
The key safe comes with a factory default combination of 0-0-0-0.
- Rotate the dials to align with the current combination (initially 0-0-0-0).
- Pull down the front cover to open the safe.
6.2. Setting a New Combination Code
You can change the 4-digit combination at any time. It is recommended to choose a memorable but secure code.
- Open the Safe: Dial the current code (default 0-0-0-0) to open the key safe.
- Locate Reset Lever: Inside the safe, on the back of the door, locate the reset lever.
- Move Lever to 'B': Push the reset lever from position 'A' to position 'B'.
- Set New Code: While the lever is in position 'B', rotate the dials to your desired new 4-digit combination.
- Move Lever to 'A': Push the reset lever back to position 'A'.
- Test New Code: Before closing the safe, scramble the dials and then enter your new combination to ensure it opens correctly. Do not close the safe door until you have successfully tested the new combination.
- Close the Safe: Once the new code is confirmed, close the safe door and scramble the dials to lock it.

Figure 6: This image provides a visual guide for setting the 4-digit combination code. It shows dialing the original code, pushing the reset lever to 'B', setting a new combination, pushing the lever to 'A', and then testing the new code before closing the safe.
6.3. Storing Keys
The internal compartment is designed to hold multiple keys securely.
- Open the key safe using the current combination.
- Place your keys inside the compartment. The internal dimensions are 75mm (height) x 55mm (width) x 30mm (depth).
- Close the safe door and scramble the dials to lock it.

Figure 7: This image demonstrates the capacity of the key safe, showing it can securely hold multiple types of keys, such as a single car key fob or up to five standard house keys.
7. Maintenance
- Cleaning: Wipe the exterior of the key safe with a damp cloth to remove dirt or dust. Avoid using abrasive cleaners or solvents.
- Weather Resistance: The key safe is designed to be water and weather resistant. However, prolonged exposure to extreme conditions may affect its lifespan. Periodically inspect the safe for any signs of wear or water ingress.
- Lubrication: If the dials become stiff, a small amount of silicone-based lubricant can be applied to the moving parts.
8. Troubleshooting
- Safe will not open with the correct code:
- Ensure all dials are perfectly aligned with the numbers of your combination.
- Try rotating the dials back and forth a few times to clear any internal mechanism issues, then re-enter the code. - Cannot set a new code:
- Make sure the safe is fully open and the reset lever is completely pushed to position 'B' before setting the new code.
- Ensure the reset lever is returned to position 'A' after setting the new code. - Safe feels loose on the wall:
- Check the mounting screws and tighten them if necessary. If the wall plugs are damaged, consider re-mounting in a slightly different spot or using new, stronger wall anchors.
9. Warranty and Support
For warranty information, technical support, or any questions not covered in this manual, please refer to the contact information provided with your purchase or visit the official Velamp website. Keep your proof of purchase for warranty claims.