carleef carleef-Pai Qi Shuan-2207
carleef M8x1.25x75mm Exhaust Bolts and Nuts Kit Instruction Manual
Model: carleef-Pai Qi Shuan-2207
1. Product Overview
The carleef M8x1.25x75mm Exhaust Bolts and Nuts Kit provides essential components for securing your vehicle's exhaust manifold. This kit is designed for reliable support of manifold components, ensuring a tight seal for ball and socket joints. Made from premium quality carbon steel, these parts offer high strength and durability.
Kit Contents:
- 2 x Bolts (M8 * 1.25 thread size, 75mm / 2.95 inch total length, 16.6mm / 0.65 inch diameter)
- 2 x Springs (45mm / 1.77 inch length, 16mm / 0.63 inch diameter)
- 2 x Nuts
- 2 x Gaskets

Image: The kit includes two bolts, two springs, two nuts, and two gaskets, laid out on a white surface.

Image: A detailed view of the bolt and spring assembly with dimensions indicating a 2.95-inch length and 0.65-inch diameter.
2. Setup and Installation
This section provides general guidance for installing the exhaust manifold bolt and spring kit. Professional installation is recommended if you are unfamiliar with automotive repair procedures.
2.1 Pre-Installation Checks
- Verify that the thread size (M8 * 1.25) and dimensions of the bolts and springs match your vehicle's requirements.
- Ensure all components of the kit are present and undamaged.
- Gather necessary tools, including wrenches, sockets, and potentially a torque wrench.
2.2 Installation Steps
- Prepare the Vehicle: Safely lift and support the vehicle. Allow the exhaust system to cool completely before beginning work.
- Remove Old Components: Carefully remove the old exhaust manifold bolts, springs, nuts, and gaskets. Be mindful of rusted or seized fasteners.
- Clean Mounting Surfaces: Thoroughly clean the mating surfaces of the exhaust manifold and downpipe to ensure a proper seal. Remove any old gasket material or corrosion.
- Assemble the New Bolts: Place a washer onto each bolt, followed by a spring. Then, thread a nut onto the bolt, ensuring the spring is compressed slightly.
- Position New Gaskets: Place the new gaskets between the exhaust manifold and the downpipe.
- Install the Kit: Insert the assembled bolts through the manifold and downpipe flanges.
- Tighten Fasteners: Hand-tighten the nuts first, then use a wrench to gradually tighten them in a crisscross pattern to ensure even pressure. Refer to your vehicle's service manual for specific torque specifications.
- Final Check: After installation, visually inspect all connections for proper alignment and tightness.
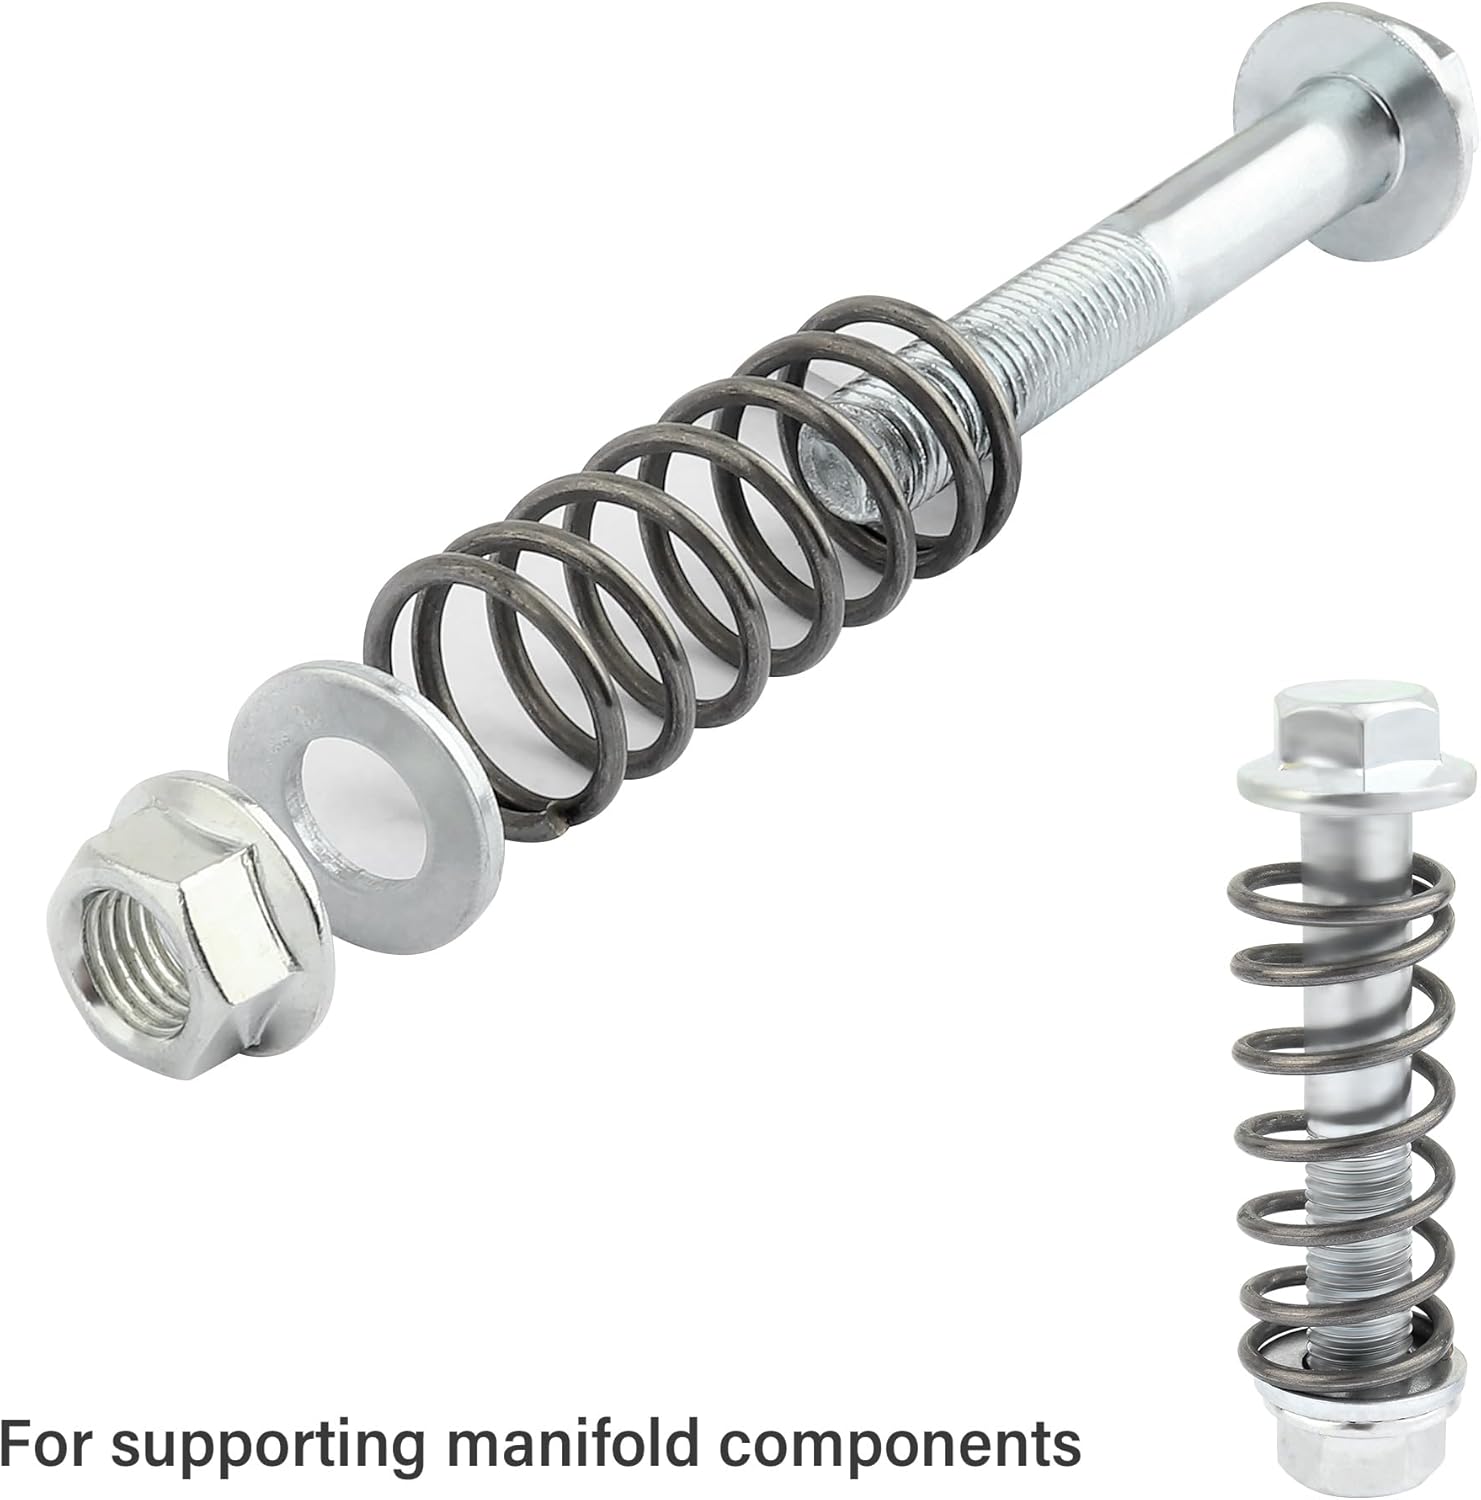
Image: An exploded view showing the assembly of the bolt, washer, spring, and nut, alongside an illustration of the assembled bolts supporting manifold components.

Image: A mechanic is shown working on a car engine, emphasizing the ease of installation for these components.
2.3 Assembly Demonstration Video
Video: A demonstration of assembling the carleef Exhaust Bolts and Nuts Kit, showing how the spring and nut fit onto the bolt.
Video: A visual guide demonstrating the assembly of exhaust manifold bolts, including measuring components and showing the final assembled product.
3. Operating Considerations
Once installed, the exhaust bolts and springs work continuously to maintain the integrity of your exhaust system. Proper installation ensures optimal performance and longevity.
- The springs are designed to provide constant tension, allowing for thermal expansion and contraction of the exhaust system without loosening the connection.
- A tight seal prevents exhaust leaks, which can affect engine performance, fuel efficiency, and emissions.
4. Maintenance
Regular inspection of your exhaust system, including the manifold bolts and springs, is crucial for maintaining vehicle performance and safety.
- Periodic Inspection: Annually or during routine vehicle maintenance, inspect the exhaust manifold bolts and springs for signs of corrosion, damage, or loosening.
- Check for Leaks: Listen for unusual noises (hissing, tapping) from the exhaust system, which could indicate a leak. Visually check for soot buildup around the manifold joints.
- Tightness Check: If accessible, gently check the tightness of the nuts. Do not overtighten, as this can strip threads or damage components.
- Replacement: If any component shows significant wear, damage, or signs of failure, replace the entire kit to ensure optimal performance and safety.
5. Troubleshooting
If you experience issues with your exhaust system after installing the kit, consider the following troubleshooting steps:
| Symptom | Possible Cause | Solution |
|---|---|---|
| Loud exhaust noise / Hissing sound | Exhaust leak due to loose bolts, damaged gasket, or improper installation. | Inspect for leaks. Tighten bolts to specification. Replace damaged gaskets. Re-install if necessary. |
| Vibration or rattling from exhaust | Loose components, worn springs, or improper alignment. | Check all connections for tightness. Ensure springs are providing adequate tension. Verify proper alignment of exhaust components. |
| Check Engine Light (CEL) related to exhaust | Significant exhaust leak affecting O2 sensor readings. | Address any exhaust leaks immediately. Consult a mechanic for diagnostic codes. |
6. Specifications
| Feature | Detail |
|---|---|
| Brand | carleef |
| Model Number | carleef-Pai Qi Shuan-2207 |
| Fastener Type | Bolt |
| Head Style | Hex |
| Thread Size | M8*1.25 |
| Item Diameter | 16.6 Millimeters |
| Total Length (Bolt) | 75mm / 2.95 inches |
| Spring Length | 45mm / 1.77 inches |
| Spring Diameter | 16mm / 0.63 inches |
| Material | Carbon Steel |
| Number of Pieces (per kit) | 8 (2 bolts, 2 springs, 2 nuts, 2 gaskets) |
| Item Weight | 3 ounces |

Image: Visual representation highlighting the premium quality carbon steel material used for the components, emphasizing high strength and durability.
7. Warranty and Support
The carleef M8x1.25x75mm Exhaust Bolts and Nuts Kit is designed for durability and reliable performance.
- Return Policy: This product is eligible for a 30-day return policy for refund or replacement. Please refer to the retailer's specific return guidelines for full details.
- Manufacturer: carleef
- Contact: For further assistance or inquiries, please contact carleef customer support through the retailer's platform or visit the official carleef website.
Ask a question about this manual
Ask about setup, troubleshooting, compatibility, parts, safety, or missing instructions. Manuals+ will review the question and use this page’s manual context to help answer it.