1. Introduction
Thank you for choosing the Asixxsix LED Wall Sconce. This modern wall light is designed to provide elegant illumination for various indoor spaces such as bathrooms, bedrooms, living rooms, hallways, and corridors. Crafted from durable iron with an acrylic shade and a luxurious gold finish, this sconce accommodates G9 LED bulbs (not included) and offers versatile mounting options. Please read this manual carefully before installation and use to ensure proper function and safety.
2. Safety Information
- Always turn off the main power supply at the circuit breaker before beginning any electrical installation.
- Installation should be performed by a qualified electrician or a person with sufficient knowledge of electrical wiring.
- Ensure all wiring connections are secure and comply with local electrical codes.
- Do not exceed the maximum wattage specified for the G9 bulbs.
- This product is designed for indoor use only and is not water-resistant. Avoid exposure to moisture.
- Handle glass components with care to prevent breakage.
3. Package Contents
Verify that all components are present before beginning installation:
- 2 x Light Poles
- 4 x Lamp Shades
- 4 x Screws
- 4 x Expansion Tubes
Note: G9 LED bulbs are not included and must be purchased separately.
4. Specifications
| Feature | Detail |
|---|---|
| Brand | Asixxsix |
| Model Name | Asixxsixmp45wdayi3 |
| Color | Gold |
| Material | Iron art + Acrylic |
| Style | Modern, Contemporary |
| Light Fixture Form | Sconce |
| Product Dimensions | 20.07"L x 5.11"W x 4.72"H (Approx. 55.5 x 8 x 34cm) |
| Indoor/Outdoor Usage | Indoor |
| Power Source | Hardwired (100-240V) |
| Light Source Type | LED (G9 bulbs required, not included) |
| Number of Light Sources | 2 per sconce |
| Brightness | Up to 500 lumens (per bulb, depending on bulb used) |
| Mounting Type | Wall Mount (Vertical or Horizontal) |
| Assembly Required | Yes |
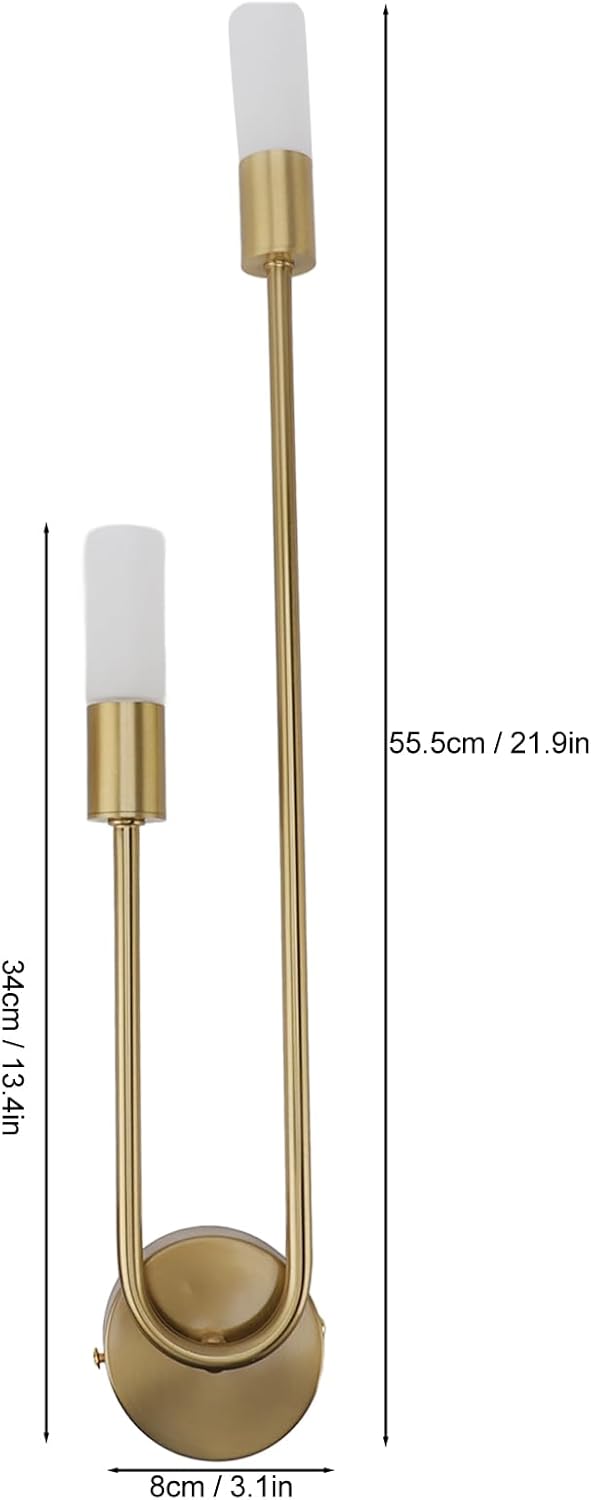
Figure 1: Product Dimensions
5. Setup and Installation
This wall sconce requires hardwired installation. Please follow these steps carefully. If you are unsure about any step, consult a qualified electrician.
- Prepare for Installation: Turn off the power at the main circuit breaker for the area where you will be installing the sconce. Ensure the power is off before proceeding.
- Mounting Plate Installation: Attach the mounting plate to the electrical junction box in your wall using the provided screws. Ensure it is securely fastened.
- Wiring Connections: Connect the electrical wires from the wall to the corresponding wires on the sconce. Typically, this involves connecting live to live (black to black), neutral to neutral (white to white), and ground to ground (green or bare copper to green or bare copper). Use wire nuts to secure connections.
- Attach Fixture to Mounting Plate: Carefully align the sconce base with the mounting plate and secure it with the provided screws. Ensure no wires are pinched.
- Assemble Light Poles and Shades: Attach the light poles to the sconce base. Then, carefully place the acrylic lamp shades onto the bulb holders.
- Install G9 Bulbs: Insert the G9 LED bulbs (not included) into the sockets.
- Restore Power: Once installation is complete and all components are secure, turn the power back on at the circuit breaker.

Figure 2: Vertical or Horizontal Mounting Options
Video 1: Demonstration of the easy assembly process for the Asixxsix LED Wall Sconce.
6. Operating Instructions
Once installed and powered, the Asixxsix LED Wall Sconce operates via your existing wall switch. There is no integrated switch on the fixture itself.
- Turning On/Off: Use the wall switch connected to the sconce to turn the light on or off.
- Bulb Replacement: To replace a G9 bulb, ensure the power is off at the circuit breaker. Carefully remove the acrylic shade, then gently pull out the old G9 bulb and insert a new one. Replace the shade and restore power.

Figure 3: Asixxsix LED Wall Sconce in a living room setting.
7. Maintenance
Regular maintenance will help preserve the appearance and functionality of your wall sconce.
- Cleaning: Before cleaning, ensure the power is turned off. Wipe the metal and acrylic surfaces with a soft, dry cloth. For stubborn marks, a slightly damp cloth can be used, followed by immediate drying. Avoid abrasive cleaners or solvents, as they may damage the finish.
- Inspection: Periodically check all connections and mounting hardware to ensure they remain secure.
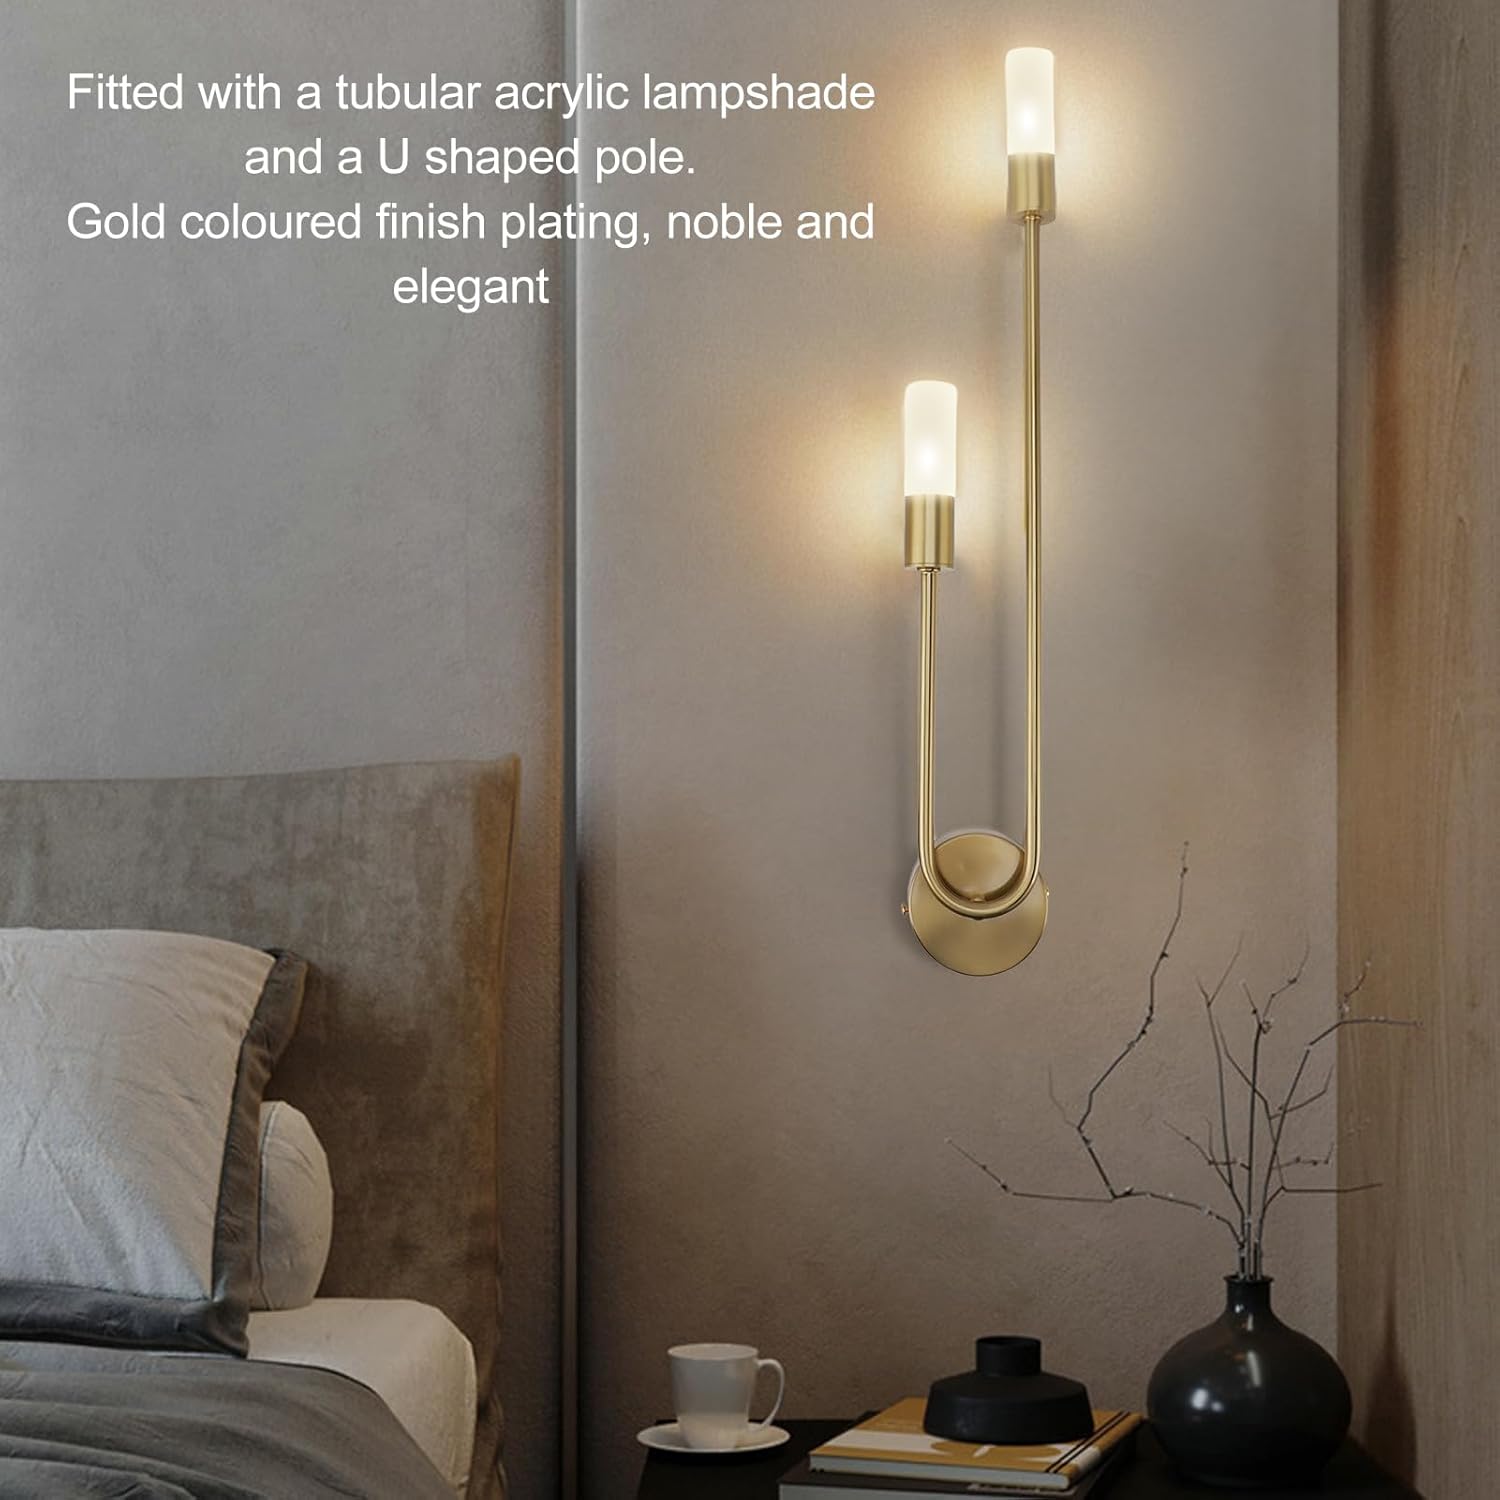
Figure 4: Detail of the acrylic lampshade and gold finish.
8. Troubleshooting
If you encounter issues with your Asixxsix LED Wall Sconce, refer to the following common problems and solutions:
| Problem | Possible Cause | Solution |
|---|---|---|
| Light does not turn on | 1. Power is off at the circuit breaker. 2. Loose wiring connection. 3. Faulty G9 bulb. | 1. Check the circuit breaker and ensure power is on. 2. Turn off power, check all wiring connections, and re-secure if loose. 3. Turn off power, replace the G9 bulb with a new one. |
| Light flickers | 1. Loose bulb. 2. Incompatible dimmer switch (if applicable). 3. Loose wiring connection. | 1. Turn off power, tighten the G9 bulb. 2. Ensure G9 LED bulbs are compatible with your dimmer switch. Replace if necessary. 3. Turn off power, check and secure wiring connections. |
| Sconce appears loose on the wall | Mounting screws are not tight. | Turn off power, gently tighten the mounting screws securing the fixture to the wall. |
If the problem persists after attempting these solutions, please contact customer support.
9. Warranty and Support
Asixxsix products are manufactured with quality and durability in mind. This product comes with a standard manufacturer's warranty against defects in materials and workmanship. For specific warranty details, claims, or technical support, please refer to the warranty information provided at the time of purchase or contact Asixxsix customer service through the retailer where the product was purchased.
For further assistance, please visit the Asixxsix Store on Amazon.