1. Product Overview
The PUWU MIG-160 PRO is a versatile 4-in-1 multiprocess welding machine designed for various welding applications. It supports Gas MIG, Flux Core Gasless MIG, Lift TIG, and MMA/Stick welding. This welder features IGBT inverter technology, an LED digital display, and thermal protection for enhanced safety and performance. It operates on dual voltage (110V/220V) and is suitable for both beginners and experienced welders.
Key Features:
- 4-IN-1 MULTIFUNCTIONAL WELDER: Capable of Gas MIG, Flux Core Gasless MIG, Lift TIG, and MMA/Stick welding, meeting a wide range of welding needs from automotive repair, construction, and fabrication to home DIY projects.
- SMART & MANUAL CONTROL: Synergic control automatically matches voltage and wire feeding speed to the selected wire diameter (.030"/.035"/.040"), ideal for beginners. Manual adjustment is available for precise customization by seasoned welders.
- PORTABLE & COMPACT DESIGN: Weighing only 15.3lb (6.95kg), this lightweight dual-voltage (110V/220V) machine is easy to carry anywhere with its sturdy handle or shoulder strap, perfect for on-the-go projects.
- ADVANCED LED DISPLAY: Features an upgraded LED digital display for clear visibility, intuitive settings, and improved operational efficiency compared to traditional machines.
- SAFETY & RELIABILITY: Equipped with robust protections against over-current, over-load, over-heating, and voltage fluctuations. Every unit is rigorously tested to guarantee safety, durability, and long service life.

Image 1.1: The PUWU MIG-160 PRO welder demonstrating its four welding capabilities: Flux MIG, MIG, Lift TIG, and Stick welding.
2. Safety Information
Always prioritize safety when operating welding equipment. Failure to follow safety precautions can result in serious injury or death. Read and understand all safety warnings and instructions before use.
General Safety Precautions:
- Wear appropriate personal protective equipment (PPE), including a welding helmet with proper shade, flame-resistant clothing, welding gloves, and safety shoes.
- Ensure adequate ventilation to avoid inhaling welding fumes.
- Keep a fire extinguisher nearby and know how to use it.
- Do not weld near flammable materials.
- Ensure the welding machine is properly grounded.
- Avoid touching live electrical parts.
- Disconnect power before performing any maintenance or adjustments.
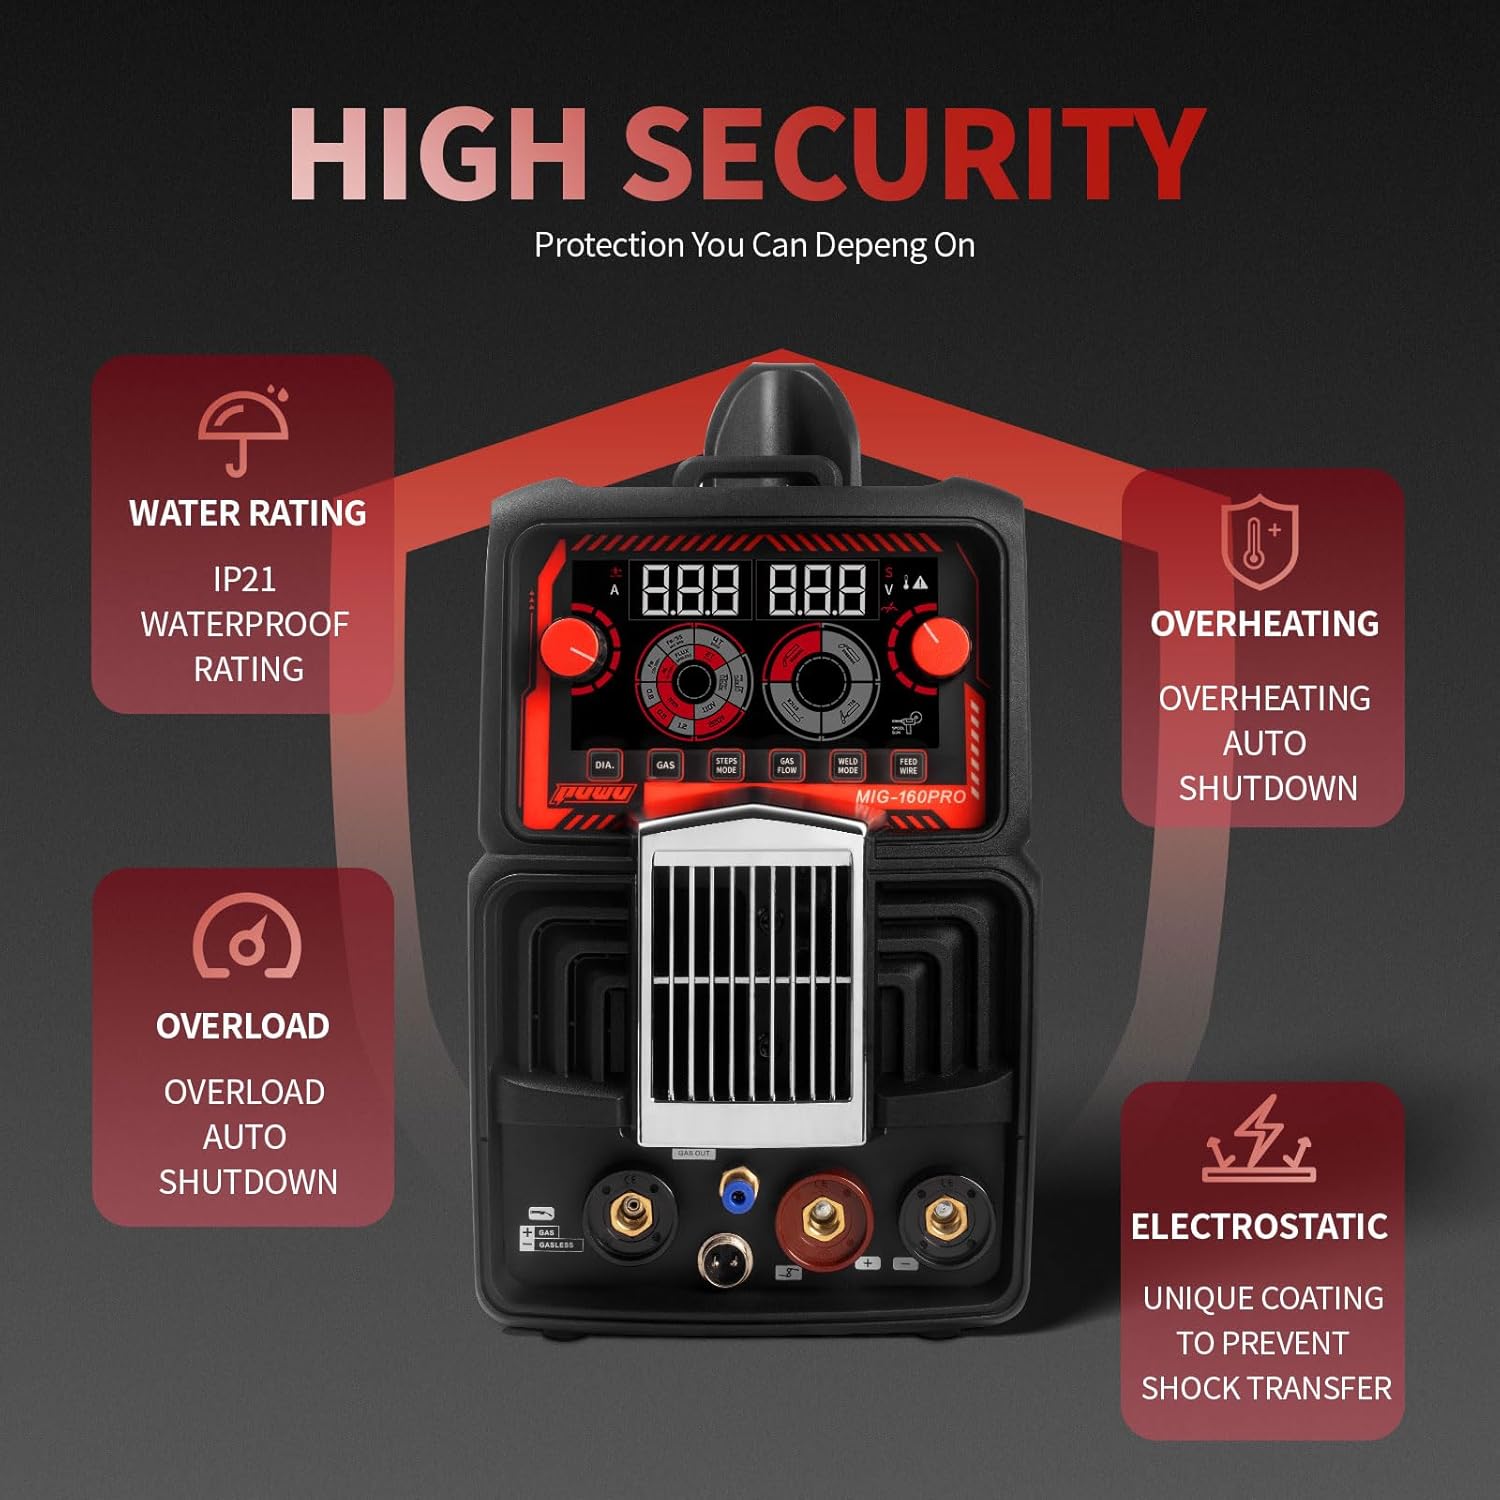
Image 2.1: The PUWU MIG-160 PRO welder highlighting its safety features, including IP21 water rating, overheating auto shutdown, overload auto shutdown, and electrostatic protection.
3. Setup
Proper setup is crucial for safe and effective welding. Follow these steps to prepare your PUWU MIG-160 PRO welder for operation.
3.1 Power Connection
- Ensure the welder's power switch is in the OFF position.
- Connect the power cord to the appropriate 110V or 220V power outlet. The machine supports dual voltage and includes a 0.3-meter conversion line for American 220V socket to 110V plug.
- Turn the power switch to the ON position. The LED display will illuminate.
Video 3.1: This video demonstrates the initial setup of the PUWU MIG-160 PRO welder, including power connection and accessory attachment.
3.2 Connecting Welding Accessories
The PUWU MIG-160 PRO comes with various accessories for different welding modes. Refer to the diagram below for connection points.
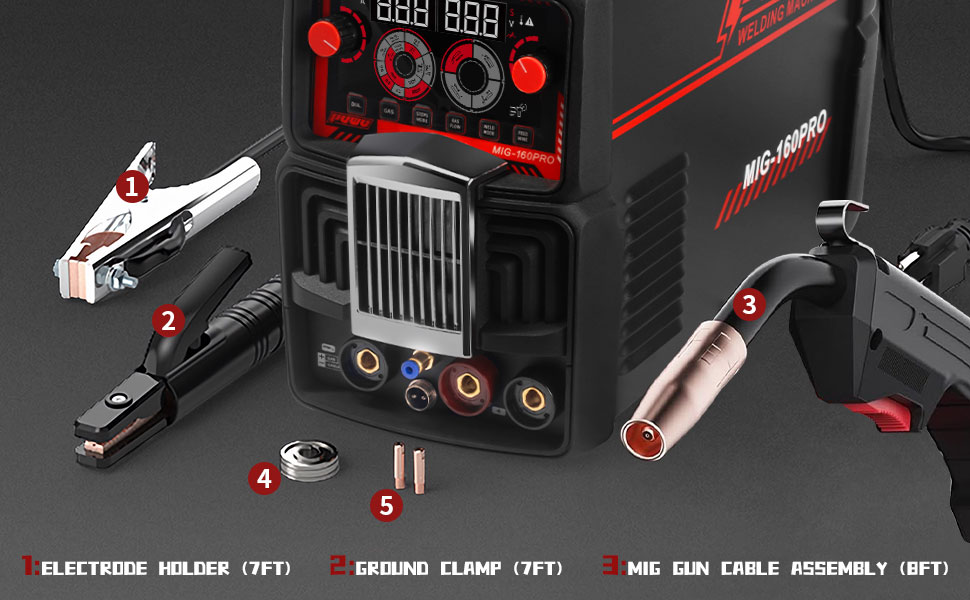
Image 3.2: The PUWU MIG-160 PRO welder with its main components labeled: Electrode Holder, Ground Clamp, and MIG Gun Cable Assembly.
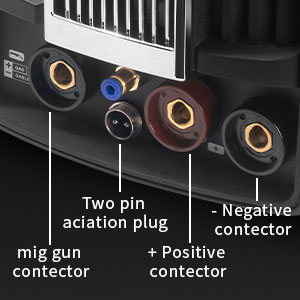
Image 3.3: Detailed view of the rear panel connections, showing the MIG gun connector, two-pin aviation plug, positive connector, and negative connector.
- MIG Gun Connection: Connect the MIG gun cable to the designated MIG gun connector on the front panel.
- Ground Clamp Connection: Connect the ground clamp cable to the negative (-) quick connector.
- Electrode Holder Connection (for Stick/MMA): Connect the electrode holder cable to the positive (+) quick connector.
- TIG Torch Connection (for Lift TIG): Connect the TIG torch cable to the negative (-) quick connector.
- Gas Hose Connection: For Gas MIG and Lift TIG, connect the gas hose to the gas inlet on the rear panel.
3.3 Wire Spool Installation (for MIG/Flux Core)
- Open the side panel of the welder.
- Place the wire spool onto the spool holder, ensuring it rotates freely.
- Feed the welding wire through the wire feeder mechanism, ensuring it passes through the correct groove on the drive roller for the wire diameter being used.
- Close the wire feeder tension arm and adjust the tension appropriately.
- Feed the wire through the MIG gun liner until it exits the contact tip.
4. Operating Instructions
The PUWU MIG-160 PRO features an intuitive control panel for easy operation. Familiarize yourself with the controls before starting any welding task.
4.1 Control Panel Overview

Image 4.1: Detailed description of the control panel buttons and knobs on the PUWU MIG-160 PRO welder.
- Left Knob/Button: Controls the welding current (Amperage).
- Right Knob: Controls the welding voltage.
- Wire Diameter Selector Button (DIA.): Selects the wire diameter (0.8mm, 0.9mm, 1.2mm).
- Material Select Control (GAS): Selects material type (e.g., Fe/SS, Flux, HT).
- 2T/4T Automatic/Non-Automatic (STEPS MODE): Toggles between 2-stroke and 4-stroke trigger modes.
- Gas Button (GAS FLOW): Controls gas flow.
- Welding Mode Selection (WELD MODE): Selects the welding process (MIG, TIG, Stick).
- Wire Feeder (FEED WIRE): Controls wire feed speed.

Image 4.2: Close-up of the intelligent electronic screen, showing current and voltage knobs and function buttons.
4.2 Welding Process Selection
Use the WELD MODE button to cycle through the available welding processes: MIG, Lift TIG, and Stick (MMA).
4.3 Parameter Adjustment
Once a welding mode is selected, the LED display will show the current and voltage settings. Use the left and right knobs to adjust these parameters according to your welding requirements and material thickness. For MIG welding, the wire feed speed will automatically adjust in synergic mode, or can be manually fine-tuned.

Image 4.3: The digital control panel of the PUWU MIG-160 PRO, illustrating how to change wire thickness or adjust amperage, with suggested voltage and wire transfer speed automatically switched.
4.4 Performing a Weld
- Ensure all connections are secure and proper PPE is worn.
- Select the desired welding mode and adjust parameters.
- Position the ground clamp securely to the workpiece.
- Initiate the arc according to the specific welding process (e.g., trigger for MIG, scratch start for Lift TIG, tap for Stick).
- Maintain a consistent travel speed and arc length for optimal weld quality.
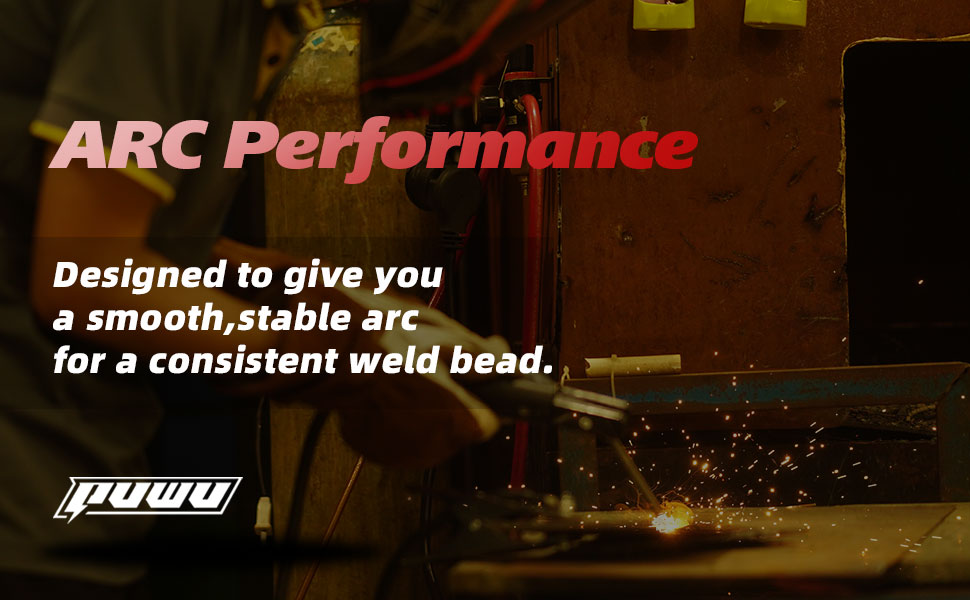
Image 4.4: A welder demonstrating arc performance, designed to give a smooth, stable arc for a consistent weld bead.
5. Maintenance
Regular maintenance ensures the longevity and optimal performance of your welding machine.
5.1 General Cleaning
- Periodically clean the exterior of the machine with a dry cloth.
- Use compressed air to blow out dust and debris from the cooling vents. Ensure the machine is unplugged before cleaning.
5.2 MIG Gun and Wire Feeder Maintenance
- Inspect the MIG gun nozzle, contact tip, and diffuser regularly. Replace worn or damaged parts.
- Clean the wire feeder rollers and guide tubes to prevent wire feeding issues.
- Ensure the wire liner is free from kinks or blockages.

Image 5.1: Exploded view of the MB-11 MIG torch, showing the nozzle, electrode, and torch head components for maintenance reference.
6. Troubleshooting
This section provides solutions to common issues you might encounter with your PUWU MIG-160 PRO welder.
Common Issues and Solutions:
- No Power: Check power cord connection, wall outlet, and ensure the welder's power switch is ON. Verify input voltage.
- No Arc: Ensure ground clamp is securely attached to the workpiece. Check welding cable connections. Verify correct welding mode and parameters are selected. Inspect contact tip/electrode for wear.
- Poor Weld Quality: Adjust current/voltage settings. Check wire feed speed. Ensure proper gas flow (if applicable). Clean workpiece thoroughly.
- Wire Feeding Problems: Check wire spool installation and tension. Inspect wire liner for blockages. Ensure correct drive roller groove is used.
- Overheat Protection Activated: Allow the machine to cool down. Ensure cooling vents are not obstructed. Reduce duty cycle or welding current if continuously overheating.
7. Specifications
Detailed technical specifications for the PUWU MIG-160 PRO Multiprocess Welder.
| Feature | Value |
|---|---|
| Manufacturer | PUWU |
| Part Number | MIG 160PRO |
| Product Dimensions | 42.5 x 8.5 x 34 cm |
| Item Model Number | MIG-160 PRO |
| Power Source | AC |
| Item Weight | 10.9 kg |
| Country of Origin | China |
| Date First Available | July 20 2024 |

Image 7.1: Detailed welding parameters table for MIG, ARC, and Lift TIG functions at both 110VAC and 220VAC.
8. Warranty and Support
For warranty information and technical support, please refer to the documentation included with your product or contact PUWU customer service. Keep your purchase receipt for warranty claims.