1. Safety Information
Please read and understand all instructions before assembly and use. Retain this manual for future reference.
- Do not exceed the weight limit of 15 kg (33 lbs) per shelf. Overloading can cause instability and damage.
- Ensure the unit is properly assembled and level before placing any items on it. Uneven surfaces can lead to tipping.
- Keep electrical components (power strip, LED strip) away from water or damp environments to prevent electrical shock.
- Ensure proper grounding for all electrical connections.
- Always unplug the power strip from the wall outlet when not in use or when performing maintenance or cleaning.
- Keep small parts and packaging materials away from children to prevent choking hazards.
2. Package Contents
Verify that all components listed below are present before beginning assembly. If any parts are missing or damaged, please contact customer support.
- Wooden Shelf Panels (various sizes)
- Metal Frame Parts
- Power Strip with 4 AC Outlets and 2 USB Ports
- LED Strip with Remote Controller
- Assembly Hardware (screws, bolts, nuts)
- Hex Tool (Allen Wrench)
- Screwdriver
- Velcro Tape (for cable management)
- Adjustable Footpads
3. Assembly Instructions
Follow these steps carefully for proper assembly. All hardware is labeled for easy identification.
- Unpack and Identify Parts: Lay out all components on a clean, soft surface to prevent scratches. Refer to the parts list to ensure everything is present.
- Assemble the Metal Frame: Connect the main metal frame pieces using the provided screws and hex tool. Do not fully tighten screws until the entire frame is assembled.
- Attach Shelf Panels: Secure the wooden shelf panels to the metal frame. The top and bottom shelves are fixed. The two middle shelves are adjustable.
- Install Adjustable Shelves: For the two middle shelves, determine your desired height. Insert the shelf supports into the corresponding holes on the metal frame, then place the shelves. Ensure they are securely seated.
- Install Power Strip: Mount the power strip into its designated slot on the back or side panel of the stand using the provided screws.
- Attach LED Strip: Adhere the LED strip to the underside of the top shelf. Ensure the strip is positioned correctly for desired lighting effect.
- Tighten All Screws: Once all components are in place, systematically tighten all screws to ensure the stand is stable and secure.
- Adjust Footpads: Turn the adjustable footpads at the bottom of the stand to level the unit on uneven floors. This is crucial for stability, especially if placing sensitive audio equipment like turntables.

Image 3.1: Fully assembled Besiost AV Media Stand, showcasing its structure and capacity for audio equipment.

Image 3.2: Detailed dimensions of the media stand, including shelf heights and overall footprint.

Image 3.3: Illustration of the two adjustable middle shelves, showing how their height can be customized.
4. Operating Instructions
4.1 Power Strip
The integrated power strip provides convenient access to power for your audio and video components.
- Connect the power strip's 6.5-foot cord to a standard 120V wall outlet.
- Use the 4 AC outlets for devices requiring standard power.
- Use the 2 USB ports (5V/2A) for charging compatible devices.
- Utilize the provided velcro tape for neat cable management, securing cords to prevent tangles.
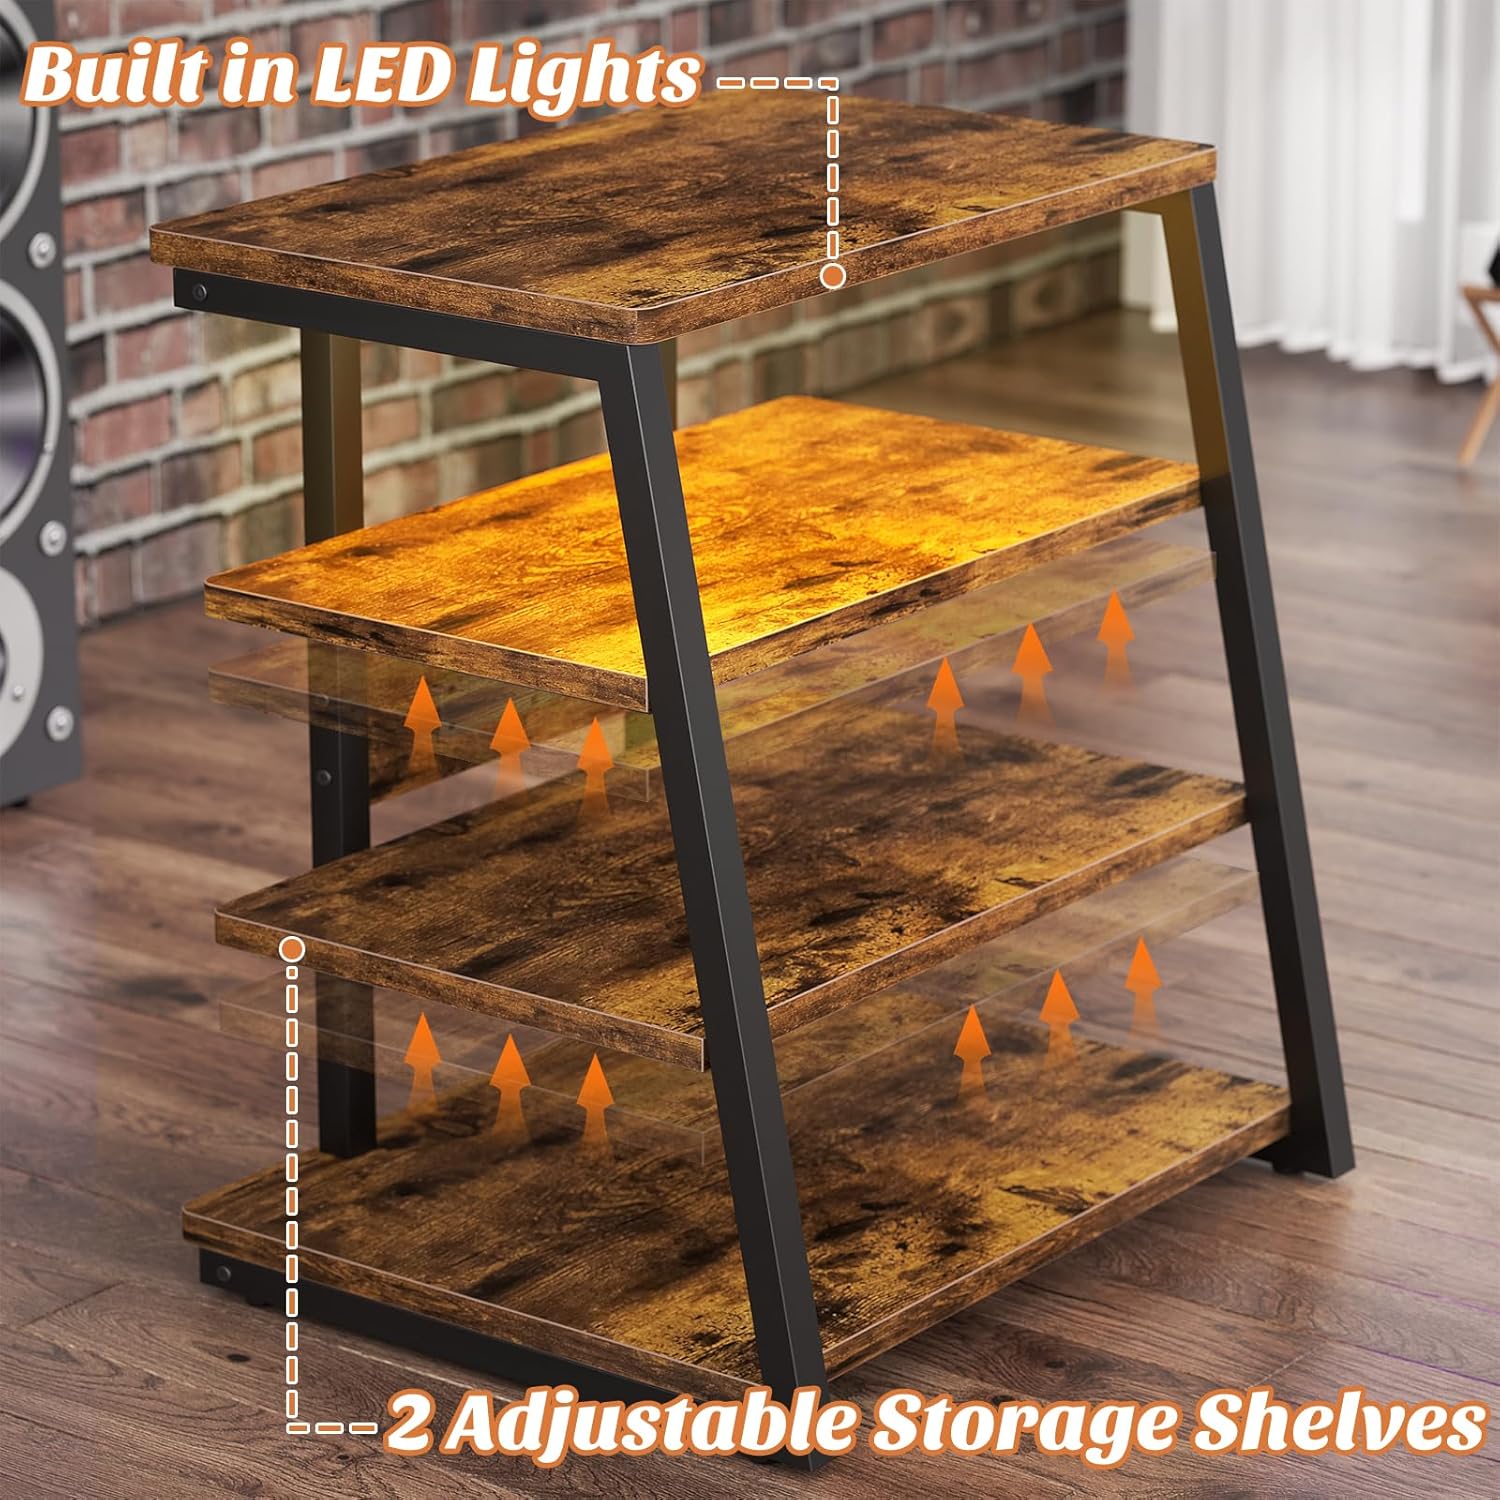
Image 4.1: Detail of the embedded power strip, showing 4 AC outlets and 2 USB ports.
4.2 LED Strip
The LED strip provides ambient lighting and can be controlled via the included remote.
- Ensure the LED strip is properly connected to its power source (usually a USB port on the power strip or a separate adapter).
- Use the remote controller to turn the lights on/off, change colors, adjust brightness, and select various lighting effects.
5. Maintenance
Regular maintenance helps preserve the appearance and functionality of your media stand.
- Cleaning: Wipe the surfaces with a dry, soft cloth. Avoid abrasive cleaners or harsh chemicals that may damage the finish.
- Dusting: Regularly dust the shelves and frame to prevent buildup.
- Hardware Check: Periodically check all screws and connections to ensure they remain tight. Retighten if necessary to maintain structural integrity.
- Electrical Components: Ensure the power strip and LED strip connections are secure and free from damage.
6. Troubleshooting
If you encounter issues with your media stand, refer to the following common problems and solutions.
| Problem | Possible Cause | Solution |
|---|---|---|
| Stand is wobbly or unstable. | Screws are loose; uneven floor; incorrect assembly. | Ensure all screws are tightened. Adjust the footpads to level the stand. Review assembly instructions. |
| LED lights are not working. | Loose connection; remote battery dead; LED strip damaged. | Check all connections to the LED strip and power source. Replace remote battery. Contact customer support if damaged. |
| Power outlets are not providing power. | Power strip not plugged in; circuit breaker tripped; power strip damaged. | Ensure the power strip is securely plugged into a working wall outlet. Check your home's circuit breaker. Test with another device. Contact customer support if damaged. |
| Shelves do not fit correctly. | Incorrect orientation; wrong shelf used; assembly error. | Double-check the orientation of the shelves and ensure you are using the correct shelf for each position. Refer to assembly diagrams. |
7. Specifications
| Feature | Detail |
|---|---|
| Material | Engineered Wood, Metal Frame |
| Product Dimensions (D x W x H) | 12"D x 23.6"W x 30.7"H (approximate, based on images) |
| Number of Shelves | 4 (2 fixed, 2 adjustable) |
| Weight Capacity per Shelf | 15 kg (33 lbs) |
| Power Strip | 4 x 120V AC Outlets, 2 x 5V/2A USB Ports |
| Power Cord Length | 6.5 feet |
| LED Lighting | Integrated LED strip with remote control |
| Assembly Required | Yes |
| Color | Rustic Brown |
8. Warranty and Support
Besiost products are designed for quality and durability. For any questions, missing parts, or assistance with assembly or operation, please contact Besiost customer support through your retailer's platform or the official Besiost website. Please have your model number (B0D4PSWTTF) and purchase date available when contacting support.