Introduction
This manual provides detailed instructions for the assembly, operation, and maintenance of your Armocity 5-Tier AV Media Stand. Please read this manual thoroughly before assembly and use to ensure proper function and safety.
The Armocity 5-Tier AV Media Stand is designed to accommodate various audio-visual equipment, offering ample storage with its 23.6-inch wide, adjustable shelves. Its open design promotes air circulation, preventing electronics from overheating. The stand includes integrated power strips with 4 outlets and 2 USB ports, along with LED lighting for customizable ambiance.

Image: The Armocity 5-Tier AV Media Stand set up with vintage audio equipment in a living room setting.
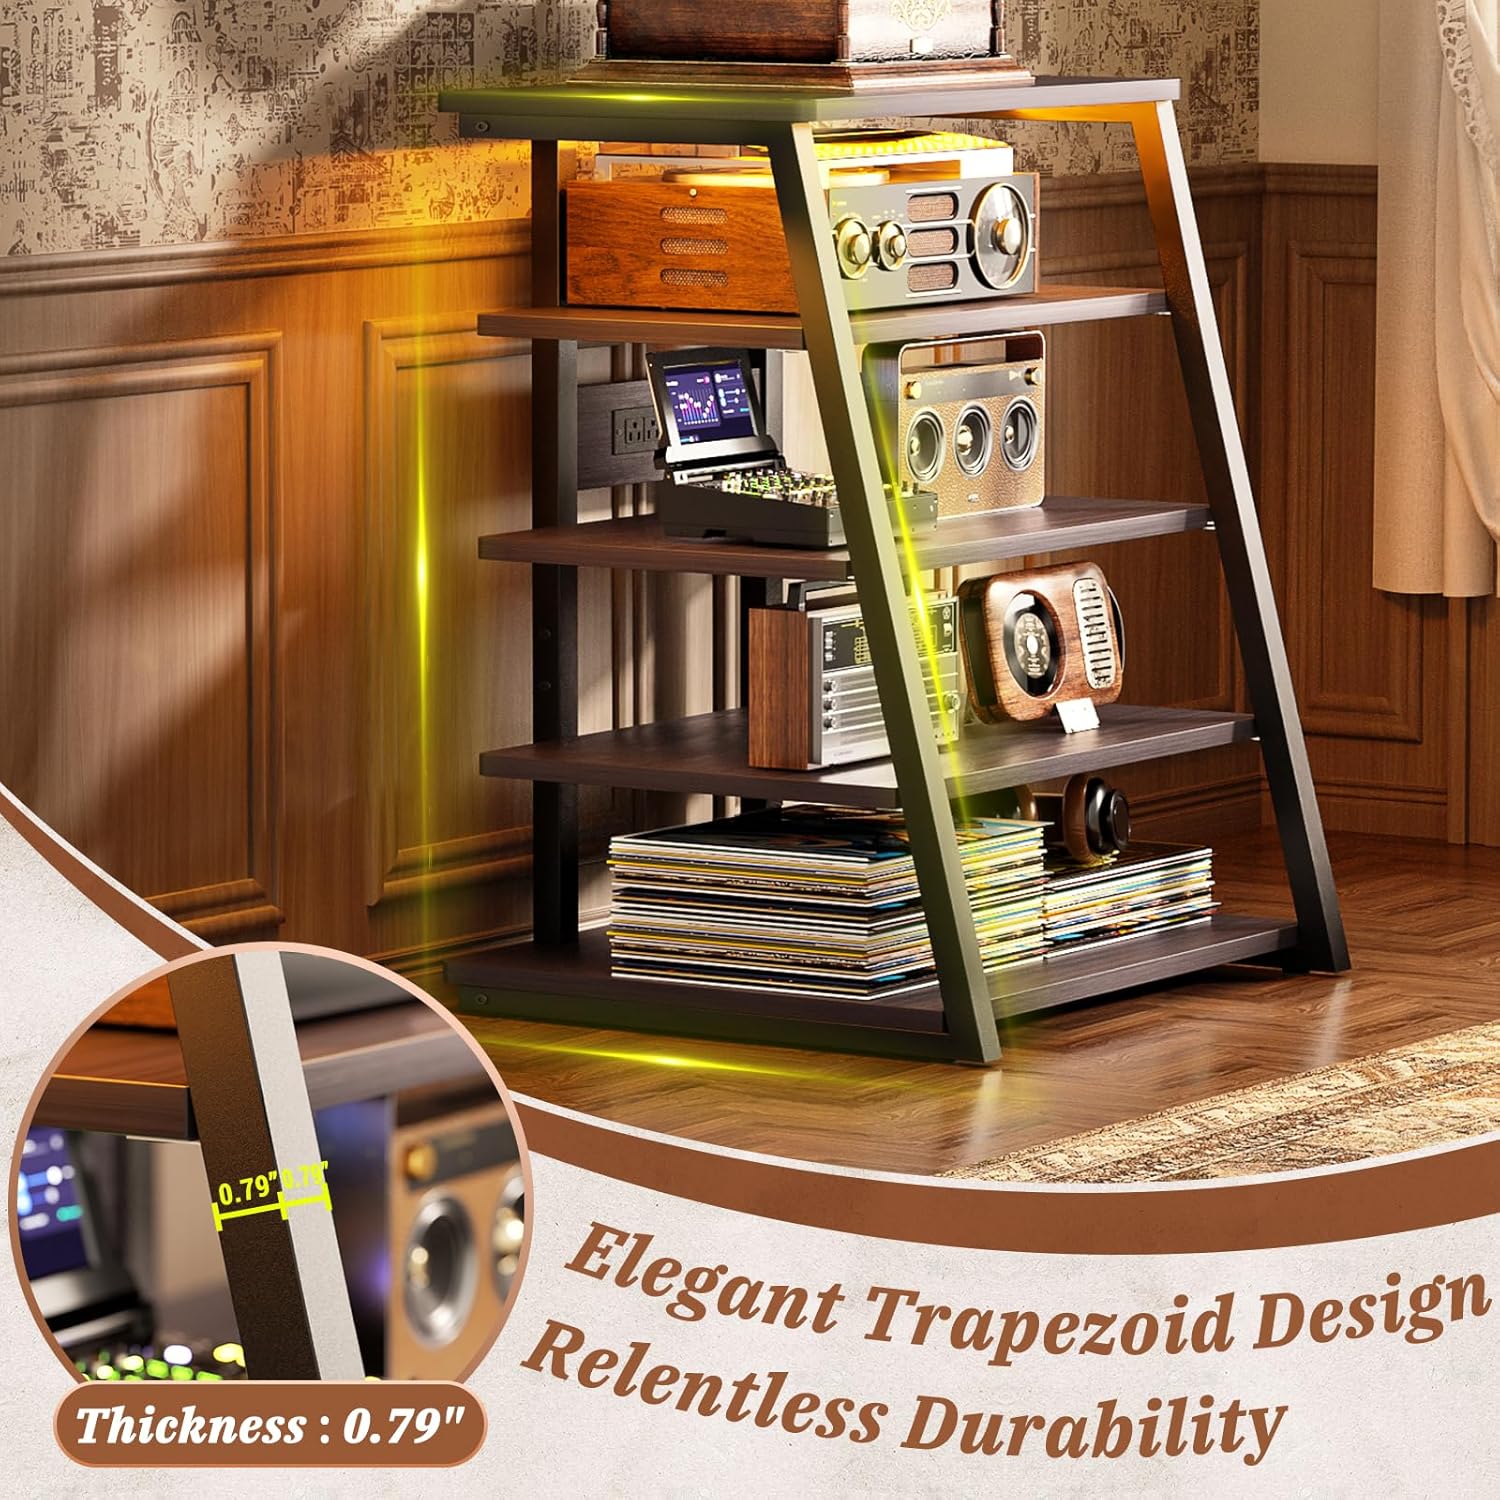
Image: A close-up view highlighting the elegant trapezoid design and the 0.79-inch thickness of the shelves.
Safety Information
- Ensure all components are securely fastened before placing any equipment on the stand.
- Do not exceed the weight capacity of the shelves. Refer to the Specifications section for details.
- Avoid spilling liquids on the product, especially near the power strips, to prevent electrical hazards and damage.
- Keep children and pets away from the stand during assembly.
- Place the stand on a level, stable surface to prevent tipping.
- Do not attempt to modify the power strips or LED lighting system.
Package Contents
Before beginning assembly, verify that all parts listed below are present and undamaged. If any parts are missing or damaged, please contact customer support.
- Shelf Boards (5 pieces)
- Metal Frame Components
- Power Strip with LED Lights (pre-installed or separate unit)
- Assembly Hardware (screws, bolts, Allen wrench, etc.)
- Instruction Manual
Setup Instructions
Follow these steps carefully for proper assembly. It is recommended to have two people for assembly.
Step 1: Unpack and Identify Parts
Carefully remove all components from the packaging. Lay them out on a clean, soft surface to prevent scratches. Identify each part using the provided hardware list and diagrams.

Image: Diagram showing the overall dimensions of the media stand and individual shelf spacing.
Step 2: Assemble the Frame
Attach the metal frame components together using the designated screws and the provided Allen wrench. Ensure all connections are snug but do not overtighten until all parts are aligned.
Step 3: Install Shelf Boards
Carefully slide each shelf board into the designated slots on the metal frame. The shelves are adjustable; ensure they are placed at your desired height. Secure each shelf with the appropriate fasteners.
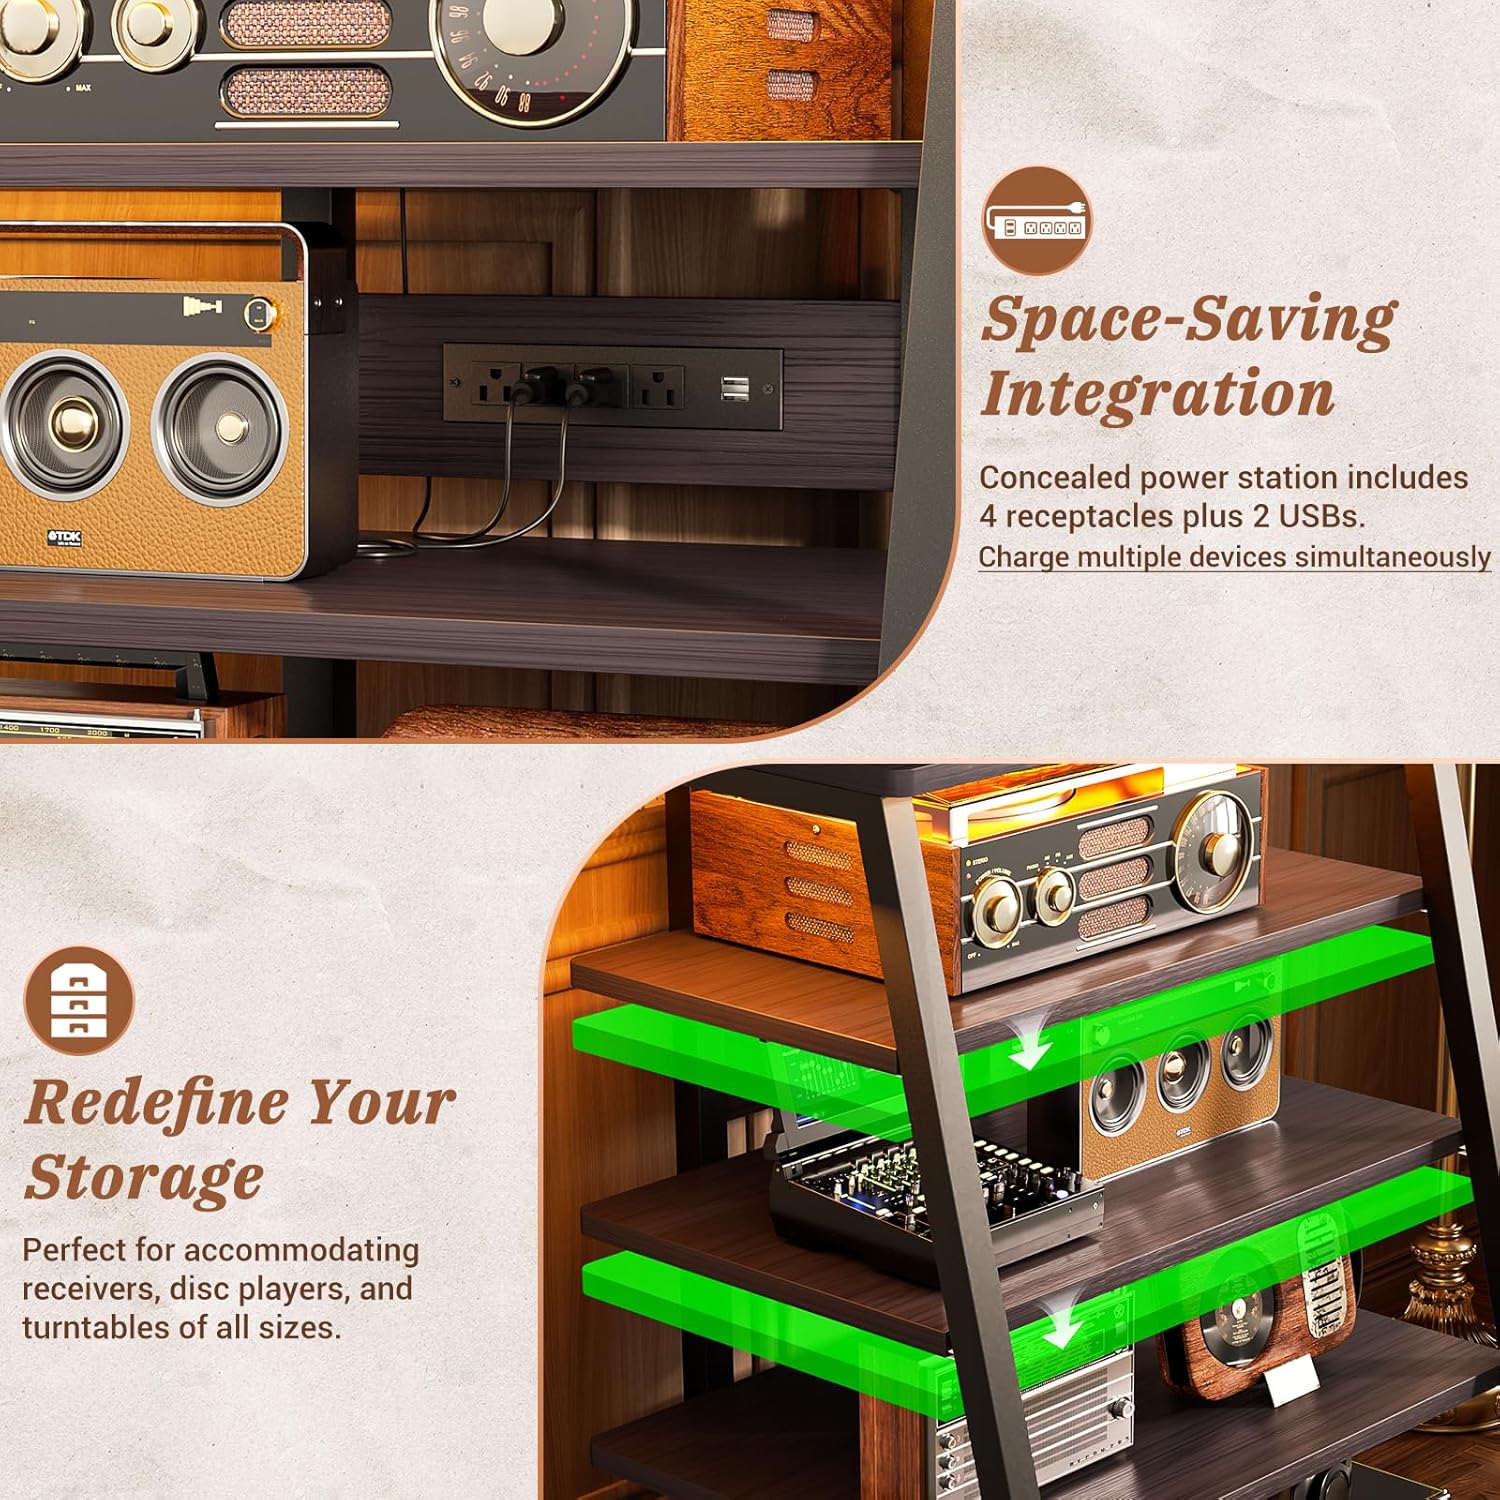
Image: A close-up view illustrating the adjustable shelves and the integrated power strip with outlets and USB ports.
Step 4: Connect Power Strip and LED Lights
If the power strip and LED lights are not pre-installed, follow the specific instructions provided in the package to attach them to the stand. Connect the power cord to a standard wall outlet.
Step 5: Final Placement
Once assembled, move the stand to its desired location. Ensure it is stable and level before placing any audio-visual equipment on it.
Operating Instructions
Using the Power Strips
The integrated power strip provides 4 AC outlets and 2 USB ports. Plug your electronic devices directly into these outlets for convenient power access. Ensure the total power consumption of connected devices does not exceed the power strip's maximum rating.
Controlling the LED Lights
The LED lights offer various modes, including static colors and dynamic effects. Use the included remote control or integrated button (if applicable) to cycle through the 20 dynamic modes or select a static color. The lights can enhance the ambiance of your media setup.
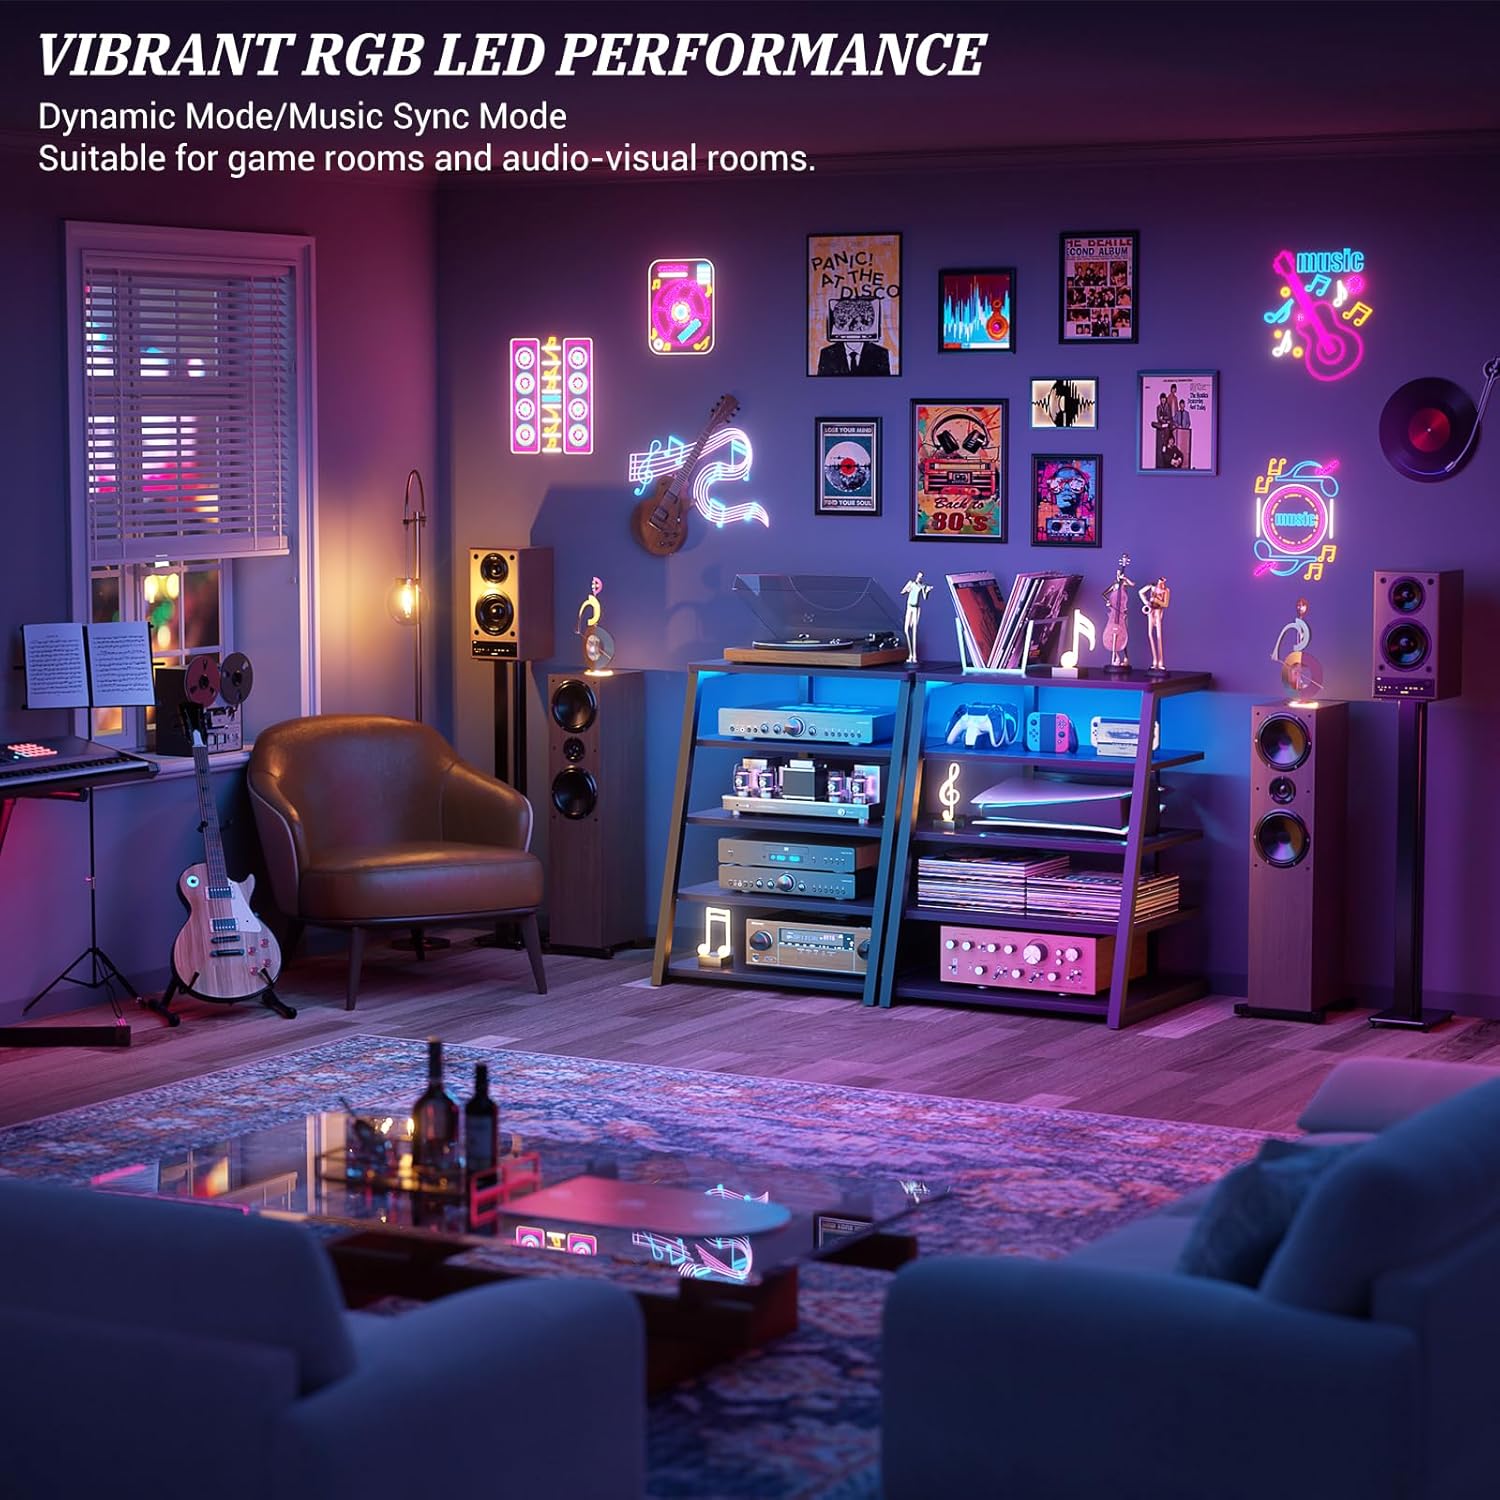
Image: The media stand illuminated with vibrant RGB LED lighting, showcasing its dynamic capabilities in a room setting.
Maintenance
To maintain the appearance and longevity of your media stand, follow these simple care instructions:
- Cleaning: Wipe the surfaces with a dry, soft cloth. Avoid abrasive cleaners or harsh chemicals that may damage the finish.
- Liquid Spills: In case of spills, immediately wipe with a dry cloth. Ensure no liquid enters the power strip components.
- Inspections: Periodically check all fasteners to ensure they remain tight. Retighten if necessary.
Troubleshooting
Problem: LED lights are not turning on.
Solution:
- Ensure the power cord is securely plugged into a working wall outlet.
- Check if the power strip's main switch (if present) is in the "ON" position.
- Verify that the LED light connection to the power strip is secure.
- If using a remote control, check its battery.
Problem: Devices plugged into the power strip are not receiving power.
Solution:
- Confirm the power strip is plugged into a live outlet.
- Check if the power strip has an overload protector that may have tripped. Reset if necessary.
- Test the devices in a different outlet to rule out device malfunction.
Problem: The stand feels unstable.
Solution:
- Ensure the stand is placed on a flat, level surface.
- Check all assembly screws and bolts to ensure they are tightened securely.
- Distribute the weight of your equipment evenly across the shelves.
Specifications
| Feature | Detail |
|---|---|
| Product Dimensions (D x W x H) | 22.8"D x 23.6"W x 40.8"H |
| Material | Engineered Wood, Metal Frame |
| Color | Black Ebony |
| Number of Shelves | 5 (Adjustable) |
| Power Strip | 4 AC Outlets, 2 USB Ports |
| LED Lights | RGB, 20 Dynamic Modes |
| Mounting Type | Freestanding |
| Assembly Required | Yes |
| Care Instructions | Wipe with Dry Cloth |
Warranty and Support
Armocity products are designed for quality and durability. For specific warranty information, please refer to the documentation included with your purchase or visit the official Armocity website. If you encounter any issues or require assistance, please contact Armocity customer support through the following channels:
- Online Support: Visit the Armocity Store on Amazon for FAQs and contact options.
- Email: Refer to your product packaging for customer service email address.
- Phone: Refer to your product packaging for customer service phone number.
Please have your model number (40.8'' Black Ebony) and purchase date available when contacting support.