Introduction
This manual provides detailed instructions for the operation and maintenance of your Generic X20-1 7-inch GPS Navigation System. Please read this manual thoroughly before using the device to ensure proper functionality and to maximize your navigation experience.
Package Contents
Verify that all items are present in the package:
- GPS Navigation Device
- Car Charger
- USB Cable
- Windshield Bracket
- Center Console Bracket
- User's Manual (this document)

Product Overview
The Generic X20-1 is a 7-inch touchscreen GPS navigation system designed for various vehicle types, including cars and trucks. It features intelligent route planning, voice broadcast, and multimedia capabilities.

Key Features:
- 7-inch High-Resolution Touchscreen Display
- Multiple Vehicle Modes (Car, Truck, Bicycle, Bus, Ambulance, Taxi, Walking)
- Professional Truck Mode with dimension/weight restrictions
- 2D/3D Map View
- POSTCODE/ADDRESS Search
- Built-in Hi-Fi Speaker and FM Transmitter
- Voice Reminders for Speed Limits and Turns
- Multimedia Playback (MP3, MP4, Photo Viewer, eBook Reader)
- Free Map Updates for North America (2024 maps pre-installed)
Setup
1. Mounting the Device
The device can be mounted using either the windshield suction cup bracket or the center console bracket.
- Windshield Mount:
- Attach the back clip to the GPS device.
- Connect the back clip assembly to the suction cup bracket.
- Clean the desired area on your windshield.
- Press the suction cup firmly against the windshield and engage the lever to secure it.
- Adjust the viewing angle as needed.
- Center Console Mount:
- Attach the back clip to the GPS device.
- Connect the back clip assembly to the center console bracket.
- Peel off the protective film from the adhesive pad on the center console bracket.
- Press the bracket firmly onto a clean, flat surface on your dashboard or center console.
- Adjust the viewing angle as needed.

2. Powering On and Charging
Connect the device to your vehicle's 12V power outlet using the provided car charger. The device will automatically power on when connected and begin charging its internal battery. A full charge is recommended before initial use.
3. Initial Satellite Signal Acquisition
For the first use, position the device in an open area with a clear view of the sky to allow it to acquire GPS satellite signals. This process may take a few minutes. Once acquired, the device will display your current location.

Operating Instructions
1. Main Menu Navigation
Upon powering on, the device will display the main menu with various icons for different functions. Tap an icon to access its corresponding feature.

2. Setting a Destination
- From the main menu, tap the "Navigation" icon.
- Select your preferred search method (e.g., "Address Search", "POSTCODE Search", "Find on Map", "Places Search").
- Enter the destination details using the on-screen keyboard.
- Confirm the destination, and the device will calculate the route.
- Follow the voice-guided instructions and on-screen map for navigation.

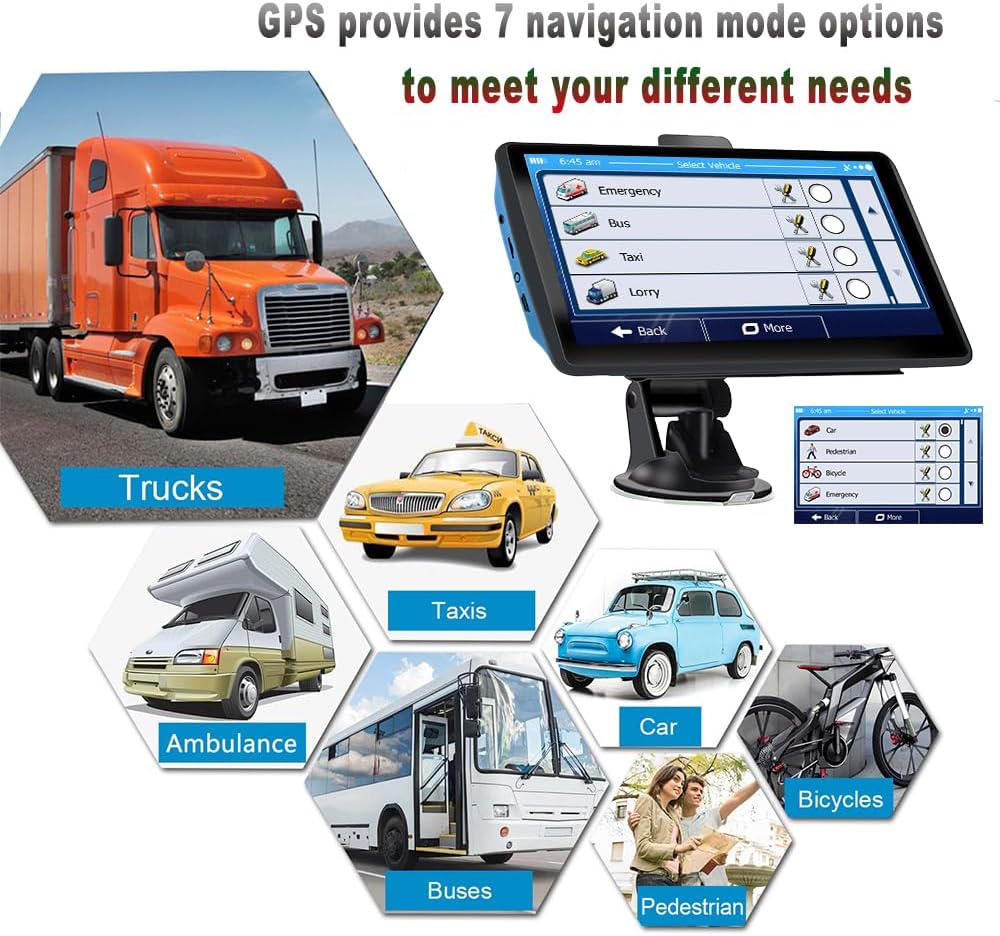
3. Vehicle Mode Selection
The device supports 7 vehicle modes. Selecting the correct mode ensures optimal route planning.
- From the navigation interface or settings, locate the "Select Vehicle" option.
- Choose from: Car, Truck, Bicycle, Bus, Ambulance, Taxi, or Pedestrian.
- For Truck mode, you can input specific vehicle dimensions (length, width, height) and weight to avoid restricted routes.
4. Truck Routing Features
In Professional Truck Mode, the GPS system considers vehicle-specific parameters to provide safe and efficient routes, avoiding low bridges, weight-restricted roads, and other truck-specific limitations.

5. FM Transmitter Function
The built-in FM transmitter allows you to broadcast navigation voice prompts and music through your vehicle's stereo system.
- From the main menu, tap the "FM" icon.
- Select an unused FM frequency on the device.
- Tune your car's radio to the same FM frequency.
- Navigation voice and music from the GPS will now play through your car speakers.

6. Multimedia Playback
The device supports playing MP3 and MP4 media files, viewing photos, and reading eBooks. Access these functions via their respective icons on the main menu.
Maintenance
- Cleaning: Use a soft, dry cloth to clean the screen and exterior of the device. Avoid abrasive cleaners or solvents.
- Storage: When not in use for extended periods, store the device in a cool, dry place away from direct sunlight.
- Battery Care: To prolong battery life, avoid fully discharging the battery frequently. Charge the device regularly.
- Map Updates: The device comes with 2024 North America maps and offers free updates. Refer to the manufacturer's website or support information for instructions on how to update maps.
Troubleshooting
| Problem | Possible Cause | Solution |
|---|---|---|
| Device does not power on. | Low battery; faulty power connection. | Connect to car charger or USB power source. Ensure connections are secure. |
| No GPS signal. | Obstructed view of sky; device indoors. | Move to an open area with a clear view of the sky. Wait a few minutes for signal acquisition. |
| Navigation voice not heard. | Volume too low; FM transmitter not configured correctly. | Increase device volume. If using FM transmitter, ensure device and car radio are on the same frequency. |
| Touchscreen unresponsive. | Temporary software glitch. | Perform a soft reset (refer to device settings or contact support if no reset button is visible). |
Specifications
| Feature | Detail |
|---|---|
| Model Number | X20-1 |
| Display Size | 7 Inches |
| Product Dimensions | 8.46 x 5.51 x 3.54 inches |
| Item Weight | 1.17 pounds |
| Battery | 1 A battery required (included) |
| Operating System | Windows |
| Connectivity | USB |
| Map Type | North America (2024, free updates) |
| Special Feature | Touchscreen, Voice Command |
| Audio Output Mode | Stereo (via built-in speaker or FM transmitter) |
Warranty and Support
Warranty Information:
This product comes with a 1-year warranty from the date of purchase. The warranty covers manufacturing defects and malfunctions under normal use. It does not cover damage caused by misuse, accidents, unauthorized modifications, or natural disasters.
Customer Support:
For technical assistance, warranty claims, or general inquiries, please refer to the contact information provided with your purchase documentation or visit the manufacturer's official website. Please have your model number (X20-1) and purchase date ready when contacting support.