MAGIC UNION Dog Kennel
MAGIC UNION 8x4x6 FT Outdoor Dog Kennel User Manual
Model: Dog Kennel | Brand: MAGIC UNION
Introduction
This manual provides essential instructions for the safe assembly, operation, and maintenance of your MAGIC UNION 8x4x6 FT Outdoor Dog Kennel. Please read all instructions carefully before assembly and retain this manual for future reference. Ensure all components are present and undamaged before beginning assembly.
Safety Information
- Always assemble the kennel on a flat, stable surface.
- Ensure all connections are secure before placing a pet inside.
- Regularly inspect the kennel for any signs of wear, damage, or loose parts.
- Keep children away from the assembly area.
- This kennel is designed for pets. Do not use it for purposes other than its intended use.
Package Contents
Verify that all the following components are included in your package. If any parts are missing or damaged, please contact customer support.
- Welded Wire Steel Panels (various sizes for walls and door)
- Steel Roof Frame Components
- Waterproof Roof Cover
- Lockable Door Assembly
- Swivel Feeder with 2 Stainless Steel Bowls
- Ground Stakes
- Assembly Hardware (bolts, nuts, snap-pins, elastic spherical buckles)
- Instruction Manual
Setup and Assembly Instructions
The MAGIC UNION Dog Kennel features a snap-pin assembly design for quick installation. Follow these steps carefully.
Step 1: Prepare the Area
Choose a level, stable outdoor location for the kennel. Clear any debris or obstacles from the area. Ensure adequate drainage if placing on soft ground.
Step 2: Assemble the Wall Panels
- Unpack all steel panels.
- Connect the panels using the provided snap-pins. Ensure the pins are fully engaged to secure each panel connection.
- Form the rectangular base of the kennel (94.5"L x 51.2"W).
- Integrate the door panel and the swivel feeder panel into the desired positions.

Image: Overall dimensions of the kennel (94.5"L x 51.2"W x 68.9"H) and detailed measurements of the swivel feeder area.
Step 3: Install the Roof Frame
- Assemble the steel roof frame components according to the diagrams in the included paper instructions.
- Attach the assembled roof frame to the top of the wall panels. Ensure all connections are tight and secure.
Step 4: Attach the Waterproof Roof Cover
- Drape the waterproof roof cover over the roof frame.
- Secure the cover to the frame using the elastic spherical buckles. Ensure the cover is taut and evenly distributed to prevent water accumulation. The spire design helps with water runoff.
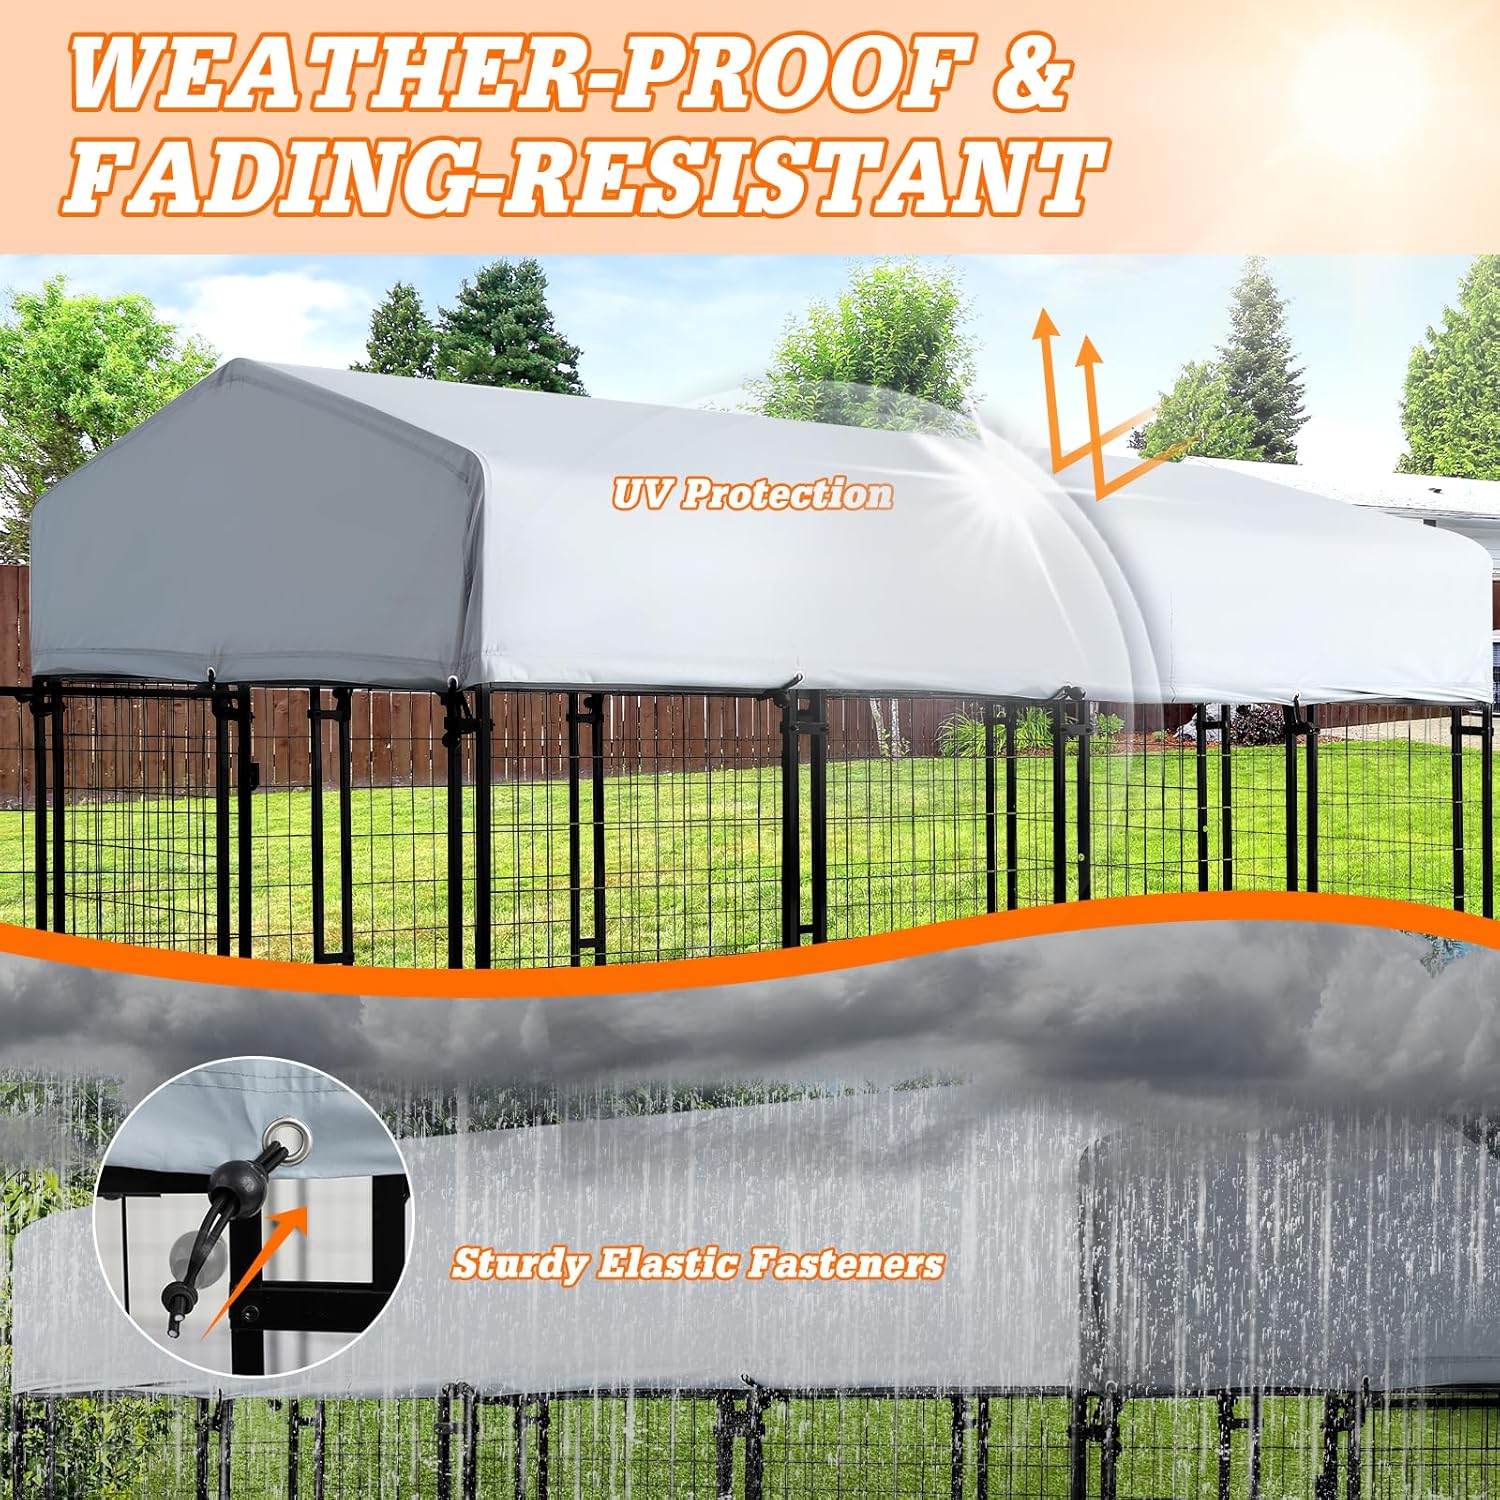
Image: The waterproof roof cover, highlighting its UV protection and the elastic fasteners that secure it to the kennel frame.
Step 5: Secure with Ground Stakes
- Insert the provided ground stakes through the designated loops at the base of the kennel panels.
- Drive the stakes firmly into the ground to enhance stability and wind resistance.

Image: Details of the robust metal connections between panels and the ground stake for added stability.
Operating Instructions
Using the Lockable Door
The kennel features a secure, lockable door to prevent pets from escaping and to protect them from external dangers. To open, slide the latch mechanism. To close, ensure the door is fully shut and engage the latch until it clicks into place.
Utilizing the Swivel Feeder
The integrated swivel feeder allows for convenient feeding without needing to enter the kennel. The feeder includes two stainless steel bowls.
- To access the bowls, unlatch the small feeder door.
- Rotate the feeder mechanism outwards.
- Place food and water in the stainless steel bowls.
- Rotate the feeder back into the kennel and secure the feeder door latch.
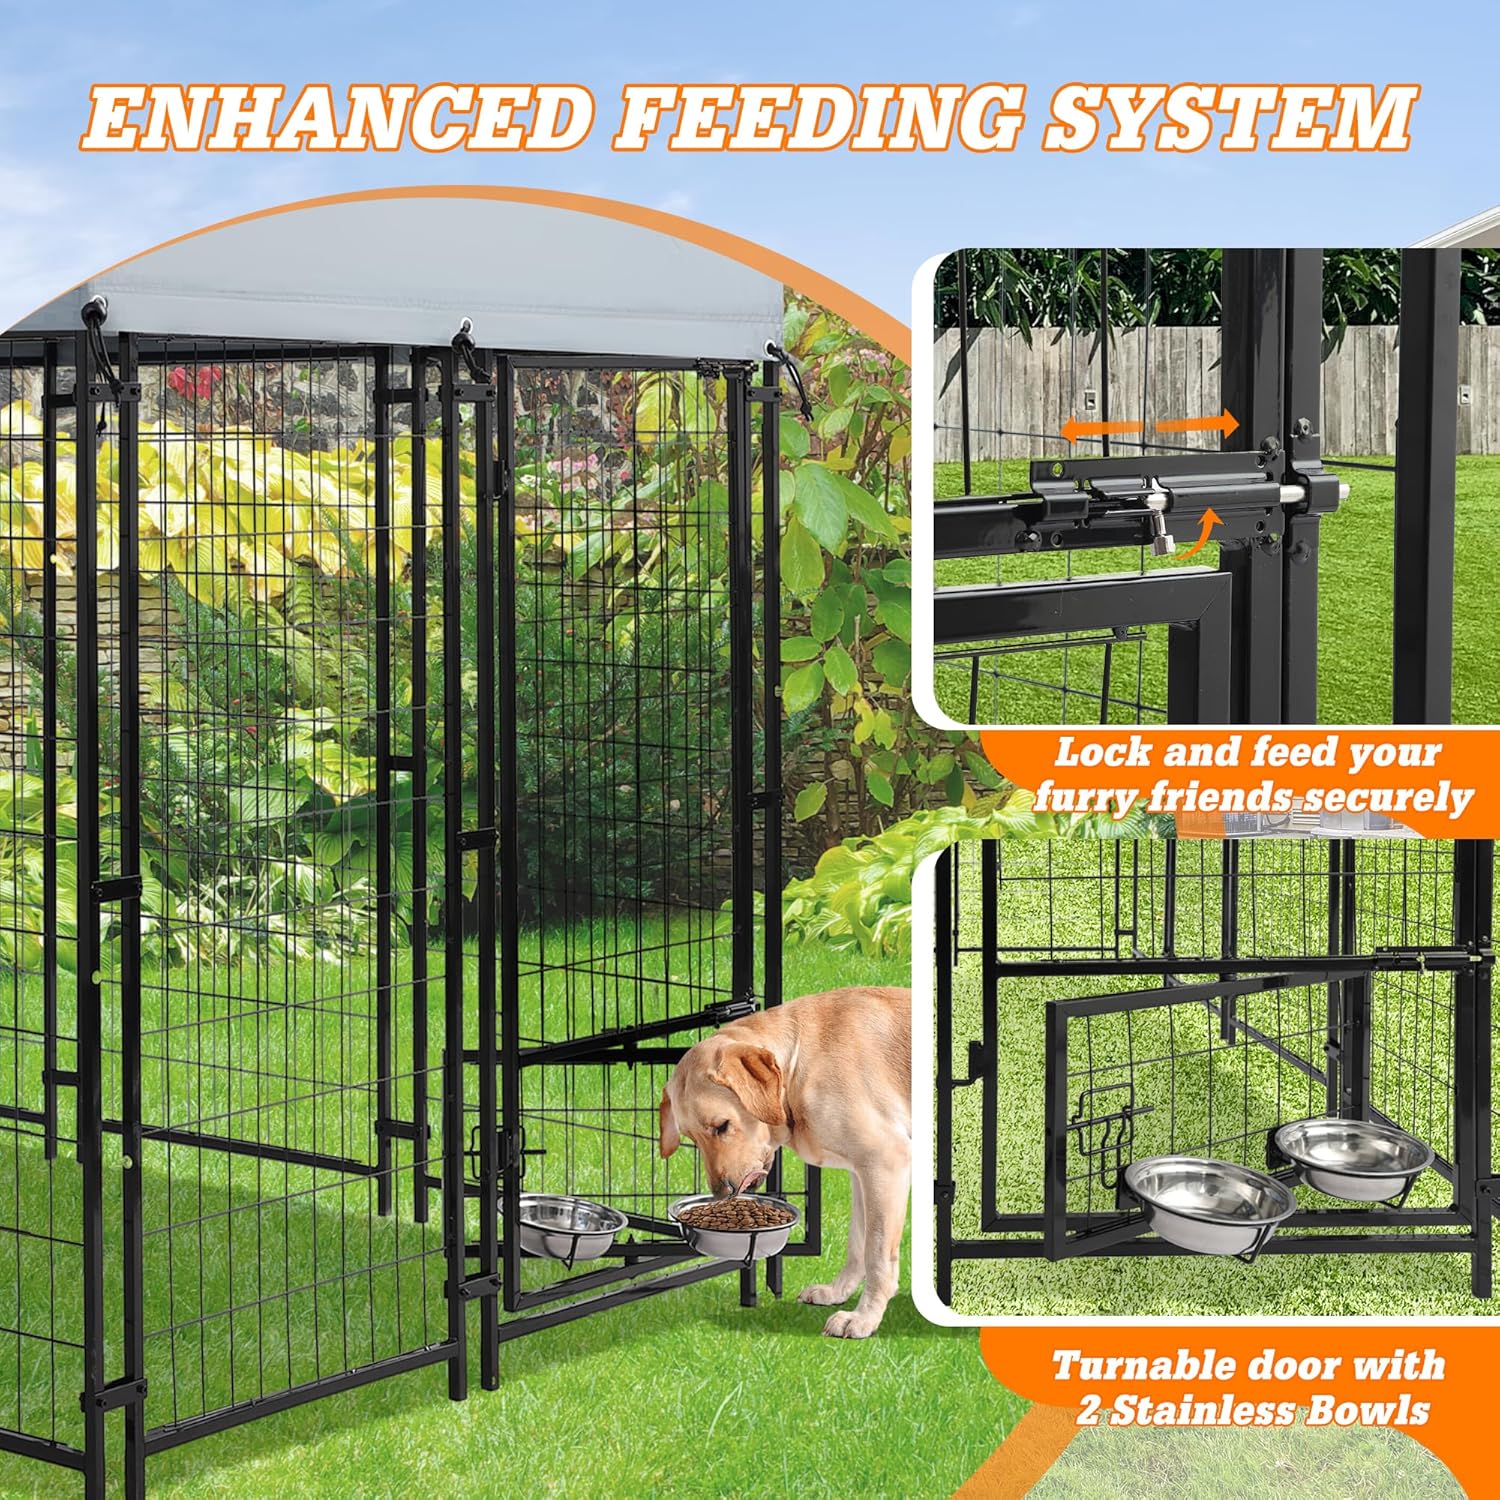
Image: A dog using the swivel feeder, with detailed views of the secure lock and the rotatable bowl system.
Maintenance
Cleaning the Kennel
Regular cleaning is essential for your pet's health and the longevity of the kennel.
- Frame and Panels: The galvanized steel frame with epoxy coating can be cleaned with water and a mild, pet-safe detergent. Rinse thoroughly and allow to air dry.
- Roof Cover: The waterproof cover can be wiped clean with a damp cloth. For deeper cleaning, it can be removed and hosed down. Ensure it is completely dry before reattaching to prevent mildew.
- Bowls: The stainless steel bowls are removable and dishwasher safe for easy cleaning. Clean them daily to maintain hygiene.
Inspection
Periodically inspect all connections, latches, and the overall structure for any signs of wear, rust, or damage. Tighten any loose bolts or replace damaged parts immediately to ensure the safety and security of your pet.
Troubleshooting
- Kennel Instability: Ensure the kennel is placed on a level surface. Verify all snap-pins are fully engaged and ground stakes are firmly driven into the ground.
- Difficulty with Door Latch: Check for any obstructions in the latch mechanism. Ensure the door is properly aligned with the frame.
- Water Accumulation on Roof: Ensure the roof cover is taut and properly secured with all elastic buckles. The spire design is intended to prevent pooling.
- Rust or Corrosion: While the kennel features an epoxy coating for resistance, prolonged exposure to harsh conditions or damage to the coating can lead to rust. Clean and apply rust-inhibiting paint to affected areas if necessary.
Specifications
| Product Dimensions (L x W x H) | 94.5" x 51.2" x 68.9" (240cm x 130cm x 175cm) |
| Material | Galvanized Steel with Epoxy Coating |
| Steel Tube Dimensions | 32mm x 32mm (square), 1mm thickness |
| Roof Cover Material | Waterproof, UV-protected fabric |
| Special Features | Lockable Door, Swivel Feeder, Removable Roof Cover, Weather Resistant |
| Recommended Pet Size | Most Small & Medium Dog Breeds |
| Number of Doors | 1 |
Warranty and Support
Warranty Information
This MAGIC UNION Dog Kennel comes with a 1-Year Warranty from the date of purchase. This warranty covers manufacturing defects in materials and workmanship under normal use. It does not cover damage caused by misuse, accidents, unauthorized modifications, or normal wear and tear.
Customer Support
For any questions, missing parts, or warranty claims, please contact MAGIC UNION customer support. Refer to your purchase documentation for specific contact details or visit the official MAGIC UNION website.
Ask a question about this manual
Ask about setup, troubleshooting, compatibility, parts, safety, or missing instructions. Manuals+ will review the question and use this page’s manual context to help answer it.