Introduction
Thank you for choosing the MASHI Digital Wall Clock Model 5505. This manual provides detailed instructions for setting up, operating, and maintaining your new digital clock. Please read this manual thoroughly before use to ensure optimal performance and longevity of your device.

Image: The MASHI Digital Wall Clock Model 5505 with its remote control.
Product Features
- Large 16-Inch LED Display: Features a 15.28-inch width and 5.21-inch height, with 3.92-inch digits for clear visibility of time, date, day of the week, and temperature.
- RGB Modern Night Light: Offers 8 fixed colors and 1 multi-color option with 10 levels of brightness adjustment.
- Remote Control: Allows convenient operation from up to 32 feet away.
- Automatic Daylight Saving Time (DST): Seamlessly adjusts for DST with a simple setting.
- Auto/Manual Brightness: Includes 10 brightness levels and an automatic dimming sensor that adapts to ambient light.
- Power Source: Operates via corded electric (5V/2A power adapter and 11.5-foot cable included). Not battery operated for primary function.
- Memory Function: Requires 2 AAA batteries (not included) to retain time settings during power outages.
- Mounting Options: Designed for wall mounting.

Image: Detailed dimensions of the 16-inch display.
Package Contents
Please verify that all items are present in your package:
- 1 x MASHI 16" Large Display Digital Clock
- 1 x Remote Control
- 1 x USB Charging Cable (11.5 feet)
- 1 x 5V/2A Power Adapter
- 2 x Mounting Nails
- 1 x Ruler (for mounting assistance)
- 1 x Instruction Manual

Image: All items included in the product box.
Setup
1. Install Backup Batteries (Optional but Recommended)
While the clock is not battery-operated for its main function, installing 2 AAA batteries (not included) will preserve your time and settings during a power outage. Locate the battery compartment on the back of the clock, insert the batteries according to the polarity markings, and close the compartment.
2. Connect Power
Connect the provided USB charging cable to the clock's charging port and then plug the 5V/2A power adapter into a standard electrical outlet. The clock display will illuminate.

Image: Visual guide for initial setup steps.
3. Mounting the Clock
The clock can be wall-mounted using the two mounting holes on the back. Use the included nails and ruler to mark and secure the clock to your desired location. Ensure the clock is securely fastened before releasing it.
Operating Instructions
Clock Overview

Image: Front display features and their labels.

Image: Back panel features and their labels.
1. Setting Time and Date
- Press the SET button on the remote control or the back of the clock to enter time setting mode.
- Use the + and - buttons to adjust the hour, then press SET to confirm and move to minutes.
- Repeat for minutes, year, month, and day.
- Press SET again to exit setting mode.
2. 12/24 Hour Format Switching
Short press the SET button, then use the + or - button to toggle between 12-hour (with AM/PM indicator) and 24-hour formats.
3. Alarm Clock Settings
The clock supports two independent alarms.
- Press the ALARM 1/2 Setting button on the back or the corresponding alarm button on the remote.
- Use + and - to set the desired alarm time.
- Press the alarm button again to confirm and activate the alarm. An alarm icon will appear on the display.
- To turn off an alarm, press its corresponding alarm button again until the icon disappears.
4. Night Light Control
The clock features a bottom night light with multiple color options.
- Press the Night Light button on the remote to cycle through 8 fixed colors and 1 multi-color option.
- When the night light changes color, press the OK button on the remote to confirm and set the current color.
- To turn off the night light, cycle through the options until it is off.

Image: The clock showcasing its multi-color night light feature.
5. Brightness Adjustment
The clock offers 10 levels of brightness and an automatic dimming function.
- Manual Adjustment: Use the Brightness +/- buttons on the remote to cycle through 10 brightness levels.
- Automatic Dimming: The built-in sensor will automatically adjust the display brightness based on ambient light conditions.
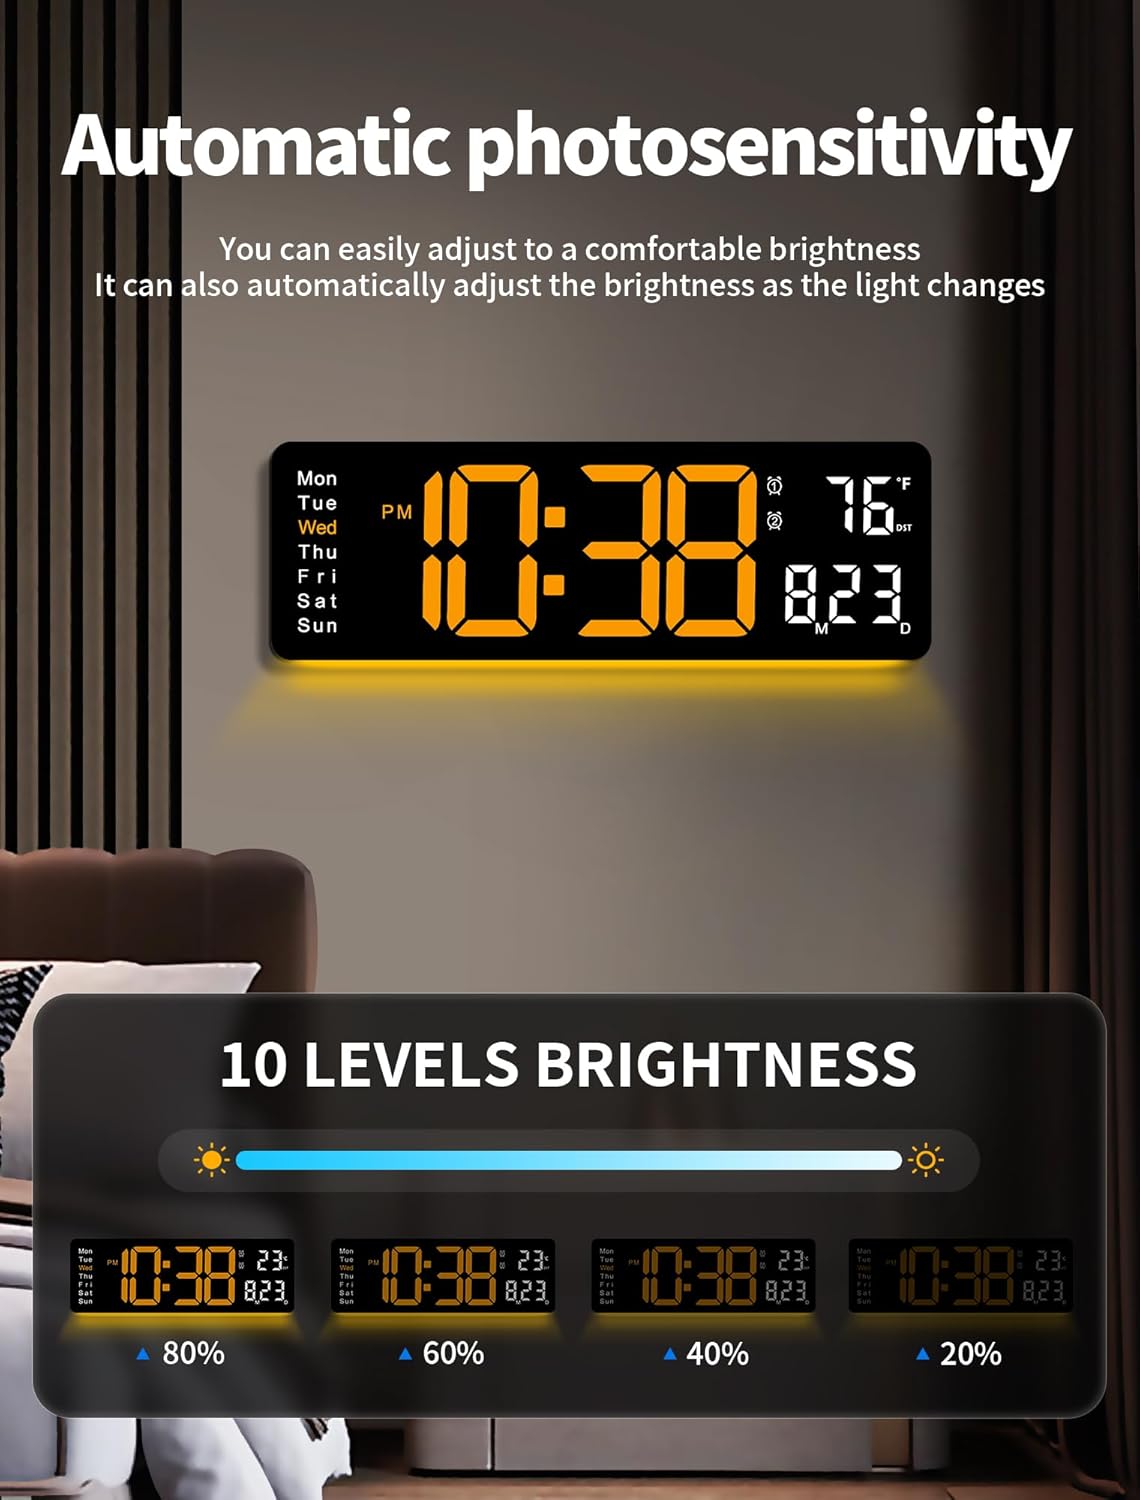
Image: Illustration of automatic brightness adjustment and various brightness levels.
6. Daylight Saving Time (DST)
To activate or deactivate DST, long press the - button on the remote control. The DST indicator will appear or disappear on the display.
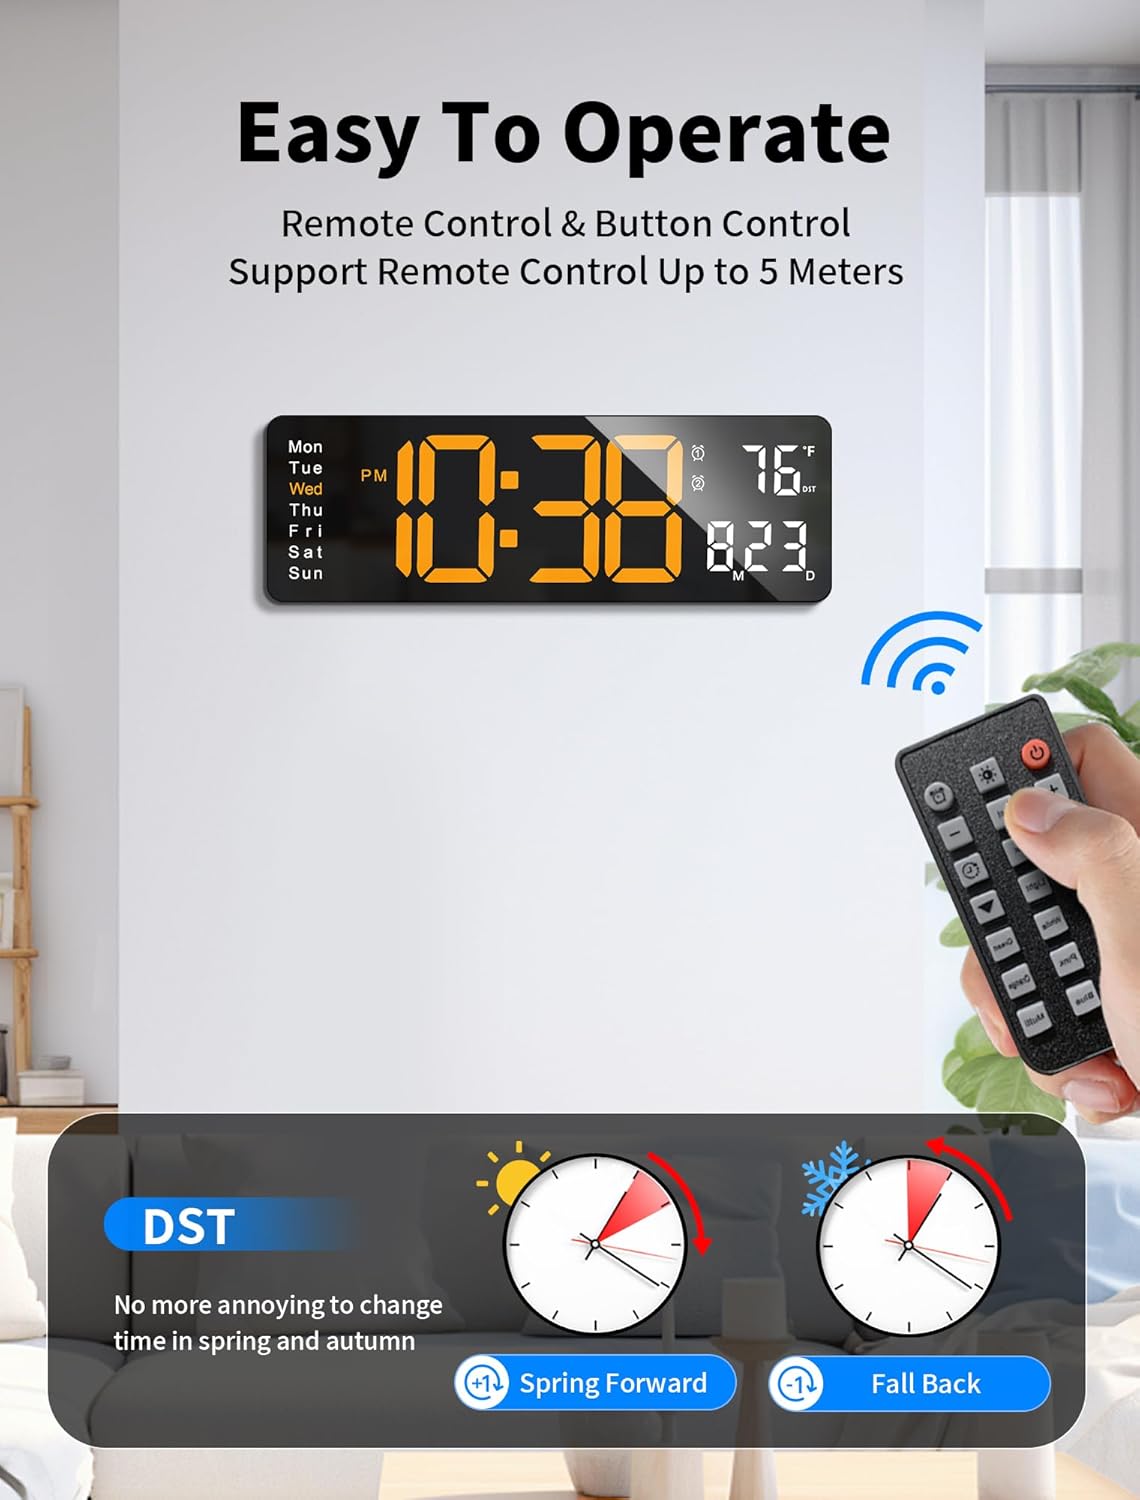
Image: Remote control and DST function illustration.
7. Timer Function
The clock includes a timer function for both forward counting (stopwatch) and backward counting (countdown).
- Press the TIMER button on the remote to activate the timer mode.
- Use the + and - buttons to set the desired countdown time (up to 99 minutes and 59 seconds).
- Press START/STOP to begin or pause the timer.
- Press RESET to clear the timer.
Maintenance
- Cleaning: Wipe the clock display and body with a soft, dry cloth. Avoid using abrasive cleaners or solvents.
- Battery Replacement: If the clock loses time during a power outage, replace the 2 AAA backup batteries.
- Storage: If storing the clock for an extended period, disconnect it from power and remove the backup batteries.
Troubleshooting
| Problem | Possible Cause | Solution |
|---|---|---|
| Clock display is off. | No power connection or power outage. | Ensure the power adapter is securely plugged into the clock and a working outlet. Check if there's a power outage. |
| Remote control not working. | Remote batteries are dead or incorrect orientation. Obstruction between remote and clock. | Replace remote batteries. Ensure line of sight to the clock's sensor. |
| Time is incorrect after power outage. | Backup batteries not installed or dead. | Install or replace 2 AAA backup batteries. Reset the time manually. |
| Night light not changing colors. | Not pressing 'OK' to confirm color selection. | After cycling to the desired color, press the OK button on the remote to set it. |
| Display is too bright/dim. | Brightness level needs adjustment. Auto-dimming sensor is active. | Use the Brightness +/- buttons on the remote to manually adjust. Ensure the auto-dimming sensor is not obstructed. |
Specifications
- Brand: MASHI
- Model Number: 5505
- Display Type: Digital LED
- Product Dimensions: 15.28" (W) x 5.21" (H) x 1.3" (D)
- Digit Height: Approximately 3.92 inches
- Power Source: Corded Electric (5V/2A DC)
- Cable Length: 11.5 feet
- Backup Battery: 2 x AAA (not included) for memory function
- Special Features: Time, Date, Day of Week, Temperature (°F/°C), DST, 2 Alarms, Night Light (8 colors + multi-color), Auto/Manual Brightness (10 levels), Timer (99 min 59 sec)
- Mounting Type: Wall Mount
- Item Weight: 1.57 pounds (0.71 Kilograms)
- Indoor/Outdoor Usage: Indoor
Warranty and Support
Specific warranty information for the MASHI Digital Wall Clock Model 5505 is not provided in this manual. For warranty details, technical support, or any inquiries regarding your product, please refer to the contact information provided on the product packaging or the official MASHI website. Keep your purchase receipt as proof of purchase for any warranty claims.