Introduction
This manual provides detailed instructions for the NekSide ZD09 Digital Voice Recorder. This compact and portable device is designed for high-quality audio recording in various settings, including interviews, meetings, and courses. It features advanced noise reduction technology, a dual microphone system, and a convenient carabiner design for easy portability.
Key features include a 64GB storage capacity, support for up to 3072Kpbs recording quality, and a long-lasting battery providing 40-48 hours of continuous recording. The device also supports one-touch recording and Type-C fast charging.
Package Contents
Please check the package for the following items:
- NekSide ZD09 Digital Voice Recorder
- Headphones
- Type-C USB Cable
- User Manual
Product Overview
The NekSide ZD09 is a compact, keychain-style digital voice recorder with a durable aluminum casing. Its design allows for easy attachment to backpacks, keychains, or jeans, making it an ideal portable recording solution.
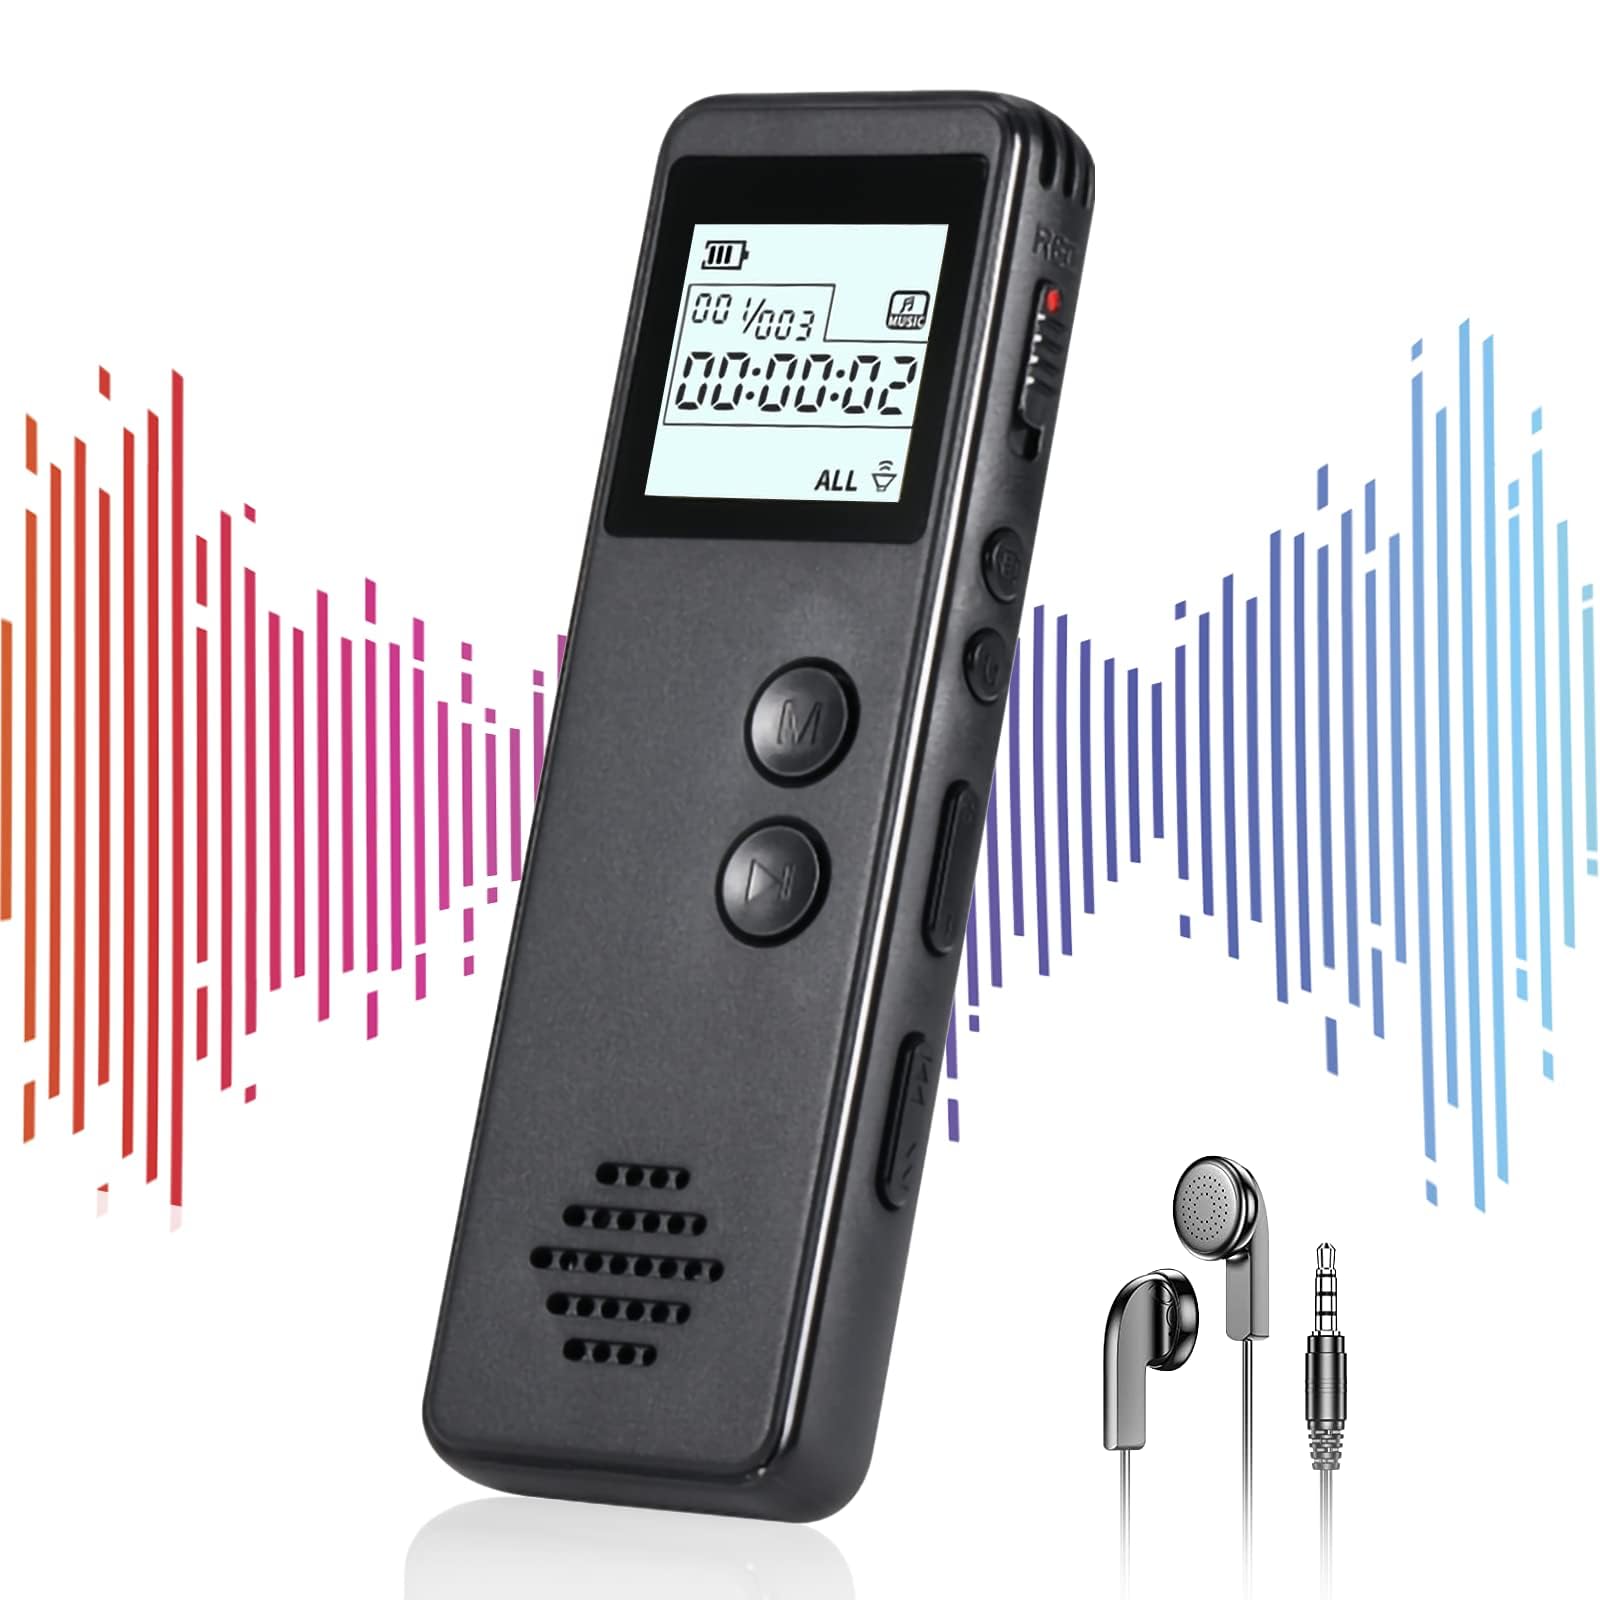
Image: The NekSide ZD09 Digital Voice Recorder, showcasing its compact size and carabiner clip for portability.
Device Layout
- On/Off Switch: Located on the side, used to power the device on and off, initiating recording.
- Function/Menu Button: Used for navigating settings and playback options (typically when headphones are connected).
- Type-C Port: For charging the device and connecting to a computer for file transfer.
- Headphone Jack (USB Type): For audio playback and accessing device settings via the included headphones.
- Microphone: Built-in dual microphones for omnidirectional sound pickup.
Setup
1. Charging the Device
Before first use, fully charge the recorder. Connect the provided Type-C USB cable to the device's Type-C port and the other end to a USB power adapter (not included) or a computer's USB port. The device will fully charge in approximately 1.5 hours. The recorder supports recording while charging.
2. Powering On/Off
To power on the device, slide the On/Off switch to the "ON" position. To power off and save the current recording, slide the switch to the "OFF" position.
3. Connecting to a Computer
To transfer or manage recorded files, connect the recorder to your computer using the Type-C USB cable. The device will appear as a removable storage drive, allowing you to access the audio files stored on the internal 64GB memory card.
Operating Instructions
1. One-Touch Recording
To start recording, simply slide the On/Off switch to the "ON" position. The device will automatically begin recording. To stop recording and save the file, slide the switch back to the "OFF" position.
2. Playback
Connect the included headphones to the USB-type headphone jack on the device. Use the Function/Menu button to navigate through recorded files and control playback (play, pause, skip). Refer to the on-screen prompts or audio cues through the headphones for specific menu options.
3. Voice Activated Recording (VAR)
The device supports Voice Activated Recording. This feature can be enabled or disabled through the device's settings menu (accessible via headphones). When enabled, the recorder will automatically start recording when sound is detected and pause when silence occurs, conserving memory and battery life.
4. Adjusting Settings
Various settings such as recording bit rate (up to 3072 kbps), microphone sensitivity, and maximum time segment for each recorded file can be adjusted. These settings are typically accessed through the menu system when headphones are connected, or by connecting the device to a computer and modifying configuration files if applicable.
5. Deleting Files
Recorded files can be deleted directly from the device without connecting to a PC. Access the file management options through the menu system using the headphones.
Maintenance
- Cleaning: Use a soft, dry cloth to clean the device. Avoid using liquid cleaners or solvents.
- Storage: Store the recorder in a cool, dry place away from direct sunlight and extreme temperatures.
- Battery Care: To prolong battery life, avoid completely discharging the battery frequently. Recharge the device regularly, even if not in use for extended periods.
- Data Backup: Regularly back up important recordings to your computer to prevent data loss.
Troubleshooting
- Device not turning on:
Ensure the battery is charged. Connect the device to a power source using the Type-C cable and allow it to charge for at least 15 minutes before attempting to power on again. - Poor recording quality:
Check the microphone sensitivity settings and adjust if necessary. Ensure the microphone is not obstructed. Record in a quiet environment. If using the carabiner, ensure it is not clanking against the device during recording, as this can be picked up by the sensitive microphone. - Cannot access files on computer:
Verify that the Type-C cable is securely connected to both the recorder and the computer. Ensure the recorder is powered on when connected. Try a different USB port on your computer. - Memory full:
The device has a 64GB internal memory. If you receive a 'memory full' error, connect the device to a computer and transfer or delete old files. Some models may allow replacing the internal Micro SD card, consult product specifications or support for details. - No sound during playback:
Ensure headphones are properly connected to the USB-type headphone jack. Check the volume level on the device.
Specifications
- Model Number: ZD09
- Brand: NekSide
- Storage Capacity: 64GB (stores approximately 4552 hours of audio)
- Recording Quality: Up to 3072 kbps
- Microphone: Built-in Dual Microphones, Omnidirectional, 360° surround sound pickup, 60 feet real-time recording range
- Noise Reduction: ANC chip, DSP 3.0 technology
- Battery: 300mAh rechargeable lithium battery
- Battery Life: 40-48 hours continuous recording, 10 days standby time
- Charging Time: Approximately 1.5 hours via Type-C port
- Audio Formats: MP3, WAV
- Connectivity: Type-C USB port, USB-type headphone jack
- Product Dimensions: 0.8 x 1.1 x 6 cm (or 8D x 11W x 60H millimeters)
- Features: One-touch recording, Voice Activated Recording, Low battery auto-save function, Carabiner design
Warranty and Support
For warranty information, technical support, or customer service inquiries, please refer to the documentation included with your purchase or visit the official NekSide website. Contact details for customer support are typically provided in the product packaging or on the manufacturer's website.