1. Introduction
Thank you for choosing the TROPOW Beer Kegerator. This appliance is designed to keep your beer fresh and chilled, providing a refreshing draft experience. It can accommodate various keg sizes and also functions as a standard refrigerator with included shelves. This manual provides essential information for safe installation, operation, and maintenance of your kegerator.
The TROPOW Beer Kegerator features an auto-defrosting design for optimal performance and an extended 9.8 ft beer hose to ensure proper foam and flavor. It includes a temperature control knob allowing adjustment from 32°F to 50°F. The unit is designed for convenience with four wheels (two lockable), a removable drip tray, and a stainless steel guard rail.
2. Safety Information
Please read all safety instructions carefully before operating the appliance to prevent injury or damage.
- Electrical Safety: Ensure the power outlet matches the voltage requirements (110V). Do not use extension cords. Always unplug the unit before cleaning or maintenance.
- Placement: Place the kegerator on a firm, level surface. Allow adequate ventilation space (at least 4 inches) around the back and sides of the unit for proper cooling. Do not place in direct sunlight or near heat sources.
- CO₂ Tank Handling: Handle CO₂ tanks with care. Ensure connections are secure to prevent leaks. Store CO₂ tanks in a well-ventilated area.
- Children: This appliance is not intended for use by persons (including children) with reduced physical, sensory or mental capabilities, or lack of experience and knowledge, unless they have been given supervision or instruction concerning use of the appliance by a person responsible for their safety.
- Flammable Refrigerant: The appliance uses a flammable refrigerant. Dispose of the appliance according to local regulations.
3. Package Contents
Verify that all components are present in the package:
- TROPOW Beer Kegerator Unit
- Dual Tap Beer Tower
- Beer Line (9.8 ft)
- CO₂ Tank (empty)
- CO₂ Tank Bracket
- Installation Kit (hoses, clamps, regulator)
- Removable Drip Tray
- Stainless Steel Guard Rail
- Internal Shelves (2)
- Casters (4, two with locking mechanism)
4. Setup
4.1 Unpacking and Placement
- Carefully remove all packaging materials.
- Place the kegerator on a flat, stable surface. Ensure there is at least 4 inches of clearance from walls or other objects for proper ventilation.
- Allow the unit to stand upright for at least 2-4 hours before plugging it in. This allows the refrigerant to settle.
4.2 Attaching Casters
- Carefully tilt the kegerator to access the bottom. It is recommended to have assistance.
- Screw the four casters into the designated holes on the bottom of the unit. Install the two lockable casters at the front.
- Once upright, lock the front casters to prevent movement.
4.3 Installing Drip Tray and Guard Rail
- Place the removable drip tray onto the designated slot on the top surface of the kegerator, directly below where the beer tap will be.
- Insert the stainless steel guard rail into the holes around the perimeter of the top surface.
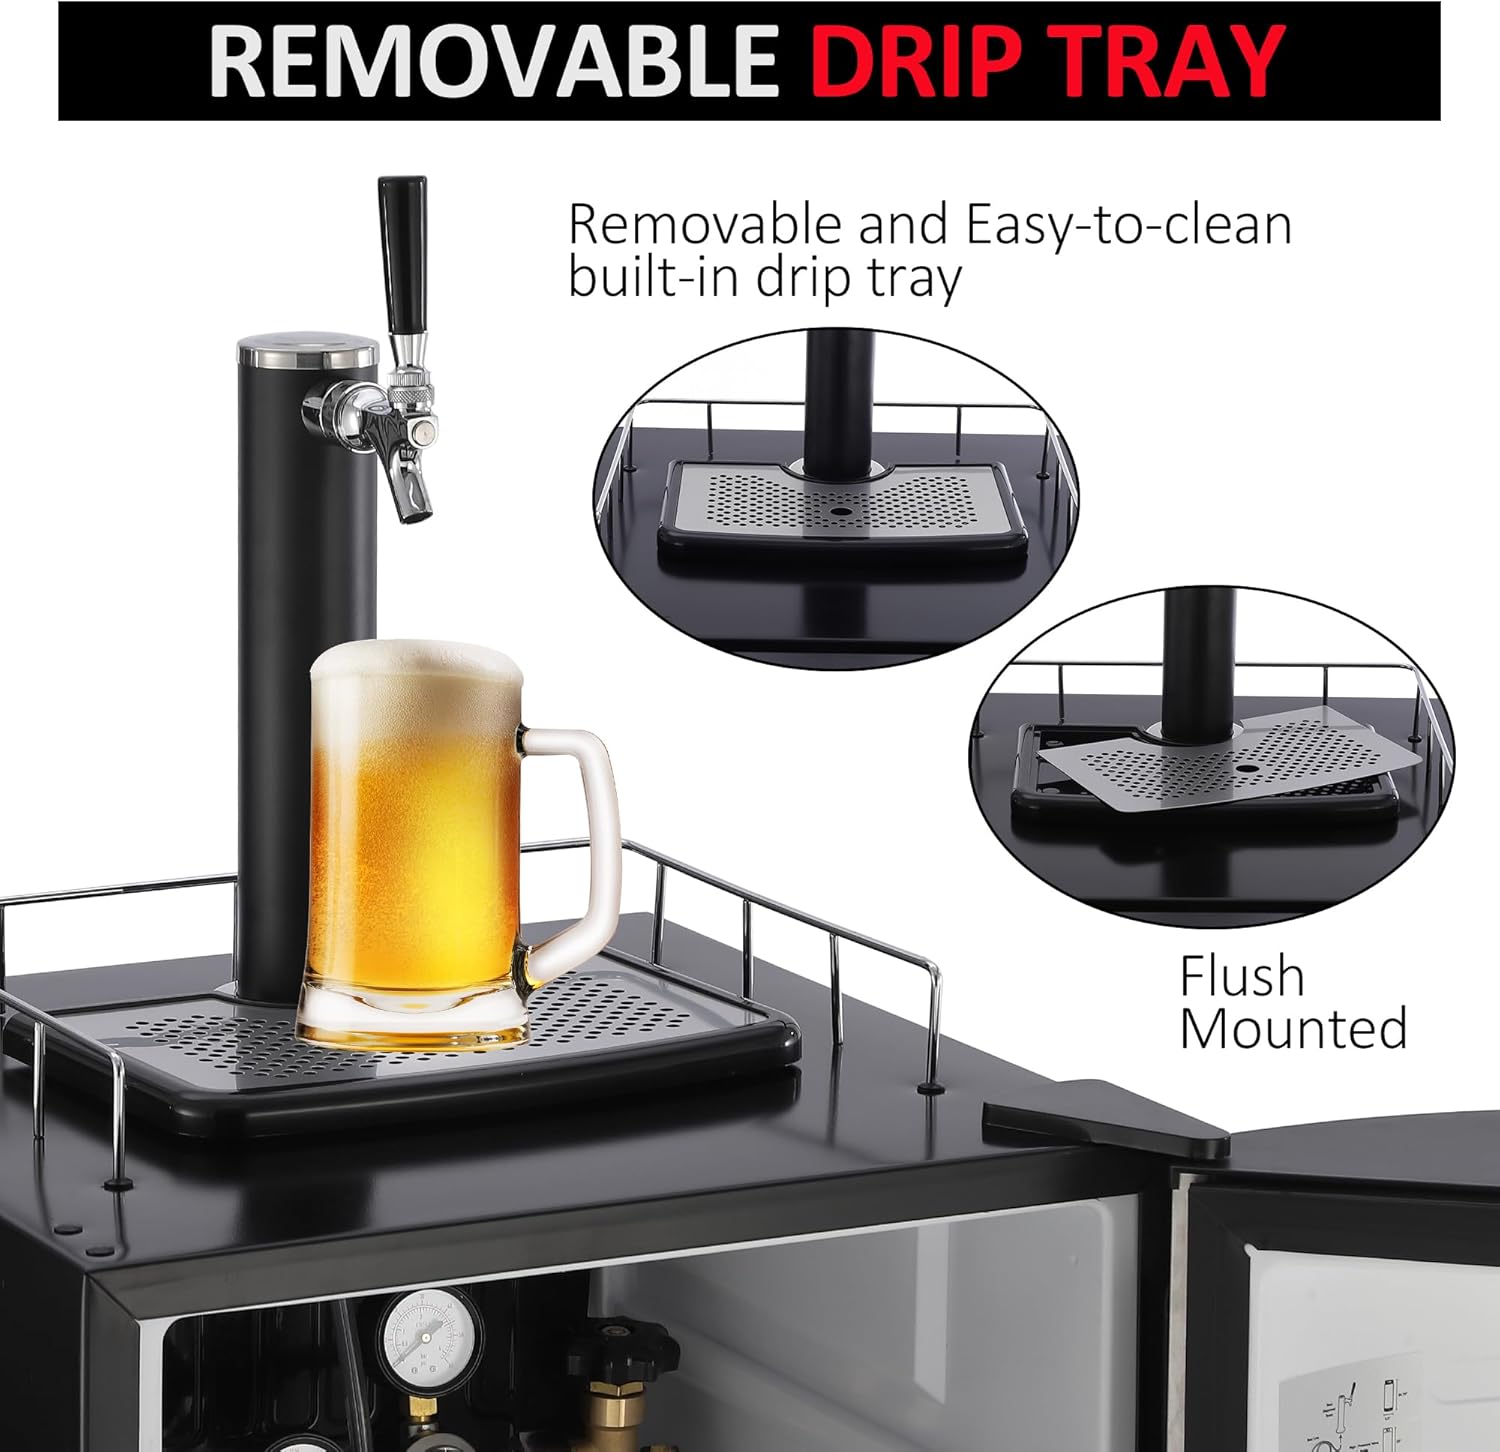
Image: The removable drip tray is placed on the top surface, and the guard rail is inserted into the surrounding holes. This setup helps catch spills and provides safety.
4.4 Beer Tower and Line Connection
- Feed the beer line through the hole on the top of the kegerator and secure the beer tower to the top surface using the provided hardware.
- Inside the kegerator, connect the beer line to the keg coupler.
- Attach the CO₂ regulator to the CO₂ tank. Ensure a tight seal.
- Connect the gas line from the CO₂ regulator to the keg coupler.
- Place the CO₂ tank in the tank bracket inside the kegerator.

Image: Close-up view of the dual faucet draft tower with stainless steel parts and chrome guard rail, ready for beer dispensing.
4.5 Loading Kegs and Initial Power-On
- Open the kegerator door and place your desired keg(s) inside. The unit can hold one full-size keg (15.5 gal), one quarter-barrel keg (7.75 gal), or two sixth-barrel kegs (5 gal).
- Connect the keg coupler to the keg.
- Plug the kegerator into a grounded electrical outlet.
- Adjust the temperature knob to your desired setting (32°F to 50°F). Allow several hours for the unit to reach the set temperature before dispensing.
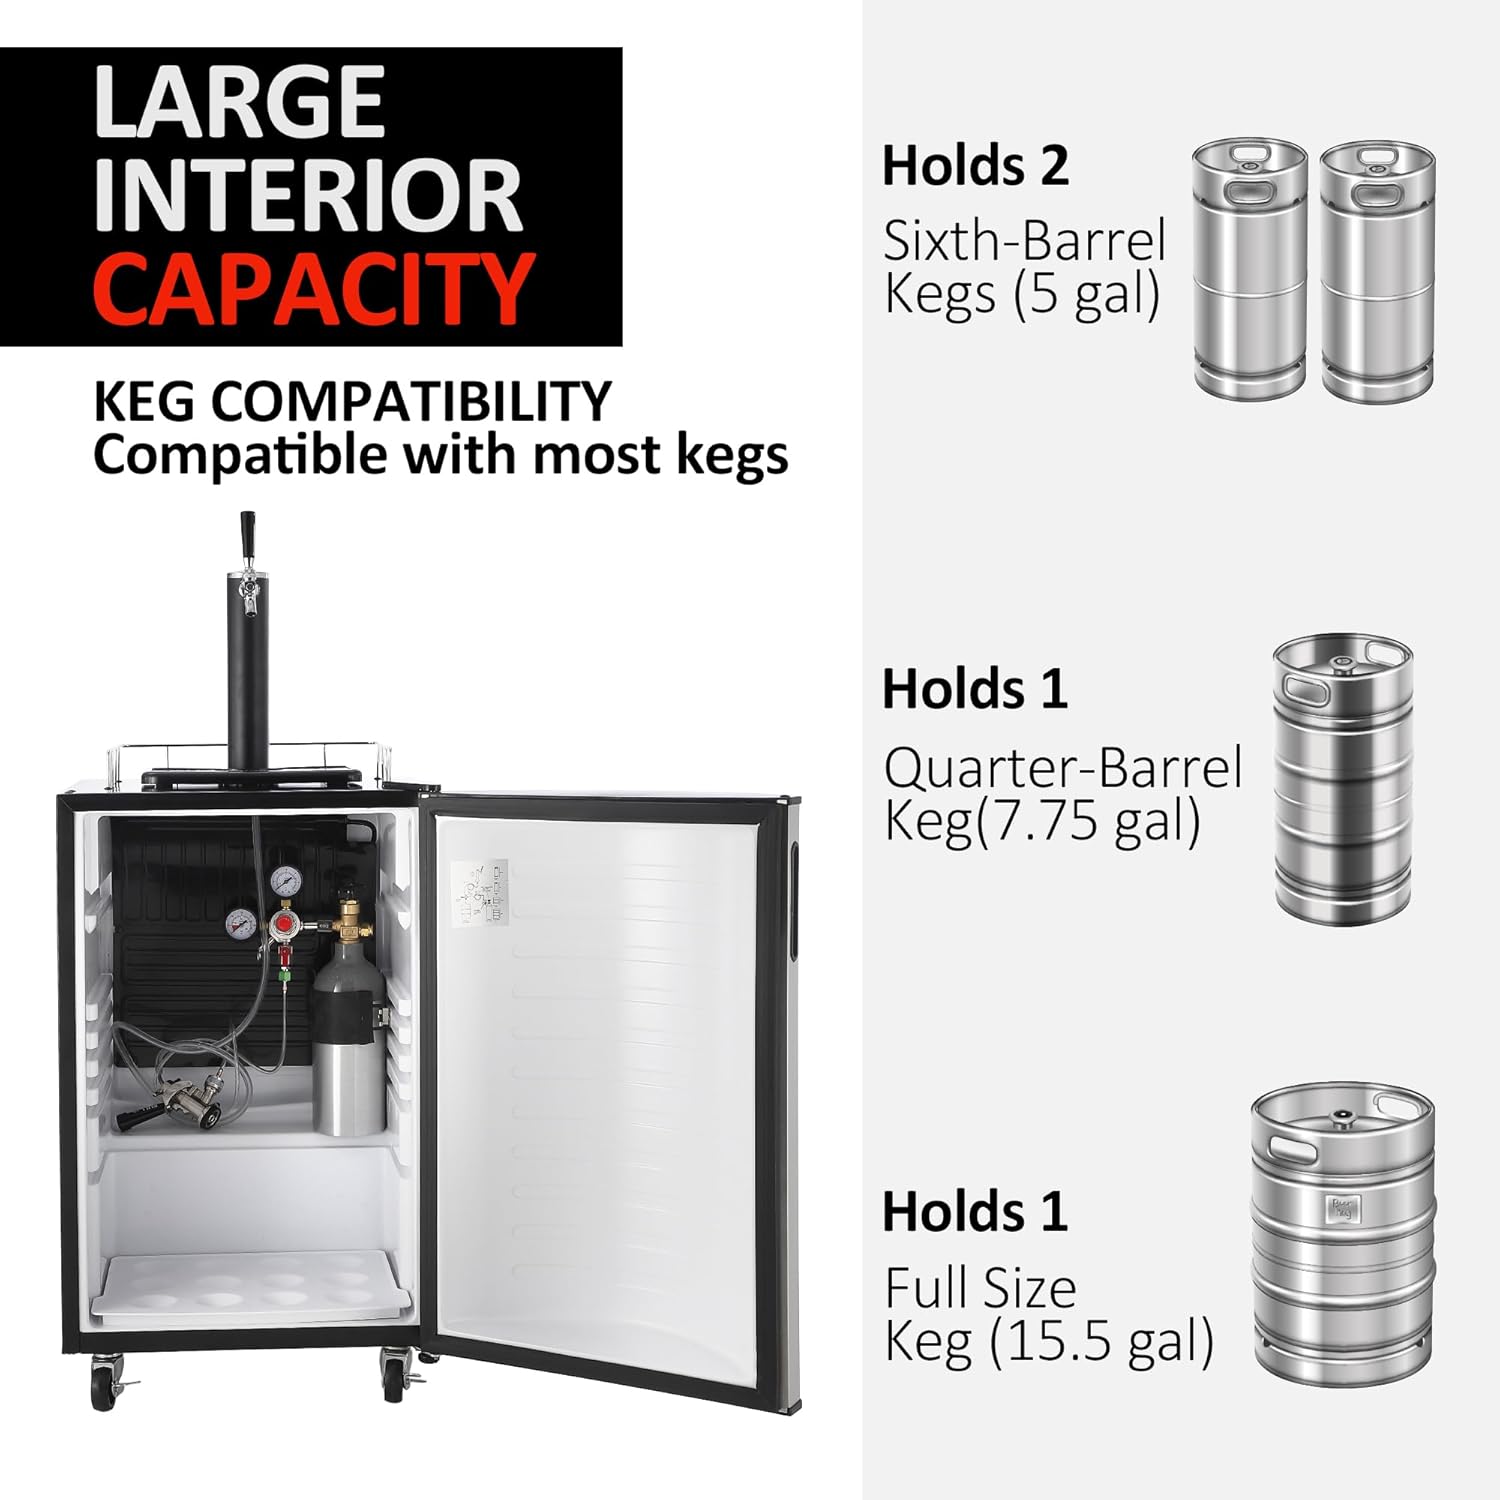
Image: The interior of the kegerator showing its large capacity, capable of holding various keg sizes including a full-size keg, a quarter-barrel keg, or two sixth-barrel kegs.
5. Operating Instructions
5.1 Temperature Control
The kegerator features a temperature control knob located inside the unit. Rotate the knob to select a temperature between 32°F and 50°F (0°C and 10°C). Lower settings provide colder temperatures. The unit will automatically maintain the set temperature, even after a power outage.
5.2 Dispensing Beer
- Ensure the CO₂ tank valve is open and the regulator is set to the appropriate pressure for your beer type (typically 10-12 PSI).
- Place a glass under the tap faucet.
- Pull the tap handle forward to dispense beer.
- Push the tap handle back to close the flow.
5.3 Using as a Refrigerator
To use the unit as a standard refrigerator, remove the kegs, CO₂ tank, and beer lines. Insert the two provided shelves into the internal slots. You can then store beverages or food items as you would in a regular compact refrigerator.

Image: The kegerator interior configured with shelves, demonstrating its use as a beverage refrigerator for cans and bottles.
6. Maintenance
6.1 Cleaning the Drip Tray
The drip tray is removable for easy cleaning. Regularly empty and wash the drip tray with warm, soapy water to prevent residue buildup and maintain hygiene.
6.2 Cleaning Beer Lines
Regular cleaning of beer lines is crucial for optimal beer taste and hygiene. It is recommended to clean beer lines every 2-4 weeks, or after every keg change. Use a specialized beer line cleaning solution and a line cleaning kit (not included) following the manufacturer's instructions.
6.3 Interior and Exterior Cleaning
- Interior: The kegerator features an automatic defrost system, minimizing ice buildup. For general cleaning, unplug the unit and wipe the interior with a damp cloth and mild detergent. Rinse with clean water and dry thoroughly.
- Exterior: Wipe the exterior surfaces with a soft, damp cloth. For stainless steel surfaces, use a stainless steel cleaner to maintain its finish. Avoid abrasive cleaners or scouring pads.
7. Troubleshooting
If you encounter issues with your TROPOW Beer Kegerator, refer to the following common problems and solutions:
| Problem | Possible Cause | Solution |
|---|---|---|
| Kegerator does not turn on | No power supply; Power cord not plugged in; Circuit breaker tripped | Check power outlet; Ensure cord is securely plugged in; Reset circuit breaker |
| Unit is not cooling | Temperature setting too high; Door not closed properly; Insufficient ventilation; Ambient temperature too high | Adjust temperature to a lower setting; Ensure door is sealed; Provide adequate clearance around unit; Move unit to a cooler location |
| Beer not dispensing or dispensing slowly | CO₂ tank empty; CO₂ regulator pressure too low; Beer line clogged; Keg coupler not properly connected | Replace CO₂ tank; Increase regulator pressure; Clean beer lines; Re-seat keg coupler |
| Excessive foam | Beer temperature too warm; CO₂ pressure too high; Beer line not properly chilled; Dirty beer lines | Lower temperature setting; Reduce CO₂ pressure; Ensure beer lines are cold; Clean beer lines |
| Unusual noises | Unit not level; Components vibrating; Normal compressor operation | Ensure unit is level; Check for loose components; Some noise from compressor is normal |
8. Specifications
| Feature | Detail |
|---|---|
| Brand | TROPOW |
| Model | Beer Kegerator |
| Capacity | 4.5 Cubic Feet (approx. 128 Liters) |
| Product Dimensions (D x W x H) | 31.5" x 26.18" x 37.6" |
| Item Weight | 72.71 Pounds |
| Voltage | 110V |
| Defrost System | Automatic |
| Temperature Range | 32°F to 50°F (0°C to 10°C) |
| Installation Type | Freestanding |
| Material Type | Steel (body), Stainless Steel (door) |
| Included Components | Single Tap Draft Beer Dispenser, CO₂ Tank (empty), Drip Tray, Guard Rail, Shelves, Casters |

Image: Diagram illustrating the key dimensions of the TROPOW Beer Kegerator, including height, width, and depth.
9. Warranty and Support
TROPOW products are manufactured to high-quality standards and are warranted against defects in materials and workmanship. For specific warranty details, including duration and coverage, please refer to the warranty card included with your purchase or contact TROPOW customer support.
For technical assistance, troubleshooting, or to inquire about replacement parts, please contact TROPOW customer support through the retailer where the product was purchased or visit the official TROPOW website.