NekSide 128GB
NekSide 128GB Digital Voice Activated Recorder User Manual
Model: 128GB
1. Introduction
This manual provides detailed instructions for the operation and maintenance of your NekSide 128GB Digital Voice Activated Recorder. Please read this manual thoroughly before using the device to ensure proper function and to maximize its capabilities. This device is designed for high-quality audio recording in various environments.

Image 1.1: The NekSide 128GB Digital Voice Activated Recorder, showcasing its compact design, display, control buttons, and included accessories like a 128GB MicroSD card and wired earphones.
2. Package Contents
Verify that all items are present in your package:
- NekSide Digital Voice Activated Recorder (128GB model)
- USB Type-C Cable
- Wired Earphones
- User Manual (this document)

Image 2.1: An illustration of the NekSide recorder and its accompanying accessories, including headphones, a USB cable, the user manual, and a 128GB TF card, indicating a complete package.
3. Device Layout and Features
Familiarize yourself with the physical components and key features of your recorder.
3.1 Key Features
- High-Fidelity Recording: Supports up to 3072Kbps HD recording quality.
- Dual Microphones: Equipped with two microphones for enhanced sound pickup and clarity.
- Voice Activated Recording (VAR): Automatically starts recording when sound is detected and pauses during silence.
- Noise Reduction: Integrated DSP chip for automatic noise reduction, improving audio quality.
- Large Storage Capacity: 128GB internal memory, capable of storing over 2048 hours of recordings.
- Long Battery Life: 270mAh battery provides sufficient power for extended recording sessions, up to 100 hours.
- USB Type-C Connectivity: For fast data transfer and charging.
- A-B Repeat Function: Allows for repeated playback of a specific segment of a recording.
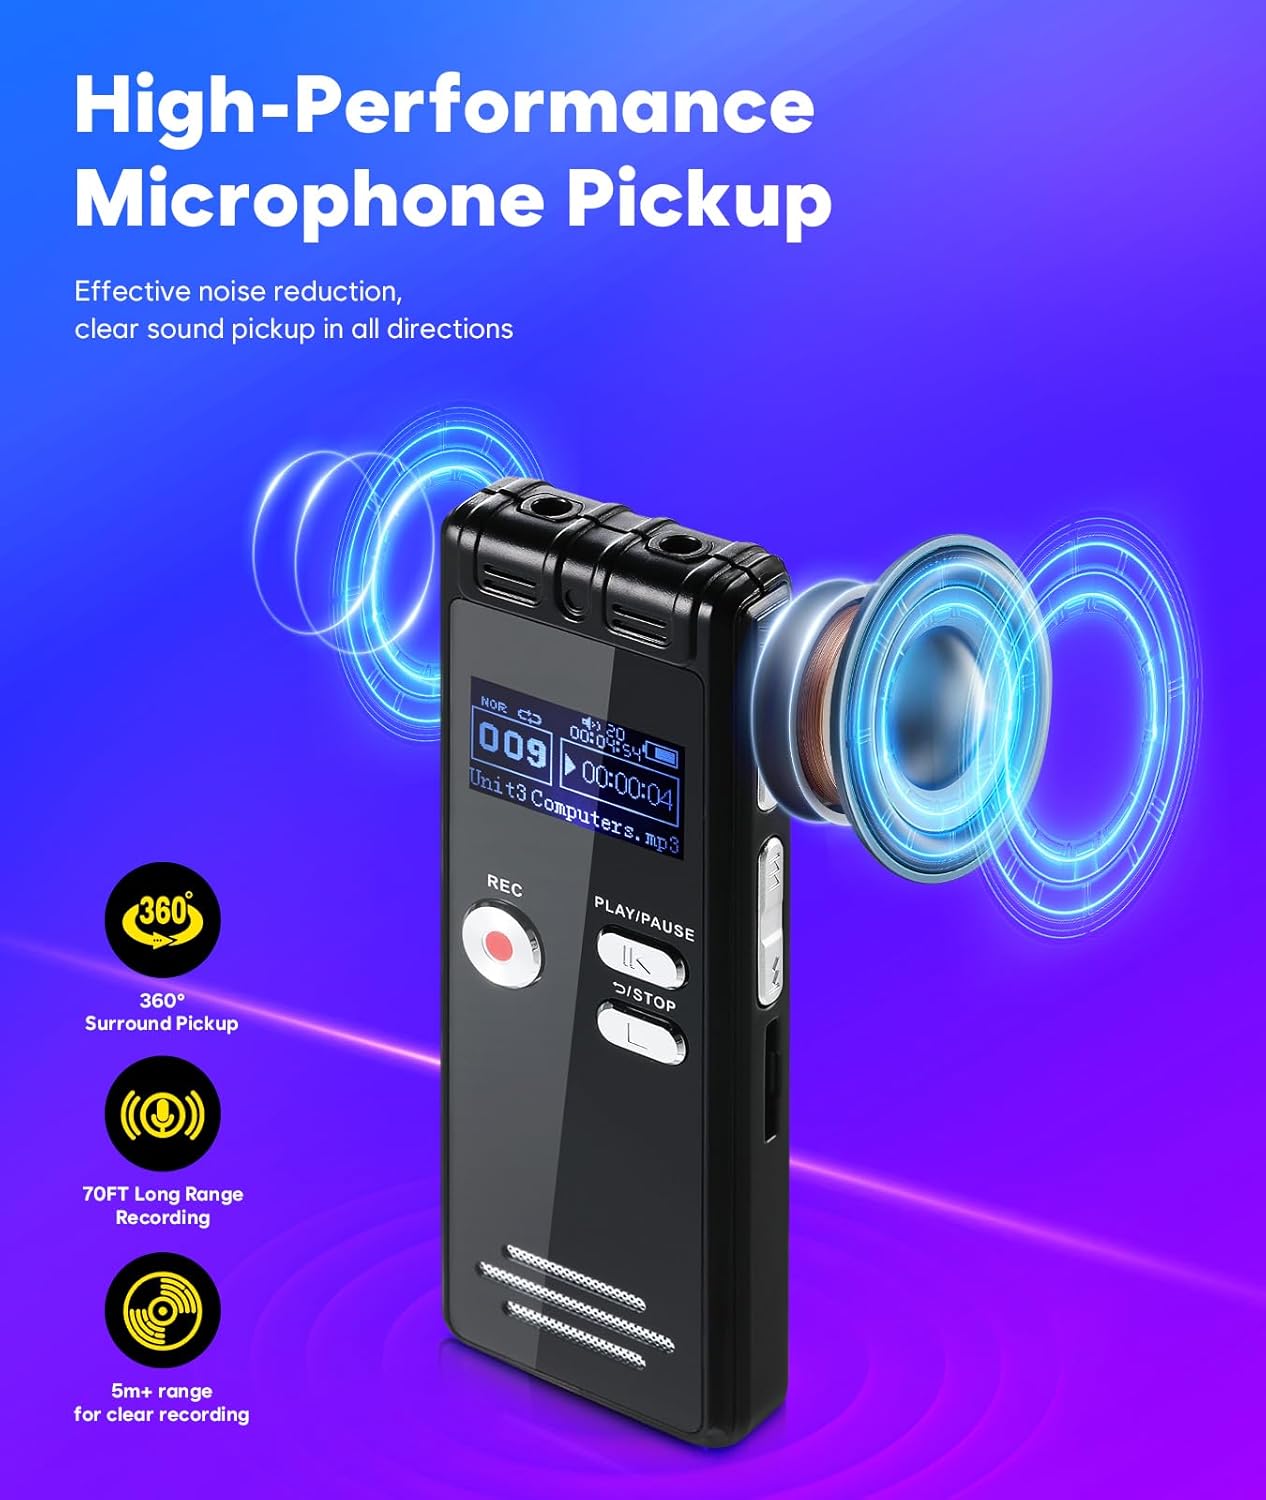
Image 3.1: The recorder's high-performance microphone system is illustrated, emphasizing its 360-degree surround pickup capability and effective 70-foot long-range recording for clear sound capture.

Image 3.2: This image highlights the recorder's 3072Kbps HD recording resolution, featuring an internal DSP chip for automatic noise reduction, ensuring high-quality audio output.
3.2 Device Components
- Display Screen: Shows recording status, menu options, and file information.
- REC Button: Initiates recording.
- PLAY/PAUSE Button: Starts or pauses playback.
- STOP Button: Stops recording or playback and saves the current recording.
- Navigation Buttons: For menu navigation and volume control.
- USB Type-C Port: For charging and data transfer.
- Headphone Jack (3.5mm): For private listening to recordings.
- Built-in Speaker: For direct audio playback.

Image 3.3: A detailed view of the NekSide recorder's ports and features, including the headphone jack, USB Type-C port for data transfer, memory card slot, and integrated speakers.
4. Setup
4.1 Charging the Device
Before first use, fully charge the recorder. Connect the supplied USB Type-C cable to the device's USB port and the other end to a USB power adapter (not included) or a computer's USB port. The battery indicator on the screen will show charging status. A full charge typically takes approximately 2-3 hours.
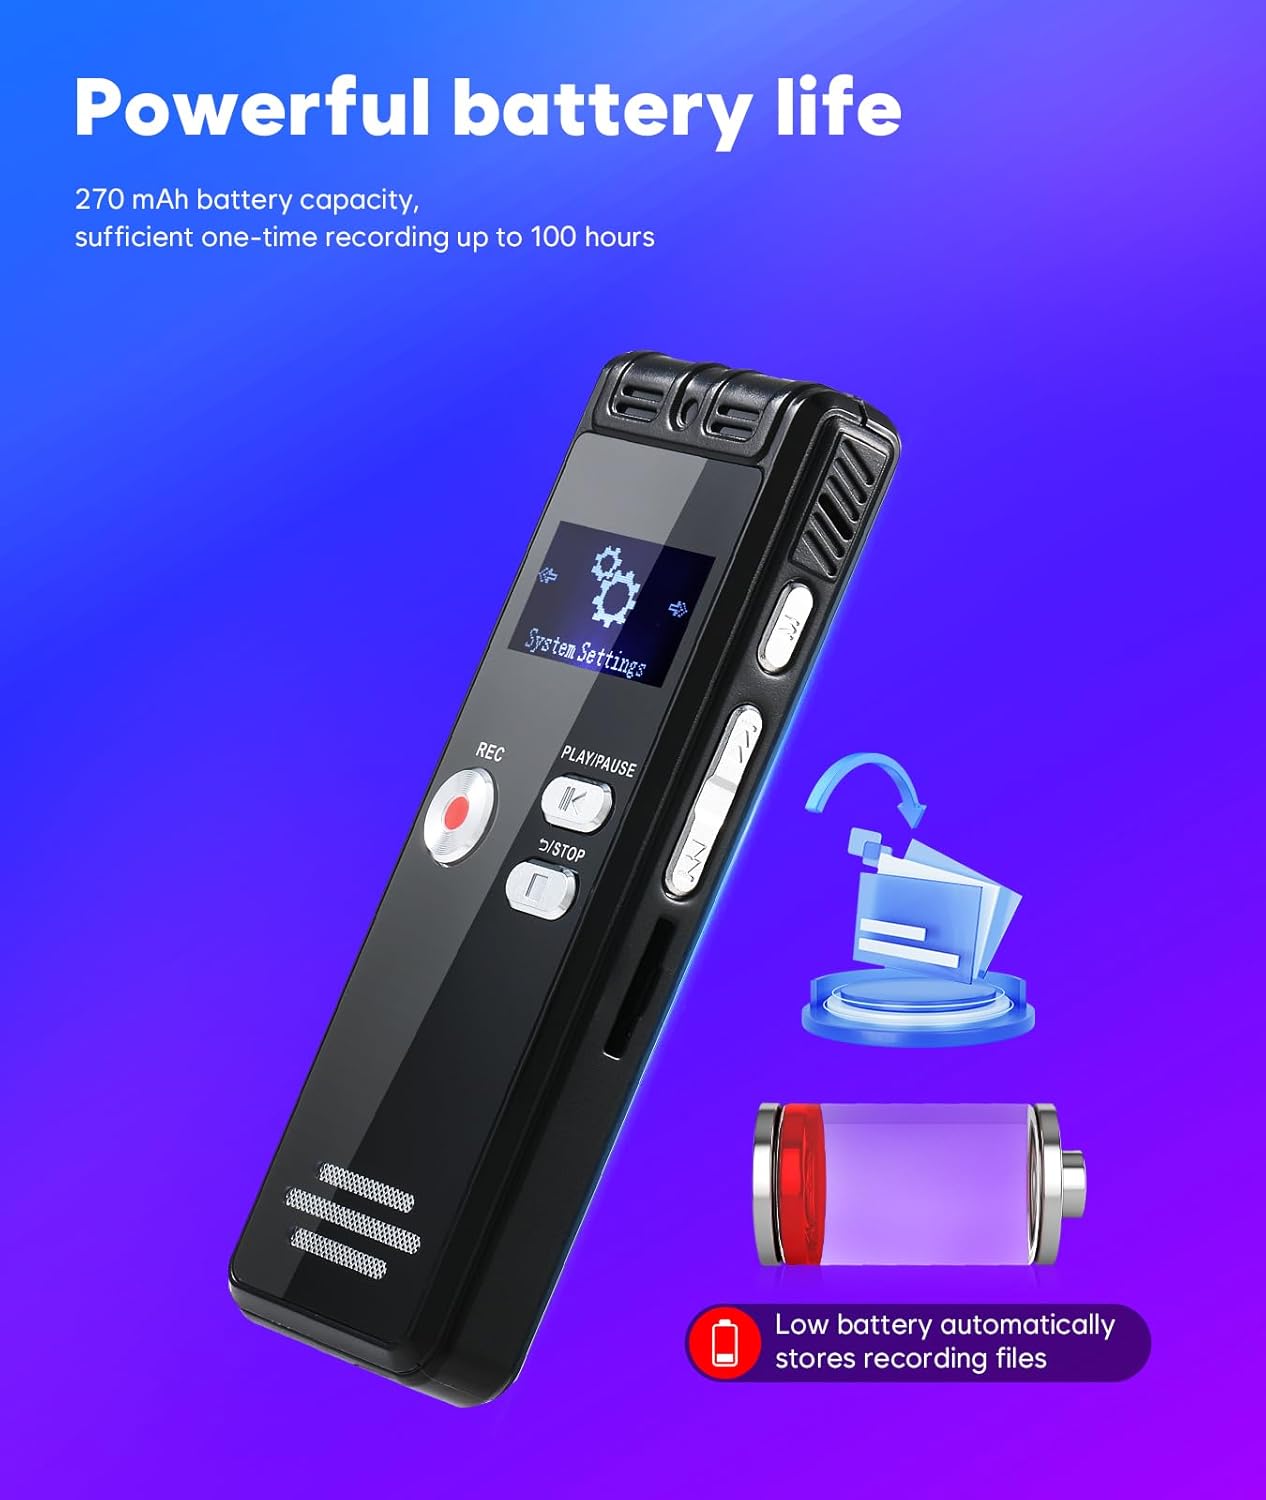
Image 4.1: This image illustrates the recorder's powerful 270mAh battery, capable of up to 100 hours of recording, and highlights its intelligent feature to automatically save recording files when the battery is low.
4.2 Powering On/Off
- To Power On: Press and hold the Power button (usually located on the side) for a few seconds until the screen illuminates.
- To Power Off: Press and hold the Power button until the device powers down.
4.3 Initial Settings (Time/Date)
Upon first power-on or after a factory reset, you may need to set the correct time and date. Navigate to the 'System Settings' menu using the navigation buttons. Select 'Time Setting' or 'Date Setting' and adjust the values accordingly. This ensures accurate timestamps for your recordings.
5. Operating Instructions
5.1 Recording Audio
- Ensure the device is powered on and has sufficient battery.
- Press the REC button to start recording. The screen will display the recording time and a recording indicator.
- To pause recording, press the PLAY/PAUSE button. Press it again to resume.
- To stop recording and save the file, press the STOP button. The recording will be saved automatically.

Image 5.1: This image demonstrates the simple button operation of the NekSide recorder, showing a finger pressing the REC button to initiate recording. The image also highlights the PLAY/PAUSE and STOP buttons for managing recordings.
5.2 Voice Activated Recording (VAR)
The VAR function allows the recorder to automatically start recording when sound is detected and pause when there is silence, conserving memory and battery life.
- Navigate to the 'Recording Settings' menu.
- Select 'Voice Activated Recording' or 'VOR Mode'.
- Choose your desired sensitivity level (e.g., Low, Medium, High).
- Exit the menu. The device is now ready for voice-activated recording.

Image 5.2: The recorder's display shows the voice-activated recording feature in action, with a visual representation of how it automatically records only when a clear voice is detected, preventing the capture of silent periods.
5.3 Playback
- From the main menu, navigate to 'Recordings' or 'Files'.
- Use the navigation buttons to select the desired recording file.
- Press the PLAY/PAUSE button to start playback.
- During playback, use the navigation buttons to adjust volume or fast forward/rewind.
- To stop playback, press the STOP button.
A-B Repeat Function
To repeat a specific section of an audio file:
- During playback, press a designated button (refer to your device's specific button layout, often a 'Mode' or 'M' button) at the start point (A).
- Press the same button again at the end point (B). The section between A and B will now loop.
- Press the button a third time to exit A-B repeat mode.
6. File Management and Transfer
You can easily transfer recorded files to a computer or Android smartphone.
- Connect the recorder to your computer or Android smartphone using the supplied USB Type-C cable.
- The device will appear as a removable disk drive.
- Open the drive to access your recorded files (typically in WAV format).
- Copy and paste the files to your desired location on your computer or phone.
- Safely eject the device before disconnecting the USB cable.

Image 6.1: The NekSide recorder is shown connected to both a laptop and a smartphone via its USB Type-C port, illustrating the simple process for file playback and data transfer between devices.
7. Maintenance
- Cleaning: Use a soft, dry cloth to clean the device. Avoid liquid cleaners or solvents.
- Storage: Store the device in a cool, dry place away from direct sunlight and extreme temperatures.
- Battery Care: To prolong battery life, avoid fully discharging the battery frequently. Charge the device regularly, even if not in use for extended periods.
- Data Backup: Regularly back up important recordings to a computer or external storage device to prevent data loss.
8. Troubleshooting
| Problem | Possible Cause | Solution |
|---|---|---|
| Device does not power on. | Low battery; device malfunction. | Charge the device for at least 30 minutes. If still unresponsive, contact support. |
| Cannot record. | Memory full; low battery; recording mode error. | Delete old files to free up space. Charge the device. Check recording settings. |
| Poor recording quality. | Distance from sound source; high ambient noise; incorrect settings. | Move closer to the sound source. Ensure noise reduction is enabled. Adjust microphone sensitivity. |
| Device not recognized by computer. | Faulty USB cable; incorrect connection; driver issue. | Try a different USB port or cable. Ensure the device is powered on. Restart computer. |
9. Specifications
| Feature | Detail |
|---|---|
| Model Number | 128GB |
| Memory Storage Capacity | 128 GB |
| Recording Quality | Up to 3072Kbps HD |
| Microphone Form Factor | Built-In Dual MIC |
| Audio Format | WAV |
| Battery Type | 1 Lithium Ion battery (included) |
| Hardware Interface | USB Type C |
| Headphones Jack | 3.5 millimeters |
| Product Dimensions | 1.2 x 0.6 x 3.5 inches |
| Item Weight | 3.04 ounces (0.19 Pounds) |
| Screen Size | 1.2 Inches |
10. Warranty and Support
NekSide products are designed for reliability and performance. For any questions, technical assistance, or warranty claims, please refer to the contact information provided with your purchase or visit the official NekSide support website. Please retain your proof of purchase for warranty services.