GODOX LEDM150
Godox LEDM150 LED Video Light Instruction Manual
Brand: GODOX | Model: LEDM150
1. Introduction
The Godox LEDM150 is a compact and portable LED video light designed for various photography and video recording applications. Featuring 150 high-brightness LED beads, it delivers soft, uniform illumination with a stable color temperature of 5600K and a high Color Rendering Index (CRI) of 95+. This light is suitable for outdoor photography, live streaming, Zoom calls, and general video production, offering adjustable brightness and a built-in rechargeable battery for extended use.

Figure 1.1: Godox LEDM150 LED Video Light with hot shoe mount.
2. Safety Precautions
- Do not disassemble or modify the product. Repairs should only be performed by authorized service personnel.
- Do not operate the light in wet conditions or expose it to water.
- Avoid direct eye exposure to the LED light, especially at high brightness settings, as it may cause discomfort or vision impairment.
- Keep the product away from flammable materials and heat sources.
- Ensure proper ventilation during use to prevent overheating.
- Use only the specified charging cable and power source to prevent damage to the battery or light.
- Keep out of reach of children.
3. Package Contents
Verify that all items are included in your package:
- Godox LEDM150 LED Video Light (x1)
- Diffuser (x1)
- L-type Stand (Hot Shoe Mount) (x1)
- Mobile Phone Mounting Bracket (x1)
- USB Charging Cable (x1)

Figure 3.1: Included items in the Godox LEDM150 package.
4. Product Overview
Familiarize yourself with the main components of the Godox LEDM150 LED Video Light.
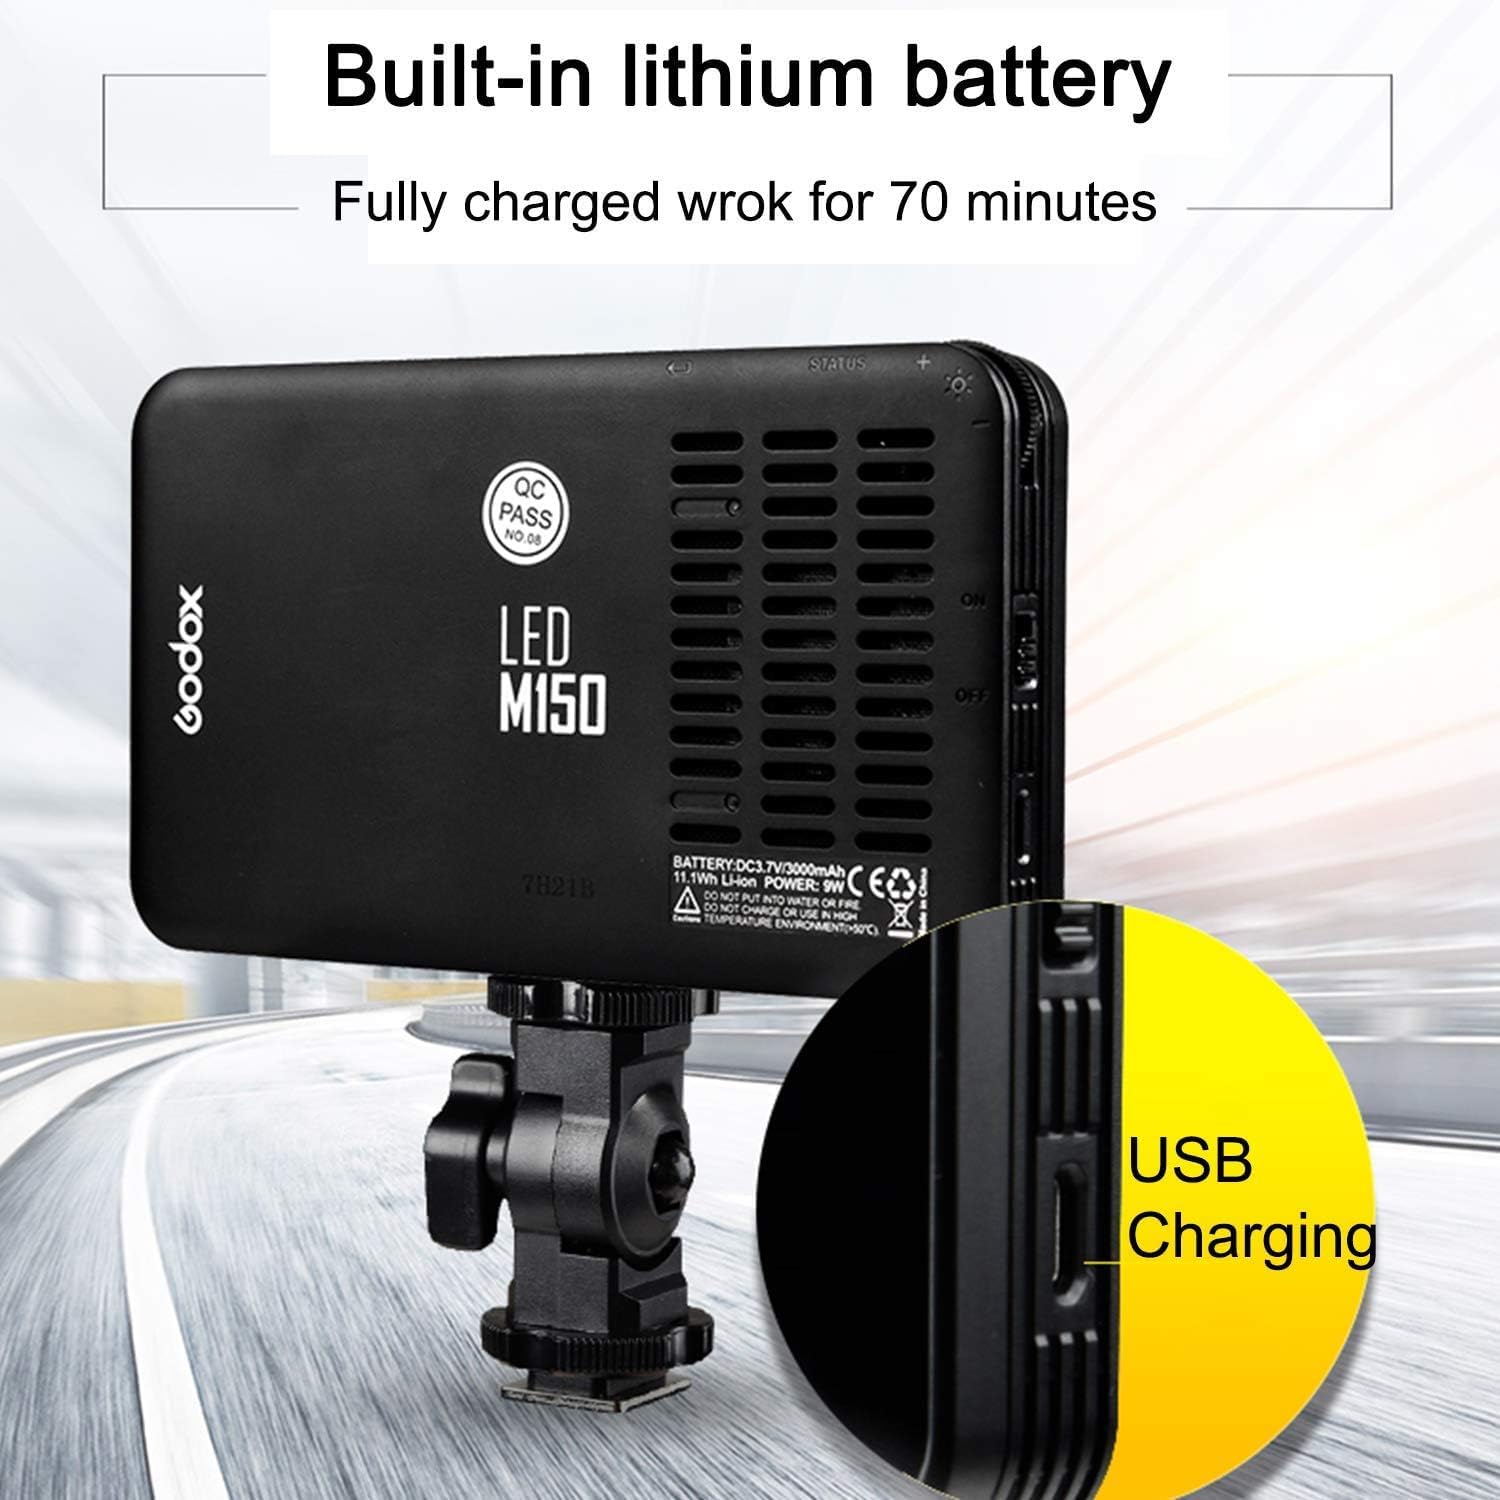
Figure 4.1: Rear view of the LEDM150, highlighting the USB charging port, power switch, and brightness adjustment dial.
- LED Panel: Front-facing panel with 150 LED beads for illumination.
- Diffuser Slot: Grooves on the sides to attach the included diffuser.
- Power Switch: On/Off button located on the side.
- Brightness Adjustment Dial: Rotary dial for stepless brightness control (10%-100%).
- USB Charging Port: Micro USB port for charging the internal battery.
- 1/4" Threaded Hole: Located at the bottom for mounting accessories.
5. Setup
5.1 Attaching the L-type Stand
- Locate the 1/4" threaded screw on the L-type stand.
- Align the screw with the 1/4" threaded hole at the bottom of the LEDM150 light.
- Screw the light onto the stand until secure.

Figure 5.1: The L-type stand, used for mounting the light.
5.2 Mounting on Camera or Light Stand
- Once the L-type stand is attached to the light, slide the hot shoe foot of the stand into your camera's hot shoe mount or a compatible light stand adapter.
- Tighten the locking knob on the L-type stand to secure the light in position.
5.3 Attaching the Mobile Phone Mounting Bracket
The mobile phone mounting bracket can be attached to the back of the LEDM150 light for use as a phone photo light.
- Align the bracket with the back of the LEDM150.
- Secure the bracket firmly to the light.
- Place your mobile phone into the bracket.
5.4 Attaching the Diffuser
The included diffuser softens the light output and reduces harsh shadows.
- Gently slide the diffuser into the grooves on the front edges of the LEDM150 light.
- Ensure it is securely seated.
6. Operation
6.1 Power On/Off
- To turn on the light, slide the power switch to the 'ON' position.
- To turn off the light, slide the power switch to the 'OFF' position.
6.2 Adjusting Brightness
The LEDM150 features stepless dimming for precise control over light intensity.
- Rotate the brightness adjustment dial (located next to the power switch) to increase or decrease the light output.
- The brightness range is from 10% to 100%.

Figure 6.1: Adjusting brightness using the stepless dimming dial.
6.3 Multiple Usage Methods
The versatile design of the LEDM150 allows for various applications:
- On Mobile Phone: Attach the mobile phone bracket to the light and mount your phone for enhanced mobile photography/videography.
- Handheld: Use the light directly by hand for flexible positioning.
- On Camera: Mount the light onto your DSLR or mirrorless camera's hot shoe.
- On Light Stand: Attach to a light stand for studio or location setups.

Figure 6.2: Various methods for using the LEDM150 light.
7. Charging
The Godox LEDM150 features a built-in 3.7V/3000mAh lithium battery.
- Connect the included USB charging cable to the Micro USB port on the side of the light.
- Connect the other end of the USB cable to a standard USB power adapter (e.g., phone charger, computer USB port, power bank).
- The light can be used while charging.
- A full charge provides approximately 60-70 minutes of operation at maximum brightness.
Figure 7.1: USB charging port location on the LEDM150.
8. Specifications
| Feature | Specification |
|---|---|
| Model | Godox LEDM150 |
| LED Beads | 150 |
| Color Temperature | 5600K (±300K) |
| CRI (Color Rendering Index) | 95+ |
| Brightness Range | 10% - 100% (Stepless Dimming) |
| Max. Illumination (0.5m) | 1029 LUX (at 100% brightness) |
| Battery | Built-in 3.7V/3000mAh Lithium Battery |
| Battery Life (Max. Brightness) | Approx. 60-70 minutes |
| Charging Port | Micro USB |
| Dimensions (L x W x H) | 13.2 x 8.0 x 2.0 cm / 5.2 x 3.15 x 0.79 inches |
| Weight | 170 g / 5.9 oz |

Figure 8.1: Illustration of Color Rendering Index (CRI) and its impact on color accuracy.
9. Maintenance
- Cleaning: Use a soft, dry cloth to clean the light. Do not use harsh chemicals or abrasive materials.
- Storage: Store the light in a cool, dry place away from direct sunlight and extreme temperatures.
- Battery Care: For optimal battery life, charge the light regularly, even if not in frequent use. Avoid fully discharging the battery for extended periods.
10. Troubleshooting
| Problem | Possible Cause | Solution |
|---|---|---|
| Light does not turn on. | Battery is depleted. Power switch is off. |
Charge the light using the USB cable. Ensure the power switch is in the 'ON' position. |
| Light output is too dim or too bright. | Brightness setting is incorrect. | Adjust the brightness using the adjustment dial. |
| Light flickers or turns off unexpectedly. | Low battery. Loose connection. |
Recharge the battery. Ensure the light is securely mounted and connections are firm. |
11. Warranty and Support
This product is covered by a manufacturer's warranty. For detailed warranty information, please refer to the warranty card included with your purchase or visit the official Godox website. For technical support, troubleshooting assistance, or service inquiries, please contact Godox customer service through their official channels.