1. Introduction
Thank you for purchasing the ODK L-Shaped Computer Desk. This manual provides essential information for the safe and efficient assembly, operation, and maintenance of your new desk. Please read these instructions carefully before beginning assembly and retain them for future reference.

Figure 1.1: ODK L-Shaped Computer Desk setup.
2. Safety Information
- The tabletop has a maximum load capacity of 50kg. Do not exceed this weight limit.
- Do not place the desk on unstable or uneven surfaces. Ensure all adjustable feet are properly leveled.
- Keep all electrical components (power outlets, USB ports) away from liquids to prevent electric shock.
- Ensure all screws and fasteners are tightened securely during assembly and periodically check for looseness.
- Keep small parts out of reach of children during assembly to prevent choking hazards.
3. Package Contents
Before assembly, verify that all components listed below are present and undamaged. If any parts are missing or damaged, please contact customer support.
- Desk panels (tabletop, monitor stand, shelves)
- Metal frame components
- 2 Fabric drawers
- Power strip with 2 AC outlets and 2 USB ports
- Assembly hardware (screws, bolts, wrench)
- Instruction manual
4. Setup and Assembly Instructions
This product requires assembly. All necessary tools are included. For detailed step-by-step instructions, please refer to the included assembly guide. The drawers and racks can be installed on either the left or right side to suit your preference.

Figure 4.1: Desk dimensions and adjustable drawer/rack placement.
- Unpack all components and lay them out on a clean, soft surface to prevent scratches.
- Identify each part using the labels and the assembly diagram.
- Attach the metal frame components to the main tabletop sections using the provided screws. Do not overtighten initially.
- Assemble the monitor stand and attach it to the main tabletop.
- Install the two fabric drawers into their designated slots. These can be placed on either the left or right side of the desk.
- Attach the shelving units to the L-shaped section of the desk.
- Securely fasten the power strip to the underside of the desk in a convenient location.
- Once all components are in place, tighten all screws and fasteners.
- Adjust the leveling feet at the bottom of the desk to ensure stability on uneven floors.

Figure 4.2: Flexible placement of drawers and shelves.
5. Operating Instructions
5.1. Using the Integrated Power Outlets and USB Ports
The desk is equipped with a built-in power strip featuring two AC outlets and two USB ports (5V-2A) for convenient charging of your devices.
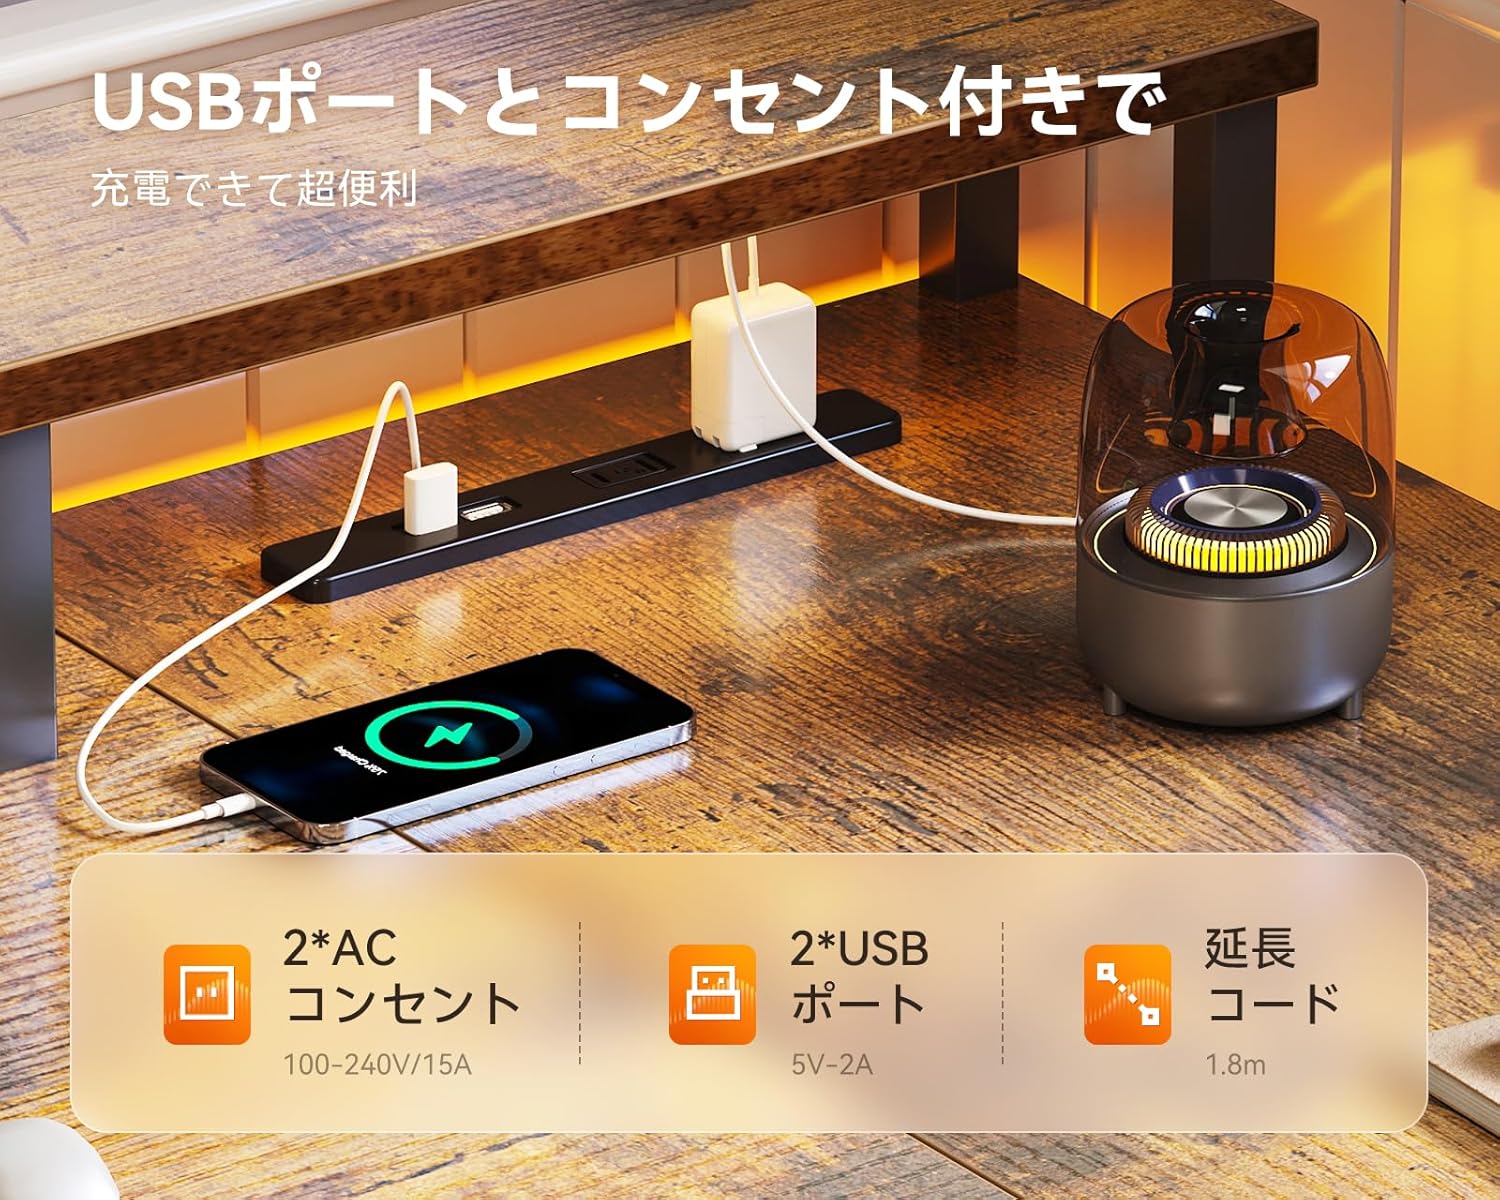
Figure 5.1: Integrated power outlets and USB ports for charging.
- Plug the desk's main power cord into a wall outlet.
- Connect your devices (e.g., laptop, smartphone) to the AC outlets or USB ports as needed.
- Ensure devices are compatible with the power specifications (AC 100-240V/15A, USB 5V-2A).
5.2. Utilizing the Monitor Stand
The elevated monitor stand helps improve your posture and reduce strain on your neck and shoulders during long periods of use.

Figure 5.2: Benefits of using the monitor stand for ergonomic posture.
- Place your monitor(s) on the elevated stand.
- Adjust your chair height to ensure your eyes are level with the top third of your monitor screen.
- The space beneath the monitor stand can be used for storing notebooks, keyboards, or other small items.
5.3. Storage Features
The desk offers ample storage with two fabric drawers and multiple open shelves to keep your workspace organized.

Figure 5.3: Designated storage areas for printer, CPU, and other items.
- Use the fabric drawers for documents, stationery, or personal items.
- The open shelves are suitable for books, decorative items, or office supplies.
- The dedicated space under the main desk area can accommodate a CPU tower.
6. Maintenance
- Cleaning: Wipe the desk surfaces with a soft, damp cloth. Avoid harsh chemicals or abrasive cleaners that may damage the finish.
- Dusting: Regularly dust the desk to prevent buildup.
- Fasteners: Periodically check all screws and bolts to ensure they remain tight. Retighten if necessary to maintain stability.
- Spills: Clean up spills immediately to prevent staining or damage to the desk surface.
7. Troubleshooting
7.1. Desk Wobbles
- Ensure all assembly screws are fully tightened.
- Adjust the leveling feet at the bottom of the desk legs to compensate for uneven flooring.
7.2. Power Outlets/USB Ports Not Working
- Check if the desk's main power cord is securely plugged into a functional wall outlet.
- Verify that the devices you are trying to charge are working correctly and their cables are not damaged.
- Ensure the total power draw does not exceed the rated capacity of the power strip (AC 15A).
7.3. Drawers Do Not Slide Smoothly
- Check for any obstructions in the drawer tracks.
- Ensure the fabric drawers are correctly inserted and not overloaded.
8. Specifications
| Feature | Specification |
|---|---|
| Brand | ODK |
| Model Number | B01XS060101027JP |
| Shape | L-shaped |
| Product Dimensions (W x D x H) | 172.5 cm x 100 cm x 76 cm |
| Material | Melamine faced board (top), Metal (base) |
| Finish Type | Powder Coated |
| Color | Vintage |
| Maximum Recommended Weight | 50 kg |
| Number of Drawers | 2 |
| Special Features | Integrated USB outlets, Monitor stand, Shelves |
| Assembly Required | Yes (Tools included) |
9. Warranty and Support
ODK is committed to providing high-quality products. While specific warranty details are not provided in this manual, if you encounter any defects or issues with your desk, please do not hesitate to contact our customer support team. We are available to assist you with any concerns or questions you may have.
For support, please refer to the contact information provided with your purchase or visit the official ODK website.


