
1. Introduction
Thank you for choosing the Yinleader Smart Car Battery Charger. This intelligent charger is designed to provide efficient and safe charging for various 12V and 24V lead-acid batteries (AGM, GEL, SLA, VRLA) and 12V LiFePO4 batteries. Please read this manual carefully before use to ensure proper operation and to maximize the lifespan of your battery and charger.
2. Safety Information
WARNING: Read all safety warnings and instructions before using this product. Failure to follow the warnings and instructions may result in electric shock, fire, and/or serious injury.
- Always wear eye protection and protective clothing when working with batteries.
- Ensure the charger is disconnected from the AC power supply before making or breaking connections to the battery.
- Use the charger in a well-ventilated area. Do not operate in explosive atmospheres, such as in the presence of flammable liquids, gases, or dust.
- Keep the charger away from water, rain, or excessive moisture.
- Do not charge frozen batteries. Allow them to warm up before charging.
- Never attempt to charge non-rechargeable batteries.
- Ensure the battery terminals are clean before connecting the charger.
- Connect the red (+) clamp to the positive battery terminal and the black (-) clamp to the negative battery terminal.
- If charging a battery installed in a vehicle, connect the negative clamp to the vehicle chassis away from the battery and fuel line if the battery's negative terminal is grounded. Connect the positive clamp to the positive battery terminal.
- Do not touch the battery clamps together when the charger is powered on.
- Keep out of reach of children.
3. Package Contents
- Yinleader Smart Car Battery Charger (Model: YINLEADER-12V24V10A20A)
- Battery Clamps (Red for positive, Black for negative)
- Power Cord
- User Manual
4. Product Features
- High-Efficiency Charging: Offers 12V/20A and 24V/10A fast charging, significantly quicker than standard 10A chargers.
- Smart LED Display: Large LCD screen displays ambient temperature, voltage, current, and remaining battery capacity for easy monitoring.
- Multi-Stage Charging: Features a 6-stage charging process including Soft Start, Bulk Charge, Absorption, Battery Test, Recondition, and Float stages for optimal battery health.
- Advanced Safety Protections: Includes short-circuit protection, overcurrent protection, reverse polarity protection, and an intelligent cooling system.
- Battery Repair Function: Capable of activating and repairing deeply discharged (0V start), long-unused, or old batteries that may not accept a charge.
- Wide Compatibility: Suitable for 12V/24V 4Ah-150Ah lead-acid batteries (AGM, GEL, SLA, VRLA) and 12V LiFePO4 batteries. Note: 24V LiFePO4 batteries are not supported.
- Automatic Operation: Automatically stops charging when the battery is full and resumes charging if the battery level drops below a certain threshold.

Figure 4.1: LCD Display and Control Buttons. The display shows charging parameters, while buttons allow selection of current, battery type, and repair mode.

Figure 4.2: Large Serrated Alligator Clips. These clips ensure a secure connection to various battery terminals.

Figure 4.3: Intelligent Cooling Fan. The fan activates to maintain optimal operating temperature, preventing overheating.
5. Setup
- Prepare the Battery: Ensure the battery terminals are clean and free of corrosion. If the battery is in a vehicle, ensure the vehicle's ignition is off and all accessories are disconnected.
- Connect Battery Clamps:
- Connect the RED (+) positive clamp to the positive (+) terminal of the battery.
- Connect the BLACK (-) negative clamp to the negative (-) terminal of the battery.
- If charging a battery in a vehicle, connect the black (-) clamp to the vehicle chassis away from the battery and fuel line.
- Connect to Power: Plug the charger's power cord into a standard AC power outlet (220-240V). The charger will power on and display the current battery status.

Figure 5.1: Charger connected to a battery. Ensure correct polarity for safe operation.
6. Operating Instructions
6.1. Automatic Charging
Once connected to the battery and power, the charger will automatically detect the battery voltage (12V or 24V) and begin the charging process. The LCD screen will display real-time charging information.
6.2. Selecting Charging Mode
Use the buttons on the charger to select specific modes if needed:
- Current Selection: Press the 'Current Selection' button to cycle through available charging currents (e.g., 5A, 10A, 20A for 12V; 5A, 10A for 24V).
- Battery Selection: Press the 'Battery Selection' button to choose the appropriate battery type (e.g., LifePO4, GEL, AGM, STD). Ensure this matches your battery for optimal charging.
- Repair Mode: Press the 'Repair Mode' button to activate the battery repair function for deeply discharged or sulfated batteries.
6.3. Understanding the 6-Stage Charging Process
The charger employs a sophisticated 6-stage charging process to ensure efficient and safe charging, and to prolong battery life:
- Soft Start: A gentle initial charge to prepare the battery.
- Bulk Charge: Charges the battery at maximum current until it reaches approximately 80% capacity.
- Absorption: Charges at a decreasing current to bring the battery to 100% capacity.
- Battery Test: Monitors the battery to ensure it can hold a charge.
- Recondition: A special mode for deeply discharged or sulfated batteries to restore capacity.
- Float: Maintains the battery at full charge with a low, constant voltage, preventing self-discharge.
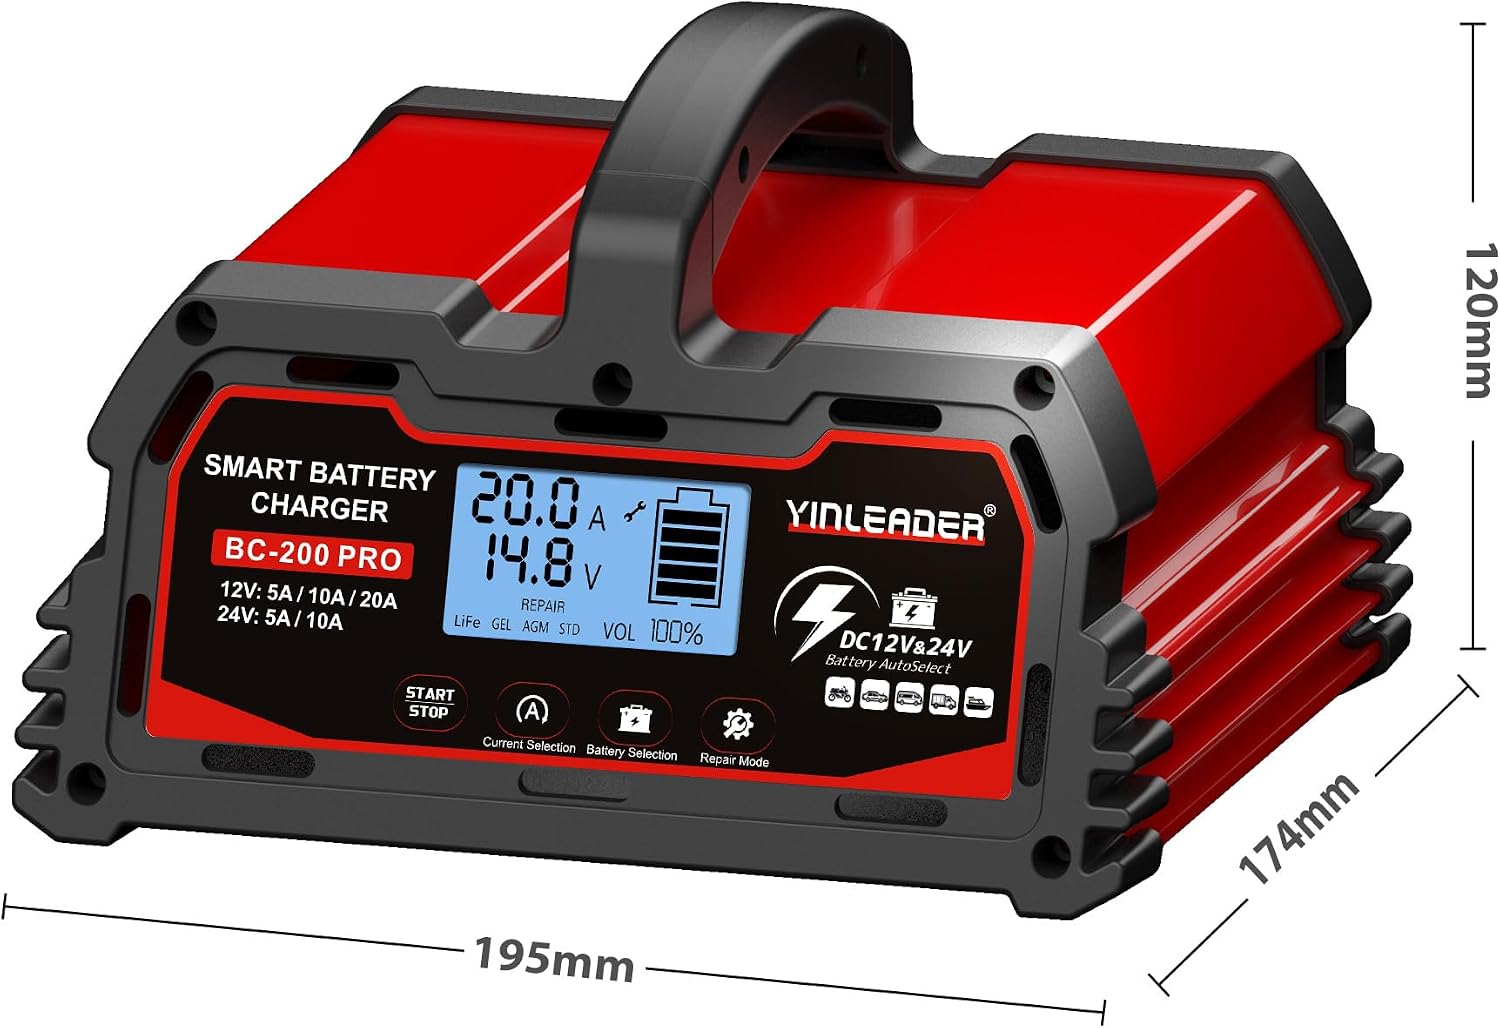
Figure 6.1: 6-Stage Charging Process. This diagram shows how voltage and current are managed throughout the charging cycle.
6.4. Repair Function (0V Start)
If a battery is deeply discharged (e.g., 0V) or has not been used for a long time, the repair mode can attempt to recondition it. Select 'Repair Mode' and allow the charger to work. This process can take several hours. Not all deeply discharged batteries can be recovered.
6.5. Disconnecting the Charger
- Unplug the charger from the AC power outlet.
- Remove the BLACK (-) negative clamp from the battery terminal (or vehicle chassis).
- Remove the RED (+) positive clamp from the battery terminal.
7. Maintenance
- Cleaning: Disconnect the charger from power and battery before cleaning. Wipe the casing with a soft, dry cloth. Do not use abrasive cleaners or solvents.
- Storage: Store the charger in a cool, dry place when not in use. Keep cables neatly coiled to prevent damage.
- Cable Inspection: Regularly inspect the power cord and battery clamps for any signs of damage, such as cuts, fraying, or loose connections. Do not use the charger if any part is damaged.
8. Troubleshooting
| Problem | Possible Cause | Solution |
|---|---|---|
| Charger does not turn on. | No power from outlet; faulty connection. | Check power outlet with another device. Ensure power cord is securely plugged in. |
| Charger not charging. | Incorrect battery connection; battery too damaged; incorrect mode selected. | Verify correct polarity of battery clamps. Try 'Repair Mode' for deeply discharged batteries. Ensure correct battery type is selected. |
| Charger displays error code. | Internal fault; battery fault. | Disconnect and reconnect the charger. If error persists, contact customer support. |
| Charger gets hot during operation. | Normal operation; blocked ventilation. | Some heat is normal. Ensure cooling fan is not obstructed and charger is in a well-ventilated area. If excessively hot, disconnect immediately. |
| Battery not fully charged or charges slowly. | Battery capacity too large for selected current; battery degradation; charger limitation. | Ensure appropriate current is selected for battery size. Older batteries may not reach 100% capacity. Some chargers may have slight variations in output. |
9. Specifications
- Brand: Yinleader
- Model Number: YINLEADER-12V24V10A20A
- Input Voltage: 24 Volts (DC) - Note: This refers to the internal operating voltage, the AC input is standard household voltage.
- Output Voltage: 24 Volts (DC)
- Current Rating: 20 A
- Dimensions (L x W x H): 19 cm x 17 cm x 12 cm
- Item Weight: 1.7 Kilograms
- Compatible Devices: 12V/24V Lead-Acid Batteries (AGM, GEL, SLA, VRLA), 12V LiFePO4 Batteries
- Number of Ports: 1
- Safety Certifications: CE
- Country of Origin: China

Figure 9.1: Product Overview. The charger features a robust design with integrated handle for portability.
10. Warranty and Support
This Yinleader Smart Car Battery Charger comes with a 2-year manufacturer's warranty from the date of purchase. This warranty covers defects in materials and workmanship under normal use.
The warranty does not cover:
- Damage caused by misuse, abuse, accident, or neglect.
- Damage from unauthorized repairs or modifications.
- Normal wear and tear.
For warranty claims or technical support, please contact your retailer or Yinleader customer service with your purchase receipt and product model number.