Introduction
Thank you for choosing the Huilefu Modern Dimmable LED Ceiling Light, Model 6601. This fixture features a contemporary design, adjustable brightness, and three selectable color temperatures (warm white, neutral white, cool white) controlled by a convenient remote. This manual provides essential information for safe installation, operation, and maintenance of your new ceiling light.

Image: The Huilefu Modern Dimmable LED Ceiling Light (Model 6601) installed in a contemporary living room setting, showcasing its sleek design and illumination.
Safety Instructions
- WARNING: Risk of electric shock. Disconnect power at the fuse box or circuit breaker before installation or servicing.
- All electrical connections must be in accordance with local codes and ordinances, and the National Electric Code (NEC).
- If you are not familiar with electrical wiring, consult a qualified electrician.
- Do not install this fixture on a wet location or near flammable materials.
- Ensure the mounting surface can support the weight of the fixture.
- Do not look directly into the LED light source when it is illuminated.
Package Contents
Please check to ensure all components are present and undamaged before beginning installation.
- LED Ceiling Light Fixture (Model 6601)
- Remote Control
- Mounting Hardware (screws, wire nuts, etc.)
- Instruction Manual
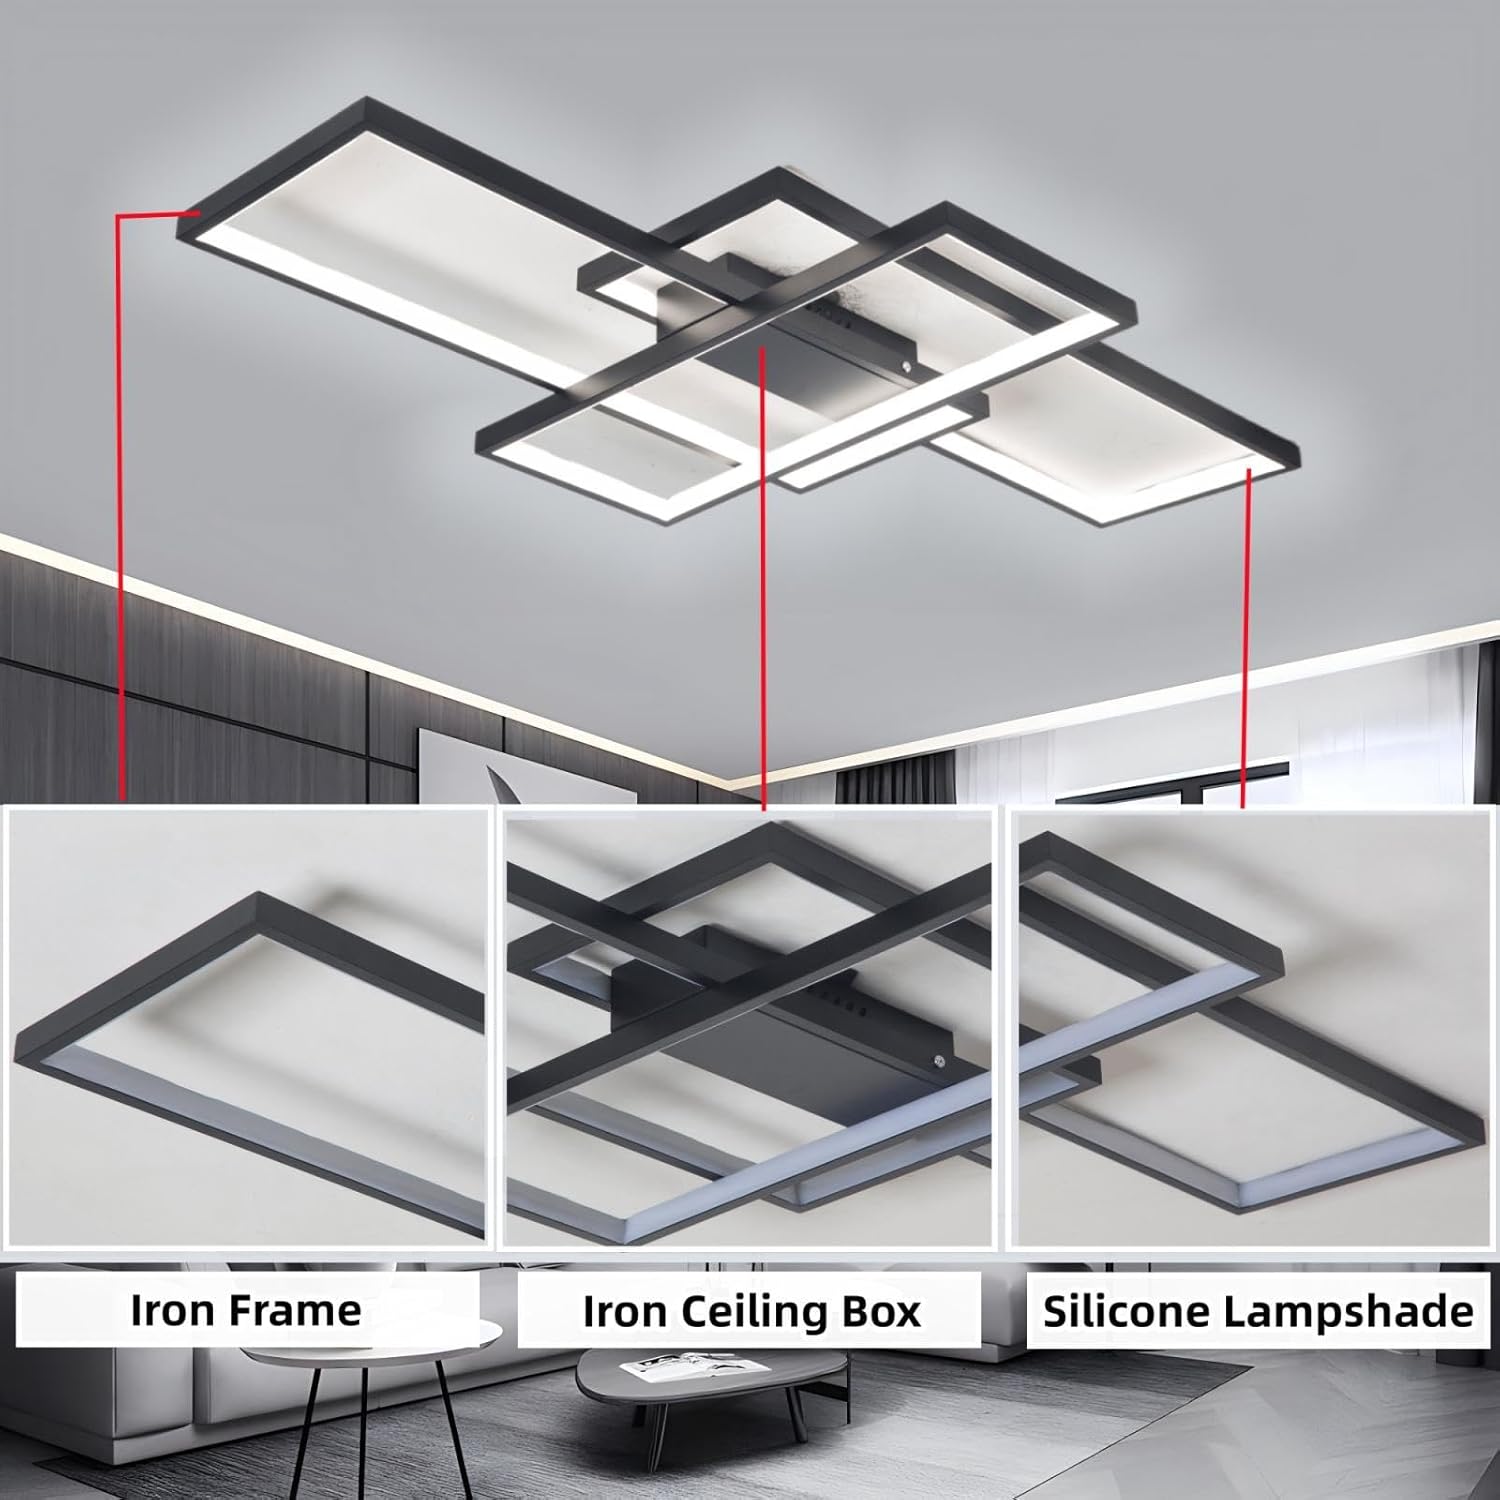
Image: Detailed view of the light fixture's main components: the iron frame, iron ceiling box, and silicone lampshade.
Specifications
| Brand | Huilefu |
| Model Number | 6601 |
| Voltage | 110 Volts |
| Wattage | 85 Watts |
| Light Type | LED |
| Color Temperature | 2700K (Warm), 4000K (Neutral), 6500K (Cool) - Selectable |
| Material | Aluminum lamp body, iron chassis, silicone lampshade |
| Assembled Dimensions (L x W x H) | 43.3 inches x 23.6 inches x 2.5 inches (110 cm x 60 cm x 6.5 cm) |
| Special Features | Dimmable, Remote Control, Energy Efficient LED, High Color Rendering Index (CRI 90+) |
| Power Source | Corded Electric |

Image: Dimensional diagram of the ceiling light and visual representation of the 2700K, 4000K, and 6500K color temperatures.

Image: Information on eye protection, flicker-free operation, and the high Color Rendering Index (CRI) of 90+ for vivid and natural light.
Installation
Before You Begin: Ensure power is disconnected at the circuit breaker. Read all safety instructions.
- Prepare Mounting Surface: Ensure the ceiling junction box is securely mounted and capable of supporting the fixture's weight.
- Attach Mounting Bracket: Secure the fixture's mounting bracket to the junction box using the provided screws.
- Wire Connections: Connect the electrical wires from the fixture to the corresponding wires in the junction box (Live to Live, Neutral to Neutral, Ground to Ground) using wire nuts. Ensure all connections are secure.
- Mount the Fixture: Carefully lift the light fixture and attach it to the mounting bracket. Secure it with the provided screws. Ensure the fixture is flush against the ceiling.
- Restore Power: Once the fixture is securely installed and all connections are checked, restore power at the circuit breaker.
Note: Some users have reported challenges in aligning components during assembly. Take care to ensure all pieces are straight and properly fitted before final tightening. If you are unsure about any step, consult a qualified electrician.
Operating Instructions
Remote Control Functions

Image: Layout of the remote control, indicating buttons for power, color temperature adjustment, brightness control, and night light mode.
- ON/OFF: Press the 'ON' button to turn the light on, and 'OFF' to turn it off.
- Switch Colors: Press the 'Switch Colors' button to cycle through 2700K (Warm White), 4000K (Neutral White), and 6500K (Cool White).
- Night Light: Activates a low-brightness, warm light setting.
- Brightness Increase/Decrease (Bright+/Dim-): Adjusts the light intensity.
- Color Temperature Adjustment (Warm/Cool): Long press these buttons to fine-tune the color temperature within the selected range.
- Channel Control (CH1-CH4): The remote can control up to four identical ceiling lights independently or simultaneously. Refer to the pairing instructions below.
Remote Control Pairing Instructions
If your remote control is not responding or you wish to pair it with a new fixture, follow these steps:
- Clear Existing Code: Within 3 seconds of turning on the light fixture, point the remote control at the light and press the ON button (top left corner) 6 times consecutively. The light fixture will flash a few times, indicating successful decoding (clearing the previous pairing).
- Turn Off the Light: Switch off the light fixture.
- Bind New Code: Within 3 seconds of turning the light back on, press the ON button (bottom left corner, usually the main power ON) once. The light fixture will flash twice, indicating successful binding.
- The remote control should now be reconnected to the ceiling light.
Maintenance
- Cleaning: Disconnect power before cleaning. Use a soft, dry cloth to wipe the fixture. Do not use abrasive cleaners or solvents, as they may damage the finish or electrical components.
- LED and Driver Replacement: The LED module and driver are designed to be replaceable, extending the lifespan of your fixture. For replacement parts or service, please contact Huilefu customer support.
Troubleshooting
| Problem | Possible Cause | Solution |
|---|---|---|
| Light does not turn on. | No power supply; Loose wiring; Faulty LED driver. | Check circuit breaker. Ensure all wire connections are secure. Contact customer support if driver is suspected faulty. |
| Remote control not working. | Remote not paired; Dead batteries; Obstruction. | Replace remote batteries. Follow remote pairing instructions in the 'Operating Instructions' section. Ensure clear line of sight to the fixture. |
| Light flickers or dims unexpectedly. | Unstable power supply; Loose connection; Faulty LED module/driver. | Check power supply stability. Verify wire connections. Contact customer support for potential component replacement. |
Warranty and Support
For warranty information or technical support, please contact Huilefu customer service through your retailer or the official Huilefu website. Please have your model number (6601) and purchase date available when contacting support.
Design Overview
The Huilefu LED light fixture features a versatile modern design. While primarily intended as a ceiling light, its aesthetic can complement various interior styles, including potential wall applications for decorative purposes, as shown in the example below. Please note that this product is specifically designed and marketed as a ceiling light.
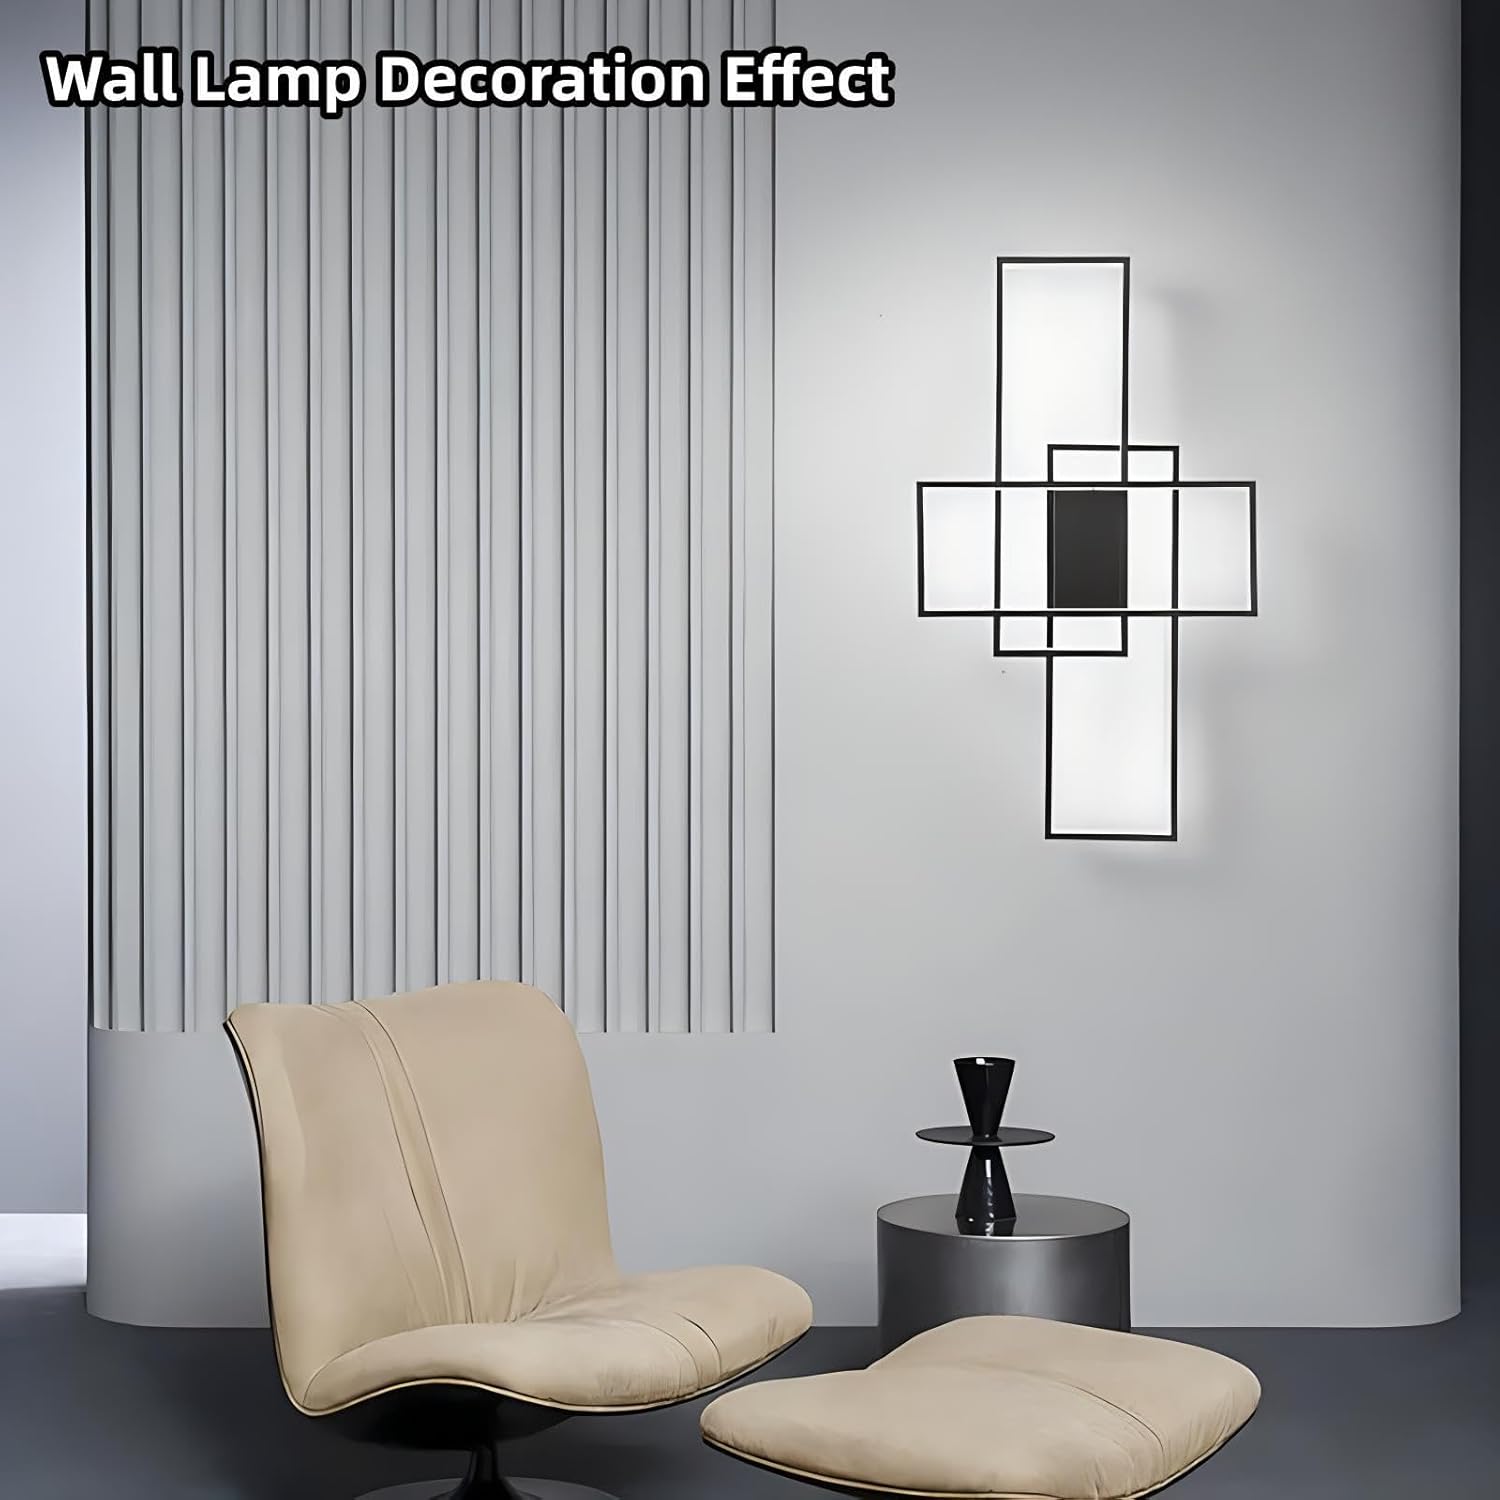
Image: A design example showing a similar geometric light fixture used as a decorative wall lamp, highlighting its modern aesthetic versatility.