1. Introduction
This manual provides instructions for the safe and effective use of your Mingzhe Wearable Electric Breast Pump MY-378. Please read thoroughly before first use and retain for future reference. This device is designed to assist breastfeeding mothers in expressing breast milk comfortably and efficiently.
2. Product Components and Overview
The Mingzhe Wearable Electric Breast Pump is a compact, hands-free device designed for convenience. It consists of a main motor unit, a milk collection cup, and various silicone components for comfort and milk flow.
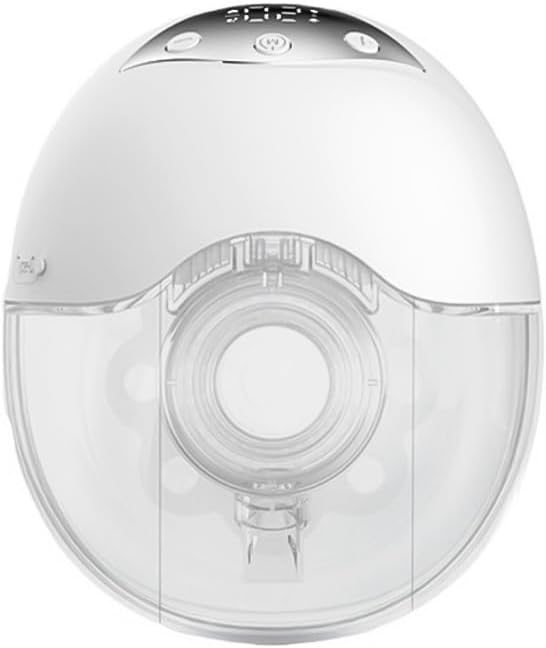
Figure 2.1: Front view of the Mingzhe Wearable Electric Breast Pump, showing the main unit and milk collection cup.

Figure 2.2: Dimensions of the Mingzhe Wearable Electric Breast Pump, illustrating its compact size for discreet wear.
3. Setup
3.1 Initial Cleaning
Before first use, and after each subsequent use, all parts that come into contact with breast milk must be disassembled and thoroughly cleaned. Refer to Section 5 for detailed cleaning instructions.
3.2 Assembly
After cleaning and drying, carefully assemble the pump components. Ensure all silicone parts are correctly seated and form a tight seal to maintain optimal suction. Refer to Figure 5.1 in the Cleaning and Maintenance section for an assembly diagram.
3.3 Charging the Device
The pump is equipped with a built-in rechargeable battery. Before initial use, fully charge the device.

Figure 3.1: Illustration of the Mingzhe Wearable Electric Breast Pump charging via a Type-C cable, highlighting its 1200mAh battery capacity.
- Connect the provided Type-C charging cable to the pump's charging port.
- Plug the other end of the cable into a suitable USB power adapter (not included).
- The LED screen will display the charging status. A full charge provides extended working time.
4. Operating Instructions
4.1 Control Panel Overview
Familiarize yourself with the pump's control panel and LED screen.

Figure 4.1: Detailed view of the Mingzhe Wearable Electric Breast Pump's LED screen and control buttons, including Power/Mode, Gear Shift, and specific mode indicators.
- Power/Mode Button: Used to turn the pump on/off and switch between modes.
- Gear Shift (+/-) Buttons: Used to increase or decrease the suction level.
- LED Screen: Displays current mode, suction level, and operating time.
4.2 Power On/Off
- To turn on: Press and hold the Power/Mode button for a few seconds until the screen illuminates.
- To turn off: Press and hold the Power/Mode button for a few seconds until the screen turns off.
4.3 Mode Selection
Briefly press the Power/Mode button to cycle through the four available working modes:

Figure 4.2: Diagram illustrating the four working modes (Massage, Pumping, Frequency Conversion, Automatic) and 12 suction levels of the Mingzhe Wearable Electric Breast Pump.
- Massage Mode: Features a faster rhythm and lower suction, designed to stimulate milk let-down and alleviate breast discomfort.
- Pumping Mode: Offers a slower rhythm and stronger suction, mimicking a baby's natural sucking to express milk efficiently.
- Frequency Conversion Mode: Alternates between long and short suctions, which can be effective for stimulating milk ducts, especially in the early postpartum period.
- Automatic Mode: Combines elements of massage and pumping, with suction gradually increasing over time.
4.4 Suction Level Adjustment
Within each mode, you can adjust the suction intensity. Use the Gear Shift (+) button to increase the suction level and the Gear Shift (-) button to decrease it. There are 12 distinct suction levels to choose from, allowing for personalized comfort and efficiency.
5. Cleaning and Maintenance
Proper cleaning and maintenance are crucial for hygiene and the longevity of your breast pump.

Figure 5.1: Exploded view of the Mingzhe Wearable Electric Breast Pump, demonstrating easy disassembly for thorough cleaning.
5.1 Disassembly
Carefully separate all components that come into contact with breast milk from the main motor unit. This typically includes the milk collection cup, silicone flange, valve, and diaphragm.
5.2 Cleaning Instructions
- Wash all disassembled parts (except the main motor unit, which should never be submerged in water) with warm soapy water. Use a mild dish soap.
- Rinse all parts thoroughly under running water to remove any soap residue.
- The milk-contacting parts of this pump are dishwasher safe. Place them on the top rack of your dishwasher.
- Do not wash the main motor unit. Wipe it clean with a damp cloth if necessary.
5.3 Sterilization
Sterilize parts as recommended by your healthcare provider or product guidelines. This can be done by boiling, steaming, or using a cold water sterilization solution.
5.4 Drying and Reassembly
- Allow all cleaned and sterilized parts to air dry completely on a clean surface or drying rack before reassembly. This prevents mold or bacterial growth.
- Once dry, reassemble the pump according to Figure 5.1, ensuring all parts are securely fitted and seals are tight to maintain proper suction.
6. Troubleshooting
If you encounter issues with your breast pump, refer to the following common problems and solutions:
- No Power: Ensure the pump is fully charged. Check the charging cable and adapter for any damage.
- Weak Suction: Verify that all pump parts are correctly assembled and form a tight seal. Check for any damage or tears in the silicone components (flange, valve, diaphragm). Ensure the milk collector is not overfilled.
- Milk Leakage: Confirm that all parts are securely connected and the silicone seal is properly seated. Ensure the milk collector is not filled beyond its maximum capacity.
- Unusual Noise: Disassemble and reassemble the pump to ensure no parts are misaligned. If unusual noise persists, contact customer support.
- Pump Not Charging: Ensure the Type-C cable is fully inserted into both the pump and the power source. Try a different charging cable or adapter if available.
If these steps do not resolve the issue, please contact customer support for further assistance.
7. Specifications
| Feature | Specification |
|---|---|
| Brand | Mingzhe |
| Model | MY-378 |
| Power Source | Battery Powered (Built-in 1200mAh) |
| Material | Silicone |
| Working Modes | 4 (Massage, Pumping, Frequency Conversion, Automatic) |
| Suction Levels | 12 |
| Milk Collector Capacity | 210ml |
| Dimensions (H x W x D) | 140.0mm x 118.0mm x 68.0mm |
| Item Weight | 0.4 Kilograms |
| Dishwasher Safe | Yes (for milk-contacting parts) |
8. Warranty and Support
For warranty information, technical support, or any product-related inquiries, please refer to the product packaging or contact the seller directly through your purchase platform. Please retain your purchase receipt as proof of purchase for warranty claims.


