1. Product Overview
The CCLIFE Single-Handed Grease Gun, Model 2503, is designed for efficient and precise lubrication in various applications. Featuring a pistol grip for easy one-handed operation, this grease gun delivers up to 6000 PSI of pressure. Its robust construction ensures durability and a leak-proof piston design prevents grease leakage during high-pressure use. It is suitable for mechanical engineering, automotive, construction, and other industrial sectors.

Figure 1: CCLIFE Single-Handed Grease Gun with included accessories, including the flexible hose, metal extension, and grease nipple.
2. Safety Information
Read and understand all safety warnings and instructions before operating this grease gun. Failure to follow these instructions may result in serious injury.
- Eye Protection: Always wear appropriate eye protection (safety glasses or goggles) when operating the grease gun to prevent injury from pressurized grease or debris.
- Hand Protection: Wear protective gloves to prevent skin contact with grease and to improve grip.
- Pressure Warning: This grease gun operates at high pressure (up to 6000 PSI). Never point the nozzle at yourself or others. Do not exceed the recommended pressure for the component being greased.
- Proper Use: Use the grease gun only for its intended purpose of applying grease. Do not use it for other fluids or applications.
- Grease Compatibility: Ensure the grease used is compatible with the components being lubricated.
- Storage: Store the grease gun in a clean, dry place, out of reach of children and unauthorized personnel.
- Maintenance: Regularly inspect the grease gun for damage, leaks, or worn parts. Do not operate a damaged grease gun.
3. Package Contents
Verify that all items listed below are present in your package. If any items are missing or damaged, contact customer support.
- CCLIFE Single-Handed Grease Gun (6000 PSI)
- 2 x 400 g Multi-Purpose Grease EP2 cartridges
- 12-inch (310 mm) Flexible Hose
- Metal Extension
- Grease Nipple
4. Setup
Follow these steps to prepare your grease gun for use.
- Loading the Grease Cartridge:
- Unscrew the barrel from the grease gun head.
- Pull the plunger rod all the way back and lock it into place.
- Remove the cap from one end of the 400g grease cartridge and insert it into the barrel, open end first.
- Remove the seal from the other end of the cartridge.
- Screw the barrel back onto the grease gun head securely.
- Release the plunger rod lock and push the rod forward slightly to ensure contact with the cartridge.

Figure 2: Preparing to load a grease cartridge into the gun.
- Attaching the Hose/Extension:
- Screw the flexible hose or metal extension firmly onto the outlet port of the grease gun head.
- Attach the grease nipple to the end of the hose or extension if required for your application.
- Priming the Grease Gun:
- Point the nozzle into a waste container.
- Pump the pistol grip handle several times until grease begins to flow smoothly from the nozzle. This removes any air pockets.
5. Operating Instructions
Once the grease gun is set up and primed, follow these steps for effective lubrication.
- Prepare the Application Point: Clean the grease fitting (zerk) on the component to be lubricated to prevent dirt from entering the bearing or joint.
- Attach to Grease Fitting: Press the grease gun nozzle firmly onto the grease fitting until it snaps into place. Ensure a secure connection to prevent grease leakage.
- Apply Grease: Squeeze the pistol grip handle to dispense grease. Apply grease slowly and steadily. Observe the component for signs of lubrication, such as grease emerging from seals or a change in resistance. Avoid over-greasing, which can damage seals.
- Remove from Fitting: Once sufficient grease has been applied, twist the nozzle slightly while pulling it away from the fitting to release it.
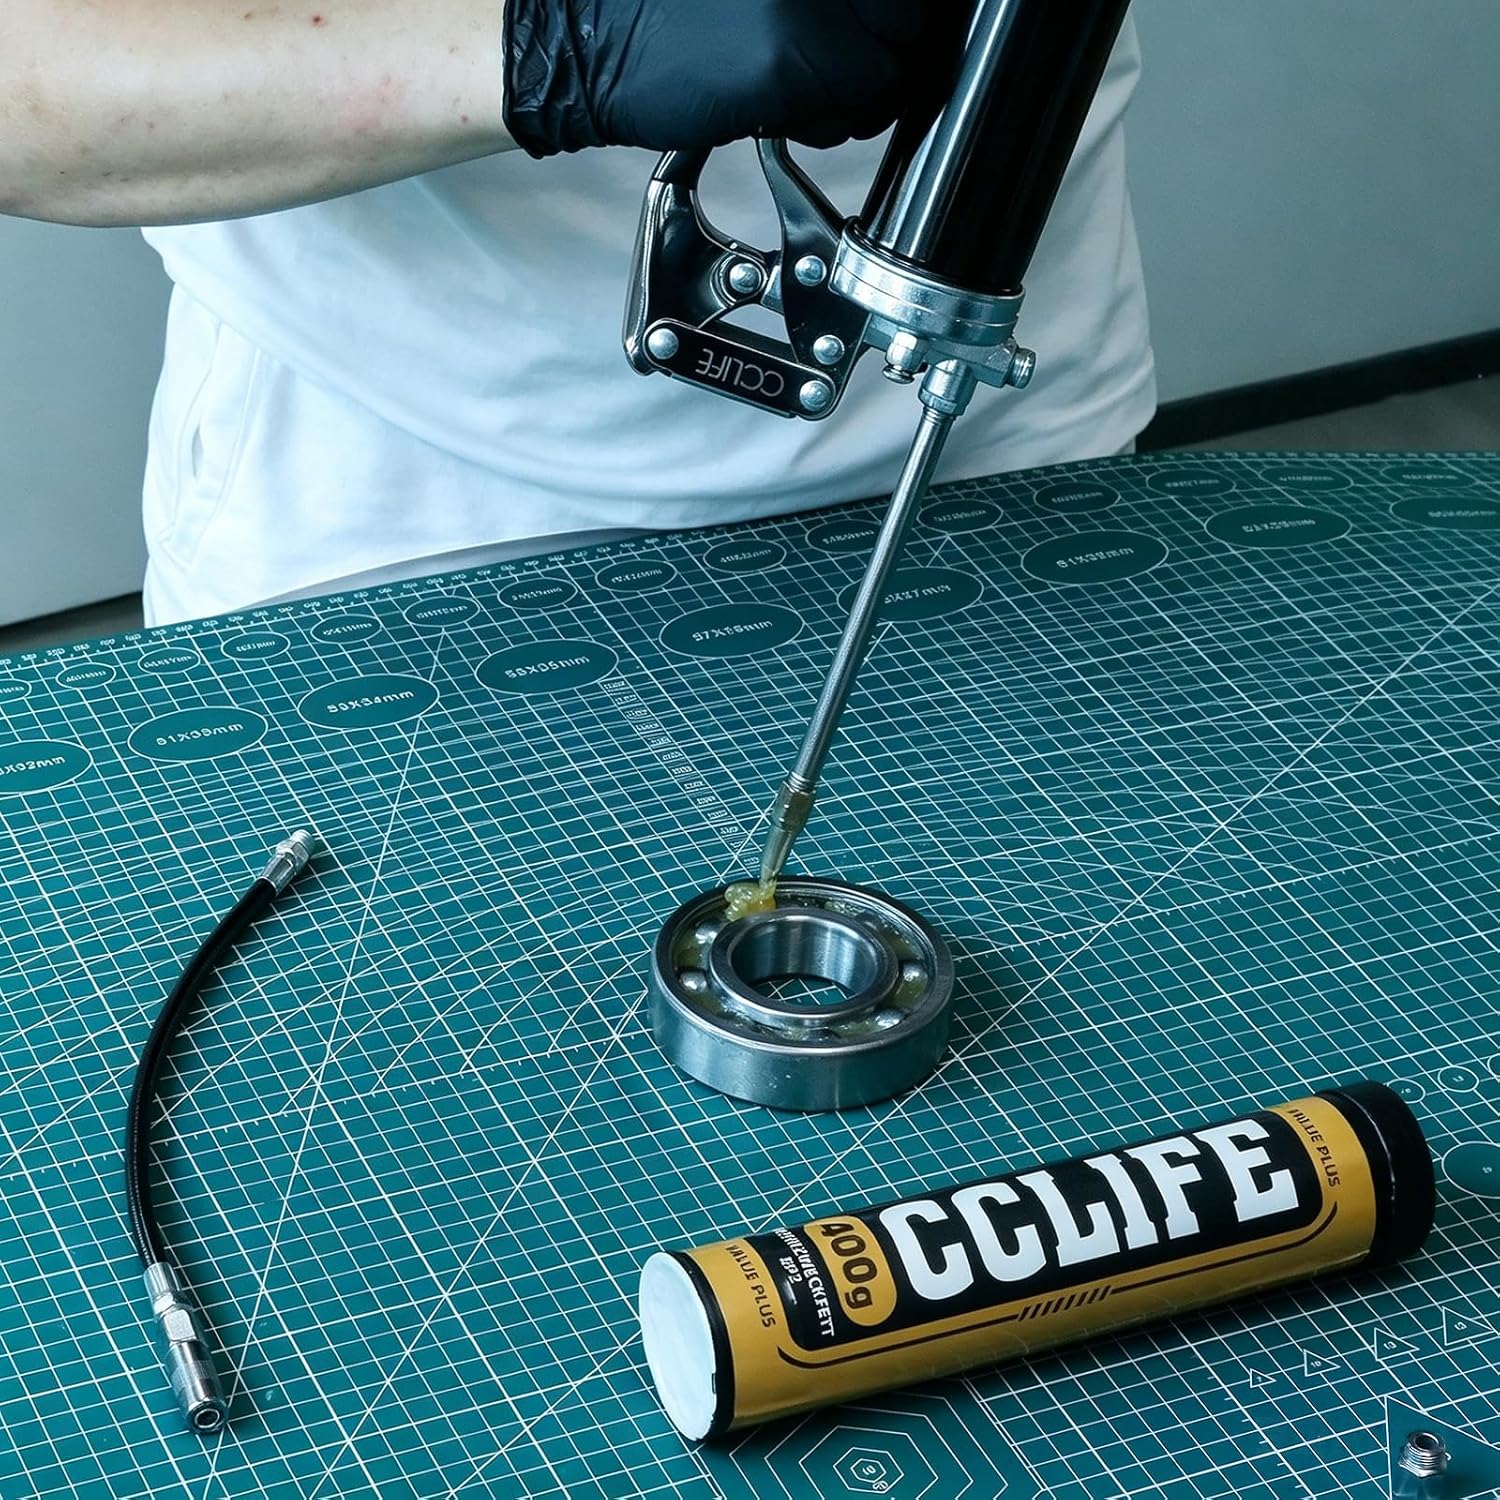
Figure 3: Applying grease to a bearing using the CCLIFE grease gun.

Figure 4: Detailed view of grease application to a bearing.
6. Maintenance
Regular maintenance ensures the longevity and optimal performance of your grease gun.
- Cleaning: After each use, wipe down the exterior of the grease gun to remove any excess grease or dirt. Keep the nozzle and fittings clean.
- Check for Leaks: Periodically inspect the grease gun for any signs of leakage, especially around connections and the piston. The leak-proof piston design minimizes leakage, but seals can wear over time.
- Storage: Store the grease gun in a clean, dry environment. If storing for an extended period, ensure it is clean and free of residual grease.
- Cartridge Replacement: When a grease cartridge is empty, replace it following the steps in the Setup section.

Figure 5: A bearing after proper lubrication, demonstrating the effectiveness of the grease gun.

Figure 6: Close-up of the multi-purpose EP2 grease, suitable for bearings in various temperature conditions.
7. Troubleshooting
Here are some common issues and their potential solutions:
| Problem | Possible Cause | Solution |
|---|---|---|
| No grease flow | Air pocket in the gun; empty cartridge; clogged nozzle/fitting | Prime the gun (Section 4.3); replace cartridge; clean nozzle/fitting |
| Grease leaking from connections | Loose connections; worn seals | Tighten all connections; inspect and replace worn seals if necessary |
| Difficulty attaching/detaching from fitting | Damaged fitting; worn coupler | Inspect fitting for damage; replace coupler if worn |
| Low pressure | Air in the system; worn pump mechanism | Re-prime the gun; if problem persists, contact customer support |
8. Specifications
| Brand | CCLIFE |
| Model Number | 2503 |
| Maximum Pressure | 6000 PSI |
| Grease Cartridge Capacity | 400 g (220 mm) |
| Hose Length | 12 inches (310 mm) |
| Item Weight | 2 kg 400 g |
| Package Dimensions | 40.5 x 18 x 7.5 cm |
| Color | Black |
| Batteries Included | No |
9. Warranty and Support
For warranty information, technical support, or to inquire about replacement parts, please contact CCLIFE customer service through the retailer where the product was purchased or visit the official CCLIFE website. Please have your model number (2503) and purchase date available when contacting support.