1. Product Overview
The UFDIPLMY LED Backlight Strip is designed as a replacement component for various television models. This product provides illumination for the TV display, ensuring clear and vibrant images. Key features include high brightness, extended service life, and energy efficiency.
- High Brightness: Up to 700 nits for clear display.
- Long Lifespan: Designed to last over 100,000 hours.
- Energy Efficient: Reduces power consumption compared to older technologies.
- Wide Application: Compatible with multiple TV models.
- Environmental Friendly: Designed with sustainability in mind.
- Easy Installation: Engineered for straightforward replacement.

Figure 1: Overview of the UFDIPLMY LED Backlight Strips. The package includes two types of strips, B1 and B2, which differ in length and number of LEDs.
2. Safety Information
Before attempting any installation or repair, please read and understand all safety precautions. Working with electronic components, especially inside a television, can be hazardous if not performed correctly. It is recommended that installation be performed by a qualified technician.
- Disconnect Power: Always unplug the television from the power outlet before beginning any work.
- Static Electricity: Discharge any static electricity from your body before handling electronic components. Use an anti-static wrist strap if available.
- Handle with Care: LED strips are delicate. Avoid bending or applying excessive force.
- Eye Protection: Wear appropriate eye protection when working with tools.
- Component Identification: Ensure correct component identification and placement to avoid damage.
3. Package Contents
The UFDIPLMY LED Backlight Strip package typically includes the following components:
- 4 pieces of B1 LED strips (5 LEDs, 3V each, 468mm length)
- 4 pieces of B2 LED strips (6 LEDs, 3V each, 570mm length)
- Total of 8 LED backlight strips.
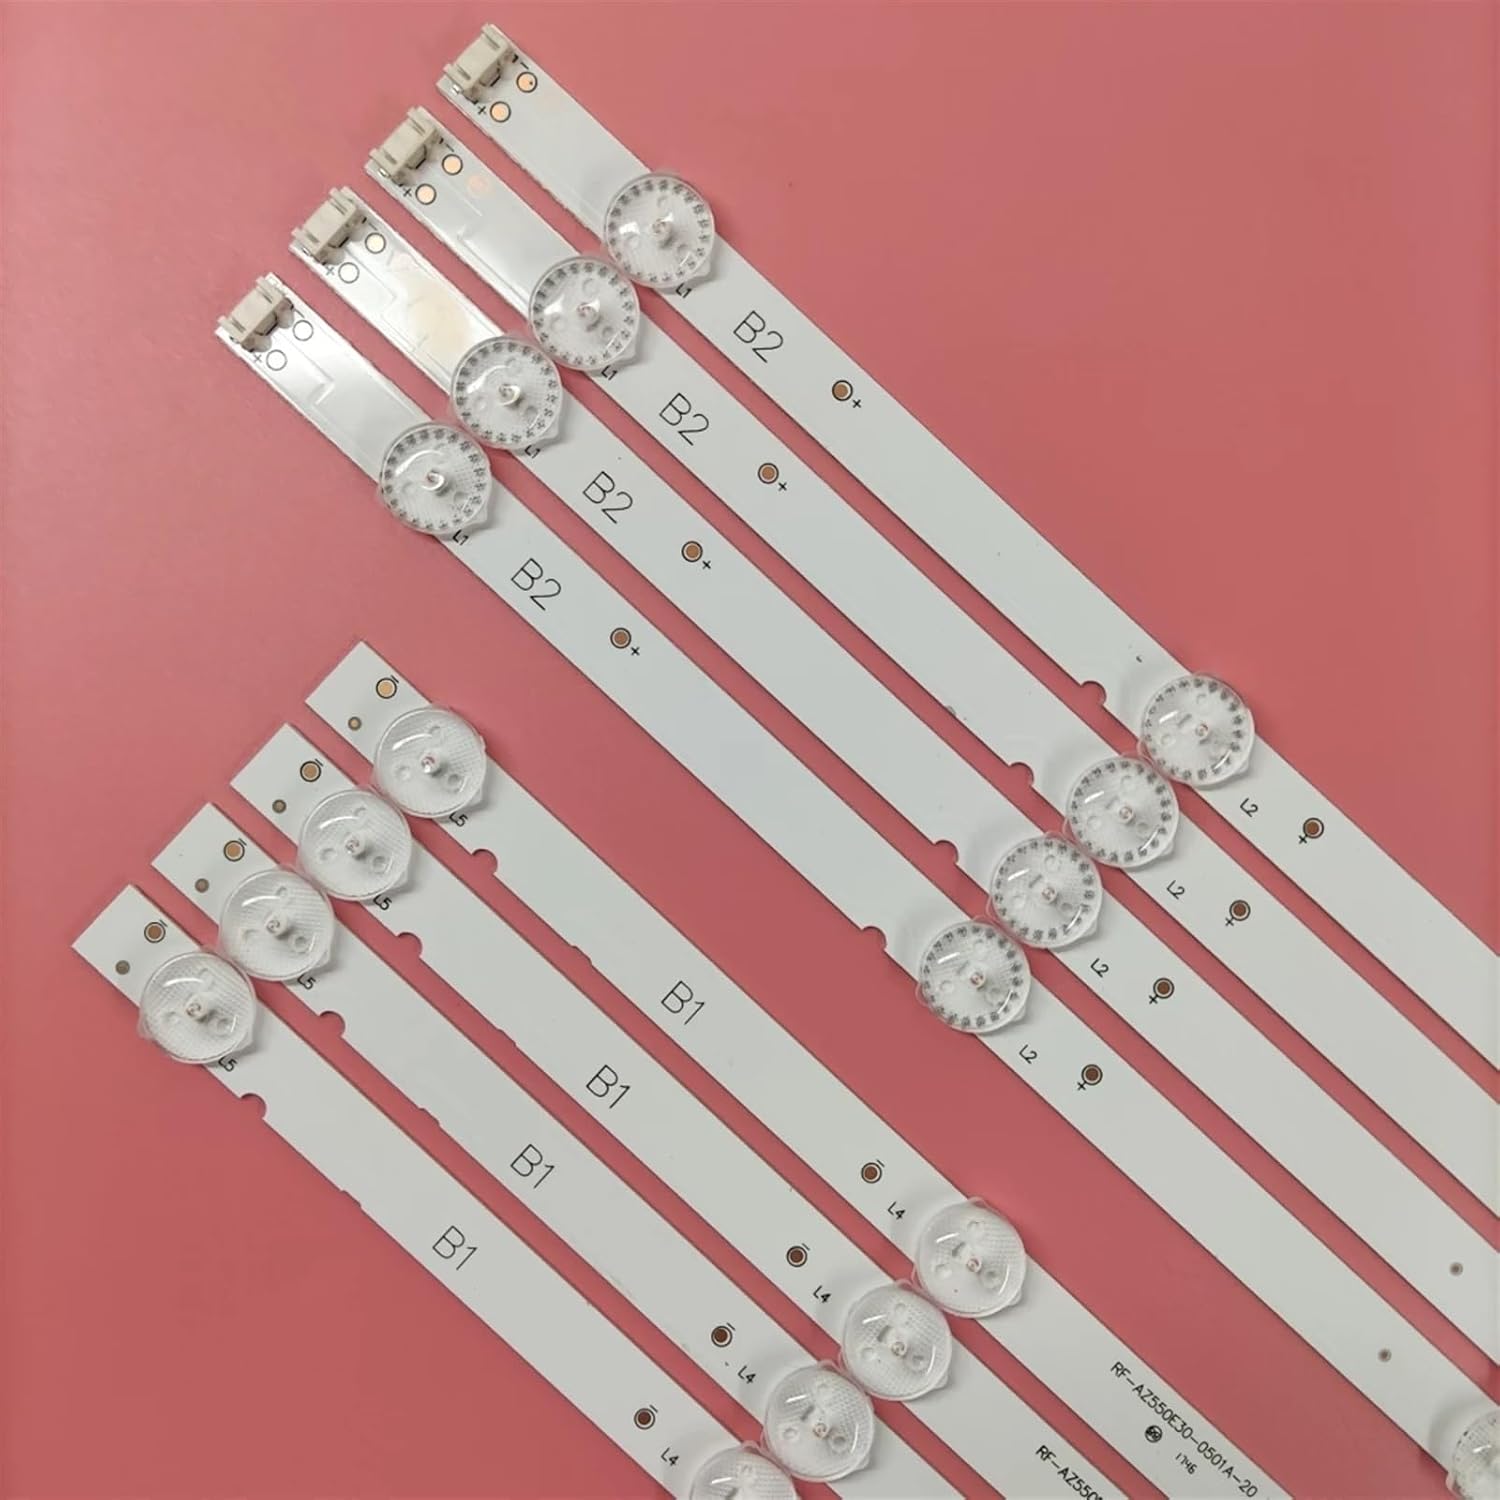
Figure 2: Detailed view of B1 and B2 LED strips. Note the distinct labeling and connector types for each strip variant.
4. Compatibility
These LED backlight strips are compatible with various television models. Please verify your TV's model number against the list below to ensure proper fit and function. Incompatible parts can lead to damage or improper operation.
Compatible TV Models:
- 55U4700LA
- 55U4750A
- TH-55FX580C
- 55LJ540V
- 55LJ5400
- 55LJ620V
- RF-AZ550E30
- 0501A
- 0601B

Figure 3: Example of model number labels found on the LED strips. Always cross-reference these with your TV's original parts.
5. Installation Guide
Replacing LED backlight strips requires careful disassembly and reassembly of the television. If you are not experienced with TV repair, it is highly recommended to seek professional assistance to avoid damaging your television or the new components.
General Installation Steps (Consult TV-Specific Service Manual for Details):
- Preparation:
- Ensure the TV is unplugged and completely powered off.
- Lay the TV face down on a soft, clean surface to protect the screen.
- Gather necessary tools: screwdrivers, plastic prying tools, anti-static wrist strap.
- Disassembly:
- Remove the back cover of the television.
- Carefully disconnect all cables and connectors from the main board, power supply board, and T-con board.
- Remove the main board, power supply board, and any other components obstructing access to the display panel.
- Carefully remove the bezel and frame surrounding the display.
- With extreme caution, lift and remove the LCD panel and diffuser layers. These components are very fragile.
- Backlight Replacement:
- Locate the old LED backlight strips. They are usually adhered to the metal chassis.
- Gently peel off the old strips, noting their orientation and connection points.
- Clean the chassis surface to ensure proper adhesion for the new strips.
- Install the new UFDIPLMY LED backlight strips (B1 and B2) in the correct positions, ensuring they align with the original layout. Connect them securely.
- Verify that all strips are properly seated and connected.
- Reassembly:
- Carefully place the diffuser layers and LCD panel back into position. Ensure no dust or debris is trapped.
- Reattach the bezel and frame.
- Reconnect all internal cables and components.
- Replace the back cover of the television.
- Testing:
- Plug in the TV and power it on.
- Check for uniform brightness across the screen and ensure there are no dark spots or flickering.
- If issues arise, immediately power off and re-check connections.
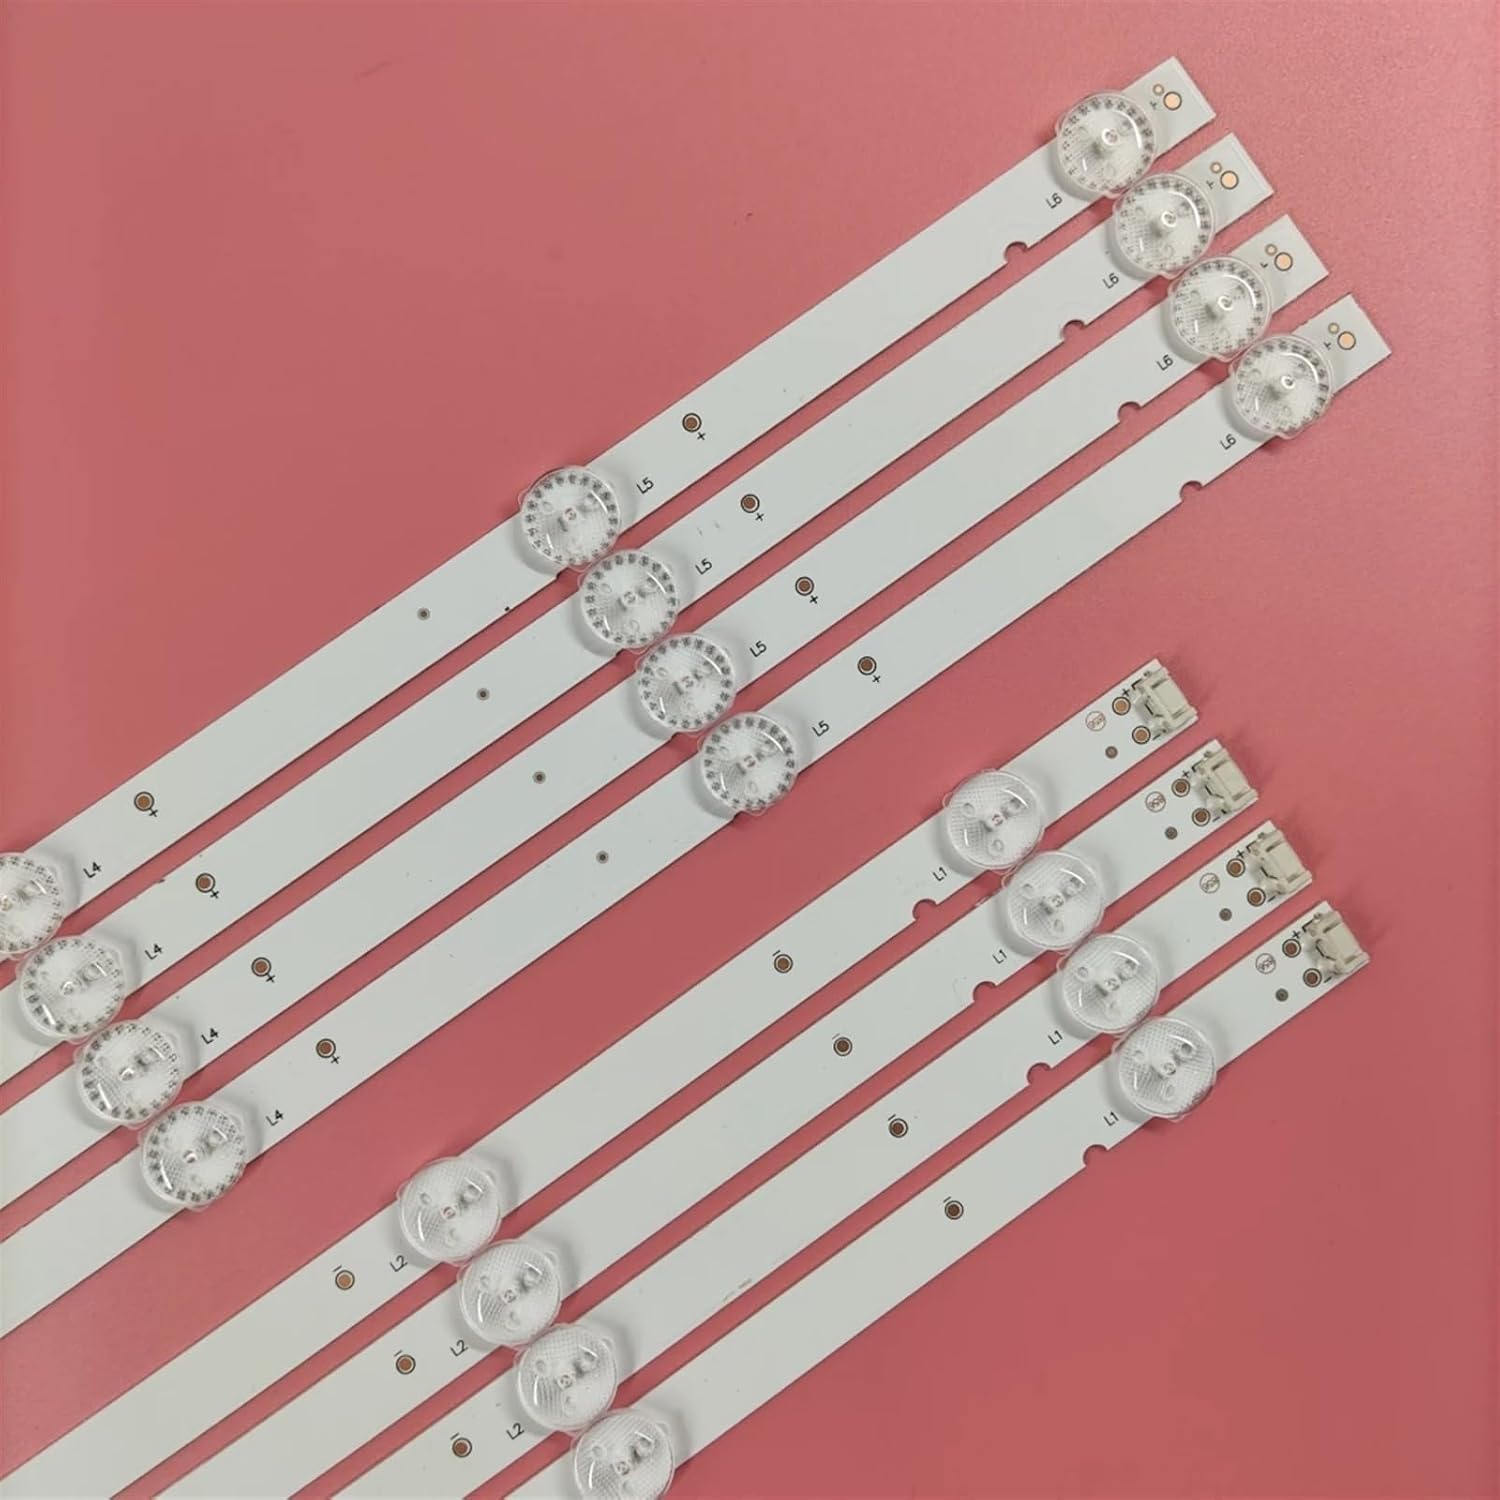
Figure 4: Close-up of an LED strip, highlighting the individual LED components and the connector. Ensure these connectors are properly seated during installation.
6. Post-Installation Check
After successful installation, perform the following checks:
- Power On: Ensure the TV powers on normally and displays an image.
- Brightness Uniformity: Observe the screen for any uneven brightness, dark spots, or areas where the backlight is not functioning.
- Color Accuracy: Check if the colors appear natural and consistent across the screen.
- Sound and Other Functions: Confirm that all other TV functions, including sound, remote control, and input switching, are working correctly.
7. Maintenance
LED backlight strips are generally maintenance-free once installed correctly. However, proper care of your television can contribute to the longevity of all its components.
- Dust Prevention: Keep the television's ventilation ports clear of dust to prevent overheating, which can degrade electronic components over time.
- Cleaning: When cleaning the TV screen, use a soft, lint-free cloth and a specialized screen cleaner. Avoid spraying liquids directly onto the screen or into the TV's openings.
- Environmental Conditions: Operate the TV within recommended temperature and humidity ranges to prevent stress on internal components.
8. Troubleshooting
If you encounter issues after installing the LED backlight strips, consider the following troubleshooting steps:
| Problem | Possible Cause | Solution |
|---|---|---|
| No backlight / Dark screen | Loose connection, faulty strip, power supply issue. | Check all strip connections. Ensure power supply to backlights is functional. Verify strip integrity. |
| Uneven brightness / Dark spots | Improperly seated diffuser layers, faulty LED on a strip, incorrect strip placement. | Re-seat diffuser layers. Inspect individual LEDs for damage. Ensure strips are correctly aligned. |
| Flickering backlight | Unstable power supply, loose connection, faulty LED driver. | Check power supply stability. Secure all connections. Consult a technician for LED driver issues. |
| TV not powering on | Incorrect reassembly, short circuit, damaged main board. | Double-check all internal connections. Ensure no screws are misplaced causing shorts. Seek professional diagnosis. |
If troubleshooting steps do not resolve the issue, it is advisable to consult a professional television repair technician.
9. Specifications
| Feature | Detail |
|---|---|
| Product Type | LED Backlight Strip |
| Brand | UFDIPLMY |
| Compatible Models | 55U4700LA, 55U4750A, TH-55FX580C, 55LJ540V, 55LJ5400, 55LJ620V, RF-AZ550E30, 0501A, 0601B |
| LED Voltage | 3V per LED |
| B1 Strip Configuration | 5 LEDs, 468mm length (4 pieces included) |
| B2 Strip Configuration | 6 LEDs, 570mm length (4 pieces included) |
| Total Pieces | 8 (4x B1, 4x B2) |
| Brightness | Up to 700 nits |
| Lifespan | Over 100,000 hours |
| Item Weight | 1.76 ounces (50 Grams) |
| Package Dimensions | 1.18 x 0.79 x 0.39 inches |
10. Warranty and Support
For specific warranty information regarding your UFDIPLMY LED Backlight Strip, please refer to the purchase documentation or contact the seller directly. General support for installation and troubleshooting can often be found through online forums dedicated to TV repair or by consulting a certified electronics technician.
For further assistance, you may contact the manufacturer or seller through their official channels. Always provide your product model number and purchase details when seeking support.